Table of Contents
Advertisement
Quick Links
Pack 01 - 04
B U I L D
I N S T R U C T I O N S
STAGE 06: ADDING THE
CYLINDER HEADS (1)
VALVE COVERS (1)
STAGE 10: WIRING THE ENGINE
VALVE COVERS (2)
"MERCEDES-BENZ" and
are the intellectual property of Mercedes-Benz Group AG.
They are used by Agora Models under license.
MAGNETOS
STAGE 13B: ASSEMBLING THE
FRONT LEFT WHEEL RIM (2)
(EASY)
Advertisement
Chapters
Table of Contents

Related Manuals for Agora Models MERCEDES-BENZ W196R


Summary of Contents for Agora Models MERCEDES-BENZ W196R
-
Page 1: Table Of Contents
STAGE 13B: ASSEMBLING THE STAGE 05: FITTING THE FRONT LEFT WHEEL RIM (2) FUEL PUMP STAGE 11: FITTING THE (EASY) VALVE COVERS (2) "MERCEDES-BENZ" and are the intellectual property of Mercedes-Benz Group AG. They are used by Agora Models under license. - Page 2 Advice from the experts This set of step-by-step instructions will enable you to complete the build of your 1:8-scale Mercedes-Benz W 196 R. The only tool you will need is a screwdriver. Most of the steps involve simply screwing or fitting parts together, and the correct screws needed for each step are clearly labelled on the instructional images.
- Page 3 Advice from the experts When you see this symbol on one of the images in these instructions, we have provided a Top Tip to help you with your build. Check back on this page for the corresponding tip! You can find more expert tips and advice for building the Mercedes W196R on our forum. Go to https://community.agoramodels.com/forum/198-mercedes-w196r/ Page 6 –...
-
Page 4: Stage 01: Adding Details To The Nose
Stage 01: Adding Details to the Nose PARTS LIST Nose Badge Radiator support Air intake frame Air intake Steering wheel Screwdriver 1F 1F 2 screws (1.7 x 4 mm) CM 5 screws (1.7 x 4 mm) AGORAMODELS MERCEDES -BENZ W 196 R... -
Page 5: Stage 02: Assembling The Air Intake And The Dials
Stage 02: Assembling the Air Intake and the Dials 1-2# PARTS LIST 2I 2I 2A Air intake net 2H Dashboard AP 2 screws (1.7 x 4 mm) 2B Air intake frame 2I Tachometer AM 8 screws (1.5 x 2 mm) 2C Hinge (L) 2J Water temperature gauge BM 4 screws (1.7 x 3 mm) - Page 6 Stage 02: Assembling the Air Intake and the Dials Couple the air intake frame to the nose. AGORAMODELS MERCEDES -BENZ W 196 R...
-
Page 7: Stage 03: Building The Engine Block And The Steering Column
Stage 03: Building the Engine Block and the Steering Column PARTS LIST 3I 3I 3A Engine lower block (L) 3I Steering column part A BM 3 screws (1.7 x 3 mm) 3B Oil pan part A 3J Steering column part B DM 5 screws (2 x 4 mm) 3C Engine lower block (R) 3K Steering column part C... - Page 8 Stage 03: Building the Engine Block and the Steering Column Turn the steering wheel 1F over. 3I 3I AGORAMODELS MERCEDES -BENZ W 196 R...
- Page 9 Stage 03: Building the Engine Block and the Steering Column 3I 3I AGORAMODELS MERCEDES -BENZ W 196 R...
-
Page 10: Stage 04: Building The Engine Block And Gearbox
Stage 04: Building the Engine Block and Gearbox 1-4# PARTS LIST Engine upper block part A (L) Engine upper block part B (L) Central gearbox part A Engine upper block part C (L) Central gearbox part B Oil pressure valve 5 screws (1.7 x 4 mm) 5 screws (2 x 4 mm) AGORAMODELS... - Page 11 Stage 04: Building the Engine Block and Gearbox AGORAMODELS MERCEDES -BENZ W 196 R...
-
Page 12: Stage 05: Fitting The Fuel Pump
Stage 05: Fitting the Fuel Pump 1-5# PARTS LIST 5I 5I DM 3 screws (2 x 4 mm) Fuel pump body Fuel pump part A Joints 1 (x4) Fuel pump part B Pipe 1 Joint 3 Pipe 2 Joint 4 Joint 2 Screwdriver 5I 5I... - Page 13 Stage 05: Fitting the Fuel Pump AGORAMODELS MERCEDES -BENZ W 196 R...
- Page 14 Stage 06: Adding the Magnetos 1-6# PARTS LIST Magneto part A Magneto part C 3 screws (1.7 x 4 mm) Magneto part B Magneto part D 2 screws (1.5 x 3 mm) Brackets (x2) Magnetos support PTO shaft Pins (x2) AGORAMODELS MERCEDES -BENZ W 196 R...
- Page 15 Stage 06: Adding the Magnetos AGORAMODELS MERCEDES -BENZ W 196 R...
-
Page 16: Stage 07: Constructing The Cylinder Heads
Stage 07: Constructing the Cylinder Heads (1) 1-7# PARTS LIST Cylinder head base Cover 2 5 screws (1.7 x 4 mm) Cylinder head Fuel injectors (x4) 3 screws (2 x 4 mm) Cover 1 Spark plugs (x8) 3 screws (2.3 x 5 mm) AGORAMODELS MERCEDES -BENZ W 196 R... - Page 17 Stage 07: Constructing the Cylinder Heads (1) AGORAMODELS MERCEDES -BENZ W 196 R...
-
Page 18: Stage 08: Constructing The Cylinder Heads
Stage 08: Constructing the Cylinder Heads (2) 1-8# PARTS LIST Cylinder head base Cover 2 5 screws (1.7 x 4 mm) Cylinder head Fuel injectors (x4) 3 screws (2 x 4 mm) Cover 1 Spark plugs (x8) 3 screws (2.3 x 5 mm) AGORAMODELS MERCEDES -BENZ W 196 R... - Page 19 Stage 08: Constructing the Cylinder Heads (2) AGORAMODELS MERCEDES -BENZ W 196 R...
-
Page 20: Stage 09: Fitting The Valve Covers
Stage 09: Fitting the Valve Covers (1) 1-9# PARTS LIST Valve cover base 1 Valve cover 2 5 screws (2 x 5 mm) Valve cover 1 Plate 3 screws (1.2 x 2 mm) Valve cover base 2 AGORAMODELS MERCEDES -BENZ W 196 R... - Page 21 Stage 10: Wiring the Engine 1-10# PARTS LIST Valve covers bracket 1 Wires (x16) 3 screws (1.7 x 4 mm) Wires cover 1 Wires cover 2 5 screws (1.5 x 3 mm) AGORAMODELS MERCEDES -BENZ W 196 R...
- Page 22 Stage 10: Wiring the Engine AGORAMODELS MERCEDES -BENZ W 196 R...
-
Page 23: Stage 11: Fitting The Valve Covers
Stage 11: Fitting the Valve Covers (2) 1-11# PARTS LIST Valve cover base 3 Valve cover 3 Valve cover base 4 Valve cover 4 Valve cover bracket 2 3 screws (1.7 x 4 mm) 5 screws (2 x 5 mm) AGORAMODELS MERCEDES -BENZ W 196 R... -
Page 24: Stage 12: Assembling The Front Left Wheel Rim
Stage 12: Assembling the Front Left Wheel Rim (1) (Regular) PARTS LIST REGULAR ASSEMBLY Outer rim Spokes 2 5 screws (1.7 x 4 mm) Central ring 1 4 screws (1.7 x 4 mm) Inflation valve Central ring 2 Hub 1 Double-sided tape Spokes 1 Tweezers... - Page 25 Stage 12: Assembling the Front Left Wheel Rim (1) (Regular) Apply 24 pieces of double-sided tape 12I to 12A’s inner profile and tear off their top sheets. Insert 1 spoke 12F through a hole in 12D’s first level (counting from the bottom).
- Page 26 Stage 12: Assembling the Front Left Wheel Rim (1) (Regular) Insert 12 spokes 12E through Insert 12 spokes 12E through 12D’s second level of holes. 12D’s fourth level of holes. AGORAMODELS MERCEDES -BENZ W 196 R...
- Page 27 Stage 12B: Assembling the Front Left Wheel Rim (1) (Easy) 12B# PARTS LIST 12FF 12FF 12GG 12GG 12AA 12AA 12EE 12EE 12BB 12BB 12CC 12CC 12DD 12DD 12HH 12HH EASY ASSEMBLY 12AA 12EE Central ring 1 Hub 4 5 screws (1.5 x 3 mm) 12BB 12FF Hub 1...
-
Page 28: Stage 12B: Assembling The Front Left Wheel Rim
Stage 12B: Assembling the Front Left Wheel Rim (1) (Easy) 12BB 12BB 12GG 12GG 12EE 12EE 12FF 12FF 12DD 12DD 12CC 12CC 12AA 12AA Insert the spokes one by one. AGORAMODELS MERCEDES -BENZ W 196 R... -
Page 29: Stage 13: Assembling The Front Left Wheel Rim
Stage 13: Assembling the Front Left Wheel Rim (2) (Regular) 1-13# PARTS LIST Inner rim Central ring 3 Hub 2 Spokes 3 Double-sided tape 4 screws (1.7 x 4 mm) 5 screws (1.5 x 5 mm) REGULAR ASSEMBLY Apply 24 pieces of double-sided tape 13E to 12B’s inner profile and tear off their top sheets. - Page 30 Stage 13: Assembling the Front Left Wheel Rim (2) (Regular) Insert 1 spoke 13D through a hole in 13C’s first level (counting from the bottom). Place its thinner end as shown, on tape 13E. Insert 12 spokes 13D through Repeat the process with the 13C’s second level of holes.
- Page 31 Stage 13B: Assembling the Front Left Wheel Rim (2) (Easy) 1-13B# PARTS LIST 13AA Outer rim 13BB Inner rim 13CC Central ring 2 13DD Inflation valve 13AA 13AA 13BB 13BB 13CC 13CC 5 screws (1.7 x 4 mm) 8 screws (1.7 x 4 mm) 13DD 13DD 13CC...
- Page 32 Stages 78 and 84 Stages 78 and 84 are the two largest sections of the main body provided with Pack 1. Keep them safely protected until they are required at the end of the build. AGORAMODELS MERCEDES -BENZ W 196 R...
- Page 33 REAR BRAKE DRUMS AND EXPANSION TANK CONNECTING THE GEARBOX STAGE 22: FITTING THE REAR STAGE 17: ATTACHING THE RIGHT CHASSIS SECTION ENGINE COVERS "MERCEDES-BENZ" and are the intellectual property of Mercedes-Benz Group AG. They are used by Agora Models under license.
- Page 34 Advice from the experts This set of step-by-step instructions will enable you to complete the build of your 1:8-scale Mercedes-Benz W 196 R. The only tool you will need is a screwdriver. Most of the steps involve simply screwing or fitting parts together, and the correct screws needed for each step are clearly labelled on the instructional images.
- Page 35 Advice from the experts When you see this symbol on one of the images in these instructions, we have provided a Top Tip to help you with your build. Check back on this page for the corresponding tip! You can find more expert tips and advice for building the Mercedes W196R on our forum. Go to https://community.agoramodels.com/forum/198-mercedes-w196r/ Page 6 –...
- Page 36 Stage 14: Fitting the Front Left Tyre (Regular) 2-14# PARTS LIST Tyre Hub 3 Hubcap Washer ring REGULAR ASSEMBLY Soften the tyre 14A by placing it in a bowl of hot water. AGORAMODELS MERCEDES -BENZ W 196 R...
- Page 37 Stage 14B: Fitting the Front Left Tyre (Easy) 2-14B# PARTS LIST 14AA Tyre 14BB Hubcap 14CC Hub 5 14DD Washer ring 14BB 14BB 14CC 14CC 14AA 14AA 14DD 14DD EASY ASSEMBLY 13BB 13BB 14AA 14AA 14AA 14AA Soften the tyre 14AA by placing it in a bowl of hot water.
- Page 38 Stage 15: Connecting the Spark Plugs, the Fuel Lines and the Oil Hoses 2-15# PARTS LIST Spark plugs wire 1 Spark plugs wire 2 Fuel lines fairlead Fuel lines 1 (x4) Fuel lines 2 (x4) Oil hoses connector 1 Oil hose 1 Oil hose 2 Oil hoses connector 2 Engine cooling duct...
- Page 39 Stage 15: Connecting the Spark Plugs, the Fuel Lines and the Oil Hoses AGORAMODELS MERCEDES -BENZ W 196 R...
- Page 40 Stage 16: Connecting the Fuel Pump Line and the Expansion Tank 2-16# PARTS LIST Expansion tank Oil hoses connector 3 Oil hose 5 connector Oil hose 3 Detail Fuel pump connector Oil hoses connector 4 Fuel pump line Oil hose 4 AGORAMODELS MERCEDES -BENZ W 196 R...
- Page 41 Stage 16: Connecting the Fuel Pump Line and the Expansion Tank AGORAMODELS MERCEDES -BENZ W 196 R...
- Page 42 Stage 17: Attaching the Engine Covers 2-17# PARTS LIST Engine side cover part A Engine side cover part B Engine front cover Oil hoses 6 (x2) 3 screws (1.7 x 4 mm) 3 screws (2 x 4 mm) 4 screws (2 x 5 mm) AGORAMODELS MERCEDES -BENZ W 196 R...
- Page 43 Stage 18: Adding Detail to the Firewall and Connecting Fuel Lines 2-18# PARTS LIST Firewall Oil hoses connector 6 2 screws (1.7 x 3 x 5 mm) Plate Oil hose 9 5 screws (1.2 x 3 mm) Oil hose 7 Fuel filter Starter wire Fuel line 3...
- Page 44 Stage 18: Adding Detail to the Firewall and Connecting Fuel Lines AGORAMODELS MERCEDES -BENZ W 196 R...
- Page 45 Stage 18: Adding Detail to the Firewall and Connecting Fuel Lines AGORAMODELS MERCEDES -BENZ W 196 R...
- Page 46 Stage 19: Building the Left Chassis Section 2-19# PARTS LIST Chassis – left section Radiator support (L) Front suspension support 1 2 screws (2 x 10 mm) 2 screws (2 x 5 mm) AGORAMODELS MERCEDES -BENZ W 196 R...
- Page 47 Stage 20: Attaching the Rear Axle Support 2-20# PARTS LIST Rear axle support 2 screws (2 x 4 mm) 3 screws (2 x 5 mm) AGORAMODELS MERCEDES -BENZ W 196 R...
- Page 48 Stage 21: Fitting the Rear Left Chassis Section 2-21# PARTS LIST Chassis – rear left Reservoir cover 3 screws (1.7 x 4 mm) section Fuel lines connector 2 2 screws (2 x 4 mm) Torsion bar support Fuel lines connector 3 2 screws (1.7 x 4 mm) bushing 1 Reservoir support...
- Page 49 Stage 21: Fitting the Rear Left Chassis Section AGORAMODELS MERCEDES -BENZ W 196 R...
- Page 50 Stage 22: Fitting the Rear Right Chassis Section 2-22# PARTS LIST Rear crossbeam 3 screws (1.7 x 4 mm) Chassis – rear right section 2 screws (1.7 x 4 mm) Torsion bar support bushing 2 2 screws (2 x 4 mm) Suspension lock 2 3 screws (2.3 x 5 mm) Fuel pump...
- Page 51 Stage 22: Fitting the Rear Right Chassis Section AGORAMODELS MERCEDES -BENZ W 196 R...
- Page 52 Stage 23: Attaching the Right Chassis Section 2-23# PARTS LIST Chassis – right section 4 screws (1.7 x 4 mm) Brake fluid reservoir 2 screws (2 x 4 mm) Reservoir base 2 screws (2 x 10 mm) Radiator support (R) 6 screws (2 x 5 mm) Front crossbeam AGORAMODELS...
- Page 53 Stage 23: Attaching the Right Chassis Section Chassis – underside AGORAMODELS MERCEDES -BENZ W 196 R...
- Page 54 Stage 24: Fitting the Front Suspension and Steering Support 2-24# PARTS LIST Front suspension support 2 Steering support Front lower crossbeam Front suspension upper arm axles (x2) Reinforcement panel Front torsion bar support bushings (x2) 3 screws (2 x 4 mm) 2 screws (2 x 6 mm) 3 screws (2 x 5 mm) AGORAMODELS...
- Page 55 Stage 24: Fitting the Front Suspension and Steering Support AGORAMODELS MERCEDES -BENZ W 196 R...
- Page 56 Stage 25: Assembling the Gearbox 2-25# PARTS LIST Gearbox part A Gearbox rear support 4 screws (1.7 x 4 mm) Gearbox part B Rear transmission 3 screws (2.3 x 4 mm) Gearbox part C shaft AGORAMODELS MERCEDES -BENZ W 196 R...
- Page 57 Stage 25: Assembling the Gearbox AGORAMODELS MERCEDES -BENZ W 196 R...
- Page 58 Stage 26: Building the Rear Brake Drums and Connecting the Gearbox 2-26# PARTS LIST Rear brake drums Rear suspension arms GP 5 screws (2.3 x 5 mm) HP 3 screws (1.7 x 5 mm) part A (x2) Rear brake drums Driveshaft (L) IP 3 screws (2 x 4 x 6 mm) CM 2 screws (1.7 x 4 mm)
- Page 59 Stage 26: Building the Rear Brake Drums and Connecting the Gearbox Couple the gearbox to the rear section of the chassis. AGORAMODELS MERCEDES -BENZ W 196 R...
- Page 60 Stage 26: Building the Rear Brake Drums and Connecting the Gearbox AGORAMODELS MERCEDES -BENZ W 196 R...
- Page 61 FRONT RIGHT TYRE (REGULAR) FRONT LEFT SUSPENSION STAGE 37: ASSEMBLING THE STAGE 39B: FITTING THE FRONT RIGHT WHEEL RIM (1) FRONT RIGHT TYRE (EASY) (REGULAR) "MERCEDES-BENZ" and are the intellectual property of Mercedes-Benz Group AG. They are used by Agora Models under license.
- Page 62 Advice from the experts This set of step-by-step instructions will enable you to complete the build of your 1:8-scale Mercedes-Benz W 196 R. The only tool you will need is a screwdriver. Most of the steps involve simply screwing or fitting parts together, and the correct screws needed for each step are clearly labelled on the instructional images.
- Page 63 Advice from the experts When you see this symbol on one of the images in these instructions, we have provided a Top Tip to help you with your build. Check back on this page for the corresponding tip! You can find more expert tips and advice for building the Mercedes W196R on our forum. Go to https://community.agoramodels.com/forum/198-mercedes-w196r/ Page 6 –...
- Page 64 Advice from the experts Page 15 – I For easier fitting, we recommend swapping steps I & J. Temporarily remove the screw PM holding the upper suspension arm 32D to the spindle 32A. Drive the screw QM fully into the suspension arm, then put the suspension arm in place with screw QM in its hole with the chassis upright.
-
Page 65: Stage 27: Building The Rear Suspension
Stage 27: Building the Rear Suspension (1) 3-27# PARTS LIST Rear suspension left wishbone Rear suspension left lower arm Rear suspension left upper arm Shock absorber casing Shock absorber stem Shock absorber bellow Spring 2 screws (2 x 5 mm) 2 screws (2 x 7 mm) 3 screws (2.3 x 7 mm) 2 screws (2 x 11 mm) - Page 66 Stage 27: Building the Rear Suspension (1) AGORAMODELS MERCEDES -BENZ W 196 R...
-
Page 67: Stage 28: Building The Rear Suspension
Stage 28: Building the Rear Suspension (2) 3-28# PARTS LIST Rear suspension Shock absorber 2 screws (2 x 5 mm) right wishbone bellow 2 screws (2 x 7 mm) Right lower arm Spring 3 screws (2.3 x 7 mm) Right upper arm 2 screws (2 x 11 mm) Shock absorber casing 4 screws (2 x 3 x 6 mm) - Page 68 Stage 28: Building the Rear Suspension (2) AGORAMODELS MERCEDES -BENZ W 196 R...
-
Page 69: Stage 29: Attaching The Rear Subframe
Stage 29: Attaching the Rear Subframe 3-29# PARTS LIST Rear subframe 3 screws (2 x 5 mm) Rear subframe tube 3 screws (1.7 x 4 mm) Gearbox lever 7 screws (2 x 4 mm) AGORAMODELS MERCEDES -BENZ W 196 R... - Page 70 Stage 29: Attaching the Rear Subframe AGORAMODELS MERCEDES -BENZ W 196 R...
- Page 71 Stage 30: Fitting the Water Pump and the Fuel Pump Oil Reservoir 3-30# PARTS LIST Water pump Pipe Crankshaft front coupling Fuel pump oil reservoir Reservoir cap Oil hose 2 screws (1.7 x 3 mm) AGORAMODELS MERCEDES -BENZ W 196 R...
-
Page 72: Stage 31: Building The Front Left Suspension
Stage 31: Building the Front Left Suspension 3-31# PARTS LIST Spindle part A Spindle part B Lower suspension arm Upper suspension arm Shock absorber stem Shock absorber casing Torsion bar Spring 2 screws (1.7 x 4 mm) 4 screws (2 x 3 x 6 mm) 4 screws (2 x 8 mm) 2 screws (2 x 14 mm) AGORAMODELS... - Page 73 Stage 31: Building the Front Left Suspension Chassis – front left section AGORAMODELS MERCEDES -BENZ W 196 R...
-
Page 74: Stage 32: Building The Front Right Suspension
Stage 32: Building the Front Right Suspension 3-32# PARTS LIST Spindle part A Spindle part B Lower suspension arm Upper suspension arm Shock absorber stem Shock absorber casing Torsion bar Spring 2 screws (1.7 x 4 mm) 4 screws (2 x 3 x 6 mm) 4 screws (2 x 8 mm) 2 screws (2 x 14 mm) AGORAMODELS... - Page 75 Stage 32: Building the Front Right Suspension Chassis – front right section AGORAMODELS MERCEDES -BENZ W 196 R...
-
Page 76: Stage 33: Fitting The Steering Bar
Stage 33: Fitting the Steering Bar 3-33# PARTS LIST Central steering bar Left tie rod Right plate Right tie rod Left plate Arm 1 Arm 2 2 screws (2 x 5 mm) 4 screws (2 x 7 mm) 3 screws (1.7 x 6 mm) AGORAMODELS MERCEDES -BENZ W 196 R... - Page 77 Stage 33: Fitting the Steering Bar Slide the central steering bar into the front section of the chassis. AGORAMODELS MERCEDES -BENZ W 196 R...
-
Page 78: Stage 34: Fixing The Front Stabilizer Bar
Stage 34: Fixing the Front Stabilizer Bar 3-34# PARTS LIST Front axle stabilizer Left bracket Right bracket Brake cables links (x2) Left brake cable Brake distributor Right brake cable 5 screws (1.7 x 3 mm) 3 screws (1.7 x 4 mm) AGORAMODELS MERCEDES -BENZ W 196 R... - Page 79 Stage 34: Fixing the Front Stabilizer Bar Repeat on the other side. AGORAMODELS MERCEDES -BENZ W 196 R...
-
Page 80: Stage 35: Building The Front Left Brake Drum
Stage 35: Building the Front Left Brake Drum 3-35# PARTS LIST Brake drum Brake drum cable 2 5 screws (2 x 4 mm) Brake plate part A Brake drum cable 3 2 screws (2 x 5 mm) Brake plate part B Brake drum cable 4 Brake drum cable 1 AGORAMODELS... - Page 81 Stage 35: Building the Front Left Brake Drum Attach the front left wheel to the brake drum 35A. AGORAMODELS MERCEDES -BENZ W 196 R...
-
Page 82: Stage 36: Building The Front Right Brake Drum
Stage 36: Building the Front Right Brake Drum 3-36# PARTS LIST Brake drum Brake plate part A Brake plate part B Brake drum cable 1 Brake drum cable 2 Brake drum cable 3 Brake drum cable 4 5 screws (2 x 4 mm) AGORAMODELS MERCEDES -BENZ W 196 R... - Page 83 Stage 37: Assembling the Front Right Wheel Rim (1) (Regular) 3-37# PARTS LIST Jig from Stage 12 (12G) REGULAR ASSEMBLY Outer rim Spokes 1 5 screws (1.7 x 4 mm) Central ring 1 Spokes 2 4 screws (1.7 x 4 mm) Inflation valve Central ring 2 Hub 1...
-
Page 84: Stage 37: Assembling The Front Right Wheel Rim
Stage 37: Assembling the Front Right Wheel Rim (1) (Regular) Apply 24 pieces of double-sided tape 37H to 37A’s inner profile and tear off their top sheets. Insert 1 spoke 37F through a hole in 37D’s first level (counting from the bottom). - Page 85 Stage 37: Assembling the Front Right Wheel Rim (1) (Regular) Insert 12 spokes 37E through Insert 12 spokes 37E through 37D’s second level of holes. 37D’s fourth level of holes. AGORAMODELS MERCEDES -BENZ W 196 R...
-
Page 86: Stage 37B: Assembling The Front Right Wheel Rim
Stage 37B: Assembling the Front Right Wheel Rim (1) (Easy) 3-37B# PARTS LIST 37FF 37FF 37GG 37GG 37AA 37AA 37EE 37EE 37BB 37BB 37CC 37CC 37DD 37DD Tweezers from Stage 12B (12HH) EASY ASSEMBLY 37AA 37EE Central ring 1 Hub 4 5 screws (1.5 x 3 mm) 37BB 37FF... - Page 87 Stage 37B: Assembling the Front Right Wheel Rim (1) (Easy) 37BB 37BB 37GG 37GG 37EE 37EE 37FF 37FF 37DD 37DD 37CC 37CC 37AA 37AA Insert the spokes one by one. AGORAMODELS MERCEDES -BENZ W 196 R...
-
Page 88: Stage 38: Assembling The Front Right Wheel Rim
Stage 38: Assembling the Front Right Wheel Rim (2) (Regular) 3-38# PARTS LIST Inner rim Central ring 3 Hub 2 Spokes 3 Double-sided tape 4 screws (1.7 x 4 mm) 5 screws (1.5 x 5 mm) REGULAR ASSEMBLY Apply 24 pieces of double-sided tape 38E to 37B’s inner profile and tear off their top sheets. - Page 89 Stage 38: Assembling the Front Right Wheel Rim (2) (Regular) Insert 1 spoke 38D through a hole in 38C’s first level (counting from the bottom). Place its thinner end as shown, on tape 38E. Insert 12 spokes 38D through Repeat the process with other 11 spokes 38D.
-
Page 90: Stage 38B: Assembling The Front Right Wheel Rim
Stage 38B: Assembling the Front Right Wheel Rim (2) (Easy) 3-38B# PARTS LIST 38AA Outer rim 38BB Inner rim 38CC Central ring 2 38DD Inflation valve 38AA 38AA 38BB 38BB 38CC 38CC 5 screws (1.7 x 4 mm) 8 screws (1.7 x 4 mm) 38DD 38DD 38CC... -
Page 91: Stage 39: Fitting The Front Right Tyre (Regular)
Stage 39: Fitting the Front Right Tyre (Regular) 3-39# PARTS LIST Tyre Hub 3 Hubcap Washer ring 2 screws (2 x 5 mm) REGULAR ASSEMBLY Soften the tyre 39A by placing it in a bowl of hot water. Attach the front right wheel to the brake drum 36A. -
Page 92: Stage 39B: Fitting The Front Right Tyre (Easy)
Stage 39B: Fitting the Front Right Tyre (Easy) 3-39B# PARTS LIST 39AA Tyre 39BB Hubcap 39CC Hub 5 39DD Washer ring 2 screws (2 x 5 mm) 39BB 39BB 39CC 39CC 39DD 39DD 39AA 39AA REGULAR ASSEMBLY 38BB 38BB 39AA 39AA 39AA 39AA... - Page 93 STAGE 47B: ASSEMBLING THE REAR LEFT STAGE 44: INSTALLING THE SECOND EXHAUST WHEEL RIM (2) (EASY) MANIFOLD AND FITTING THE ENGINE STAGE 45: INSTALLING THE EXPANSION TANK "MERCEDES-BENZ" and are the intellectual property of Mercedes-Benz Group AG. They are used by Agora Models under license.
- Page 94 Advice from the experts This set of step-by-step instructions will enable you to complete the build of your 1:8-scale Mercedes-Benz W 196 R. The only tool you will need is a screwdriver. Most of the steps involve simply screwing or fitting parts together, and the correct screws needed for each step are clearly labelled on the instructional images.
- Page 95 Advice from the experts When you see this symbol on one of the images in these instructions, we have provided a Top Tip to help you with your build. Check back on this page for the corresponding tip! You can find more expert tips and advice for building the Mercedes W196R on our forum. Go to https://community.agoramodels.com/forum/198-mercedes-w196r/ Page 9 –...
- Page 96 Stage 40: Fixing the Central Crossbeam and the Rear Torsion Bars 4-40# PARTS LIST Central crossbeam Left tube Right tube Left rear torsion bar Right rear torsion bar 3 screws (2 x 5 mm) 3 screws (2 x 13 mm) Chassis –...
- Page 97 Stage 41: Building the Inlet Manifold 4-41# PARTS LIST Inlet manifold 11 screws (1.7 x 4 mm) Pipes (x8) AGORAMODELS MERCEDES -BENZ W 196 R...
- Page 98 Stage 42: Installing the Inlet Manifold 4-42# PARTS LIST Inlet manifold cover Throttle body Inlet manifold support Tube 2 screws (1.7 x 3 mm) 2 screws (2 x 5 mm) 4 screws (1.7 x 5 mm) Couple the inlet manifold Chassis –...
- Page 99 Stage 43: Installing the First Exhaust Manifold 4-43# PARTS LIST Exhaust manifold Couple the exhaust manifold 43A to the engine. AGORAMODELS MERCEDES -BENZ W 196 R...
- Page 100 Stage 44: Installing the Second Exhaust Manifold and Fitting the Engine 4-44# PARTS LIST Exhaust manifold Flange Accelerator rod 1 Lever 1 Spring Lever 2 Accelerator rod 2 Lever 3 Fuel line 4 (replacement) 3 screws (1.7 x 4 mm) 3 screws (2 x 4 mm) 44D 44F 2 screws (1.7 x 5 mm)
- Page 101 Stage 44: Installing the Second Exhaust Manifold and Fitting the Engine Remove the fuel line 4 (18N) and replace it with 44I. AGORAMODELS MERCEDES -BENZ W 196 R...
- Page 102 Stage 44: Installing the Second Exhaust Manifold and Fitting the Engine Temporarily remove pipe 30B from the engine. Couple the engine to the chassis. Front side AGORAMODELS MERCEDES -BENZ W 196 R...
- Page 103 Stage 44: Installing the Second Exhaust Manifold and Fitting the Engine Underside Reattach pipe 30B to the engine. AGORAMODELS MERCEDES -BENZ W 196 R...
- Page 104 Stage 45: Installing the Expansion Tank 4-45# PARTS LIST Expansion tank part A Tube 1 Tube 2 Tube 3 Expansion tank part B Pipe 1 Pipe 2 Pipe 3 Pipe 4 Adhesive tape 4 screws (1.7 x 4 mm) 3 screws (1.7 x 3 mm) AGORAMODELS MERCEDES -BENZ W 196 R...
- Page 105 Stage 45: Installing the Expansion Tank Couple the expansion tank to the engine. AGORAMODELS MERCEDES -BENZ W 196 R...
- Page 106 Stage 46: Assembling the Rear Left Wheel Rim (1) (Regular) 4-46# PARTS LIST Jig from Stage 12 (12G) REGULAR ASSEMBLY Outer rim Spokes 1 5 screws (1.7 x 4 mm) Central ring 1 Spokes 2 4 screws (1.7 x 4 mm) Inflation valve Central ring 2 Hub 1...
- Page 107 Stage 46: Assembling the Rear Left Wheel Rim (1) (Regular) Apply 24 pieces of double-sided tape 46H to 46A’s inner profile and tear off their top sheets. Insert 1 spoke 46F through a hole in 46D’s first level (counting from the bottom). Repeat the process with Insert 12 spokes 46F through other 11 spokes 46F.
- Page 108 Stage 46: Assembling the Rear Left Wheel Rim (1) (Regular) Insert 12 spokes 46E through Insert 12 spokes 46E through 46D’s fourth level of holes. 46D’s second level of holes. AGORAMODELS MERCEDES -BENZ W 196 R...
- Page 109 Stage 46B: Assembling the Rear Left Wheel Rim (1) (Easy) 4-46B# PARTS LIST 46FF 46FF 46GG 46GG 46AA 46AA 46EE 46EE 46BB 46BB 46CC 46CC 46DD 46DD Tweezers from Stage 12B (12HH) EASY ASSEMBLY 46AA 46EE Central ring 1 Hub 4 5 screws (1.5 x 3 mm) 46BB 46FF...
- Page 110 Stage 46B: Assembling the Rear Left Wheel Rim (1) (Easy) 46BB 46BB 46GG 46GG 46EE 46EE 46FF 46FF 46DD 46DD 46CC 46CC 46AA 46AA Insert the spokes one by one. AGORAMODELS MERCEDES -BENZ W 196 R...
- Page 111 Stage 47: Assembling the Rear Left Wheel Rim (2) (Regular) 4-47# PARTS LIST Inner rim Central ring 3 Hub 2 Spokes 3 Double-sided tape 4 screws (1.7 x 4 mm) 5 screws (1.5 x 5 mm) REGULAR ASSEMBLY Apply 24 pieces of double-sided tape 47E to 46B’s inner profile and tear off their top sheets.
- Page 112 Stage 47: Assembling the Rear Left Wheel Rim (2) (Regular) Insert 1 spoke 47D through a hole in 47C’s first level (counting from the bottom). Place its thinner end as shown, on tape 47E. Repeat the process with Insert 12 spokes 47D through other 11 spokes 47D.
- Page 113 Stage 47B: Assembling the Rear Left Wheel Rim (2) (Easy) 4-47B# PARTS LIST 47AA Outer rim 47BB Inner rim 47CC Central ring 2 47DD Inflation valve 47AA 47AA 47BB 47BB 47CC 47CC 5 screws (1.7 x 4 mm) 8 screws (1.7 x 4 mm) 47CC 47CC 47DD...
- Page 114 COCKPIT FRAME AND FITTING GEAR LEVER THE STEERING WHEEL STAGE 56: FITTING THE SEAT STAGE 51: CONSTRUCTING THE PADDING AND HEADREST STEERING BOX "MERCEDES-BENZ" and are the intellectual property of Mercedes-Benz Group AG. They are used by Agora Models under license.
- Page 115 Advice from the experts This set of step-by-step instructions will enable you to complete the build of your 1:8-scale Mercedes-Benz W 196 R. The only tool you will need is a screwdriver. Most of the steps involve simply screwing or fitting parts together, and the correct screws needed for each step are clearly labelled on the instructional images.
- Page 116 Advice from the experts When you see this symbol on one of the images in these instructions, we have provided a Top Tip to help you with your build. Check back on this page for the corresponding tip! You can find more expert tips and advice for building the Mercedes W196R on our forum. Go to https://community.agoramodels.com/forum/198-mercedes-w196r/ Page 20 –...
- Page 117 Stage 48: Fitting the Rear Left Tyre (Regular) 5-48# PARTS LIST Tyre Hub 3 Hubcap Washer ring 2 screws (2 x 5 mm) REGULAR ASSEMBLY Soften the tyre 48A by placing it in a bowl of hot water. Attach the wheel to the rear suspension left wishbone 27A.
- Page 118 Stage 48B: Fitting the Rear Left Tyre (Easy) 5-48B# PARTS LIST 48AA Tyre 48BB Hubcap 48CC Hub 5 48DD Washer ring 2 screws (2 x 5 mm) 48CC 48CC 48AA 48AA 48BB 48BB 48DD 48DD EASY ASSEMBLY 47BB 47BB 48AA 48AA 48AA 48AA...
- Page 119 Stage 49: Installing the Rear Brake Distributor and Brake Line 5-49# PARTS LIST Front chassis upper rod Tubes (x2) 5 screws (2 x 4 mm) Front chassis lower rod Rear brake line Rear brake distributor AGORAMODELS MERCEDES -BENZ W 196 R...
- Page 120 Stage 49: Installing the Rear Brake Distributor and Brake Line AGORAMODELS MERCEDES -BENZ W 196 R...
- Page 121 Stage 50: Building the Gear Lever 5-50# PARTS LIST Gear lever base Y-shaped pipe 2 screws (1.7 x 3 mm) Gear lever support Tube 2 3 screws (2 x 4 mm) Gear lever Tube 3 Washer ring Pipe Tube 1 AGORAMODELS MERCEDES -BENZ W 196 R...
- Page 122 Stage 50: Building the Gear Lever AGORAMODELS MERCEDES -BENZ W 196 R...
- Page 123 Stage 51: Constructing the Steering Box 5-51# PARTS LIST Steering box 2 screws (2 x 4 mm) 4 screws (1.7 x 5 mm) Steering gear 3 screws (2.3 x 5 mm) Steering support 2 screws (2 x 3 x 6 mm) AGORAMODELS MERCEDES -BENZ W 196 R...
- Page 124 Stage 52: Assembling the Radiator Frame 5-52# PARTS LIST Radiator upper cover Radiator lower cover 4 screws (2 x 4 mm) Radiator frame AGORAMODELS MERCEDES -BENZ W 196 R...
- Page 125 Stage 53: Attaching the Radiator Panels 5-53# PARTS LIST Radiator front panel Radiator rear panel AGORAMODELS MERCEDES -BENZ W 196 R...
- Page 126 Stage 54: Detailing and Fitting the Radiator 5-54# PARTS LIST Oil radiator front panel Pipe 1 2 screws (1.5 x 3 mm) Oil radiator rear panel Pipe 2 3 screws (2 x 3 mm) Radiator shock absorber AGORAMODELS MERCEDES -BENZ W 196 R...
- Page 127 Stage 54: Detailing and Fitting the Radiator Couple the radiator to the engine and chassis. AGORAMODELS MERCEDES -BENZ W 196 R...
- Page 128 Stage 55: Building the Seat Frame 5-55# PARTS LIST Seat frame Back padding 3 screws (2 x 5 mm) Seatback AGORAMODELS MERCEDES -BENZ W 196 R...
- Page 129 Stage 56: Fitting the Seat Padding and Headrest 5-56# PARTS LIST Seat Seat padding Frame part A Frame part B Headrest 5 screws (1.7 x 4 mm) 4 screws (2 x 5 mm) 5 screws (2 x 4 mm) 3 screws (2.6 x 7 mm) AGORAMODELS MERCEDES -BENZ W 196 R...
- Page 130 Stage 57: Preparing the Cockpit Floor Panel 5-57# PARTS LIST Cockpit floor panel Panel 2 Panel 1 AGORAMODELS MERCEDES -BENZ W 196 R...
- Page 131 Stage 58: Fixing the Clutch Bell Housing 5-58# PARTS LIST Clutch bell housing 3 screws (1.7 x 4 mm) * You may choose to put Model supports (x4)* supports 58B beneath your model to keep wheels raised. AGORAMODELS MERCEDES -BENZ W 196 R...
- Page 132 Stage 59: Fitting the Cockpit Floor Panel 5-59# PARTS LIST Panel 1 11 screws (2 x 5 mm) Panel 2 AGORAMODELS MERCEDES -BENZ W 196 R...
- Page 133 Stage 59: Fitting the Cockpit Floor Panel Loosen the two highlighted screws by half a turn. Mount the cockpit floor panel on the chassis. Retighten the two loosened screws. AGORAMODELS MERCEDES -BENZ W 196 R...
- Page 134 Stage 60: Detailing the Cockpit Frame and Fitting the Steering Wheel 5-60# PARTS LIST Cockpit frame Detail 5 2 screws (1.7 x 4 mm) Detail 1 Oil pressure gauge 3 screws (2.3 x 6 mm) Detail 2 Water temperature 5 screws (1.7 x 3 mm) Detail 3 gauge Detail 4...
- Page 135 Stage 60: Detailing the Cockpit Frame and Fitting the Steering Wheel Temporarily separate the steering Replace 2J and 2K wheel and panel 3L from the steering with 60G and 60H. column and couple the steering column to the cockpit frame. 3I 3I AGORAMODELS MERCEDES -BENZ W 196 R...
- Page 136 STAGE 65: ASSEMBLING THE FUEL TANK STAGE 66: MOUNTING THE FUEL TANK STAGE 67: ASSEMBLING THE OIL TANK STAGE 68: MOUNTING THE OIL TANK "MERCEDES-BENZ" and are the intellectual property of Mercedes-Benz Group AG. They are used by Agora Models under license.
- Page 137 Advice from the experts This set of step-by-step instructions will enable you to complete the build of your 1:8-scale Mercedes-Benz W 196 R. The only tool you will need is a screwdriver. Most of the steps involve simply screwing or fitting parts together, and the correct screws needed for each step are clearly labelled on the instructional images.
- Page 138 Advice from the experts When you see this symbol on one of the images in these instructions, we have provided a Top Tip to help you with your build. Check back on this page for the corresponding tip! You can find more expert tips and advice for building the Mercedes W196R on our forum. Go to https://community.agoramodels.com/forum/198-mercedes-w196r/ Page 8 –...
- Page 139 Stage 61: Mounting the Cockpit Frame 6-61# PARTS LIST Firewall bar Wire Wire bracket Steering box cover Steering column bracket 3 screws (2 x 4 mm) 2 screws (2 x 3 mm) 8 screws (2 x 4 mm) 3 screws (2 x 7 mm) 5 screws (2 x 6 mm) AGORAMODELS MERCEDES -BENZ W 196 R...
- Page 140 Stage 61: Mounting the Cockpit Frame Mount the cockpit frame and the steering column onto the chassis. AGORAMODELS MERCEDES -BENZ W 196 R...
- Page 141 Stage 62: Connecting the Steering Column and Fitting the Seat 6-62# PARTS LIST Shaft Joint 1 Joints 2 (x2) 3 screws (2 x 4 mm) 10 screws (1.7 x 3 mm) Mount the seat on the cockpit frame. AGORAMODELS MERCEDES -BENZ W 196 R...
- Page 142 Stage 63: Assembling and Fitting the Pedals 6-63# PARTS LIST Clutch pedal Brake pedal 4 screws (1.7 x 4 mm) Footrest part A Gas pedal 3 screws (2 x 8 mm) Footrest part B Gas pedal shaft Footrest part C AGORAMODELS MERCEDES -BENZ W 196 R...
- Page 143 Stage 63: Assembling and Fitting the Pedals Couple the gas and brake pedals to the chassis. AGORAMODELS MERCEDES -BENZ W 196 R...
- Page 144 Stage 64: Adding Details to the Fuel Tank 6-64# PARTS LIST Fuel tank body Fuel tank detail 1 (R) Fuel tank detail 2 (L) 3 screws (1.7 x 4 mm) 3 screws (1.7 x 3 mm) AGORAMODELS MERCEDES -BENZ W 196 R...
- Page 145 Stage 65: Assembling the Fuel Tank 6-65# PARTS LIST Fuel tank bottom Detail 3 6 screws (2 x 4 mm) Detail 1 Fuel line 6 Detail 2 Fuel line 7 Fuel line 5 Detail 4 AGORAMODELS MERCEDES -BENZ W 196 R...
- Page 146 Stage 65: Assembling the Fuel Tank Couple the fuel tank body 64A to the fuel tank bottom 65A. AGORAMODELS MERCEDES -BENZ W 196 R...
- Page 147 Stage 66: Mounting the Fuel Tank 6-66# PARTS LIST Gearbox rear cover Bracket 3 screws (2.3 x 5 mm) Fuel distributor Fuel line 10 3 screws (1.7 x 3 mm) Detail 1 Fuel line 11 2 screws (1.7 x 3 mm) Fuel line 8 Detail 3 3 screws (2 x 8 mm)
- Page 148 Stage 66: Mounting the Fuel Tank Temporarily remove 26G by loosening the highlighted screw. Mount the fuel tank onto the chassis. AGORAMODELS MERCEDES -BENZ W 196 R...
- Page 149 Stage 66: Mounting the Fuel Tank AGORAMODELS MERCEDES -BENZ W 196 R...
- Page 150 Stage 66: Mounting the Fuel Tank AGORAMODELS MERCEDES -BENZ W 196 R...
- Page 151 Stage 67: Assembling the Oil Tank 6-67# PARTS LIST Oil tank body Filler cap Oil tank bottom Bracket 3 screws (1.7 x 4 mm) 4 screws (2 x 5 mm) 2 screws (1.7 x 3 mm) AGORAMODELS MERCEDES -BENZ W 196 R...
- Page 152 Stage 68: Mounting the Oil Tank 6-68# PARTS LIST Shaft part A Bracket 2 (R) 4 screws (1.7 x 4 mm) Shaft part B Tubes 2 (x2) 3 screws (1.7 x 5 mm) Detail 1 Details 3 (x2) 3 screws (2 x 7 mm) Tube 1 Tubes 3 (x2) Detail 2...
- Page 153 Stage 68: Mounting the Oil Tank Couple the oil tank to the fuel tank. AGORAMODELS MERCEDES -BENZ W 196 R...
- Page 154 Stage 68: Mounting the Oil Tank AGORAMODELS MERCEDES -BENZ W 196 R...
- Page 155 STAGE 70B: ASSEMBLING THE REAR RIGHT WHEEL RIM (2) (EASY) STAGE 71: FITTING THE REAR RIGHT TYRE (REGULAR) STAGE 71B: FITTING THE REAR RIGHT TYRE (EASY) "MERCEDES-BENZ" and are the intellectual property of Mercedes-Benz Group AG. They are used by Agora Models under license.
- Page 156 Advice from the experts This set of step-by-step instructions will enable you to complete the build of your 1:8-scale Mercedes-Benz W 196 R. The only tool you will need is a screwdriver. Most of the steps involve simply screwing or fitting parts together, and the correct screws needed for each step are clearly labelled on the instructional images.
- Page 157 Stage 69: Assembling the Rear Right Wheel Rim (1) (Regular) 7-69# PARTS LIST Jig from Stage 12 (12G) REGULAR ASSEMBLY Outer rim Spokes 1 5 screws (1.7 x 4 mm) Central ring 1 Spokes 2 4 screws (1.7 x 4 mm) Inflation valve Central ring 2 Hub 1...
- Page 158 Stage 69: Assembling the Rear Right Wheel Rim (1) (Regular) Apply 24 pieces of double-sided tape 69H to 69A’s inner profile and tear off their top sheets. Insert 1 spoke 69F through a hole in 69D’s first level (counting from the bottom).
- Page 159 Stage 69: Assembling the Rear Right Wheel Rim (1) (Regular) Insert 12 spokes 69E through Insert 12 spokes 69E through 69D’s second level of holes. 69D’s fourth level of holes. AGORAMODELS MERCEDES -BENZ W 196 R...
- Page 160 Stage 69B: Assembling the Rear Right Wheel Rim (1) (Easy) 7-69B# PARTS LIST 69FF 69FF 69GG 69GG 69AA 69AA 69EE 69EE 69BB 69BB 69CC 69CC 69DD 69DD Tweezers from Stage 12B (12HH) EASY ASSEMBLY 69AA 69EE Central ring 1 Hub 4 5 screws (1.5 x 3 mm) 69BB 69FF...
- Page 161 Stage 69B: Assembling the Rear Right Wheel Rim (1) (Easy) 69BB 69BB 69GG 69GG 69EE 69EE 69FF 69FF 69DD 69DD 69CC 69CC 69AA 69AA Insert the spokes one by one. AGORAMODELS MERCEDES -BENZ W 196 R...
- Page 162 Stage 70: Assembling the Rear Right Wheel Rim (2) (Regular) 7-70# PARTS LIST Inner rim Central ring 3 Hub 2 Spokes 3 Double-sided tape 4 screws (1.7 x 4 mm) 5 screws (1.5 x 5 mm) REGULAR ASSEMBLY Apply 24 pieces of double-sided tape 70E to 69B’s inner profile and tear off their top sheets.
- Page 163 Stage 70: Assembling the Rear Right Wheel Rim (2) (Regular) Insert 1 spoke 70D through a hole in 70C’s first level (counting from the bottom). Place its thinner end as shown, on tape 70E. Repeat the process with other Insert 12 spokes 70D through 11 spokes 70D.
- Page 164 Stage 70B: Assembling the Rear Right Wheel Rim (2) (Easy) 7-70B# PARTS LIST 70AA Outer rim 70BB Inner rim 70CC Central ring 2 70DD Inflation valve 70AA 70AA 70BB 70BB 70CC 70CC 5 screws (1.7 x 4 mm) 8 screws (1.7 x 4 mm) 70DD 70DD 70CC...
- Page 165 Stage 71: Fitting the Rear Right Tyre (Regular) 7-71# PARTS LIST REGULAR Tyre ASSEMBLY Hub 3 Hubcap Washer ring 2 screws (2 x 5 mm) Soften the tyre 71A by placing it in a bowl of hot water. Attach the wheel to the rear suspension right wishbone 28A.
- Page 166 Stage 71B: Fitting the Rear Right Tyre (Easy) 7-71B# PARTS LIST EASY 71AA Tyre ASSEMBLY 71BB Hubcap 71CC Hub 5 71DD Washer ring 2 screws (2 x 5 mm) 71BB 71BB 71CC 71CC 71DD 71DD 71AA 71AA 70BB 70BB 71AA 71AA 71AA 71AA...
- Page 167 FRONT AND REAR STAGE 81: FITTING THE LEFT BOTTOM PANELS STAGE 76: ATTACHING THE DUCTS AND VENT COVERS RIGHT LOWER BODY PANEL "MERCEDES-BENZ" and are the intellectual property of Mercedes-Benz Group AG. They are used by Agora Models under license.
- Page 168 Advice from the experts This set of step-by-step instructions will enable you to complete the build of your 1:8-scale Mercedes-Benz W 196 R. The only tool you will need is a screwdriver. Most of the steps involve simply screwing or fitting parts together, and the correct screws needed for each step are clearly labelled on the instructional images.
- Page 169 Advice from the experts When you see this symbol on one of the images in these instructions, we have provided a Top Tip to help you with your build. Check back on this page for the corresponding tip! You can find more expert tips and advice for building the Mercedes W196R on our forum. Go to https://community.agoramodels.com/forum/198-mercedes-w196r/ Page 7 –...
- Page 170 Stage 72: Preparing the Bottom Floor Panel 8A-72# PARTS LIST Bottom floor panel 3 screws (2 x 3 mm) Speaker cover AGORAMODELS MERCEDES -BENZ W 196 R...
- Page 171 Stage 73: Fitting the Battery Compartment 8A-73# PARTS LIST Battery compartment with switch 3 screws (2 x 5 mm) 5 screws (2 x 3 mm) Switch Switch AGORAMODELS MERCEDES -BENZ W 196 R...
- Page 172 Stage 74: Installing the Speaker and the Circuit Board 8A-74# PARTS LIST Speaker Speaker support Battery compartment cover 5 screws (2 x 4 mm) 3 screws (2.3 x 4 mm) The circuit board 74A should be rotated 90 degrees clockwise to allow the floor panel 72A to sit flush on the chassis in Stage 75.
- Page 173 Stage 75: Attaching the Left Lower Body Panel and the Bottom Floor Panel 8A-75# PARTS LIST Body lower panel (L) 4 screws (2.3 x 8 mm) Insert three YM screws in the highlighted holes to enlarge them, then remove the screws. Attach the bottom floor panel 72A and the body lower panel 75A to the chassis.
- Page 174 Stage 76: Attaching the Right Lower Body Panel 8A-76# PARTS LIST Body lower panel (R) 4 screws (2.3 x 8 mm) AGORAMODELS MERCEDES -BENZ W 196 R...
- Page 175 Stage 77: Fitting the Mudguards and Testing the Engine Sound 8A-77# PARTS LIST Mudguard 1 (L) Stretchers (x4) 10 screws (1.7 x 4 mm) Mudguard 2 (R) Insert two AAA batteries into the battery compartment. AGORAMODELS MERCEDES -BENZ W 196 R...
- Page 176 Stage 77: Fitting the Mudguards and Testing the Engine Sound Test the engine sound effect by pressing the highlighted button. Repeat on the other side. AGORAMODELS MERCEDES -BENZ W 196 R...
- Page 177 Stage 78: Preparing the Rear Body Panel PARTS LIST Body rear panel 3 screws (1.5 x 3 mm) Panel support AGORAMODELS MERCEDES -BENZ W 196 R...
- Page 178 Stage 79: Attaching the Windscreen and the Left Mirror 8A-79# PARTS LIST Windscreen Left side-view mirror 2 screws (2 x 5 mm) Windscreen support 1 body 3 screws (1.5 x 5 mm) Mirror support 1 2 screws (1.5 x 4 mm) Windscreen support 2 Mirror support 2 Mirror base...
- Page 179 Stage 79: Attaching the Windscreen and the Left Mirror AGORAMODELS MERCEDES -BENZ W 196 R...
- Page 180 Stage 80: Attaching the Right Mirror 8A-80# PARTS LIST Right side-view mirror body Mirror support 1 Mirror support 2 Mirror base Side-view mirrors lenses (x2) 2 screws (2 x 5 mm) 2 screws (1.5 x 4 mm) AGORAMODELS MERCEDES -BENZ W 196 R...
- Page 181 Stage 80: Attaching the Right Mirror Remove the protective films from both of the lenses 80E. AGORAMODELS MERCEDES -BENZ W 196 R...
- Page 182 Stage 81: Fitting the Left Ducts and Vent Covers 8A-81# PARTS LIST Vent hole cover (L) Duct part A (L) Duct part B (L) Bracket 1 (L) Knob Bracket 2 2 screws (1.7 x 4 mm) 2 screws (2 x 4 mm) 3 screws (1.7 x 3 mm) 4 screws (1.7 x 4 mm) AGORAMODELS...
- Page 183 Stage 82: Fitting the Right Ducts and Vent Covers 8A-82# PARTS LIST Vent hole cover (R) Duct part A (R) Duct part B (R) 82G 82F Bracket 1 (R) Knob Bracket 2 2 screws (1.7 x 4 mm) 2 screws (2 x 4 mm) 3 screws (1.7 x 3 mm) 4 screws (1.7 x 4 mm) AGORAMODELS...
- Page 184 Stage 83: Fitting the Fuel and Oil Tank Covers and Mounting the Rear Body Panel 8A-83# PARTS LIST Fuel tank cap cover Oil tank bracket 3 screws (2 x 7 mm) Oil tank cap cover Oil tank hinge 2 screws (1.5 x 4 mm) Fuel tank bracket 6 screws (1.7 x 4 mm) Fuel tank hinge...
- Page 185 Stage 83: Fitting the Fuel and Oil Tank Covers and Mounting the Rear Body Panel AGORAMODELS MERCEDES -BENZ W 196 R...
- Page 186 Stage 83: Fitting the Fuel and Oil Tank Covers and Mounting the Rear Body Panel Mount the body rear panel onto the chassis. AGORAMODELS MERCEDES -BENZ W 196 R...
- Page 187 Stage 84: Mounting the Nose and the Front Body Panel PARTS LIST Body front panel Mounting plate 5 screws (1.7 x 4 mm) Front right wheel arch Fixing pin 1 4 screws (2 x 4 mm) panel Fixing pins 2 (x4) 18 screws (1.7 x 4 mm) AGORAMODELS MERCEDES -BENZ W 196 R...
- Page 188 Stage 84: Mounting the Nose and the Front Body Panel Temporarily remove Mount the nose 1A mudguards 77A and 77B. onto the chassis. AGORAMODELS MERCEDES -BENZ W 196 R...
- Page 189 Stage 84: Mounting the Nose and the Front Body Panel Mount the body front panel 84A onto the chassis. W hite hite ZM Put mudguards 77A and 77B back in place. Repeat on the other side. AGORAMODELS MERCEDES -BENZ W 196 R...
- Page 190 Stage 84: Mounting the Nose and the Front Body Panel AGORAMODELS MERCEDES -BENZ W 196 R...
- Page 191 Stage 85: Mounting the Front and Rear Bottom Panels 8A-85# PARTS LIST Rear bottom panel Front bottom panel 5 screws (1.7 x 5 mm) 8 screws (1.7 x 4 mm) AGORAMODELS MERCEDES -BENZ W 196 R...
- Page 192 Stage 85: Mounting the Front and Rear Bottom Panels BUILD COMPLETE Build Complete! We hope you have enjoyed building your Mercedes-Benz W 196 R. Don’t forget, when you choose your next model the first Pack is absolutely free! Go to agoramodels.com for more details. Warning: to keep your model in pristine condition please keep out of direct sunlight.
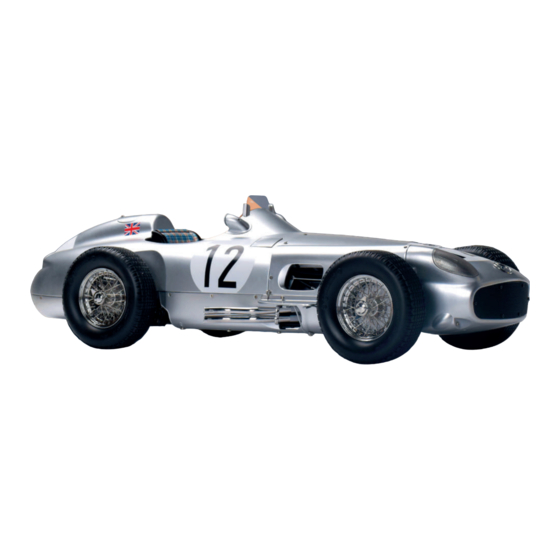
- Page 193 Your Completed Mercedes-Benz W 196 R AGORAMODELS MERCEDES -BENZ W 196 R...
- Page 194 Your Completed Mercedes-Benz W 196 R AGORAMODELS MERCEDES -BENZ W 196 R...
Need help?
Do you have a question about the MERCEDES-BENZ W196R and is the answer not in the manual?
Questions and answers