Advertisement
Quick Links
In the 1960s, Carroll Shelby's Cobras dominated racetracks worldwide, first winning races coast to coast
across North America, then in 1965, winning the World Manufacturer's GT Championship, achieving the
ultimate goal of defeating Ferrari. The Semi-Competitions were modified from full competition models
just enough to make them street legal. Only 29 models were produced, making them one of the most
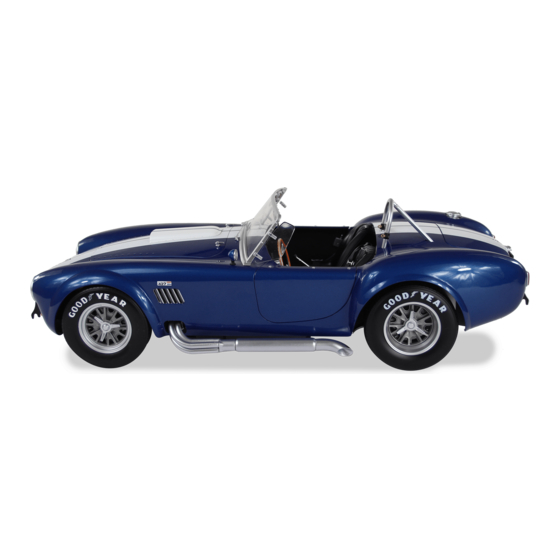
Your 1:8 model replicates the original 1965 Semi-Competition Cobra in intricate detail. From the detail on
the dashboard dials to the writing on the wheels, every piece is precisely reproduced.
STAGE 83: OIL COOLER BRACKETS AND FLUID
STAGE 84: AIR INLETS AND EXPANSION
TANK PARTS
STAGE 85: MAIN COBRA BODY & DOOR
STAGE 86 : SIDE MIRROR PARTS , RADIATOR
BRACKET, HOOD HINGES & MOUNTING PLATE
AGORAMODELS
Pack 11 | Build Instructions
sought-after American sports cars by collectors.
In your eleventh model pack, you will assemble:
PIPE
LOCKS
STAGE 87: LEFT INNER SIDE PANEL & DOOR
STAGE 88: RIGHT INNER SIDE PANEL & DOOR
STAGE 89: ELECTRICAL WIRES
STAGE 90: LEFT FENDER GRILLE
& JACKING PADS
1
ARCH TRIM
ARCH TRIM
SHELBY COBRA 427 S/C
Advertisement

Subscribe to Our Youtube Channel
Related Manuals for Agora Models SHELBY COBRA 427 S/C


Summary of Contents for Agora Models SHELBY COBRA 427 S/C
- Page 1 ARCH TRIM STAGE 85: MAIN COBRA BODY & DOOR STAGE 89: ELECTRICAL WIRES LOCKS STAGE 90: LEFT FENDER GRILLE STAGE 86 : SIDE MIRROR PARTS , RADIATOR & JACKING PADS BRACKET, HOOD HINGES & MOUNTING PLATE AGORAMODELS SHELBY COBRA 427 S/C...
- Page 2 S T A G E 8 3 P A R T S L I S T Name Quantity Left oil cooler bracket Right oil cooler bracket Left hose Right hose Screws TYPE OP01 Screws TYPE OP08 Right hose Screws Left hose Left oil cooler bracket Right oil cooler bracket AGORAMODELS SHELBY COBRA 427 S/C...
- Page 3 Radiator Mounting Frame. Fix in place from the reverse side using 1 x TYPE OP01 screw. Repeat on the right side to attach the Right Oil Cooler Bracket. 1 x OP01 AGORAMODELS SHELBY COBRA 427 S/C...
- Page 4 M O U N T I N G F R A M E Align the two tabs on the side of the Radiator with the two raised screw holes on the Radiator Mounting Frame. Secure in place using 2 x TYPE OP08 screws. 2 x OP08 AGORAMODELS SHELBY COBRA 427 S/C...
- Page 5 1 leading towards the Oil Cooler. Push the end of the hose into the hole on the Oil Cooler. Repeat with the Right Hose on the right side of the Oil Cooler (picture 4). AGORAMODELS SHELBY COBRA 427 S/C...
- Page 6 Stage 83: Oil Cooler Brackets And Hoses C O N T I N U E D . . . Stage 83 complete! AGORAMODELS SHELBY COBRA 427 S/C...
- Page 7 Left air inlet Right air inlet Expansion tank bottom Expansion tank top Expansion tank cap Screws TYPE OP08 Screws TYPE OP16 Expansion tank cap Expansion tank top Expansion tank bottom Screws Left air inlet Right air inlet AGORAMODELS SHELBY COBRA 427 S/C...
- Page 8 Align the screw holes on the Right Air Inlet with the hole on the Radiator Mounting Frame. Fix in place using a TYPE OP08 screw. Repeat to fix the Left Air Inlet on the left side of the Radiator Mounting Frame. 1 x OP08 AGORAMODELS SHELBY COBRA 427 S/C...
- Page 9 A T T A C H T H E E X P A N S I O N T A N K Align the screw holes on the Expansion Tank Bottom with the bracket as shown in picture 1. Fix in place using a TYPE OP08 screw. 1 x OP08 AGORAMODELS SHELBY COBRA 427 S/C...
- Page 10 Position the Expansion Tank Cap on the Expansion Tank Top and seceure from the underside using a TYPE OP16 screw. Place the Expansion Tank Top onto the bottom part and push them together to fix. 1 x OP16 AGORAMODELS SHELBY COBRA 427 S/C...
- Page 11 Stage 84: Air Inlets And Expansion Tank Parts Stage 84 complete! AGORAMODELS SHELBY COBRA 427 S/C...
- Page 12 S T A G E 8 5 P A R T S L I S T Name Quantity Main Cobra body Left door lock Right door lock Screws TYPE OD06 Screws TYPE OD05 Screws TYPE OD09 Main Cobra body Right door lock Left door lock Screws AGORAMODELS SHELBY COBRA 427 S/C...
- Page 13 S T E P 2 A T T A C H T H E D A S H B O A R D Turn the Main Body upside down and rest the front and rear ends on the packaging. AGORAMODELS SHELBY COBRA 427 S/C...
- Page 14 Main Body on its side and align the door hinge screw holes with those on the Main Body. Fix the hinge in place using 2 x TYPE OD09 screws. Repeat this operation to attach the Right Door. AGORAMODELS SHELBY COBRA 427 S/C...
- Page 15 Stage 85: Main Cobra Body & Door Locks C O N T I N U E D . . . 2 x OD09 2 x OD09 AGORAMODELS SHELBY COBRA 427 S/C...
- Page 16 Stage 85: Main Cobra Body & Door Locks Stage 85 complete! AGORAMODELS SHELBY COBRA 427 S/C...
- Page 17 Left hood hinge Right hood hinge Mounting plate Screws TYPE OP02 Screws TYPE OP08 Screws TYPE OD06 Screws Radiator central bracket Mirror sticker Side mirror Left hood hinge Mounting plate Right hood hinge Side mirror bracket AGORAMODELS SHELBY COBRA 427 S/C...
- Page 18 A S S E M B L E T H E S I D E M I R R O R Align the two pins on the Side Mirror with the holes on the Mirror Bracket before pushing them together. Carefully peel the Mirror Sticker from its backing sheet before positioning on the Side Mirror. AGORAMODELS SHELBY COBRA 427 S/C...
- Page 19 Main Body. There are two holes, so check you have the correct postion – the correct hole is furthest from the steering wheel (picture 3). Fix in place from the underside using a TYPE OP02 screw. 1 x OP02 AGORAMODELS SHELBY COBRA 427 S/C...
- Page 20 Take the Right Hood Hinge and sit it squarely over the screw hole on the underside of the Hood. Fix in place with a TYPE OD06 screw. Repeat with the Left Hood Hinge on the left side. 1 x OD06 1 x OD06 AGORAMODELS SHELBY COBRA 427 S/C...
- Page 21 If necessary, fix the Radiator Central Bracket with superglue. Push the Mounting Plate into the slot on the Radiator so that the front edge of the Mounting Plate fits over the Radiator Central Bracket. 2 x OP08 AGORAMODELS SHELBY COBRA 427 S/C...
- Page 22 Place the Shelby Emblem (from pack 1) into the hole in the front of the Main Body. Hold it in place and turn the Main Body over to fix the Emblem in place using a TYPE OP08 screw 1 x OP08 AGORAMODELS SHELBY COBRA 427 S/C...
- Page 23 Stage 86: Side Mirror Parts, Radiator Bracket, Hood Hinges & Mounting Plate Stage 86 complete! AGORAMODELS SHELBY COBRA 427 S/C...
- Page 24 S T A G E 8 7 P A R T S L I S T Name Quantity Left inner side panel Door arch trim Screws TYPE OD08 Left inner side panel Door arch trim Screws AGORAMODELS SHELBY COBRA 427 S/C...
- Page 25 Push together to fix in place. Next, with the right side facing you, fit the Trim into position around the inside of the Left Door. Secure in place using 3 x TYPE OD08 screws. 3 x OD08 AGORAMODELS SHELBY COBRA 427 S/C...
- Page 26 Stage 87: Left Inner Side Panel & Door Arch Trim Stage 87 complete! AGORAMODELS SHELBY COBRA 427 S/C...
- Page 27 S T A G E 8 8 P A R T S L I S T Name Quantity Right inner side panel Door arch trim Screws TYPE OD08 Screws TYPE OD03 Right inner side panel Door arch trim Screws AGORAMODELS SHELBY COBRA 427 S/C...
- Page 28 Push together to fix in place. Next, with the right side facing you, fit the Trim into position around the inside of the Right Door. Secure in place using 3 x TYPE OD08 screws. 3 x OD08 AGORAMODELS SHELBY COBRA 427 S/C...
- Page 29 With the underside of the Main Body facing you, align the two tabs on the Firewall with the two raised screw holes just behind the Dashboard. Secure in place with 2 x TYPE OD03 screws. 2 x OD03 AGORAMODELS SHELBY COBRA 427 S/C...
- Page 30 Stage 88: Right Inner Side Panel & Door Arch Trim Stage 88 complete! AGORAMODELS SHELBY COBRA 427 S/C...
- Page 31 Electrical wire 1 Electrical wire 2 Electrical wire 3 Electrical wire 4 Electrical wire 5 Electrical wire 6 Electrical wire 7 Electrical wire 8 Electrical wire 9 Electrical wire 10 Electrical wires 1 – 10 AGORAMODELS SHELBY COBRA 427 S/C...
- Page 32 A D D W I R I N G T O T H E F U E L T A N K A S S E M B LY Connect each of the ten wires to its number- matched pair on the Fuel Tank Assembly. Stage 89 complete! AGORAMODELS SHELBY COBRA 427 S/C...
- Page 33 S T A G E 9 0 P A R T S L I S T Name Quantity Left front fender grille Left jacking pad Right jacking pad Screws TYPE OP02 Screws TYPE OD03 Screws Right jacking pad Left front fender grille Left jacking pad AGORAMODELS SHELBY COBRA 427 S/C...
- Page 34 Main Body, checking that the silver post heads are on the outer side of the body. Fix in place from the reverse side using a TYPE OP01 screw. 1 x OP01 AGORAMODELS SHELBY COBRA 427 S/C...
- Page 35 C O N T I N U E D . . . Repeat on the right side to fix the Right jacking Pad. Please keep the polystyrene packaging for use when assembling your next Pack. 1 x OP01 Stage 90 complete! AGORAMODELS SHELBY COBRA 427 S/C...
Need help?
Do you have a question about the SHELBY COBRA 427 S/C and is the answer not in the manual?
Questions and answers