Sign In
Upload
Download
Table of Contents
Contents
Add to my manuals
Delete from my manuals
Share
URL of this page:
HTML Link:
Bookmark this page
Add
Manual will be automatically added to "My Manuals"
Print this page
×
Bookmark added
×
Added to my manuals
Manuals
Brands
Beckhoff Manuals
I/O Systems
EJ18 Series
Manual
Beckhoff EJ18 Series Manual
16-channel digital input modules
Hide thumbs
1
2
Table Of Contents
3
4
5
6
7
8
9
10
11
12
13
14
15
16
17
18
19
20
21
22
23
24
25
26
27
28
29
30
31
32
33
34
35
36
37
38
39
40
41
42
43
44
45
46
47
page
of
47
Go
/
47
Contents
Table of Contents
Bookmarks
Table of Contents
Table of Contents
Foreword
Overview 16-Channel Digital Input Modules
Notes on the Documentation
Safety Instructions
Intended Use
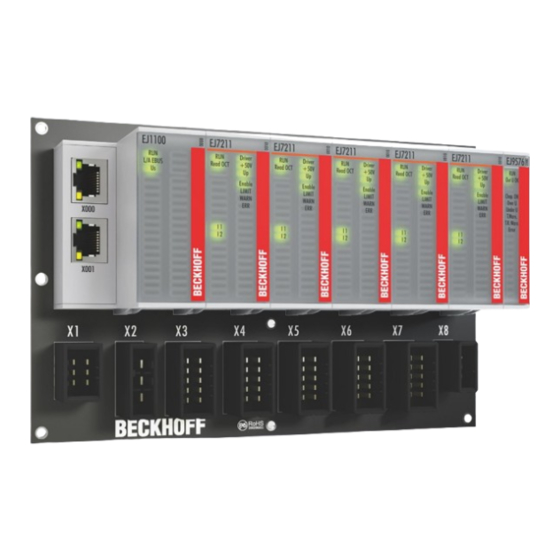
Signal Distribution Board
Documentation Issue Status
Guide through Documentation
Marking of Ethercat Plug-In Modules
Beckhoff Identification Code (BIC)
Electronic Access to the BIC (Ebic)
Certificates
System Overview
Product Description
EJ1809, EJ1819 - Introduction
EJ1809, EJ1819 - Technical Data
EJ1889 - Introduction
EJ1889 - Technical Data
EJ1809, EJ1819, EJ1889 - Pinout
EJ1809, EJ1819, EJ1889 - Leds
EJ1859 - Introduction
EJ1859 - Technical Data
EJ1859 - Pinout
EJ1859 - Leds
Installation of EJ Modules
Power Supply for the Ethercat Plug-In Modules
Ejxxxx - Dimensions
Installation Positions and Minimum Distances
Minimum Distances for Ensuring Installability
Installation Positions
Codings
Color Coding
Mechanical Position Coding
Installation on the Signal Distribution Board
Extension Options
Using Placeholder Modules for Unused Slots
Linking with Ethercat Terminals and Ethercat Box Modules Via an Ethernet/Ethercat Connection
IPC Integration
Disassembly of the Signal Distribution Board
Disposal
Ethercat Basics
Commissioning
Advertisement
Quick Links
Download this manual
Documentation | EN
EJ18xx
16-Channel digital input modules
2021-09-29 | Version: 1.5
Table of
Contents
Previous
Page
Next
Page
1
2
3
4
5
Advertisement
Table of Contents
Need help?
Do you have a question about the EJ18 Series and is the answer not in the manual?
Ask a question
Questions and answers
Subscribe to Our Youtube Channel
Related Manuals for Beckhoff EJ18 Series
I/O Systems Beckhoff EJ1809 Manual
16-channel digital input modules (47 pages)
I/O Systems Beckhoff EK1101 Documentation
Ethercat bus coupler (85 pages)
I/O Systems Beckhoff EtherCAT EL600x Series Documentation
Serial interface terminals (204 pages)
I/O Systems Beckhoff EtherCAT EL6022 Documentation
Serial interface terminals (204 pages)
I/O Systems Beckhoff EtherCAT EL6021 Documentation
Serial interface terminals (204 pages)
I/O Systems Beckhoff EPI3 Series Documentation
Io-link box modules with analog inputs (98 pages)
I/O Systems Beckhoff EP4374 Documentation
Ethercat box with analog inputs and outputs (53 pages)
I/O Systems Beckhoff EP1518-0001 Documentation
Ethercat box with 8 digital inputs and 2 counters (73 pages)
I/O Systems Beckhoff EP4174-0002 Documentation
4-channel analog output, +-10 v, 0/4...20 ma, 16 bit, differential (55 pages)
I/O Systems Beckhoff EL2911 Operating Instructions Manual
Twinsafe potential supply terminal with 4 digital fail-safe inputs (57 pages)
I/O Systems Beckhoff EP8309-1022 Documentation
Multi functional i/o box (116 pages)
I/O Systems Beckhoff EPI2 Series Documentation
Io-link box modules with digital outputs (94 pages)
I/O Systems Beckhoff EPP2 Series Documentation
Ethercat p box modules with digital outputs (153 pages)
I/O Systems Beckhoff EPP3204-0002 Documentation
4-channel analog input pt100 (rtd) (67 pages)
I/O Systems Beckhoff EL3751 Documentation
1-channel multi-functional input for measurement technology (270 pages)
I/O Systems Beckhoff EP9224-2037 Documentation
Ethercat box, 4-port junction, with power supply, enp, b17 (83 pages)
This manual is also suitable for:
Ej1809
Ej1819
Table of Contents
Print
Rename the bookmark
Delete bookmark?
Delete from my manuals?
Login
Sign In
OR
Sign in with Facebook
Sign in with Google
Upload manual
Upload from disk
Upload from URL


Need help?
Do you have a question about the EJ18 Series and is the answer not in the manual?
Questions and answers