
Related Manuals for Beckhoff EPI2 Series


Summary of Contents for Beckhoff EPI2 Series
- Page 1 Documentation | EN EPI2xxx, ERI2xxx IO-Link box modules with digital outputs 2022-08-29 | Version: 1.8...
-
Page 3: Table Of Contents
Table of contents Table of contents 1 Foreword .............................. 5 Notes on the documentation ...................... 5 Safety instructions .......................... 6 Documentation issue status ...................... 7 2 Product overview ............................ 9 EPI2xxx, ERI2xxx Module overview.................... 9 EPI2008-000x, ERI2008-000x ...................... 10 2.2.1 Introduction ........................ 10 2.2.2 Technical Data ......................... - Page 4 Table of contents Cabling ............................ 41 5 Commissioning and configuration ...................... 42 Configuration of the IO link master.................... 42 Configuration of the IO-Link devices .................... 43 5.2.1 Open the IO link configuration tool................... 43 5.2.2 Integrating IO-Link devices .................... 44 5.2.3 Removal of IO-Link devices .....................
-
Page 5: Foreword
, XTS and XPlanar are registered trademarks of and licensed by Beckhoff Automation GmbH. Other designations used in this publication may be trademarks whose use by third parties for their own purposes could violate the rights of the owners. Patent Pending... -
Page 6: Safety Instructions
All the components are supplied in particular hardware and software configurations appropriate for the application. Modifications to hardware or software configurations other than those described in the documentation are not permitted, and nullify the liability of Beckhoff Automation GmbH & Co. KG. Personnel qualification This description is only intended for trained specialists in control, automation and drive engineering who are familiar with the applicable national standards. -
Page 7: Documentation Issue Status
Foreword Documentation issue status Version Comment • Product images updated • Technical data updated • Structure update • Dimensions updated • UL requirements updated • Figures in the chapters "Introduction" updated • Front page updated • EPI2338-000x, ERI2338-000x: Imprint updated •... - Page 8 Foreword Firm and hardware version The documentation refers to the firm and hardware status that was valid at the time it was prepared. The properties of the modules are subject to continuous development and improvement. Modules having earlier production statuses cannot have the same properties as modules with the latest status. Existing properties, however, are always retained and are not changed, so that these modules can always be replaced by new ones.
-
Page 9: Product Overview
Product overview Product overview EPI2xxx, ERI2xxx Module overview Digital output modules Module Signal Number of Current Comment Housing connection outputs 8 x M8 0,5 A (Σ 4 A) Maximum of the total of all outputs 4 A Industrial housing EPI2008-0001 [} 10] 8 x M8 0,5 A (Σ 4 A) Maximum of the total of all outputs 4 A Zinc die-cast housing... -
Page 10: Epi2008-000X, Eri2008-000X
Product overview EPI2008-000x, ERI2008-000x 2.2.1 Introduction IO-Link interface Class B +24 V P24 Digital outputs Output EPI2008-0001 ERI2008-0001 IO-Link interface Class B +24 V P24 Output B Output A Digital n.c. outputs EPI2008-0002 ERI2008-0002 8 digital outputs 24 V 0.5 A The EPI2008-000x and ERI2008-000x IO-Link box modules with digital outputs switch binary control signals from the controller to the process level to the actuators. -
Page 11: Technical Data
Product overview 2.2.2 Technical Data All values are typical values over the entire temperature range, unless stated otherwise. IO-Link Connection 1 x M12 plug, 5-pin, A-coded Data transfer rate 230.4 kbaud (COM 3) Specification version IO-Link V1.1, Class B Requirements for IO-Link master V1.1 Current consumption from L+ 100 mA Current consumption from P24 20 mA + load... -
Page 12: Process Image
Product overview 2.2.3 Process image Output 0 to Output 7 The IO-Link device is connected to IO-Link Port1 of the IO-Link master (EP6224-3022). You will find the 8 digital outputs to the module (here using the EPI2008-0001 as an example) under Output 0 to Output 7. -
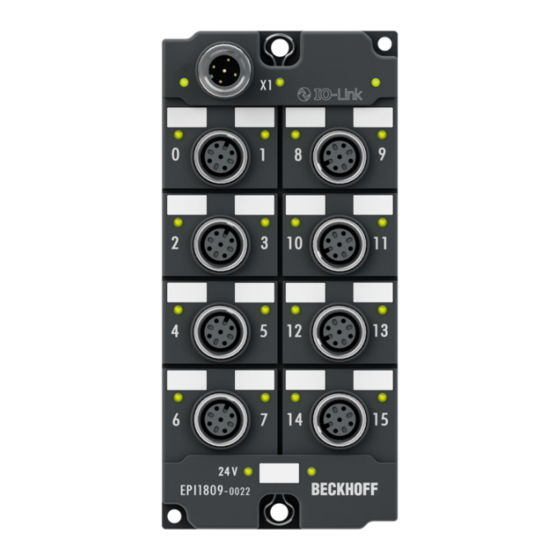
Page 13: Epi2809-002X, Eri2809-002X
Product overview EPI2809-002x, ERI2809-002x 2.3.1 Introduction IO-Link interface Class B +24 V P24 Digital Output outputs EPI2809-0021 ERI2809-0021 IO-Link interface Class B +24 V P24 Output B Digital Output A n.c. outputs EPI2809-0022 ERI2809-0022 16 digital outputs, 24 V 0.5 A (Σ 4 A) The EPI2809-002x and ERI2809-002x IO-Link boxes with digital outputs switch binary control signals from the controller to the process level to the actuators. - Page 14 Product overview The IO-Link box modules with zinc die-cast housing (ERIxxxx) are ready for use in harsh industrial and process environments. With the fully sealed design and metal surfaces the ERI series is ideal for applications requiring enhanced load capacity and protection against weld spatter, for example. Quick links Mounting and connection [} 31] Version: 1.8...
-
Page 15: Technical Data
Product overview 2.3.2 Technical data All values are typical values over the entire temperature range, unless stated otherwise. IO-Link Connection 1 x M12 plug, 5-pin, A-coded Data transfer rate 230.4 kbaud (COM 3) Specification version IO-Link V1.1, Class B Requirements for IO-Link master V1.1 Current consumption from L+ 100 mA Current consumption from P24 20 mA + load... -
Page 16: Process Image
Product overview 2.3.3 Process image Output 0 to Output 15 The IO-Link device is connected to IO-Link Port1 of the IO-Link master (EP6224-3022). You will find the 16 digital outputs to the module (here using the EPI2809-0021 as an example) under Output 0 to Output 15. -
Page 17: Epi2338-000X, Eri2338-000X
Product overview EPI2338-000x, ERI2338-000x 2.4.1 Introduction IO-Link interface Class B Digital +24 V P24 inputs/ In-/Output outputs EPI2338-0001 ERI2338-0001 IO-Link interface Class B +24 V P24 In-/Output B Digital In-/Output A inputs/ n.c. outputs EPI2338-0002 ERI2338-0002 8 digital inputs or outputs, 24 V The EPI2338-000x and ERI2338-000x IO-Link box modules have 8 digital channels, each of which can be operated as inputs or outputs. - Page 18 Product overview Supply of the connected sensors from P24, not from L Unlike many other modules, the EPI2338 and ERI2338 IO-Link boxes supply digital sensors from the additional supply voltage P24 and not from the voltage L ! This is because the connections can be used either as input or output.
-
Page 19: Technical Data
Product overview 2.4.2 Technical Data All values are typical values over the entire temperature range, unless stated otherwise. IO-Link Connection 1 x M12 plug, 5-pin, A-coded Data transfer rate 230.4 kbaud (COM 3) Specification version IO-Link V1.1, Class B Requirements for IO-Link master V1.1 Current consumption from L+ 100 mA + sensor supply Current consumption from P24 20 mA + load... - Page 20 Product overview Approvals/markings Approvals/markings CE, cURus [} 40] *) Real applicable approvals/markings see type plate on the side (product marking). Version: 1.8 EPI2xxx, ERI2xxx...
-
Page 21: Process Image
Product overview 2.4.3 Process image Inputs and Outputs The IO-Link device is connected to IO-Link Port1 of the IO-Link master (EP6224-3022). You will find the 8 digital inputs to the module (here using the EPI2338-0001 as an example) under Input 0 to Input 7 and the 8 digital outputs under Output 0 to Output 7. -
Page 22: Epi2339-002X, Eri2339-002X
Product overview EPI2339-002x, ERI2339-002x 2.5.1 Introduction IO-Link interface Class B +24 V P24 Digital In-/Output inputs/ outputs EPI2339-0021 ERI2339-0021 IO-Link interface Class B +24 V P24 In-/Output B Digital In-/Output A inputs/ n.c. outputs EPI2339-0022 ERI2339-0022 16 digital inputs or outputs, 24 V The EPI2339-002x and ERI2339-002x IO-Link boxes have 16 digital channels, each of which can be operated as inputs or outputs. - Page 23 Product overview Supply of the connected sensors from P24, not from L Unlike many other modules, the EPI2339-002x and ERI2339-002x IO-Link boxes supply digital sen- sors from the additional supply voltage P24 and not from the voltage L ! This is because the con- nections can be used either as input or output.
-
Page 24: Technical Data
Product overview 2.5.2 Technical data All values are typical values over the entire temperature range, unless stated otherwise. IO-Link Connection 1 x M12 plug, 5-pin, A-coded Data transfer rate 230.4 kbaud (COM 3) Specification version IO-Link V1.1, Class B Requirements for IO-Link master V1.1 Current consumption from L+ 100 mA + sensor supply Current consumption from P24 20 mA + load... - Page 25 Product overview Approvals/markings Approvals/markings CE, cURus [} 40] *) Real applicable approvals/markings see type plate on the side (product marking). EPI2xxx, ERI2xxx Version: 1.8...
-
Page 26: Process Image
Product overview 2.5.3 Process image Inputs and Outputs The IO-Link device is connected to IO-Link Port1 of the IO-Link master (EP6224-3022). You will find the 16 digital inputs to the module under Input 0 to Input 15 and the 16 digital outputs under Output 0 to Output 15 (here using the EPI2339-0021 as an example). -
Page 27: Io-Link Basics
The IO-Link master provides the interface to the higher-level controller and controls communication with the connected IO-Link devices. The IO-Link masters from Beckhoff have several IO-Link ports, to each of which one IO-Link device can be connected. IO-Link is not a fieldbus, but rather a point-to-point connection. - Page 28 IO-Link basics CAUTION Risk of device damage The IO-Link devices must be supplied from the 24 V power supply of the IO-Link master provided for this purpose. Otherwise, damage to the IO-Link port is possible. Version: 1.8 EPI2xxx, ERI2xxx...
-
Page 29: Establishment Of Io Link Communication
IO-Link basics Establishment of IO Link communication The establishment of the IO-Link communication is illustrated in Fig. Establishment of IO-Link communication. This illustrates in particular the sequence when automatically scanning [} 48] the IO-Link port. Fig. 5: Establishment of IO Link communication •... -
Page 30: Device Description Iodd
In order to be able to use the functionality of the parameter server, both the IO-Link master and the IO-Link device must be specified to V1.1. The IO-Link revision of the device can be read for the individual port under Settings [} 55]. All IO-Link masters from Beckhoff with current firmware support the IO-Link specification V1.1. -
Page 31: Mounting And Connection
Mounting and connection Mounting and connection Mounting 4.1.1 Dimensions EPIxxxx-xx0x and ERIxxxx-xx0x 26.5 13.5 Ø 3.5 All dimensions are given in millimeters. The drawing is not true to scale. Housing features Housing material PA6 (polyamide) Sealing compound polyurethane Mounting two mounting holes Ø 3.5 mm for M3 Metal parts brass, nickel-plated Contacts... -
Page 32: Dimensions Epixxxx-Xx2X And Erixxxx-Xx2X
Mounting and connection 4.1.2 Dimensions EPIxxxx-xx2x and ERIxxxx-xx2x 26.5 Ø 4.5 All dimensions are given in millimeters. The drawing is not true to scale. Housing features Housing material PA6 (polyamide) Sealing compound polyurethane Mounting two mounting holes Ø 4.5 mm for M4 Metal parts brass, nickel-plated Contacts... -
Page 33: Fixing
Mounting and connection 4.1.3 Fixing Protect connectors against soiling Protect all connections from contamination during module installation! Protection class IP65 can only be guaranteed if all cables and connectors are connected! Unused connections must be pro- tected with the appropriate connectors! Connector sets see catalog. Modules with narrow housing are installed with two M3 screws. -
Page 34: Tightening Torques For Plug Connectors
Mounting and connection 4.1.4 Tightening torques for plug connectors Screw connectors tight with a torque wrench. (e.g. ZB8801 from Beckhoff) Connector diameter Tightening torque 0.4 Nm 0.6 Nm Version: 1.8 EPI2xxx, ERI2xxx... -
Page 35: Io-Link Connection
Mounting and connection IO-Link connection 4.2.1 IO-Link master connection IO-Link interface The IO-Link specification defines various IO-Link pin assignment, which are described in the following section. The switching and communication line is marked with (C/Q). Port Class A (type A): The function of pin 2 and pin 5 is not preset. The vendor can assign an additional digital channel to pin 2. - Page 36 IO-Link cable Fig. 11: Example IO-Link cable: male to female The cables available from Beckhoff for the IO-Link system can be found in the chapter . IO-Link cable A 3-core IO-Link cable may be sufficient for Class A masters/devices from Beckhoff. A Class B master/device requires a 5-wire IO-Link cable.
-
Page 37: Connection Io-Link Device
Mounting and connection 4.2.2 Connection IO-Link Device The IO-Link box (EPIxxxx,ERIxxxx) has an A-coded M12 connector for the incoming IO-Link connection. IO-Link connection, Device (narrow housing) IO-Link connection, Device (wide housing) 4.2.3 IO-Link status LED IO-Link Device status LED (narrow housing) IO-Link Device status LED (wide housing) LED display Display... -
Page 38: Status Leds For Power Supply
Mounting and connection Status LEDs for power supply The IO-Link module contains 2 diagnostic LEDs for the power supply and a Diagnostic object (0x0A00) for more accurate diagnosis. The description of the diagnostic parameters (Index 0x0A00) is described in the section Object description and parameterization. -
Page 39: Signal Connection
Mounting and connection Signal connection 4.4.1 Digital outputs M8 and M12 The digital output modules connect the binary control signals from the automation unit on to the actuators at the process level. The signals are connected via screw-in M8 connectors (EPI2xxx-00x1, ERI2xxx-00x1) or screw-in M12 connectors (EPI2xxx-00x2, ERI2xxx-00x2). -
Page 40: Ul Requirements
Mounting and connection UL Requirements The installation of the EtherCAT Box Modules certified by UL has to meet the following requirements. Supply voltage CAUTION CAUTION! This UL requirements are valid for all supply voltages of all marked EtherCAT Box Modules! For the compliance of the UL requirements the EtherCAT Box Modules should only be supplied •... -
Page 41: Cabling
(type B) cable with a maximum length of 20 m. The IO-Link cables are available as straight and angled versions. Further information about the IO-Link connection can be found under: IO-Link master connection [} 35] Fig. 16: Example IO-Link cable: male to female Sensor cable Fig. 17: Selection of sensor cables available from Beckhoff EPI2xxx, ERI2xxx Version: 1.8... -
Page 42: Commissioning And Configuration
EtherCAT XML device description and configuration files The display matches that of the CoE objects from the EtherCAT XML Device Description. We rec- ommend downloading the latest XML file from the download area of the Beckhoff website and in- stalling it according to installation instructions. -
Page 43: Configuration Of The Io-Link Devices
The device catalog contains an alphabetically sorted list of the IO-Link devices for which a device description (IODD) exists in the local TwinCAT installation. The IODDs for the EPIxxxx, ERIxxxx IO-Link Box modules from Beckhoff can be downloaded via the Download finder. The downloaded zip file contains the IODD device description files for the Beckhoff EPIxxxx, ERIxxxx IO-Link Box modules. -
Page 44: Integrating Io-Link Devices
Commissioning and configuration 5.2.2 Integrating IO-Link devices The integration of the IODD file should always be the first step, since this enables the breakdown of the individual process data of the IO-Link devices as well as the display of the parameters. There are several ways of integrating an IO-Link device: 1. - Page 45 Commissioning and configuration 5.2.2.1 1. Importing the device description IODD Importing the device description simplifies the integration of the IO-Link devices. The individual process data are broken down, enabling simple parameterization of the sensor. The IODD only needs to be imported during the initial commissioning of a new IO-Link device.
- Page 46 Commissioning and configuration Fig. 22: IODD Finder, selection and import of the .xml-file 4. After clicking the download symbol, the .xml file of the selected IO-Link sensor/device is imported and stored in the following folder: - for TwinCAT 2.x: \TwinCAT\IO\IOLink - for TwinCAT 3.x: \TwinCAT\3.X\Config\IO\IOLink 5.
- Page 47 Commissioning and configuration 5.2.2.2 2. Assigning IO-Link device to port n Online configuration ü Requirement: The IO-Link device is connected. 1. Press the button Scan devices (see chapter Automatic scanning [} 48]) ð The device is automatically detected and created with the corresponding parameters. If several devices are stored in the IODD file, the first entry is always selected here.
- Page 48 Commissioning and configuration 5.2.2.3 3. Automatic scanning of the IO-Link ports This part of the documentation describes the configuration of the physically available IO-Link devices in TwinCAT. During automatic scanning of the IO-Link ports, the steps “WakeUp pulse”, “Baud rate setting”, “Reading of the communication parameters”, plus “Parameter server”...
- Page 49 Commissioning and configuration The IO-Link devices are now entered in the General display. The Port2 “Details” field displays information about the connected device. Additionally the tabs Settings [} 50] and Parameter [} 51] can be opened. Fig. 26: Device at Port2, Display “Details”, open tabs “Settings” and “Parameter” EPI2xxx, ERI2xxx Version: 1.8...
- Page 50 Commissioning and configuration Show settings of the device 3. Right-click on port2, to display more details in dialog “Settings”. 4. If necessary, change the settings as described in chapter Settings of the IO-Link devices [} 55]. Fig. 27: Settings of the device assigned to port2 Version: 1.8 EPI2xxx, ERI2xxx...
- Page 51 Commissioning and configuration Show parameters of the device 5. Open the Parameter tab via - double-click on Port2 or - richt-click on Port2 and select “Parameter” in the menu. ð The Parameters of of the respective IO link device are listed. 6.
- Page 52 Commissioning and configuration 5.2.2.4 4. Manual insertion via Create Device This part of the documentation describes the manual configuration of the IO-Link devices in TwinCAT. The manual insertion of the IO-Link device should only be carried out if the IODD from the vendor and the IO-Link device are not available.
-
Page 53: Removal Of Io-Link Devices
Commissioning and configuration 5.2.3 Removal of IO-Link devices To remove a device that has already been inserted, proceed as follows. 1. Right-click on the port to open the context menu and select “Delete”. Fig. 30: Remove the device from port2 2. Activate the IO link configuration [} 54], so that changes become effective. ð... -
Page 54: Activating The Configuration
Commissioning and configuration 5.2.4 Activating the configuration Changes in the IO-Link configuration tool only become effective when you activate the IO-Link configuration. There are two ways to activate the IO-Link configuration: • Click on the "Reload Devices" button • Activate the TwinCAT configuration: Click on the "Activate Configuration"... -
Page 55: Settings Of The Io-Link Devices
Commissioning and configuration Settings of the IO-Link devices To find the basic settings of the devices for each port, proceed as follows. 1. right-click on the port to open the context menu and select “Settings”. ð A new tab “Portx:: Settings” opens where the settings described below can be made. Fig. 32: Context menu - Settings Fig. 33: Settings of the IO-Link devices EPI2xxx, ERI2xxx... - Page 56 ð complex data types (process data) are created as octet strings. Advantage: simple further processing in the 9. Firmware Update of the Beckhoff IO-Link devices For a firmware update use the “Download” button. Observe the description in the documentation of EPIxxxx boxes in chapter Firmware Update des IO-Link Devices.
-
Page 57: Epixxxx, Erixxxx - Setting Of The Io-Link Device Parameters
Commissioning and configuration EPIxxxx, ERIxxxx - Setting of the IO-Link device parameters This chapter explains how to read out and set the IO-Link device parameters. The number and type of the objects shown on the “Parameters” tab vary according to the type of sensor. The default settings as stored in the IODD can initially be seen. - Page 58 Commissioning and configuration “Compare” button 1. Press the “Compare” button. ð the parameter data of the configuration are compared with the parameter sets in the sensor. ð The result is displayed in the “Parameter” tab see following figures. Conformity of configuration and sensor data The match is confirmed by a green tick in front of the index.
- Page 59 Commissioning and configuration Fig. 36: Compare configuration and sensor data EPI2xxx, ERI2xxx Version: 1.8...
- Page 60 Commissioning and configuration “Read” button The default values from the IODD file are always preset 1. Press the “Read” button ð The current parameter values of the sensor are read. The successful reading of the data is confirmed with a green tick in front of the index. “Write”...
- Page 61 Commissioning and configuration “Set Default” button 1. Press the “Set Default” button. ð All parameter values are set to the default settings. Write default-values to the sensor Note that the default-values must also be written to the device via the “Write” button. Fig. 38: Reset parameter values to default EPI2xxx, ERI2xxx Version: 1.8...
- Page 62 Commissioning and configuration “Export / Import” button The set parameter values can be exported as a .vbs file and restored later via Import. 1. Press the “Export / Import” button (see the diagram below (1)). ð The Import / Export dialog is opened 2.
- Page 63 Commissioning and configuration “Store” button 1. Click “Store” (data storage): ð The Beckhoff IO-Link master stores sensor-dependent-data, e. g. the following parameters (0x0018) “Application-Specific Tag”, (0x08n0) “Settings” and 0x3800 “Range Settings”. The success of storing process is marked with the storing symbol.
- Page 64 Commissioning and configuration Activate store button via PLC As for CoE, the Indexgroup of an ADS command is specified as 0xF302 for the IO link data channel. According to the IO-Link specification devices with ISDU support shall use index 0x0002 to receive the SystemCommand.
- Page 65 Commissioning and configuration Fig. 43: Store parameters EPI2xxx, ERI2xxx Version: 1.8...
- Page 66 Commissioning and configuration Standard Command (Index 0x0002) The IO-Link master writes various IO-Link-specific commands to the “Standard Command” during startup. Some of these commands are available in the TwinCAT interface (see figure below). 1. Click “Standard Command” in the parameter list of the “All Objects” user role, then double-click “Standard Command”...
- Page 67 Commissioning and configuration “Application Specific Tag” (Index 0x0018) Application-specific information can be entered and stored here. 1. Click “Application-Specific Tag” in the parameter list, then double-click “Application-Specific Tag” in the right-hand field. 2. Enter application-specific information and confirm with the Enter key. 3.
-
Page 68: Ads Access To Device Parameters
Commissioning and configuration ADS access to device parameters The exchange of the acyclic data takes place via a specified index and subindex range that is device-specific and can be read about in the corresponding vendor documentation. Parameter data exchange An intelligent IO-Link sensor/actuator (in the previous figure marked "Sensor (IO-Link Device)") can support parameterization by SPDU (Service Protocol Data Units). - Page 69 Commissioning and configuration Fig. 46: AoE-NetID allocation PortNo The individual IO-Link ports for the master are allocated via the port number. The port numbers are allocated in ascending order from 0x1000. I.e. IO-Link Port1 === PortNo 0x1000 and IO-Link Portn === PortNo 0x1000 + n-1. The following specification applies for the EP6224 (4-port IO-Link master): IO-Link Port1 === PortNo 0x1000 IO-Link Port2 === PortNo 0x1001...
- Page 70 Commissioning and configuration Fig. 47: Reading of the Application-Specific Name Example showing the principle in the code Reading of Application-Specific Name, index 0x0018 subindex 0x00 at IO-Link Port2. AmsAddr adsAdr; adsAdr.netId.b[0] = 0x0A; //AoE-NetID of EP6224 adsAdr.netId.b[1] = 0x03; //AoE-NetID of EP6224 adsAdr.netId.b[2] = 0x02;...
-
Page 71: Epi2Xxx, Eri2Xxx - Set Up The Parameters Of The Io-Link Device
Commissioning and configuration EPI2xxx, ERI2xxx - Set up the parameters of the IO- Link device 5.6.1 Input filter (Index 0x0800:01) The function of the Input filter is explained in the section EPI23xx-xxxx, ERI23xx-xxxx - Input debouncing and input signal extension [} 74]. For parameterization of the input filter proceed as follows: 1. - Page 72 Commissioning and configuration Fig. 49: Parameterization of Signal Extension (Index 0x0800:02) Version: 1.8 EPI2xxx, ERI2xxx...
-
Page 73: Diagnosis (Index 0X0A00)
Commissioning and configuration 5.6.3 Diagnosis (Index 0x0A00) The Diagnosis parameters vary between the different devices. The meaning of Diagnosis parameters (Index 0x0A00) can be read in the respective chapter Object description and parameterization. (EPI2008-000x, ERI2008-000x [} 80] / EPI2809-002x, ERI2809-002x [} 83] / EPI2338-000x, ERI2338-000x [} 86] / EPI2339-002x, ERI2339-002x [} 89]) As an example, the Diagnosis parameters of the EPI2339-0021 are presented in the figure below. -
Page 74: Epi23Xx-Xxxx, Eri23Xx-Xxxx - Input Debouncing And Input Signal Extension
Commissioning and configuration EPI23xx-xxxx, ERI23xx-xxxx - Input debouncing and input signal extension The digital IO-Link boxes EPI23xx and ERI23xx support a configurable input debouncing and a variable input signal extension for all digital inputs. This can be set via Device Parameter Object 0x0800. The set value applies for all digital inputs. - Page 75 Commissioning and configuration Input signal extension time: variable adjustable over Device Parameter (Object 0x0800 Subindex 2). Value Input signal extension time [ms] The parameter specifies the time for which an input impulse is extended with additional momentum change. Short change of the input impulse during the signal extension will be ignored. Fig. 52: Signal Extension If the input debouncing and the input signal extension is active, the input impulse is always filtered first and then extend the result.
-
Page 76: Device Parameters
IO-Link IODD Device Description The display corresponds to the display of the IO-Link device parameters. It is advisable to download the latest IO-Link IODD device description files from the Download section of the Beckhoff website and install them according to the installation instructions. - Page 77 Data Storage Lock 0x000C:03 Local Parameterization Lock 0x000C:04 Local User Interface Lock Subindex Name Flags Default value 0x0010 Vendor Name Beckhoff Automation GmbH & Co. KG 0x0011 Vendor Text www.beckhoff.com 0x0012 Product Name EPI2338-0001 0x0013 Product ID EPI2338-0001 0x0014 Product Text...
-
Page 78: Epi2008-000X, Eri2008-000X - Object Description And Parameterization
0x0018 (application-specific tag) and 0x08n0 (settings) are secured with the IO-Link master. In order to use this functionality, the IO-Link master must also support it. (e.g. with the Beckhoff EP6224-xxxx IO-Link master from firmware 10) Changes to these parameters are saved by the IO-Link master and restored when the box is replace with an identical IO-Link box. - Page 79 Index 0010 Vendor Name Index Name Meaning Data type Flags Default (hex) 0010 Vendor Name manufacturer designation String Beckhoff Automation GmbH & Co. KG Index 0011 Vendor Text Index Name Meaning Data type Flags Default (hex) 0011 Vendor Text manufacturer specific text String www.beckhoff.com...
- Page 80 Device parameters Index 0A00 Diagnosis Index Name Meaning Data type Flags Default (hex) 0A00:01 Overtemperature overheating of the IO-Link modules BOOL FALSE 0A00:02 Short detected short circuit on the IO-Link C/Q data line BOOL FALSE 0A00:03 US low supply voltage too low (< 18V) BOOL FALSE 0A00:04...
-
Page 81: Epi2809-002X, Eri2809-002X - Object Description And Parameterization
0x0018 (application-specific tag) and 0x08n0 (settings) are secured with the IO-Link master. In order to use this functionality, the IO-Link master must also support it. (e.g. with the Beckhoff EP6224-xxxx IO-Link master from firmware 10) Changes to these parameters are saved by the IO-Link master and restored when the box is replace with an identical IO-Link box. - Page 82 Index 0010 Vendor Name Index Name Meaning Data type Flags Default (hex) 0010 Vendor Name manufacturer designation String Beckhoff Automation GmbH & Co. KG Index 0011 Vendor Text Index Name Meaning Data type Flags Default (hex) 0011 Vendor Text manufacturer specific text String www.beckhoff.com...
- Page 83 Device parameters Index 0A00 Diagnosis Index Name Meaning Data type Flags Default (hex) 0A00:01 Overtemperature overheating of the IO-Link modules BOOL FALSE 0A00:02 Short detected short circuit on the IO-Link C/Q data line BOOL FALSE 0A00:03 US low supply voltage too low (< 18V) BOOL FALSE 0A00:04...
-
Page 84: Epi2338-000X, Eri2338-000X - Object Description And Parameterization
0x0018 (application-specific tag) and 0x08n0 (settings) are secured with the IO-Link master. In order to use this functionality, the IO-Link master must also support it. (e.g. with the Beckhoff EP6224-xxxx IO-Link master from firmware 10) Changes to these parameters are saved by the IO-Link master and restored when the box is replace with an identical IO-Link box. - Page 85 Index 0010 Vendor Name Index Name Meaning Data type Flags Default (hex) 0010 Vendor Name manufacturer designation String Beckhoff Automation GmbH & Co. KG Index 0011 Vendor Text Index Name Meaning Data type Flags Default (hex) 0011 Vendor Text manufacturer specific text String www.beckhoff.com...
- Page 86 Device parameters Index 0A00 Diagnosis Index Name Meaning Data type Flags Default (hex) 0A00:01 Overtemperature overheating of the IO-Link modules BOOL FALSE 0A00:02 Short detected short circuit on the IO-Link C/Q data line BOOL FALSE 0A00:03 US low supply voltage too low (< 18V) BOOL FALSE 0A00:04...
-
Page 87: Epi2339-002X, Eri2339-002X - Object Description And Parameterization
0x0018 (application-specific tag) and 0x08n0 (settings) are secured with the IO-Link master. In order to use this functionality, the IO-Link master must also support it. (e.g. with the Beckhoff EP6224-xxxx IO-Link master from firmware 10) Changes to these parameters are saved by the IO-Link master and restored when the box is replace with an identical IO-Link box. - Page 88 Index 0010 Vendor Name Index Name Meaning Data type Flags Default (hex) 0010 Vendor Name manufacturer designation String Beckhoff Automation GmbH & Co. KG Index 0011 Vendor Text Index Name Meaning Data type Flags Default (hex) 0011 Vendor Text manufacturer specific text String www.beckhoff.com...
- Page 89 Device parameters Index 0A00 Diagnosis Index Name Meaning Data type Flags Default (hex) 0A00:01 Overtemperature overheating of the IO-Link modules BOOL FALSE 0A00:02 Short detected short circuit on the IO-Link C/Q data line BOOL FALSE 0A00:03 US low supply voltage too low (< 18V) BOOL FALSE 0A00:04...
-
Page 90: Appendix
Appendix Appendix General operating conditions Protection degrees (IP-Code) The standard IEC 60529 (DIN EN 60529) defines the degrees of protection in different classes. 1. Number: dust protection and Definition touch guard Non-protected Protected against access to hazardous parts with the back of a hand. Protected against solid foreign objects of Ø 50 mm Protected against access to hazardous parts with a finger. -
Page 91: Accessories
Protective cap for M12 sockets, IP67 (50 pcs.) ZS5100-0000 Inscription labels, unprinted, 4 strips of 10 ZS5000-xxxx Printed inscription labels on enquiry Further accessories Further accessories can be found in the price list for fieldbus components from Beckhoff and online at https://www.beckhoff.com. Tools Ordering information Description ZB8801-0000 Torque wrench for plugs, 0.4…1.0 Nm... -
Page 92: Support And Service
Please contact your Beckhoff branch office or representative for local support and service on Beckhoff products! The addresses of Beckhoff's branch offices and representatives round the world can be found on her internet pages: https://www.beckhoff.com You will also find further documentation for Beckhoff components there. - Page 94 Beckhoff Automation GmbH & Co. KG Hülshorstweg 20 33415 Verl Germany Phone: +49 5246 9630 info@beckhoff.com www.beckhoff.com...
Need help?
Do you have a question about the EPI2 Series and is the answer not in the manual?
Questions and answers