
Related Manuals for Harvest TEC 747C


Summary of Contents for Harvest TEC 747C
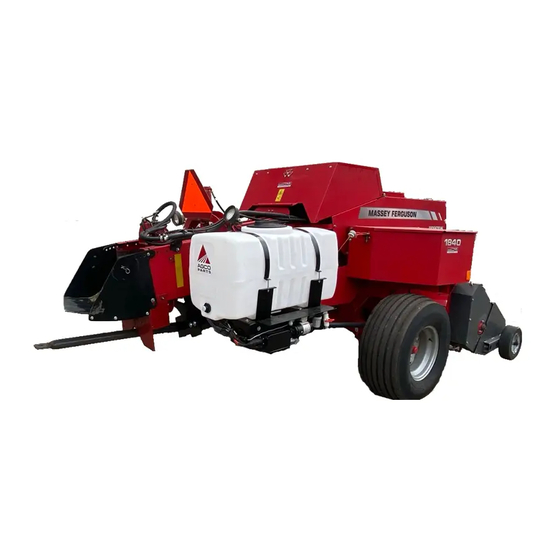
- Page 1 Installation Manual Model 747C 55 gallon Preservative Applicators Forage Harvester 747C-23-INST-Imp&Metric 10/23...
- Page 2 European Parliment and the Council of 17 May 2006 and other applicable European Directives including Directive 2004/108/EC on the Electromagnetic compatability. The application of preservatives for hay Harvest Tec system will be turned on after being installed on a farm press has been declard in conformity with the Machinery Directive.
-
Page 3: Table Of Contents
Warranty Statement Introduction Congratulations and thank you for purchasing a Harvest Tec Model 747C applicator. Please read this manual carefully to ensure correct steps are taken to attach the applicator to the baler. This applicator is designed to apply Harvest Tec buffered propionic acid. Use of alternative products may cause complications. Including inaccurate readings from the flow meter and damage to all parts. -
Page 4: Installation Of Applicator
Installation of Applicator Tank and Saddle Installation 1. Locate the left saddle leg, 001-4703XL, and mount to left side sheet of baler using two 1/2" x 1-1/2” hex bolts, 1/2" lock washers, and 1/2" flat washers. Do not fully tighten. 2. - Page 5 4x5 Baler Expanded 4x6 Baler Expanded 5x5 Baler Expanded...
-
Page 6: Installation Of Pump Manifold
5x6 Baler Expanded Installation of Pump Manifold Mounting Front Pump Plate Support Figure 2 Pump Plate Mounting Hole Mounting Holes 001-4703XE 1. Open right side door of baler. 2. Locate mounting holes for your size baler in bracket (001-4703XE). Mount bracket to pre-stamped square holes on diagonal support structure of baler. -
Page 7: Installation Of Control Manifold
Installation of Control Manifold Mounting Holes Pump Plate Mounting Hole 001-4703XE 2. Use 3/8” x 3/4” hex bolt, flat washers, lock washers, and nuts to secure Pump Plate Bracket (001-4703XF) to back side of Pump Mounting Bracket (001-4648X). Use holes 1 or 3 as designated in Figure 3 on the Pump Plate Bracket (001-4703XF). -
Page 8: Installation Of Moisture Sensor Pads And Disks
Installation of Moisture Sensor Pads and Disks 1. Open rear tail gate of baler and lock in the up position. Refer to baler manual to lock door open. 2. Remove bale shaping discs on each side of chamber by grinding welds. Once removed grind any remaining welds so sides of bale chamber are smooth. -
Page 9: Installation Of Drain / Fill Kit
Installation of Moisture Sensor Pads and Disks (continued) USR (under-shot rotor) OSR (over-shot) rotor) Figure 17 Figure 18 Figure 16 Installation of Drain / Fill Kit Locate parts bag 1. Thread 3/4" elbow fitting (003-EL3434) into end of tank. Run 3/4" hose from the elbow down the frame to the bottom of the baler. -
Page 10: Installation Of End Of Bale Sensor
Installation of End of Bale Sensor The bale rate timer sensor is used to determine when the baler door is open. With this information the system is able to change the tons/hour automatically (see Operating Instructions, Automatic Mode). Locate the sensor (006-7401) and the sensor bracket (001-4648RB). On the right side of the baler find a location 1”–... -
Page 11: Installation Of Spray Nozzles
Installation of the Spray Nozzles Locate nozzle block hanger assemblies with tips pre-installed. b. The assembly with the tee fittings will be mounted to the right hitch support plate when standing next to the PTO just in front and under the large round cross support tube. Use 1/2” x 1 1/4” Bolt, flat washer, lock washer, and nut to secure to baler. -
Page 12: Installation Of Iso Communication Module
Installation of ISO Communication Module (ICM) Locate a safe location in the cab of the tractor to place the ISO Communication Module (ICM) (006-6673). Recommended location is securely fastened out of the operator’s way in a location that is close enough to reach with a iPad/Tablet communication cord if needed. -
Page 13: Wiring Diagram
Wiring Diagram – 736K, 739K, 747C, & 747P Models 1. Connect the power harness (006-765IC) to the tractor battery (12 volt) using the red wire with fuse to the positive side and the black wire to the negative. a. The power harness must be connected to the battery! i. - Page 14 Pin Outs Integrated Control Module (ICM) on Tractor Harness 006-765IC (Deutsch Plug Number: DTM06-12SA) Pin 1 +12V from ECU Pin 2 Purple Signal Wire Pin 3 Red/White +12V CAN X Pin 4 Black/White Ground CAN X Pin 5 Orange CAN X Hi Pin 6 Blue CAN X Lo...
- Page 15 Pin Outs (continued) Power / Communication on Baler Harness 006-763B at Baler Hitch IPM (Deutsch Plug Number: HDP26-24-18SN) Pin 1 Not Used ---- Pin 2 Yellow ISO CAN Hi Pin 3 Green ISO CAN Lo Pin 4 +12V Power to ECU Pin 5 Black Ground to ECU...
-
Page 16: Pin Outs
Pin Outs (continued) CAN / IDM on Baler Harness 006-763B (Deutsch Plug Number: DT06-4S) Pin 1 +12V to ECU Pin 2 Yellow ISO CAN Hi Pin 3 Green ISO CAN Lo Pin 4 Black Ground to ECU End of Bale Sensor Plug on Baler Harness 006-763B (Deutsch Plug Number: DT06-3S) Pin 1 Orange/White... - Page 17 Model 747C Base Kit Ref Description Part # Ref Description Part # 55 Gallon tank lid 005-9022H Anchor Bracket 001-4703XA Strap 001-4402 Saddle 001-4703X Tank 005-9203SQ Left Leg 001-4703XL Handle 001-6707HRS Right Leg 001-4703XR Anchor Bracket Ext 001-4703XAX Tank fitting...
- Page 18 Parts Breakdown for Pump Assembly 006-4724A 001-4648X Part# Description Part# Description 3/8”MPT X 1/2"HB Elbow 003-EL3812 003-M1212 1/2" Union 007-4120DE 300 Series Pump 002-4315-100 1/2" Line Strainer-100 Mesh 3/8” x 3/8” Union 003-M3838 003-SE12 1/2" Street Elbow 3/8” Street Elbow 003-SE38 002-2212 1/2"...
- Page 19 Moisture Sensor Parts Breakdown (736K, 738K, 747C, 747P only) Description Part # Description Part # 1/2" x 4 1/2” Carriage Bolt RB Isolator 006-4641FX Hardware RB Moisture Pad 006-4641HX Sensor Bushing 006-4641G 1/2” Nut Hardware Plastic Isolator 006-4641I Moisture Cable- (13’&16’) 1/2"...
- Page 20 Control Box and Wiring Harnesses Ref Description Part# Ref Description Part# Power Lead Baler 20’ 006-763B Power Lead Tractor 006-765IC 120 Ohm Resistor 006-700R* Dust Plug Kit 006-765DP Key Switch Wire 006-765CPH ISO Pump Module 006-7671RB ISO Communication 006-6673 *006-700R terminator Module installation on 006-763B harness required at all times...
- Page 21 700 Solenoid Packages Solenoid Package B Ref Description Part # Description Part # Solenoid Harness (10’) 006-3650-S2 1/4" Female Disconnect 004-1207H #6 Hose Clamp 003-9003 Solenoid 002-2203F 1/4" x 1/2" Straight Fiting 003-A1412 Solenoid Valve Body 004-1207VF 1/4" Female Connector 004-1207G 1/4"...
- Page 22 Optional High Output Kit (700RBHTK) Ref Description Part # 1/4" x 1/2" Straight Fitting 003-A1412 #6 Hose Clamp 003-9003 1/4” Tee 003-TT14SQ 1/4" Sq Elbow 003-SE14F Nozzle Body 004-4722 Tip Screens 004-1203-100 Tip – White* 004-XR11008VS Nozzle Body Cap 004-4723 Tip –...
- Page 23 747C-SO Installation Kit Ref Description Part # Ref Description Part# Spray Block Holder 001-4703XD Plug Allen SS 003-F14A 1/4" x 1/4" Straight Fitting 003-A1414 Tip* 004-T86006-PT 1/4" Sq Tee 003-TT14SQ Spray Shield Manifold 001-4435NSB Mini Hose Clamp 003-9002 1/4" Female Street Elbow...
- Page 24 Optional iPad Display Kit (030-4670DK) Description Part # Suction Cup Mount 001-2012SCM Ram Mount 001-2012H ® iPad Mini Spring Load Cradle (Mini 2) 001-2012SLC Power Harness 006-4723P Female Spade Connector Hardware Eye Loop Connector Hardware iPad Mini Charger 12V 001-2012P iPad Mini 4 case 001-2012C4 iPad Mini 4...
- Page 25 Installation Instructions Identify 006-765GH harness connection to 006-765IC tractor harness. 2. Connect harness to the Harvest Tec Display before tightening into place. 3. Tighten the mounting and display. Streamline harness, as necessary. 4. Once connected, power cycle system and ensure display is working properly.
- Page 26 Optional Android Display Kit (030-1670DK) Description Part # Suction Cup Mount 001-2012SCM Ram Mount 001-2012H ® iPad Mini Spring Load Cradle (Mini 2) 001-2012SLC Android Case 001-2012A1 Android Tablet 006-1670AT...
- Page 27 Notes...
- Page 28 Notes...
- Page 29 Harvest Tec, LLC. within 30 days of the failure. If it is determined that a non-Harvest Tec branded hay preservative has been used inside the Harvest Tec applicator system where the failure occurred, then Harvest Tec reserves the right to deny the warranty request at their discretion.
- Page 30 HARVEST TEC, LLC. P.O. BOX 63 2821 HARVEY STREET HUDSON, WI 54016 USA PHONE: 715-386-9100 1-800-635-7468 FAX: 715-381-1792 Email: info@harvesttec.com...
Need help?
Do you have a question about the 747C and is the answer not in the manual?
Questions and answers