Table of Contents
Advertisement
Quick Links
Advertisement
Table of Contents
Troubleshooting

Related Manuals for KERN DBS


Summary of Contents for KERN DBS
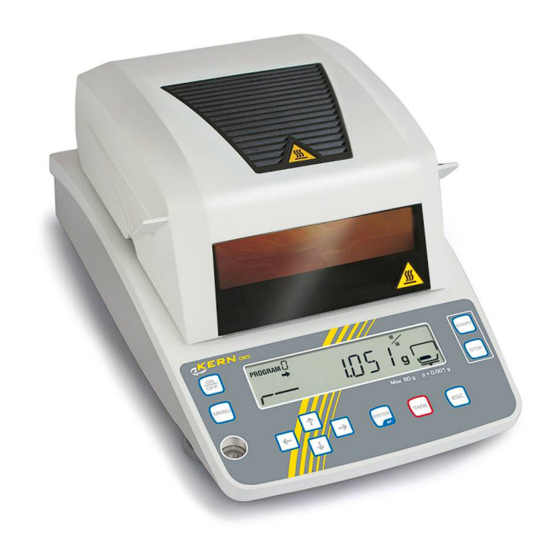
- Page 1 KERN & Sohn GmbH Ziegelei 1 Phone: +49-[0]7433- 9933-0 D-72336 Balingen Fax: +49-[0]7433-9933-149 E-Mail: info@kern-sohn.com Internet: www.kern-sohn.com Service manual Electronic Moisture Analyzer KERN DBS Version 1.0 11/2012 DBS-SH-e-1210...
-
Page 2: Table Of Contents
Replacing the Power Board Assembly (B4) ............... 19 2.3.5 Replacing the Inlet Assembly (S11) ................... 20 2.3.6 Replacing the DBS Unit Assembly (U1) ................21 2.3.7 Replacing the Detector Assembly (U11) ................23 2.3.8 Replacing the Force Coil Assembly (L1) ................24 2.3.9... - Page 3 Heater Does Not Come ON....................64 Does Not Reach Teperature Setting.................. 65 ERR. 124 Occurred......................66 10. Parts ........................67 10.1 DBS Exploded View ......................67 10.2 DBS Maintenance Parts List ....................74 10.3 Tools............................. 75 10.4 Optional accessories list....................75 DBS-SH-e-1210...
- Page 4 Das Gerät darf nur von geschultem oder beruflich ausgebildetem Fachpersonal (z. B. eichrechtlich anerkannter Instandsetzer) repariert werden. Die Serviceanleitung ist bindend für Reparaturen. Das Gerät muss nach erfolgter Reparatur wieder in den Originalzustand zurückversetzt werden. Es dürfen nur Originalersatzteile verwendet werden. DBS-SH-e-1210...
-
Page 5: Operations For Adjustment
1. Operations for Adjustment For the general operation method, refer to the User's Manual for the DBS. Entering the Service Mode Use the following procedure to switch from the user mode to the service mode. (1) Hold down the [←] and [ESC] keys for at least 2 seconds. After 2 seconds, a buzzer sounds. -
Page 6: Service Menu
* Display Example approx. 320 to 480 THAD At TT = 100 °C: WAD Display approx. 150 to 220 Room temperature ±10 °C Room temperature ±10 °C TAD Display *1) Loading pan(S14)( t0.3 Aluminum) OAD Display LAD Display WG Display DBS-SH-e-1210... - Page 7 (2) Press [ENTER] to confirm. Span Calibration Span Calibration [ENTER] Calibration Temperature Calibration Temperature Calibration [ENTER] Note 1) * 1D is minimum measurement unit. [ENTER] 0.5D Set Stable Detection Range 100D 1000D Note 1) Zero-Tracking [ENTER] Cumulative Count CLEAR Confirm Execute [ENTER] DBS-SH-e-1210...
- Page 8 120 V, without USB 120V.U 120 V, with USB 240V. 240 V, without USB 240V.U 240 V, with USB [ENTER] 120V. Note 1) Set OEM Set OEM [ENTER] Note 1) LOCK OFF Lock setting information Lock setting information [ENTER] LOCK ON DBS-SH-e-1210...
- Page 9 Note 2: Returns to "NVRAM" after loading is finished. Use the arrow keys to move between items. Description → Opens lower level menu. ← Returns to higher level menu. ↓ Moves forward through items. ↑ Moves backward through items. DBS-SH-e-1210...
-
Page 10: Service Mode Functions
Clears the cumulative time count of heater operation. Sets the correction value for measurement values Bias Setting Function (normally set to zero). Specifies the voltage used and whether or not there is Factory Settings an optional USB. Sets (or cancels) the OEM model. DBS-SH-e-1210... - Page 11 EEPROM to flash memory. Writes to the EEPROM the data backed up in flash Download memory. Initialize All Initializes all data saved in the EEPROM. Ends the service mode. DBS-SH-e-1210...
-
Page 12: Disassembling And Assembling The Balance
(*1) 80 [cN• m] for only the sensor shaft 4) To retighten self-tapping screws, carefully align the threads so they are not damaged. Note: Turn the screw counterclockwise until it drops back into the screw hole, and screw it in to tighten. DBS-SH-e-1210... -
Page 13: Removing The Case
(S2), and then shift it forward to separate it from the base (Fig. 3). Place the case assembly (S2) behind the base not to be damaged on cushion.(Fig. 4). Fig. 3 Fig. 4 DBS-SH-e-1210... - Page 14 Fasten the P4 M4×16 base plate screws (S53), together with the grounding spring (S4)on right side, to the case assembly (S2) (Fig. 3). Install the heater insulation plate (S13), windbreak (S12) , pan supporter assembly (S11) and sample pan(S14) n this order (Fig. 1). DBS-SH-e-1210...
- Page 15 Connect the power cord and confirm that the balance portion of the moisture analyzer functions properly. When the display stop “check” after pressing the power key,press “← ”key and “ESC” key for 3 seconds at the same time to be the gram display. DBS-SH-e-1210...
-
Page 16: Replacing Components
Replacing the Main Board Assembly (B2) 1) Disassemble the balance down to the case assembly (S2) by following the procedure in 2.2 Removing the Case. 2) Remove the three P4 M4×8 screws (B53) that fasten the main board assembly (B2) (Fig. 10). DBS-SH-e-1210... -
Page 17: Replacing The Analog Board Assembly (B3)
4) Install a new analog board assembly (B3) by reversing steps 2 and 3 above. Note: When assembling, install the analog board assy(B3) setting front side of the base assy(B1) (Fig.12) Note: When assembling, use clip CS-5 (B26) to securely hold the power board assembly (B4) DBS-SH-e-1210... - Page 18 (Fig. 13). Fig. 13 DBS-SH-e-1210...
-
Page 19: Replacing The Power Board Assembly (B4)
CS-5 (B26) (Fig. 16). Note: The power board assembly (B4) can be removed by lifting it up at an angle, as shown in Fig. 17. Disconnect J9 and J10 cables connected to the power board assembly (B4) (Fig.17) Fig. 16 Fig. 17 DBS-SH-e-1210... -
Page 20: Replacing The Inlet Assembly (S11)
Install a new inlet assembly (S11) by reversing steps 1 and 5 above. Note: When assembling, install the inlet assembly (S11) printed face top. (Fig.19, 20) Note: When assembling, align the cables of the inlet assembly (S11) as shown. (Fig.20) Fig.19 Fig.20 DBS-SH-e-1210... -
Page 21: Replacing The Dbs Unit Assembly (U1)
Note: When lifting the DBS unit assembly (U1), do not hold it by the parallel guides or movable posts. 6) Install a new DBS unit assembly (U1) by using a unit assembly positioning jig (J8) to position the assembly and reversing steps 2 to 5 above (Fig. 24). - Page 22 Adjusting the Cornerload Error." If the error exceeds allowable levels, adjust the tilt or cornerload. Enter the attached EEPROM (temperature coefficient) data into the replacement unit assembly (see 4 *2). Temperature Coefficients at Address Numbers 00CA to 0131、 00CA to 0011, 05A0 to 05AF, and 0112 to 0131 DBS-SH-e-1210...
-
Page 23: Replacing The Detector Assembly (U11)
2.3.7 Replacing the Detector Assembly (U11) 1) Remove the DBS unit assembly (1) using the same procedure as described in 2.3.6 Replacing the DBS Unit Assembly (U1). Unsolder the temperature sensor cables connected to the detector assembly (U11) (Fig. 25). -
Page 24: Replacing The Force Coil Assembly (L1)
2.3.8 Replacing the Force Coil Assembly (L1) 1) Remove the DBS unit assembly (1) using the same procedure as described in 2.3.6 Replacing the DBS Unit Assembly (U1). Remove the solder on the lever assembly (U7) side of the two Pt-Ni bands (U17). - Page 25 DBS unit assembly (U1). If the lever assembly (U7) moves up and down smoothly and the lever stopper (U15) emits a clear contact sound, the DBS unit assembly (U1) assembly process is finished. 19) Install a new DBS unit assembly (U1) by reversing steps 4 to 6 in 2.3.6 Replacing the DBS Unit Assembly (U1).
- Page 26 20) Adjust the tilt error and cornerload error levels according to 4.2 Adjusting the Tilt Error and 4.3 Adjusting the Cornerload Error. 21) Restore the previous state by reversing steps 1 to 3 in 2.3.6 Replacing the DBS Unit Assembly (U1). DBS-SH-e-1210...
-
Page 27: Replacing The Sensor Shaft (U4)
2.3.9 Replacing the Sensor shaft (U4) 1) Remove the DBS unit Assembly (U1) using the same procedure as described in 2.3.6 Replacing the DBS Unit Assembly (U1). Loosen the P4 M4×14 socket head bolt (U59) that fasten the sonsor shaft (U4) and remove(Fig.33). -
Page 28: Replacing The Top Case Grille (H2)
Replacing the Top Case Grille (H2) 1) With the heater case closed, remove the grille (H2) from the top case (H1) by pressing its back side toward the inside (Fig. 38). Reassemble by reversing step 1 above. Fig. 37 Fig. 38 DBS-SH-e-1210... -
Page 29: Replacing The Dbs Heater (S5)
2.3.13 Replacing the DBS Heater (S5) 1) Remove the glass unit assembly (3) using the same procedure as described in 2.3.10 Replacing the Glass Unit Assembly (S3). Disconnect the heater (S5) connector and remove the wire from the wire saddle (H12). -
Page 30: Replacing The Fan Cable Assembly (C5)
Insert the wires from the fan cable assembly (C5) and LSW cable assembly (C6) into the slit in the Top base (C3) (Fig. 43). 8) Reassemble by reversing steps 1 to 4 above. Note: Make sure no wires are pinched between the case assembly (S2) and top base (C3). Discharge Direction Slits Fig. 43 DBS-SH-e-1210... -
Page 31: Replacing The Lsw Cable Assembly (C6)
Note: Confirm the LSW functions properly in the following modes. 1. Close slowly. ⇒ If it does not function properly, retighten LSW screws or replace LSW. 2. Close while pressing laterally on heater cover (Fig. 45). ⇒ Move LSW closer to hinges and retighten. Fig.44 Fig. 45 DBS-SH-e-1210... -
Page 32: Replacing The Right Hinge (H13), Left Hinge (H14), And Hinge Springs (H15)
In some case, there is no tubing(H24) originally. Pass the three cables through the rubber sponge(H25) and insert it in the left hinge(H14) to align with the end of the left hinge(H14)(Fig.47) Fig. 46 Fig. 47 DBS-SH-e-1210... - Page 33 1. Close slowly. ⇒ If it does not function properly, retighten LSW screws or replace LSW. 2. Close while pressing laterally on heater cover (Fig. 45). ⇒ Move LSW closer to hinges and retighten. Pocket for spring hook Fig. 48 Fig. 49 DBS-SH-e-1210...
-
Page 34: Replacing The Thermistor (H10)
Loosen the two self-tapping flat head screws (H59) and two P4 M4×8 screws (H58) and remove the blind cover (H11) (Fig. 50). Pull the thermistor (H10) (gray line) out from the hole in the side wall of the top case (H1) (Fig. 51). Fig. 51 Fig. 50 DBS-SH-e-1210... - Page 35 Note: Be careful not to damage the black heat resistant paint of 10mm from the end when inserting the thermistor (H10) into the hole. Note: Tighten theFG earth cable (H17) as shown to be behind the blind cover (H11). (Fig.53) Fig. 52 Fig.53 Fig. 54 Fig.55 DBS-SH-e-1210...
-
Page 36: Replacing The Thermal Fuse (H6)
Loosen the two P4 M3×8 screws (H61) and remove the two spacers (H16), plate thermal fuse (H17), and thermal fuse (H6) from the heater frame (H3) (Fig. 59). Reassemble by reversing steps 1 to 5 above. Short cable Fig. 58 Fig. 59 DBS-SH-e-1210... -
Page 37: Replacing The Level Gauge Assy (B7)
4. Press the level gauge, center the bubbles on the level gauge by using finger only. Bubble must be on the center of the red circle. Drying time for level gauge to the base is 15~20 mins. In case of araldite rapid DBS-SH-e-1210... -
Page 38: Cheking The Eledctronic Board
3. Checking the Electronic Board The DBS boards and their signal allocations are summarized below. Numbers in parentheses ((1), (2), (3), and so on) indicate pin numbers, and a checkmark ) indicates a point that should be checked, if possible. -
Page 39: Power Board Assembly (B4)
The power board assembly (B4) includes AC primary power supplies (high voltage) intermingled on the circuit board. Therefore, carelessly touching the board could cause electric shock. Since this would be extremely dangerous, please work carefully. If necessary, check voltages on the main board assembly (B2). DBS-SH-e-1210... - Page 40 Dangerous high voltage area on the power board assembly (B4) is indicated below. Danger High Voltage Area Fig. 60 DBS-SH-e-1210...
-
Page 41: Hardware Adjustment
Replacing the following components may alter heater performance. After replacement, make adjustments if necessary. *4) See 6.2 Data Edit (EDIT) Operations and set address numbers 0234 - 0235 and 03DE - 03E7 to "0." *5) Replace the thermistor (H10) also, when replacing the thermal fuse. (H6) DBS-SH-e-1210... -
Page 42: Adjusting The Detector Assembly (U11) Height
After making adjustments, fasten the P3 M3×10 socket head bolt (U53) (Fig. 61). Disconnect the electrical tester TP1 and TPG pins from the analog board assembly (B3). Temporarily unplug the AC adapter, and connect the ILS 2S-90 cable (U20) connector to the analog board assembly (B3). Fig. 61 DBS-SH-e-1210... -
Page 43: Adjusting The Tilt Error
OPF when adjusting the screw and nut on the lever assembly (U7). Note: If tilt error adjustments were not necessary at the factory, a weight (U10) may not be attached to the lever assembly (U7). Fig. 62 Fig. 63 DBS-SH-e-1210... -
Page 44: Adjusting The Cornerload Error
Place the following calibration weight on the sample pan and press the [TARE] key to display "0 g." Model Weight DBS 60-3 30 (g) 6) Record the indicated value for each position indicated in Figure 65 by placing and measuring the weight successively in the center (1), then off-center positions (2), (3), (4), and (5), and, lastly, in the center (1) again. -
Page 45: Software Adjustment
@CN = Company Name @MN = Model Name Specify the OEM name and model name using a maximum of 23 alphanumeric characters. (4) Connect a computer to the RS-232C connector on the back of the balance, and use the following DBS-SH-e-1210... -
Page 46: How To Specify The Serial No Without Using A Computer
Use the [EDIT] menu to edit NVRAM and specify the S/N setting. Replace each of digits of the serial number to ASCII code using the following table. Set the ASCII code to the address 0044-004E. Set the code "00" to the following address of the serial number. DBS-SH-e-1210... -
Page 47: Factory Settings (Voltage/Usb)
In other words, if the information is left unlocked, an incorrect span calibration could prevent obtaining correct measurement data, or failure to detect a broken open/close switch could result in the cover remaining open with the heater ON. DBS-SH-e-1210... -
Page 48: Adjusting Linearity
(4) Input all of the value of weights, writes the value of weights to the EEPROM automatically. 5.6 Span Calibration Calibrate sensitivity using the same operations as in the user mode. Procedure (1) In the service menu, select [CAL] → [BAL]. (2) Calibrate sensitivity. (3) If an error occurs, the error code is displayed. DBS-SH-e-1210... -
Page 49: Temperature Calibration (Service Mode)
The procedure is described below. (1) In the service menu, select cumulative count. (2) In the cumulative count display, press the [→ ] key to display "CLEAR." (3) Press the [Enter] key. When "OK?" appears, press the [Enter] key again. DBS-SH-e-1210... -
Page 50: Eeprom
User data Scales data e.g. (automatic) Linearity, Temperature [RESTR Data etc. [BKUP] The DBS incorporates two EEPROM(M4,M5). The DBS save the measurement data on M4. Use the user menu to operate M4. data address edit initialize back up restore print out M5... -
Page 51: Data Edit (Edit) Operations
(6) Press the [Enter] key to confirm the data and save it to the corresponding address. (7) To continue editing, repeat the procedure from step (2). To finish editing, press the [ESC] key. This changes the screen back to [NVRAM] in the service menu. DBS-SH-e-1210... -
Page 52: Backup (Bkup) Operations
(1) In the service menu, select [NVRAM] → [INIT] (initialize all). (2) The execution confirmation message "OK?" appears. (3) Press [Enter] to confirm execution. (4) The initialization progress indicator appears. (5) When initialization is finished, the screen returns to [NVRAM] in the service menu. DBS-SH-e-1210... -
Page 53: Performance Inspection
Insert a 1 mm thick shim under the left level adjuster and record the displayed value after the display stabilizes. (B) Error = (B) - (A) For large error levels, adjust the error according to 4.2 Adjusting the Tilt Error. DBS-SH-e-1210... -
Page 54: Temperature
Temperature Calibrate the temperature using the same operations as in the user mode and confirm the value indicated on the temperature calibration kit. Table 1 DBS Inspection Standards Model DBS 60-3 Weighing Capacity 60 g Minimum Value Displayed 0.001 g 0.006 g... -
Page 55: Troubleshooting
1) Instrument is not leveled. Level the instrument using the level adjusters (B6). 2) Damaged OPF (U1) Replace the unit assembly (1) Cornerload error is large. (30 d or 1) Damaged OPF (U1) Replace the unit assembly (1) and more) make readjustment. DBS-SH-e-1210... - Page 56 Reposition the limit switch (C6). 4) Defective power board assembly (B4) Replace the power board assembly (B4). 5) The DBS was tilted or vibrated with the Open the lid of DBS, before you tilt or lid closed. vibrate the DBS.
- Page 57 2) Defective main board assembly (B2) Replace the main board assembly (B2). "ERR.124" is displayed. See "Zero-drift or span-drift is large" above. See "Reproducibility for weight measurements is poor" above. See "Does not reach temperature specified during moisture level measurement" above. DBS-SH-e-1210...
-
Page 58: Error Display
Unknown Voltage Power supply voltagecould notbedetermined. COM. ERR Communications Error Unrecognizedcommand was receivedduringcommandreception. ERR. C01 Instability Error Unstablestatecontinued foratleast1minuteduringmass calibration. Differencebetweenthemeasuredspan valueandspecifiedstandardcalibration weight ERR. C04 Span Error value exceeded2% ofthe mass ofthe standardcalibration weight. ABORT Abort Moistureanalyzer function was aborted. DBS-SH-e-1210... -
Page 59: Troubleshooting
Unplug the power cord. Is a fuse blown? Replace the fuse. Is the power cord Replace the power cord. broken? Is the power Replace the power inlet. inlet broken? Replace the power board assembly or main board assembly. DBS-SH-e-1210... -
Page 60: Reproducibility Pf Weight Measurements Is Poor
Readjust the stopper plate (U14) plate (U14) hitting attachment position. the pin? Remove the unit assembly (U) and then magnetic lids. Is the force coil Readjust the force coil (L1) (L1) hitting the attachment position. magnet assembly (U9)? Reattach the unit assembly (U). DBS-SH-e-1210... -
Page 61: Ol" Or "-Ol" Is Displayed
Open the heater cover and place the touching the main calibration weight. glass (G4)? Place the sample so it does not touch. Remove the case assembly (2) and unit cover. Is the stopper plate (U14) Readjust the stopper plate (U14) contacting the attachment position. pin? DBS-SH-e-1210... - Page 62 Replace the detector assembly (U11). normal? Replace with a properly functioning unit assembly (U). Is the unit Replace the analog board assembly (B3). assembly (U) Replace the EEPROM on the main board normal? assembly (B2). Replace the unit assembly (U). DBS-SH-e-1210...
-
Page 63: Lid Open/Close Status Is Not Detected
(C6) lever Readjust the limit switch (C6) attachment properly? position. Replace the limit switch (C6). Is the limit switch Replace the limit switch (C6). (C6) normal? Replace the power board assembly (B4). Replace the main board assembly (B2). DBS-SH-e-1210... -
Page 64: Heater Does Not Come On
Replace the heater. Check the junction cable (H7). Is the junction Replace the junction cable. cable broken? Check the thermal fuse. Is the thermal Replace the thermal fuse. fuse blown? Replace the power board assembly. Replace the main board assembly. DBS-SH-e-1210... -
Page 65: Does Not Reach Teperature Setting
Open the service menu and check the heater time count. Is the cumulative Replace the heater. time less than 5000 hours? Check the heater (S5). Is the resistance greater than 100kΩ ? Replace the heater. Replace the thermistor. DBS-SH-e-1210... -
Page 66: Err.124 Occurred
Exposed to air Change the installation location of the flow from a moisture analyzer. heater or cooler? Does not reach temperature See 9.6 Does Not Reach specified when Temperature Setting. measuring moisture? See 9.2 Reproducibility of Weight Measurements is Poor. DBS-SH-e-1210... -
Page 67: Parts
10. Parts 10.1 DBS Exploded View DBS Sub-Assembly Exploded View DBS-SH-e-1210... - Page 68 Base Unit Assembly Exploded View DBS-SH-e-1210...
- Page 69 Base Unit Assembly Exploded View DBS-SH-e-1210...
- Page 70 DBS Unit Assembly DBS-SH-e-1210...
- Page 71 Glass Unit Assembly DBS-SH-e-1210...
- Page 72 Case Assembly Exploded View DBS-SH-e-1210...
- Page 73 Heater Case Assembly Exploded View DBS-SH-e-1210...
-
Page 74: Dbs Maintenance Parts List
10.2 DBS Maintenance Parts List Parts Name Remarks Sheet Panel, DBS 321-72203 Packing box assy, DBS 321-71514-11 Including cushioning material Packing box, DBS 321-72207 Outer box only Case Assy, DBS Service 321-71738-11 including sheet panel, window panel, etc. Glass Unit Assy... -
Page 75: Tools
321-71512-10 Set of 5 Aluminum Sheets 321-71571-10 1 box (50 sheets) Fiberglass Sheets 321-71371 1 box (100 sheets) Temperature Calibration Kit, 321-71520-54 DBS-A01 Sample Pan (stainless steel) 321-71572-10 Set of 5 RS-232C Cable 321-61967 USB cable 088-52848-32 Tongs 321-71623 (*1) Indicated in User's Manual. User replaceable maintenance parts.
Need help?
Do you have a question about the DBS and is the answer not in the manual?
Questions and answers