Table of Contents
Advertisement
Advertisement
Table of Contents

Subscribe to Our Youtube Channel
Related Manuals for KERN DLB 160-3A


Summary of Contents for KERN DLB 160-3A
- Page 1 KERN & Sohn GmbH Ziegelei 1 Phone: +49-[0]7433- 9933-0 D-72336 Balingen Fax: +49-[0]7433-9933-149 E-Mail: info@kern-sohn.com Internet: www.kern-sohn.com Operating instructions Electronic Moisture Analyzer KERN DLB_A Version 1.0 04/2011 DLB_A-BA-e-1110...
-
Page 2: Table Of Contents
KERN DLB_A Version 1.0 04/2011 Operating instructions Electronic Moisture Analyser Contents T ec hnic al data ....................4 Applianc e overview .................... 6 Keyboard and display overview ....................9 B as ic Information (G eneral) ................10 Proper use ............................ 10 Improper Use .......................... - Page 3 Operator menu – mois ture analys is ..............31 10.1 How to implement drying ......................32 10.1.1 Moisture analysis with drying program PrG1 – PrG5 ..............33 10.1.2 Moisture analysis with drying program PrG time ................37 10.1.3 Moisture analysis with drying program PrG Auto Mode .............40 10.2 Save the drying programs PrG1, PrG2, PrG3, PrG4, PrG5 ............44 R S 232C interfac e .....................
-
Page 4: Technical Data
1 Technical data Data DLB 160-3A Radiator Halogen (1 x 400 W) 35°C - 160°C Temperature range Choice of steps at 1°C Maximum load (Max) 160 g Warm-up time 120 min Minimum for drying 0.5 g Weighing mode 0.001g Readability (d) Moisture analysis mode 0.01 %... - Page 5 1. Time mode Shutoff criterion Drying is finished after the set time, adjustable 1 – 99 minutes. 2. Auto mode Drying is completed, when the set weight value per time unit is lower than the nominal value, 0.1 – 9.9 % loss of weight adjustable. Sample dishes included Ø...
-
Page 6: Appliance Overview
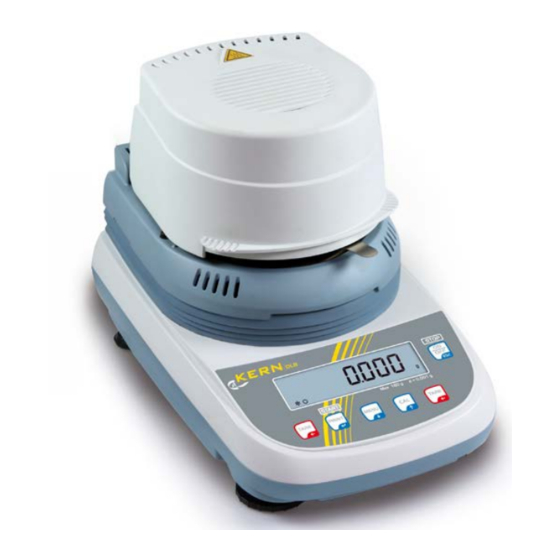
2 Appliance overview Pos. Description Foldable hood Temperature sensor Sample dish Heating top Balance Display Keyboard Levelling screw DLB_A-BA-e-1110... - Page 7 1. Plug-in connection cable „Balance / Heating top“ 2. Connection net adapter „Balance“. 3. Current supply „Heating top“. 4. RS 232 interface 5. Plug-in connection cable „Balance / Heating top“ 6. Main switch „Heating top“ 7. Adjustable foot screws DLB_A-BA-e-1110...
- Page 8 8. Housing screws 9. Housing screws (for access remove the foot screws) 10. Adjustable foot screws 11. Rigid foot screw DLB_A-BA-e-1110...
-
Page 9: Keyboard And Display Overview
2.1 Keyboard and display overview Display Description Zero indicator Stability display Display of percentage Status „Weighted in quantity sample“ Drying process active Gram display Description Description Long time pressed button Short key pressing until the acoustic signal gets mute MENU button/ •... -
Page 10: Basic Information (General)
Information is available on KERN’s home page (www.kern-sohn.com) with regard to the monitoring of balance test substances and the test weights required for this. In KERN's accredited DKD calibration laboratory test weights and balances may be calibrated (return to the national standard) fast and at moderate cost. -
Page 11: Danger Information
If you spill liquid on the device, disconnect it immediately. Afterwards do not operate the appliance and have it checked by a competent KERN stockist before any further use. DLB_A-BA-e-1110... -
Page 12: Basic Safety Precautions
4 Basic Safety Precautions 4.1 Pay attention to the instructions in the Operation Manual Carefully read this operation manual before setup and commissioning, even if you are already familiar with KERN appliances. 4.2 Personnel training The appliance may only be operated and maintained by trained personnel. - Page 13 On the installation site observe the following: Avoid extreme heat as well as temperature fluctuation caused by installing next to a radiator or in the direct sunlight; 2. Remove explosion prone, easily flammable material in the immediate vicinity. Emerging vapours, sample dish and all parts of the sample chamber are hot! 3.
-
Page 14: Unpacking And Erection
6.2 Unpacking and erection Take the appliance carefully out of its packaging, remove the plastic jacket and install it at the designated work space. The appliance is supplied part-assembled. Immediately after unpacking check if the delivered items are complete. Assemble the separate component parts according to their sequence. -
Page 15: Scope Of Delivery
6.3 Mains connection 1. Power is supplied to the balance via the external power unit. The stated voltage value must be the same as the local voltage. Only use original KERN mains adapters. Using other makes requires consent by KERN. -
Page 16: Connection Of Peripheral Devices
Before connecting or disconnecting of additional devices (printer, PC) to the data interface, always disconnect the moisture analyser from the power supply. Only use accessories and peripheral devices by KERN, as they are ideally tuned to the appliance. 6.5 Initial Commissioning In order to obtain exact results with the electronic balances, your balance must have reached the operating temperature (see warming up time chap. -
Page 17: Weighing
7 Weighing 1. In stand-by mode (see chap. 6.3) press ON/OFF button. Start-up As soon as the weight display appears, the balance is ready for weighing. 2. Press the ON/OFF button, the balance returns into stand- Switching Off by mode. 3. -
Page 18: Adjustment
8 Adjustment 8.1 Adjust balance As the acceleration value due to gravity is not the same at every location on earth, each balance must be coordinated - in compliance with the underlying physical weighing principle - to the existing acceleration due to gravity at its place of location (only if the balance has not already been adjusted to the location in the factory). -
Page 19: Calibrate / Adjust Temperature
8.2 Calibrate / adjust temperature We recommend sometimes to check the temperature value of the device using the optional temperature calibrating set DLB-A01. Before you do this, allow the device to cool down for at least 3 hours after the last heating phase. Preparation: ... - Page 20 Invoke service function: In weighing mode press the MENU button, the menu item „Therm“ will be displayed. Confirm by pressing the PRINT button. Press repeatedly the MENU button until „Service“ will be displayed. Keep pressed the PRINT button for 2 sec. Select the desired settings by pressing the MENU button Temperature calibration ...
-
Page 21: Calibrate Temperature
8.2.1 Calibrate temperature During temperature calibration only a check is carried out, i.e. no values are changed. Invoke service function „Tmp test“, see chap. 8.2. Confirm by pressing the PRINT button. The current setting will be displayed. Use the navigation buttons ... -
Page 22: Adjust Temperature
8.2.2 Adjust temperature The temperature is measured at two selectable points and it is possible to correct it there. Invoke service function „Tmp Adj“, see chap. 8.2. Confirm by pressing the PRINT button. The current setting for the first temperature point is displayed. -
Page 23: Appliance Configuration
9 Appliance configuration Via the configuration menu the appliance can be individually adapted to your weighing needs. Navigation in the menu Access to menu In weighing mode press the MENU button and keep it pressed until the acoustic signal gets mute. Release the button, the first menu point „bAud rt“... - Page 24 Menu overview Menu item Display Selection Description Baudrate bAud rt br 1200 (siehe Kap. 9.1) br 2400 br 4800 br 9600 Automatic zero point Auto 0 Au0 OFF Auto Zero switched off correction (see chap. 9.2) Au0 1 Auto Zero range ± ½ digit Au0 2 Auto Zero range ±...
-
Page 25: Baud Rate
Description of individual menu items: 9.1 Baud rate In weighing mode press the MENU button and keep it pressed until the acoustic signal gets mute. Acknowledge using PRINT button, the current setting is displayed. Use the navigation buttons to select the desired setting. ... -
Page 26: Auto Zero
Auto Zero Under this menu item the automatic zero point correction can be switched on or off. In switched-on-state the zero point is automatically corrected at drift or when dirty. Note: In the event that small quantities are removed or added to the material to be weighed, incorrect weighing results can be displayed due to the “stability compensation“. - Page 27 Use the navigation buttons to select the desired setting. Au0 OFF = Auto Zero switched off Au0 1 = Auto Zero range ± ½ digit Au0 2 = Auto Zero range ± 3 digits Au0 3 = Auto Zero range ± 7 digits Au0 3E = Auto Zero range ±...
-
Page 28: Filter
Filter This menu item allows the balance to be set according to specific ambient conditions and measuring purposes. In weighing mode press the MENU button and keep it pressed until the acoustic signal gets mute. Press MENU button repeatedly ... -
Page 29: Standstill Control Display
Standstill control display In weighing mode press the MENU button and keep it pressed until the acoustic signal gets mute. Press MENU button repeatedly Acknowledge using PRINT button, the current setting is displayed. Use the navigation buttons to select the desired setting. Stab 1: Standstill control fast / very quiet set-up location Stab 2: Standstill control fast + exact / quiet set-up location Stab 3: Standstill control exact / very set-up location. -
Page 30: Display Background Illumination
Display background illumination In weighing mode press the MENU button and keep it pressed until the acoustic signal gets mute. Press MENU button repeatedly Acknowledge using PRINT button, the current setting is displayed. Use the navigation buttons to select the desired setting. Background illumination on Background illumination off Auto... -
Page 31: Operator Menu - Moisture Analysis
10 Operator menu – moisture analysis Menu selection: PrG 1 PrG 2 The appliance offers the possibility to occupy and to save 5 PrG 3 different drying programs (Prg1, Prg2, Prg3, Prg4, Prg5) with individual drying parameters which may be invoked and started PrG 4 whenever necessary. -
Page 32: How To Implement Drying
10.1 How to implement drying Place removal aid with empty sample dish on the sample dish retainer. Make sure that the sample dish is resting flat on the sample dish retainer. Use the sample retainer at all times as it allows safe working and prevents burns. Prior to start the moisture analysis select a suitable drying program. -
Page 33: Moisture Analysis With Drying Program Prg1 - Prg5
10.1.1 Moisture analysis with drying program PrG1 – PrG5 After invoking a drying program PrG1, PrG2, PrG3, PrG4 or PrG5 previously stored (see chap. 10.2) you are queried whether the preheating stage „PrH“ shall be connected. If the preheating stage is added, the appliance will heat up to the set temperature before starting the drying. - Page 34 Start of moisture analysis: Preheating stage enabled Preheating stage disabled Confirm by the PRINT button, close the sample chamber and wait for the warm-up phase. After reaching the set temperature „ready“ will be displayed. Confirm by pressing the PRINT ...
- Page 35 During drying the display can be switched over by repeated pressing of the MENU button. Moisture [%] = loss of weight (GV) from start weight (SG) 0 – 100% Dry mass [%] = residual weight (RG) of SG 100% - 0 % ...
- Page 36 When an optional printer is connected, the measurement log will be edited independently on the settings in the menu, see chap. 11.3 For further measurement press the ON/OFF button, the appliance returns into the menu. For exiting the menu press anew the ON/OFF button, the appliance returns into weighing mode ...
-
Page 37: Moisture Analysis With Drying Program Prg Time
10.1.2 Moisture analysis with drying program PrG time After setting the drying time (available 1 -99 Min) and the drying temperature (available 35 – 160°C), moisture will be analyzed with the help of these two parameters. Confirm by pressing the PRINT button. The currently set drying time is displayed. ... - Page 38 Start of moisture analysis: Preheating stage enabled Preheating stage disabled Confirm by the PRINT button, close the sample chamber and wait for the warm-up phase. After reaching the set temperature „ready“ will be displayed. Confirm by pressing the PRINT ...
- Page 39 During drying the display can be switched over by repeated pressing of the MENU button. Moisture [%] = loss of weight (GV) from start weight (SG) 0 – 100% Dry mass [%] = residual weight (RG) of SG 100% - 0 % ...
-
Page 40: Moisture Analysis With Drying Program Prg Auto Mode
When an optional printer is connected, the measurement log will be edited independently on the settings in the menu, see chap. 11.3 For further measurement press the ON/OFF button, the appliance returns into the menu. For exiting the menu press anew the ON/OFF button, the appliance returns into weighing mode ... - Page 41 Start of moisture analysis: Preheating stage enabled Preheating stage disabled Confirm by the PRINT button, close the sample chamber and wait for the warm-up phase. After reaching the set temperature „ready“ will be displayed. Confirm by pressing the PRINT ...
- Page 42 During drying the display can be switched over by repeated pressing of the MENU button. Moisture [%] = loss of weight (GV) from start weight (SG) 0 – 100% Dry mass [%] = residual weight (RG) of SG 100% - 0 % ...
- Page 43 When an optional printer is connected, the measurement log will be edited independently on the settings in the menu, see chap. 11.3 For further measurement press the ON/OFF button, the appliance returns into the menu. For exiting the menu press anew the ON/OFF button, the appliance returns into weighing mode ...
-
Page 44: Save The Drying Programs Prg1, Prg2, Prg3, Prg4, Prg5
10.2 Save the drying programs PrG1, PrG2, PrG3, PrG4, PrG5 The appliance has more than 5 memory locations for often used drying programs. For every drying program the respective drying parameters are stored, which may be invoked and started according to needs (see chap. 10.1.1) ... - Page 45 Confirm with the PRINT button, the currently set drying mode will be displayed. Use the navigation buttons to select the desired drying mode. Acknowledge using PRINT button, the current setting is displayed. Enter the drying parameters as specified in chap.
-
Page 46: Rs 232C Interface
• Use a suitable cable to connect the moisture analyser to the interface of the printer. Faultless operation requires an adequate KERN interface cable. • Communication parameters (baud rate, bits and parity) of moisture analyser and printer must match. -
Page 47: Menu Settings „Serial
11.3 Menu settings „Serial“ In weighing mode press the MENU button, „Therm“ is displayed. Acknowledge using PRINT button, „Measure“ is displayed. Use the navigation buttons to select „Serial“ Acknowledge using PRINT button, the current setting is displayed. ... -
Page 48: Printout Examples (Ykb-01N)
11.3.1 Printout examples (YKB-01N) 1. Menu setting „Serial““Manu PC“ Printout occurs when drying is completed by pressing the PRINT button. Temp. °C Drying temperature Time: Drying time W.Start 19.998 Start weight W-End: 19.994 Residual weight Moist.: 0.02 Moisture [%] 2. Menu setting „Serial““Auto PC“ The first part of the printout occurs automatically when drying starts Temp. -
Page 49: General Information Concerning Moisture Analysis
The radiation applied in the KERN DLB penetrates mainly the sample in order to be transformed inside it into heat energy that is, warming from the inside to the outside. -
Page 50: Preparing A Sample
12.4 Preparing a sample Prepare one sample at a time for measuring. This prevents the sample from exchanging moisture with its surroundings. If several samples have to be taken at the same time, they should be packed in airtight boxes so that they do not undergo changes during storage. -
Page 51: Sample Material
12.5 Sample material Easy to determine are usually samples with the following characteristics: Grainy to powdery, pourable solids Thermally stable materials, emitting the moisture to be determined easily without other substances evaporating at the same time Liquids that vaporize to leave a dry substance without developing a film Difficult to determine may be samples that are: Glutinous or sticky Become incrusted easily or tend to form a film... -
Page 52: Drying Temperature
12.7 Drying temperature Bear in mind the following factors when setting the drying temperature: Surface of the sample: Compared with powdery or grainy samples, liquid and spreadable samples have a smaller surface for the transmission of heat energy. The use of a glass fibre filter improves the heat application. Colour of sample: Light-coloured samples reflect more heat radiation than dark ones and therefore require a higher drying temperature. - Page 53 Table of applications: Solid Drying Weight Drying Moisture body period Material Sample temperature (approx.) ( °C) (approx.) (approx (min) ABS (Novodur P2H-AT) 0,11 Accumulator lead 0,19 Acryl granulate 10-15 0,18 Activated carbon 13,33 Activated carbon 6,12 Sliced pineapple 14,4 6,71 Sliced apple (dry) 10-15 76,5...
- Page 54 Drying Solid Weight Drying Moisture period body Material Sample temperature (approx.) ( °C) (approx.) (min) (approx.) Setting lotion 0,01 98,76 Setting lotion (extra strong) 97,85 Hair styling gel 37,0 94,71 Oat flakes 9,35 Hazelnut cores Hazelnut cores (peeled) 3,74 Hydranal sodium tatrate – 2 15,67 –...
- Page 55 Solid Drying Weight Drying XXXX Moisture body period Material Sample temperature (approx.) ( °C) (approx.) (approx (min) Paper PA 6 (Ultramide B3WG5) 0,05 PA 6.6 (Ultramide B3WG5) 0,15 PBTP (Crastin SK645FR) 0,05 PC (Macrolon 2805) 10-12 0,08 PC/ABS (Babyblend T65MN) 9-11 0,12 Pepper, black, powder...
-
Page 56: Error Messages
Drying Solid Weight Drying Moisture period body Material Sample temperature (approx.) ( °C) (approx.) (min) (approx.) Tobacco 10,18 Tea, black 7,67 Pasta 10,64 Textile fibre 0,8-1,2 14,03 Theophylline 7,33 Thermoplastic PUR – 15-18 0,08 granulate Walnut Washing powder 7,32 Wheat spring water Sausage casing 78,56 Toothpaste... -
Page 57: Service, Maintenance, Disposal
Spilled weighing goods must be removed immediately. 14.2 Service, maintenance The appliance may only be opened by trained service technicians who are authorized by KERN. Ensure that the balance is regularly calibrated, see chap. Testing instruments control. 14.3 Disposal ... -
Page 58: Instant Help
15 Instant help Fault Possible cause • The display unit is not switched on. Display is not lit up. • The mains supply connection has been interrupted (mains cable not plugged in/faulty). • Power supply interrupted. Measurement is taking too •... -
Page 59: Declaration Of Conformity
Electronic Balance: KERN DLB_A Mark applied EU Directive Standards 2004/108/EC EN 61326-1:2006 2006/95/EC EN 61010-1:2001 Date: 14.04.2011 Signature: KERN & Sohn GmbH Management KERN & Sohn GmbH, Ziegelei 1, D-72336 Balingen, Tel. +49-[0]7433/9933-0 Fax +49-[0]7433/9933-149, E-Mail: info@kern-sohn.com, Internet: www.kern-sohn.com DLB_A-BA-e-1110... -
Page 60: Short Instructions For Moisture Analysis
17 Short instructions for moisture analysis Call up menu: MENU-key Scroll to next page: MENU-key Confirm PRINT button Exit menu: Press MENU button long time Scroll to previous page: CAL-key Prg 1 Load Enter On/Off sample Start Test Escape Prg 2 Prg 3 Prg 4 Prg 5...
Need help?
Do you have a question about the DLB 160-3A and is the answer not in the manual?
Questions and answers