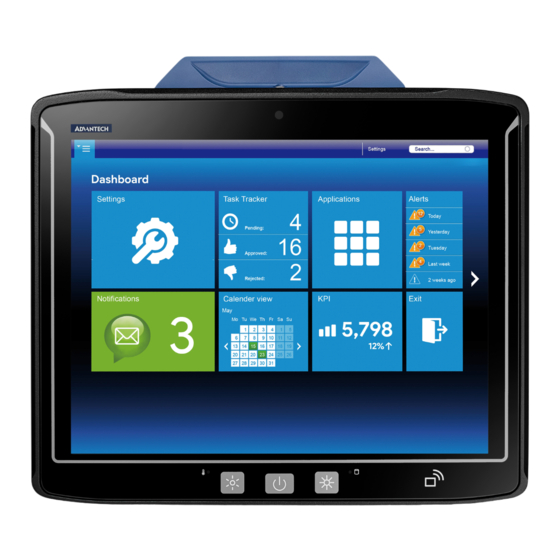
Advantech DLT-V73 Series User Manual

Advantech DLT-V73 Series User Manual

Industrial computer
Hide thumbs Also See for DLT-V73 Series:
Table of Contents

Advertisement

Quick Links

User Manual
DLT-V73 Series
Industrial Computer

Advertisement

Table of Contents
loading

Summary of Contents for Advantech DLT-V73 Series

  • Page 1 User Manual DLT-V73 Series Industrial Computer...
  • Page 2 For safe and proper use, follow these instructions. Keep them for future reference. Manual version Manual version: V1.00 Completed on: July 13, 2023 Revision History: Version Date Manual modifications Description DLT-V73 Series V1.00 July 13, 2023 Models DLT-V7310P/R, V7312P/R/D und V7312P+...
  • Page 3 Note regarding all links and website content included in this document: Advantech Co., Ltd. is not responsible for the accessibility of the websites and for the content of external links contained in this document. The content and accessibility of the linked websites are the sole responsibility of their operators.
  • Page 4 No.1, Alley 20, Lane 26, Rueiguang Road, Neihu District, Taipei 114, Taiwan, R.O.C. The importer: Advantech Europe B.V. Science Park Eindhoven 5708, 5692ER, Son en Breugel, The Netherlands Hereby, Advantech Co., Ltd. declares that the radio equipment type DLT-V73XXXXXXXXXXXXXXXX, DLTV73XXXXXXXXXXXXXXXX, DLT-V7310PXXXXXXXXXXXXXXXX, DLT-V7312PXXXXXXXXXXXXXXXX, (X=0-9, A-Z, a-z, Any character, “-”...
  • Page 5 The exact wording of any error messages  A complete description of the problem  Find the contact data of our Global Advantech Service Centers on our website: https://erma.advantech.com You can find this return shipment form on page Advantech Europe B.V. Service & Support Email: helpdesk.munich@advantech.de...
  • Page 6 Our dealers are well trained and ready to give you the support you need to get the most from your Advantech products. In fact, most problems reported are minor and can be easily solved over the phone.
  • Page 7: Table Of Contents

    5.3.3. DLT-V7312 P+ ........................38 5.3.4. VESA drill holes ........................38 5.4. Integrated power supply, power supply cable (optional) ..............39 5.4.1. DC voltage supply connection ....................41 5.4.2. DC Power supply cable ......................42 DLT-V73 Series User Manual V1.00 7 / 172...
  • Page 8 Automatic shut down ........................... 80 9.5. MPair ..............................81 9.6. MTouch ............................... 82 10. WLAN Configuration ......... 83 10.1. Safety notes ............................84 10.2. Preparation work at the factory ......................85 10.3. OS-specific configuration ........................86 DLT-V73 Series User Manual V1.00 8 / 172...
  • Page 9 14.3.2. Ensure a proper electrical connection ................... 135 14.3.3. Plugging in and screwing on the power supply cable ............136 14.3.4. Secure the power supply cable to the strain relief rail ............137 DLT-V73 Series User Manual V1.00 9 / 172...
  • Page 10 15.7. Touch stylus (optional) ........................152 15.8. Protective film for touchscreen (optional) ..................153 16. Repairs, Modifications ......154 16.1. Authorized Advantech Service Centers ..................... 155 17. Maintenance ..........156 17.1. Regular maintenance work ........................ 157 17.1.1. General ..........................157 17.1.2.
  • Page 11 21. List of figures ........... 170 DLT-V73 Series User Manual V1.00 11 / 172...
  • Page 12: Introduction

    Introduction DLT-V73 Series User Manual V1.00 12 / 172...
  • Page 13: About The Dlt-V73 Manuals

    User Manual Complete operating Skilled personnel PDF file at our websites instructions Startup Manual and User Manual apply to all models of the DLT-V73 Series: DLT-V7310 P (PCAP-Touch)  DLT-V7310 R (Resistive-Touch)  DLT-V7312 P (PCAP-Touch) ...
  • Page 14: Further Available Manuals

    Abbreviations used Term Abbreviation Lithium-ion battery pack Battery pack MS Windows MS Win MS Windows 10 IoT Enterprise LTSC Win10IoTEnt MS Windows 11 IoT Enterprise Win11IoTEnt Operating System Projected-capacitive PCAP Uninterrupted Power Supply DLT-V73 Series User Manual V1.00 14 / 172...
  • Page 15: Design Elements Used In The Manuals

    Signal word CAUTION means that slight bodily injury can occur if this information is not observed. NOTICE Prevent system malfunction and property damage Information about possible property damage to avoid damaging hardware or losing data NOTE Notes provide optional additional information DLT-V73 Series User Manual V1.00 15 / 172...
  • Page 16: Text Formatting Conventions

    Text in italics, Please refer to manual section 1.1 manual chapters underlined Examples Program files In quotation File “quectel.exe“ … marks File names In directory “C:/Program Files” …. Directories Links Underlined, blue Website https://www.advantech.com DLT-V73 Series User Manual V1.00 16 / 172...
  • Page 17: Safety Chapter

    Safety Chapter Safety Chapter DLT-V73 Series User Manual V1.00 17 / 172...
  • Page 18: Please Read And Observe

    Safety Chapter 2.1. Please read and observe These safety instructions apply to all device models in the DLT-V73 Series: For DLT-V7310, DLT-V7312 and DLT-V7312P+ in various equipment levels. WARNING Non-observance of the safety instructions can result in injury to persons and in physical damage, e.g. due to incorrect commissioning procedures or due to maintenance work not being completed.
  • Page 19: Battery Pack Safety

    This liquid must not under any circumstances be permitted to come into contact with eyes, skin or clothing. On contact with eyes or skin, rinse immediately with clear, running water and consult a doctor. DLT-V73 Series User Manual V1.00 19 / 172...
  • Page 20 DLT-V73, the warranty for this device will be rendered void. 2. The battery packs must be certified for the DLT-V73. 3. Do not use battery packs from any other Advantech devices; they are not compatible. Prevent physical damage due to deep discharge.
  • Page 21: Hf Radiation

    Any modifications to the DLT-V73 radio equipment which are not expressly approved by the party responsible for the compliance can lead to the withdrawal of the operating license for this device. DLT-V73 Series User Manual V1.00 21 / 172...
  • Page 22: Information On Safe Mounting

    2. During the mounting process, observe the requirements of the vehicle manufacturer relating to attaching auxiliary devices and connecting auxiliary consumers. 3. Observe all requirements relating to welding or drilling on support components of the vehicle. DLT-V73 Series User Manual V1.00 22 / 172...
  • Page 23: Information On Safe Electrical Installation

    2. Do not open or modify the DLT-V73. 3. Only connect or disconnect electrical connections when the device is in a de-energized state. 4. Use only original Advantech power supply cables; these meet the specific requirements for low-temperature flexibility, UV resistance, oil resistance, etc.
  • Page 24: Safety During Ongoing Work Operations

    The DLT-V73 must be disconnected from the vehicle battery while the vehicle battery is being charged. Or it must be ensured that the maximum permitted input voltage of the DLT-V73 is not exceeded. DLT-V73 Series User Manual V1.00 24 / 172...
  • Page 25: Regular Maintenance Work

    Accessories and peripherals Accessories and peripherals may only be installed or integrated if expressly approved by Advantech for the respective DLT-V73. If other parts are attached or installed and connected, claims for warranty and / or product liability will be lost.
  • Page 26: Recycling Information

    They must be disposed of properly in accordance with local regulations. Please contact the responsible authorities in your country/region to find out about the applicable regulations for proper disposal, if necessary. DLT-V73 Series User Manual V1.00 26 / 172...
  • Page 27: Functional Description

    Functional Description Functional Description DLT-V73 Series User Manual V1.00 27 / 172...
  • Page 28: Intended Use

    Only use accessories that have been tested and certified for the respective DLT-V73. Requirements for safe operation Proper transport and storage  Proper setup and use  Proper maintenance and service  Operation by trained personnel  DLT-V73 Series User Manual V1.00 28 / 172...
  • Page 29: Mount, Operate And Service The Device Correctly

    Do not damage the name plate or remove it from the device. Information on the labels on the device (examples): Model name  Serial number  FCC ID (Radio)  Barcode (for Advantech-internal use only)  DLT-V73 Series User Manual V1.00 29 / 172...
  • Page 30: Unpacking, Storing

    Unpacking, Storing Unpacking, Storing DLT-V73 Series User Manual V1.00 30 / 172...
  • Page 31: Packing List

    2. Never use the antenna as a handle. It can break due to the weight involved. 3. Do not hold the DLT-V73 by the strain relief rail. 4. Use the assistance of a second person for installation work. DLT-V73 Series User Manual V1.00 31 / 172...
  • Page 32: Storage

    3. Place devices front-to-front in this case. The VESA mounting point on the rear side of the device can damage the touchscreen of another device. 4. Use protective material (non-flammable!) between the devices as a precaution. DLT-V73 Series User Manual V1.00 32 / 172...
  • Page 33: Technical Data - Device

    Technical Data – Device Technical Data – Device DLT-V73 Series User Manual V1.00 33 / 172...
  • Page 34: General

    1024 x 768 resolution 500 cd/m² brightness DLT-V7312 12.1" XGA color TFT 1024 x 768 resolution 600 cd/m² brightness DLT-V7312 P+ 12.1" XGA color TFT 1024 x 768 resolution 600 cd/m² brightness DLT-V73 Series User Manual V1.00 34 / 172...
  • Page 35 Technical Data – Device The LC-Display of the DLT-V73 series fulfills the highest quality standards and was inspected for pixel defects. However, due to technological reasons pixel defects can occur. This is not a malfunction; it is a part of the technical specifications.
  • Page 36: Environmental Conditions

    US Highway Truck according to MIL-STD 810F IP protection class IP66 for: DLT-V7310 DLT-V7312 DLT-V7312 P+ NOTE If the CPU temperature rises to 85 °C, the CPU is throttled to avoid overheating. DLT-V73 Series User Manual V1.00 36 / 172...
  • Page 37: Device Dimensions

    Dimensions without add-ons (in mm) Fig. 5.1: Dimensions DLT-V7310 P, R (in mm) 5.3.2. DLT-V7312 P, R, D Dimensions without add-ons (in mm) Fig. 5.2: Dimensions DLT-V7312 P, R, D (in mm) DLT-V73 Series User Manual V1.00 37 / 172...
  • Page 38: Dlt-V7312 P

    100 x 100 mm. It is used to attach VESA-compatible mountings to mount the DLT- V73 at the deployment location. Depth of thread: M6 x 6mm Please observe the mounting information in manual chapter: 13.2.4 VESA mounting hole pattern DLT-V73 Series User Manual V1.00 38 / 172...
  • Page 39: Integrated Power Supply, Power Supply Cable (Optional)

    Connection to SELV circuit only. The SELV circuit is a secondary circuit that is designed and protected so that its voltages will not exceed a safe value both when operating correctly or if a single error occurs. DLT-V73 Series User Manual V1.00 39 / 172...
  • Page 40 The fuse of the power supply unit is located inside the device and is not accessible from outside. The power supply is equipped with a 16 AT fuse. In case of problems please contact our helpdesk. DLT-V73 Series User Manual V1.00 40 / 172...
  • Page 41: Dc Voltage Supply Connection

    “Ignition on” means that a control signal can be routed to this connection (e.g., ignition of a vehicle), that matches the supply voltage level and is able to supply at least 1 W to the DLT-V73. The signal reference is DC-. DLT-V73 Series User Manual V1.00 41 / 172...
  • Page 42: Dc Power Supply Cable

    Technical Data – Device 5.4.2. DC Power supply cable Fig. 5.6: DC connection cable assignment DLT-V73 Series User Manual V1.00 42 / 172...
  • Page 43: Technical Data - Radio

    Technical Data – Radio Technical Data – Radio DLT-V73 Series User Manual V1.00 43 / 172...
  • Page 44: Identification Of Radio Equipment Variants

    For products that operate in the frequency band 5.150 to 5.350 GHz, wireless access systems (WAS), including radio local area networks (RLANs), shall be restricted to indoor use. Wireless modulation BPSK/QPSK/16QAM/64QAM/256QAM/1024QAM/DBPSK/DQPSK/CCKGFSKπ/4- DQPSK,8DPSK DLT-V73 Series User Manual V1.00 44 / 172...
  • Page 45 18.5dbm ±1dBm 5955-6415| 20MHz(UHB) 18.5dbm ±1dBm WiFi 6 6G WiFi 802.11ax 5965-6405 | 40MHz(UHB) 18.5dbm ±1dBm WiFi 6 6G WiFi 802.11ax 5985-6385 | 80MHz(UHB) 19dbm ±1dBm WiFi 6 6G WiFi 802.11ax 6025-6345| 160MHz(UHB) DLT-V73 Series User Manual V1.00 45 / 172...
  • Page 46: Radio Cards (Optional)

    Frequency range 5150 to 5875 MHz Frequency band ETSI Europe 5.15 GHz to 5.35 GHz 5.47 GHz to 5.725 GHz Channels available 36 to 165 Maximum TX power 200 mW / 23 dBm DLT-V73 Series User Manual V1.00 46 / 172...
  • Page 47: Radio Card For Wwan: Quectel Em06-A/E

    LTE Cat 4 (EM05) and LTE Cat 6 (EM06) and both GNSS FCC ID: XMR201906EM06A (China excluded) FCCID Maximum transmitting Class 3 (23dBm±2dB) for LTE FDD power Class 3 (23dBm±2dB) for LTE TDD Class 3 (24dBm+1/-3dB) for WCDMA DLT-V73 Series User Manual V1.00 47 / 172...
  • Page 48: Antennas (Optional)

    5G<2.98 dBi 6G<2.98 dBi WLAN external <4.0 dBi Permanent Mount External Antenna 1399.17.0040 WWAN external <5.3 dBi Permanent Mount External Antenna TLS.01.305111 GPS external 30 +- 4,5dBi Permanent Mount External Antenna 1750001782 DLT-V73 Series User Manual V1.00 48 / 172...
  • Page 49: Wlan Antenna

    Max. 4.44 dBi (without loss through the cable) Impedance 50 Ω Polarization Vertical/horizontal Maximum transmitting power 100 mW / 20 dBm Compatible Radio card: (see section 6.2.1 Radio card for WLAN: Intel 6E (AX210.NGWG.II)) DLT-V73 Series User Manual V1.00 49 / 172...
  • Page 50: External Wlan Antenna Ieee 802.11 A/B/G/N

    RSMA plug for RSMA socket on the terminal Scope of delivery 3 m antenna cable Maximum transmitting power 100 mW / 20 dBm Compatible WLAN card (see section 6.2.1 Radio card for WLAN: Intel 6E (AX210.NGWG.II) DLT-V73 Series User Manual V1.00 50 / 172...
  • Page 51: External Wwan Antenna 2G, 3G, 4G

    Impedance 50 Ω Polarization Vertical Dimensions Height 79.45 mm Diameter 42 mm Cable length IP protection IP67 and IP69K Compatible WWAN card: (see section 6.2.2 Radio card for WWAN: QUECTEL EM06- A/E) DLT-V73 Series User Manual V1.00 51 / 172...
  • Page 52: External Gps Antenna

    N-Type or TNC N, Jack, female, bottom SMA (M) plug for SMA socket on terminal Scope of delivery 5 m antenna cable Compatible WLAN card: (see section 6.2.2 Radio card for WWAN: QUECTEL EM06-A/E) DLT-V73 Series User Manual V1.00 52 / 172...
  • Page 53: Bluetooth Integrated (Optional)

    Transmission rate: up to 3 Mbps  NOTICE For full Bluetooth 5.3 SW support you need Windows Win10IoTEnt or Win11IoTEnt. For more information on downloading the last available Standard Intel driver see chapter 10.6.2 Driver download. DLT-V73 Series User Manual V1.00 53 / 172...
  • Page 54: Connectors

    Connectors Connectors DLT-V73 Series User Manual V1.00 54 / 172...
  • Page 55: Connectors Under The Cable Cover

    Serial interfaces RS232 Baud rates: 300 bps to 1 Mbps 1 x AddOn Modul USB to serial COM – RS-232/RS-485/RS422 (switchable) (optional) CAN FD USB-A 3.2 (Gen1) LAN (10/100/1000 MBit/s) Digital I/O DLT-V73 Series User Manual V1.00 55 / 172...
  • Page 56: Fig. 7.2: Pin Assignment Description External Antennas

    WLAN external antenna incl. 3 m cable WWAN antenna WWAN external Antenna incl. 3 m cable GPS antenna GPS external antenna incl. 3 m cable Fig. 7.2: Pin assignment description external antennas DLT-V73 Series User Manual V1.00 56 / 172...
  • Page 57: Fig. 7.3: Rj45 Network Ports

    This adapter can be accessed via the bottom of the device and offers an RJ45 connection jack. The RJ45 connection port has two integrated status LEDs and are assigned as follows: Fig. 7.3: RJ45 network ports DLT-V73 Series User Manual V1.00 57 / 172...
  • Page 58 100 m given in the specification (IEEE 802.3 standard). The solution here is the use of a shorter cable. DLT-V73 Series User Manual V1.00 58 / 172...
  • Page 59: Opening The Cable Cover

    5. The device is only permitted to be operated again once the cable cover is properly sealed again; only then is the protection class guaranteed. Closing the cable cover Please refer to section 14.3.7 Attach the cable cover . DLT-V73 Series User Manual V1.00 59 / 172...
  • Page 60: Connectors Under The Antenna Cap / Wlan Diversity Antenna

    Connectors located under the antenna cap / WLAN Diversity antenna CFast – Card Slot CFast-Card Slot USB Type-C USB3.2 Gen2 interface SIM-Tray Mini-SIM-Card Slot Battery pocket Secured under the antenna cap Fig. 7.4: Connectors located under the antenna cap DLT-V73 Series User Manual V1.00 60 / 172...
  • Page 61: Open/Close The Wlan Antenna Cap Ieee 802.11 A/B/G/N/Ac/Ax

    7. Use only CFast cards that have been approved for the product by Advantech. 8. The device is only permitted to be operated again once the antenna cap is properly sealed again; only then is the protection class guaranteed. DLT-V73 Series User Manual V1.00 61 / 172...
  • Page 62: Fig. 7.6: Wlan Antenna Cap Ieee 802.11 A/B/G/N/Ac/Ax

    Fig. 7.6: WLAN antenna cap IEEE 802.11 a/b/g/n/ac/ax 1. Unfasten the three screws on the antenna with a Torx screwdriver, Tx20. 2. Remove the antenna cap from the device. Result: Fig. 7.7: WLAN antenna cap IEEE 802.11 a/b/g/n/ac/ax opened DLT-V73 Series User Manual V1.00 62 / 172...
  • Page 63: Fig. 7.8: Connected Adapter To Usb Type-C Service Port

    Optional USB Type-C to Type-A adapter can now be connected to the Service Port. Fig. 7.8: connected adapter to USB Type-C Service Port Closing the antenna cap: 1. Place the antenna cap back onto the DLT-V73. 2. Tighten all screws alternatingly (1,0 Nm torque). DLT-V73 Series User Manual V1.00 63 / 172...
  • Page 64: Operating The Dlt-V73

    Operating the DLT-V73 Operating the DLT-V73 DLT-V73 Series User Manual V1.00 64 / 172...
  • Page 65: Safety Notes

    Prevent system malfunction and property damage 1. While the vehicle battery is charging, disconnect the DLT-V73 from the vehicle battery. 2. Alternatively, ensure that the maximum permitted input voltage of the DLT-V73 is not exceeded. DLT-V73 Series User Manual V1.00 65 / 172...
  • Page 66: Switching The Dlt-V73 On/Off

    Devices with integrated UPS will switch automatically to UPS/battery power supply when the supply voltage is broken. 3. Or: Deactivate the ignition of the connected vehicle (depends on the automatic shutdown settings). DLT-V73 Series User Manual V1.00 66 / 172...
  • Page 67 Take care of the antenna cables. Do not pull, bend or squeeze the cables. Please also refer to chapter 15.1.3 Replacing the battery pack 5. Open the battery cover 6. Disconnect the battery pack. DLT-V73 Series User Manual V1.00 67 / 172...
  • Page 68: Operating The Touchscreen

    Depending on the installed operating system, the PCAP touchscreen of the DLT-V73 is multi-touch capable. This means it detects simultaneously up to ten fingers in non-glove mode / two fingers in glove-mode / and one finger in thick-glove mode. DLT-V73 Series User Manual V1.00 68 / 172...
  • Page 69: Operation Elements

    Operating the DLT-V73 8.4. Operation elements 8.4.1. DLT-V73 rear side DLT-V73 Series User Manual V1.00 69 / 172...
  • Page 70: Front Side Dlt-V7310 And Dlt-V7312

    Operating the DLT-V73 8.4.2. Front side DLT-V7310 and DLT-V7312 Note on the backlighting function on/off: The DLT-V73 will continue to react to keyboard, mouse and touchscreen inputs even if the backlight is switched off. DLT-V73 Series User Manual V1.00 70 / 172...
  • Page 71: Front Side Dlt-V7312 P

    Operating the DLT-V73 8.4.3. Front side DLT-V7312 P+ DLT-V73 Series User Manual V1.00 71 / 172...
  • Page 72: Operating States (Leds)

    -30 and +64 °C again. Computer start-up/normal operational state/shutdown delay time Screen defroster active FLASHING Ambient temperature value is outside the permitted range, i.e. < -30 °C or > +50 °C DLT-V73 Series User Manual V1.00 72 / 172...
  • Page 73: Mkeyboard

    Example for a software keyboard (the layout can be configured individually): Fig. 8.1: MKeyboard For subsequent installation, an installation program is available. NOTE The “MKeyboard manual” is available at our websites. DLT-V73 Series User Manual V1.00 73 / 172...
  • Page 74: Operating The Dlt-V73 With Ups

    3. Do not allow water or other liquids to come into contact with the device (exercise particular caution with corrosive liquids). 4. Do not allow it to come into contact with fire. For details about the UPS, see section 15.1 Integrated UPS (optional). DLT-V73 Series User Manual V1.00 74 / 172...
  • Page 75: Internal Speaker, Sound

    The DLT-V73 is equipped with two stereo speakers as standard (2 x 2,5 W). The system messages from the industrial PC are output via this speaker. The internal speakers are configured in the audio settings for the operating system in question. DLT-V73 Series User Manual V1.00 75 / 172...
  • Page 76: General Device Configuration

    General Device Configuration General Device Configuration DLT-V73 Series User Manual V1.00 76 / 172...
  • Page 77: Operating Systems (Optional)

    When a DLT-V73 is started up for the first time without a pre-installed operating system, the user needs to carry out a number of steps that will vary depending on the system to be installed. Refer to the relevant operating system manual for specific instructions. DLT-V73 Series User Manual V1.00 77 / 172...
  • Page 78: Configuring The Front Keys, Automatic Shutdown, Etc

    All DLT-V73 devices with MS Windows have had the power options set at the factory so that the optimal duration of the battery pack can be achieved. Do not modify or deactivate the power options. DLT-V73 Series User Manual V1.00 78 / 172...
  • Page 79: Linux (Optional)

    Linux (optional) NOTE The configuration of the DLT-V73 with Linux with regard to radio networks, touchscreen calibration, etc. is described in the “Advantech Linux Manual”. Please contact our Technical Customer Support if required. DLT-V73 Series User Manual V1.00 79 / 172...
  • Page 80: Automatic Shut Down

    Once the shut-off delay (after run time) has elapsed, the operating system will shut down and the device will automatically shut down (e.g. after one minute or a signal from the operating system). DLT-V73 Series User Manual V1.00 80 / 172...
  • Page 81: Mpair

    MPair. For a more detailed description of the configuration to be made and the handling of the MPair application, please refer to the separately available Manual MDevice from our homepage. www.advantech.com DLT-V73 Series User Manual V1.00 81 / 172...
  • Page 82: Mtouch

    MS Windows 11 IoT Enterprise, (Win11IoTEnt) • For more details about the required installation and the handling of the MTouch application, please refer to the separately available Manual MDevice from our homepage. www.advantech.com DLT-V73 Series User Manual V1.00 82 / 172...
  • Page 83: Wlan Configuration

    WLAN Configuration 10. WLAN Configuration DLT-V73 Series User Manual V1.00 83 / 172...
  • Page 84: Safety Notes

    Examples of country-specific regulations: Region Radio approval RED (formerly R&TTE) China SRRC Japan MIC (formerly TELEC) Taiwan Canada Canada IC DLT-V73 Series User Manual V1.00 84 / 172...
  • Page 85: Preparation Work At The Factory

    WLAN Configuration Antenna solutions for use in Germany The Advantech antenna solutions are based on the prevailing IEEE 802.11 standard. This standard allows radio data transfer at rates from 1 Mbps to 54 Mbps (867 Mbit/s if using IEEE 802.11ac) using the 2.4 GHz and 5 GHz frequency band.
  • Page 86: Os-Specific Configuration

    WLAN configuration description DLT-V73 with MS-Windows In the following manual sections DLT-V73 with Linux In manual “Advantech Linux“; please contact our Technical Customer Support if required. 10.4. Customer-specific WLAN profiles To create a customer-specific profile: 1. Use the configuration program that is already factory-installed on the DLT-V73 (Windows).
  • Page 87: Windows Zero Configuration (Wzc)

    10.6. Intel 6E (AX210.NGWG.II) WLAN Driver 10.6.1. Area of application This chapter describes the Intel 6E (AX210.NGWG.II) WLAN driver under the following MS Windows 10 IoT Enterprise LTSC (Win10IoTEnt)  MS Windows 11 IoT Enterprise, (Win11IoTEnt)  DLT-V73 Series User Manual V1.00 87 / 172...
  • Page 88: Driver Download

    The following steps should be performed as the Administrator for the installation process. 10.6.3. After image reinstallation: Driver installation If the image has been reinstalled, the DLT-V73 must be set up again using the Intel 6E (AX210.NGWG.II) WLAN driver. DLT-V73 Series User Manual V1.00 88 / 172...
  • Page 89: Standard" Driver Installation Win10Iotent / Win11Iotent

    2. Run “WiFi-22.200.0-Driver64-Win10-Win11.exe” to start the installation. (Version can be different) NOTE The following installation example shows the driver 22.200.0 for Win10IoTEnt / Win11IoTEnt. Fig. 10.2: Wi-Fi driver for Win10IoTEnt/ Win11IoTEnt (Intel 6E AX210.NGWG.II) WLAN) DLT-V73 Series User Manual V1.00 89 / 172...
  • Page 90: Fig. 10.3: (Intel 6E Ax210.Ngwg.ii Wlan) Driver Installation Welcome Dialog

    Fig. 10.3: (Intel 6E AX210.NGWG.II WLAN) driver installation welcome dialog 3. with Next continue installation Fig. 10.4: Intel 6E AX210.NGWG.II WLAN driver installation EULA Agreement 4. Set check mark on “I agree…” and continue the installation with Install. DLT-V73 Series User Manual V1.00 90 / 172...
  • Page 91: Fig. 10.5: Intel 6E Ax210.Ngwg.ii Wlan Driver Installation Starts

    5. The driver installation is performed. Fig. 10.6: Intel 6E AX210.NGWG.II WLAN driver installation Exit with Finish 6. Exit the driver installation with Finish. The WLAN configuration is then carried out using the WZC tool under Windows. DLT-V73 Series User Manual V1.00 91 / 172...
  • Page 92: Intel 6E Ax210.Ngwg.ii "Roaming" Setting

    WLAN driver installation. 1. Open Windows Device Manager. Fig. 10.7: Device Manager network adapter Properties (Intel) 2. Open right click option Properties of the network adapter Intel® Wi-Fi 6E… DLT-V73 Series User Manual V1.00 92 / 172...
  • Page 93: Fig. 10.8: Advanced - Roaming Aggressiveness Property

    WLAN Configuration Fig. 10.8: Advanced – Roaming aggressiveness Property 3. Under the Advanced tab, set the Roaming aggressiveness property to value 5. Highest. 4. Confirm the setting made with OK. DLT-V73 Series User Manual V1.00 93 / 172...
  • Page 94: Intel 6E (Ax210.Ngwg.ii) Bt Driver

    10.7.3. After image reinstallation: Driver installation If the image has been reinstalled, the DLT-V73 must be set up again using the Intel 6E (AX210.NGWG.II) BT driver. One driver is available. DLT-V73 Series User Manual V1.00 94 / 172...
  • Page 95: Standard" Driver Installation Win10Iotent / Win11Iotent

    2. Run “BT-22.200.0-32-64UWD-Win10-Win11.exe” to start the installation. (Version can be different) NOTE The following installation example shows the driver 22.200.0 for Win10IoTEnt / Win11IoTEnt. Fig. 10.9: BT driver for Win10IoTEnt / Win11IoTEnt (Intel 6E AX210.NGWG.II) DLT-V73 Series User Manual V1.00 95 / 172...
  • Page 96: Fig. 10.10: Intel 6E (Ax210.Ngwg.ii) Bt Driver Installation Welcome Dialog

    Fig. 10.10: Intel 6E (AX210.NGWG.II) BT driver installation welcome dialog 3. Continue the installation with Next. Fig. 10.11: Intel 6E (AX210.NGWG.II) BT driver installation License Agreement 4. Set check mark on “I accept …” and continue the installation with Next. DLT-V73 Series User Manual V1.00 96 / 172...
  • Page 97: Fig. 10.12: Intel 6E (Ax210.Ngwg.ii) Bt Driver Installation Type

    Fig. 10.12: Intel 6E (AX210.NGWG.II) BT driver installation Type 5. Continue the installation of the required files with Typical. Fig. 10.13: Start Intel 6E (AX210.NGWG.II) BT driver installation 6. Start the driver installation with Install DLT-V73 Series User Manual V1.00 97 / 172...
  • Page 98: Fig. 10.14: Intel 6E (Ax210.Ngwg.ii) Bt Driver Installation Is Running

    WLAN Configuration Fig. 10.14: Intel 6E (AX210.NGWG.II) BT driver installation is running 7. Driver installation is completed Fig. 10.15: Exit the driver installation with Finish 8. Exit the driver installation with Finish. DLT-V73 Series User Manual V1.00 98 / 172...
  • Page 99: Wwan Configuration

    WWAN Configuration 11. WWAN Configuration DLT-V73 Series User Manual V1.00 99 / 172...
  • Page 100: Safety Notes

    Examples of country-specific regulations Region Radio approval RED (formerly R&TTE) China SRRC Japan MIC (formerly TELEC) Taiwan Canada Canada IC DLT-V73 Series User Manual V1.00 100 / 172...
  • Page 101: Preparation Work At The Factory (Delivery Status)

    Prevent system malfunction and property damage Radio cards are located inside the devices and are not accessible from the outside. Only the manufacturer and its authorized service centers may open the device and install/remove radio cards. DLT-V73 Series User Manual V1.00 101 / 172...
  • Page 102: Sim Card For Wwan (Customer-Specific) And M2M Sim

    Inserting the SIM card: DLT-V73 must be switched off! NOTE If the SIM card contains a PIN, the customer must set up an application for the PIN query. For this reason, we recommend not using a PIN DLT-V73 Series User Manual V1.00 102 / 172...
  • Page 103: Configuration Of Radio Card Quectel Em05/Em06

    Once the download has completed, the contents of the ".zip" directory on the desktop must be unzipped. NOTE Requirements: The following steps should be performed as the Administrator for the installation process. DLT-V73 Series User Manual V1.00 103 / 172...
  • Page 104: Standard" Driver Installation Win10Iotent / Win11Iotent

    2. Run „Setup.exe“ to start the installation. (Version can be different) NOTE The following installation example shows the driver Quectel_Windows_USB_Driver(Q)_MBIM_V1.3.5 for Win10IoTEnt / Win11IoTEnt. Fig. 11-2: QUECTEL EM05/EM06 - WWAN driver for Win10IoTEnt/ Win11IoTEnt DLT-V73 Series User Manual V1.00 104 / 172...
  • Page 105: Fig. 11-3: Quectel Em05/Em06 - Uac Request - Allow App To Make Changes

    Fig. 11-3: QUECTEL EM05/EM06 - UAC request - allow app to make changes 3. Confirm the UAC request with Yes Fig. 11-4: QUECTEL EM05/EM06 – select installation directory 4. Continue the installation with Next DLT-V73 Series User Manual V1.00 105 / 172...
  • Page 106: Fig. 11-5: Quectel Em05/Em06 - Start Copying Files

    WWAN Configuration Fig. 11-5: QUECTEL EM05/EM06 – Start Copying Files 5. Continue the installation with Next Fig. 11-6: QUECTEL EM05/EM06 – WWAN driver installation is running DLT-V73 Series User Manual V1.00 106 / 172...
  • Page 107: Fig. 11-7: Quectel Em05/Em06 - Exit The Driver Installation With Finish

    WWAN Configuration Fig. 11-7: QUECTEL EM05/EM06 – Exit the driver installation with Finish 6. Exit the driver installation with Finish. DLT-V73 Series User Manual V1.00 107 / 172...
  • Page 108: Fig. 11-8: Quectel Em05/Em06 - Taskbar Wwan Option Cellular (Locked)

    Fig. 11-8: QUECTEL EM05/EM06 – Taskbar WWAN Option Cellular (Locked) 7. Within the taskbar the option Cellular is displayed. The example installation shows the addition Locked, because the PIN NOTE request on the SIM-card is active. DLT-V73 Series User Manual V1.00 108 / 172...
  • Page 109: Fig. 11-9: Quectel Em05/Em06 - Taskbar Wwan Option Cellular (Unlock Sim)

    WWAN Configuration Fig. 11-9: QUECTEL EM05/EM06 – Taskbar WWAN Option Cellular (Unlock SIM) 8. Activate Checkbox “Let Windows keep me connected” and continue with Unlock SIM DLT-V73 Series User Manual V1.00 109 / 172...
  • Page 110: Fig. 11-10: Quectel Em05/Em06 - Taskbar Wwan Option Cellular (Enter Pin)

    WWAN Configuration Fig. 11-10: QUECTEL EM05/EM06 – Taskbar WWAN Option Cellular (Enter PIN) 9. Enter PIN Code of the SIM card and confirm with Next DLT-V73 Series User Manual V1.00 110 / 172...
  • Page 111: Fig. 11-11: Quectel Em05/Em06 - Taskbar Wwan Option Cellular (Status Connected)

    10. The status changes to Connected. NOTE In addition, depending on the provider used, additional information on the mobile communications standard used (4G in the example) and the current signal strength are displayed. DLT-V73 Series User Manual V1.00 111 / 172...
  • Page 112: Trouble Shooting

    Quectel Utilite. Quectel USB NMEA Port for receiving GNSS position data (NMEA). Further notes Port on reading out are described in more detail in the next paragraph. DLT-V73 Series User Manual V1.00 112 / 172...
  • Page 113 1. Open the AT-Port via Putty. (Port number can be different!) 2. Enter the command at in the window and confirm with Return. 3. If the response is OK, then communication is present. DLT-V73 Series User Manual V1.00 113 / 172...
  • Page 114 (Strg&C) beforehand and paste it within the Putty window with a right click (Strg&V) followed by the Return key. 3. If the response ist OK, the command was successful. DLT-V73 Series User Manual V1.00 114 / 172...
  • Page 115: Fig. 11-13: Quectel Em05/Em06 - Nmea Data

    Availability of the software: see previous section. Perform the following steps: 1. Open the NMEA-Port via Putty. (Port number can be different!) 2. Check whether NMEA data are output. Sample: Fig. 11-13: QUECTEL EM05/EM06 - NMEA data DLT-V73 Series User Manual V1.00 115 / 172...
  • Page 116: Nfc Near Field Communication

    NFC Near Field Communication 12. NFC Near Field Communication DLT-V73 Series User Manual V1.00 116 / 172...
  • Page 117: Technology

    Calling up web links if a URL in the corresponding format has been stored in the  NFC chip. Can be used with active devices as an access key at terminals to content and for  services DLT-V73 Series User Manual V1.00 117 / 172...
  • Page 118: Pre-Installed Software

    12.3. Pre-installed software The Windows versions offered by Advantech (Win10IoTEnt / Win11IoTEnt) as well as the corresponding standard images include the following pre-installed NFC software: • NxpNfcClientDriver (NXP Semiconductors) Proxy TAP (NXP Semiconductors) • Fig. 0-1: NFC Proxy TAP application...
  • Page 119: Mechanical Installation

    Mechanical Installation 13. Mechanical Installation DLT-V73 Series User Manual V1.00 119 / 172...
  • Page 120: Safety Notes

    6. Close off all unused cable openings of the rubber seal using the accompanying blind plugs so that they are sealed. 7. Close the DLT-V73 with the cable cover. 8. Install the DLT-V73 on the device mounting. DLT-V73 Series User Manual V1.00 120 / 172...
  • Page 121: Mounting The Dlt-V73 At The Deployment Location

    Never install the system in a closed environment where the cooling air is unable to dissipate accumulated heat to the outside. The maximum permissible ambient temperature for the entire system needs to be taken into account for the specific application area. DLT-V73 Series User Manual V1.00 121 / 172...
  • Page 122: Electrically Isolated Dlt-V73 Mounting

    (e.g. motor supply) or that are otherwise burdened by consumers. Connecting the DLT-V73 to large electrical loads, such as converters for the forklift motor may result in random restarts, malfunctions and/or irreparable damage to the device. DLT-V73 Series User Manual V1.00 122 / 172...
  • Page 123: Attaching Accessories To The Dlt-V73

    Only use mounting brackets, accessories and mounting materials that have been tested and approved for the respective DLT-V73. All mounting brackets, accessories and mounting materials supplied by Advantech are only intended to be used for attachment of the Advantech Industrial Computers and the peripheral devices and may not be misused. DANGER Risk of accident during vehicle operation if the mounting of the DLT-V73 becomes loose and breaks while driving.
  • Page 124: Vesa Mounting Hole Pattern

    Screw-in depth VESA mounting hole pattern: M6 x 6 mm  Suitable mounting material: Cylinder-head screws int.hex DIN912 M6  Washers ISO 8738 (DIN 1440)-A6-A2  Fig. 13.1: VESA mounting hole pattern on the rear side of the DLT-V73 DLT-V73 Series User Manual V1.00 124 / 172...
  • Page 125: Attach The Mounting Bracket

    The DLT-V73 housing has holes provided for attaching a mounting bracket. Fig. 13.2: DLT-V73 with mounting bracket When a mounting bracket from a DLT-V72 is already present, an adapter plate is required to screw on the mounting bracket Fig. 13.3 adapter plate DLT-V73 Series User Manual V1.00 125 / 172...
  • Page 126: Fig. 13.4 Mounting Bracket With Adapter On Dlt-V73

    2. Mount the Mounting bracket on the adapter plate Fig. 13.4 Mounting bracket with adapter on DLT-V73 Screw-in depth: M6 x 6 mm  Suitable mounting material: cylinder head screws DIN912 M6 Washers DIN 125 - A 6.4 DLT-V73 Series User Manual V1.00 126 / 172...
  • Page 127: Attach Accessories

    3. Only mount the complete system at the deployment location, e.g. to the forklift. Please note: In addition to the mounting bracket, one accessory holder per side can still be attached in each case. DLT-V73 Series User Manual V1.00 127 / 172...
  • Page 128: Electrical Installation

    Electrical Installation 14. Electrical Installation DLT-V73 Series User Manual V1.00 128 / 172...
  • Page 129: Safety Notes

    6. Important: If a DLT-V73 with integrated UPS is installed in a vehicle, the EMERGENCY-OFF switch of the vehicle has no effect on the DLT-V73. This also applies to the peripherals supplied by the device. DLT-V73 Series User Manual V1.00 129 / 172...
  • Page 130: Power Cables And Fuses

    WARNING Electric shock, fire due to incorrect cable routing or insufficient grounding. 1. Use only original Advantech power cables; these meet the specific requirements for low-temperature flexibility, UV resistance, oil resistance, etc. 2. Make sure that the power supply cables are run without kinks and are protected (securely protected against crushing and abrading).
  • Page 131: Observe The Potential Ratios

    (e.g. printers), be sure to power up the peripheral devices at the same time or after the DLT-V73; otherwise, you may encounter start-up problems, malfunctions or even irreparable damage to the device. DLT-V73 Series User Manual V1.00 131 / 172...
  • Page 132: Preparations

    14.2.1. Material required Cable sealing set: Screws and rubber seal Note: Some parts in the scope of delivery are replacement parts. Rubber seal with blind plugs : Fig. 14.2: DLT-V73 cable sealing set DLT-V73 Series User Manual V1.00 132 / 172...
  • Page 133: Fig. 14.3: Dlt-V73 Cable Cover With Screws

    Tools Allen wrench, size 2.5mm, 3mm and 5mm  Philips screwdriver, size 1  Flat head screwdriver, size 0  Torx screwdriver, Tx20  Socket wrench, size 7mm  Torque wrench  DLT-V73 Series User Manual V1.00 133 / 172...
  • Page 134: Procedure

    1. Place the rubber seal in the sealing surface of the cable compartment (see figure). 2. Press the plugs of the rubber seal into the holes of the frame. Fig. 14.4: Rubber seal inserted in the cable compartment DLT-V73 Series User Manual V1.00 134 / 172...
  • Page 135: Ensure A Proper Electrical Connection

    (from inside to outside) 1. Toothed washer (internal) 2.Ring tongue on the power supply cable (center) Fig. 14-8: fasten nut 3.Nut (external) DLT-V73 Series User Manual V1.00 135 / 172...
  • Page 136: Plugging In And Screwing On The Power Supply Cable

    14.3.3. Plugging in and screwing on the power supply cable Mounting screws 1. Plug the DC power supply cable into the DC slot. 2. Tighten the mounting screws hand- tight. Fig. 14.9: Tighten power supply cable DLT-V73 Series User Manual V1.00 136 / 172...
  • Page 137: Secure The Power Supply Cable To The Strain Relief Rail

    Otherwise, the cables may break or the insulation may be damaged. Make sure that the power supply cables are run without kinks and are mechanically protected, securely protected against crushing and abrading. DLT-V73 Series User Manual V1.00 137 / 172...
  • Page 138: Connecting The Usb, Ethernet And Com Cables

    DLT-V73 cannot take place. 5. Only power up the DLT-V73 when all devices have been connected and the DLT-V73 has been closed correctly (remember the cable cover!). Otherwise, you may damage the DLT-V73. DLT-V73 Series User Manual V1.00 138 / 172...
  • Page 139: Close Off Unused Cable Openings

    To prevent fluids or dust penetrating the DLT-V73 during ongoing operation, the cable compartment on the device must be sealed using the corresponding cable cover. The protection class is only ensured if the cable cover is properly installed. DLT-V73 Series User Manual V1.00 139 / 172...
  • Page 140: Pressure Compensation Element

    Prevent system malfunction and property damage Do not modify or remove the pressure compensation element; doing so would make the device leak and the IP protection would no longer be ensured. Fig. 14.15: Pressure compensation element DLT-V73 Series User Manual V1.00 140 / 172...
  • Page 141: Optional Equipment

    Optional Equipment 15. Optional Equipment DLT-V73 Series User Manual V1.00 141 / 172...
  • Page 142: Integrated Ups (Optional)

    Typically 1,5 h, but can be also longer, it depends on the ambient temperature Charging temperature -10 to +50 °C (ambient temperature) Storage temperature -30 to +60 °C Maximum output power 40 W Battery voltage 7,2 V Battery capacity 2000 mAh DLT-V73 Series User Manual V1.00 142 / 172...
  • Page 143: Charging The Battery Pack

    6. Do not continue to use the DLT-V73 if you notice an unusual level of heat or an unusual smell during charging. 7. Provide for sufficient ventilation of the DLT-V73 during charging. DLT-V73 Series User Manual V1.00 143 / 172...
  • Page 144: Replacing The Battery Pack

    1. Use only original Advantech battery packs. 2. The battery packs must be authorized/approved for the DLT- V73. 3. Do not use battery packs from any other Advantech devices; they are not compatible. 4. If battery packs from other manufacturers are inserted in the DLT-V73, the warranty provided by Advantech for this device will be rendered void.
  • Page 145: Fig. 15-3: Wlan Diversity Antenna

    3. Carefully fold the WLAN diversity antenna upwards to avoid stressing the cables. Fig. 15-4: opened WLAN Diversity Antenna 4. Loosen the battery cover by removing the fastening screws and removing the battery cover. Fig. 15-5: Screws from the battery cover DLT-V73 Series User Manual V1.00 145 / 172...
  • Page 146: Fig. 15-6: Opened Battery Compartment

    Optional Equipment Fig. 15-6: opened battery compartment DLT-V73 Series User Manual V1.00 146 / 172...
  • Page 147: Fig. 15-7: Inserted Battery Pack

    Make sure that the removal tab of the battery pack is under the battery cover. Fig. 15-8: Removal tab under the battery cover 4. Mount the WLAN diversity antenna (torque 1.0 Nm) 5. Fasten the antenna cap again as specified (torque 1.0 Nm) DLT-V73 Series User Manual V1.00 147 / 172...
  • Page 148: Screen Defroster (Optional)

    2. If vehicles on which DLT-V73 devices with a Screen-Defroster and an integrated UPS are installed are parked or stored for a significant length of time, disconnect the DLT-V73 from the vehicle battery. DLT-V73 Series User Manual V1.00 148 / 172...
  • Page 149: Screen Blanking (Mblank)

    NOTE The “MBlank Manual” is available at our websites. 15.4. USB recovery stick (optional) The optional Advantech recovery stick allows images to be backed up and restored onto the DLT-V73 when necessary (backup & recovery). NOTE The “Advantech USB Recovery Stick Manual” is available at our websites.
  • Page 150: Keyboards And Keyboard Mounts (Optional)

    Full keyboard SIK65 Protection class IP66  Keyboard layouts:  German Fig. 15.9: Full keyboard Small keyboard SIK21 21 keyboard  Protection class IP66  Fig. 15.10: 21-key keypad Fig. 15.11: Keyboard mounting examples DLT-V73 Series User Manual V1.00 150 / 172...
  • Page 151: Scanner And Scanner Bracket (Optional)

    You can connect scanners to either the USB interface or the serial interface. If connected to COM1, the scanner can be powered through the interface with a voltage of 5 V. Use only scanners that have been approved by Advantech. Optional scanner brackets are available for the DLT-V73.
  • Page 152: Touch Stylus (Optional)

    Optional Equipment 15.7. Touch stylus (optional) Advantech offers some touch stylus pens (with associated mountings) for resistive and PCAP touchscreens. Use only touch stylus that have been approved by Advantech. NOTE The Accessory catalog is available at our websites. Touch stylus with mounting...
  • Page 153: Protective Film For Touchscreen (Optional)

    6. Position the protective film tight at one corner of the viewing window. The adhesive side of the film must be facing downwards! 7. Carefully press on the foil. 8. Then using a wiper (wooden wiper) to push out any air bubbles to the corners. DLT-V73 Series User Manual V1.00 153 / 172...
  • Page 154: Repairs, Modifications

    Repairs, Modifications 16. Repairs, Modifications DLT-V73 Series User Manual V1.00 154 / 172...
  • Page 155: Authorized Advantech Service Centers

    Accessories and peripherals Accessories and peripherals may only be installed or integrated if expressly approved by Advantech for the respective DLT-V73. If other parts are attached or installed and connected, claims for warranty and / or product liability will be lost.
  • Page 156: Maintenance

    Maintenance 17. Maintenance DLT-V73 Series User Manual V1.00 156 / 172...
  • Page 157: Regular Maintenance Work

    Risk of accident due to unstable attachment of DLT-V73 If the attachment of DLT-V73 becomes loose and breaks during moving, this can lead to severe accidents. Perform checks for the attachment as described above at regular intervals. DLT-V73 Series User Manual V1.00 157 / 172...
  • Page 158: Replacing The Battery Pack

    Maintenance 17.2. Replacing the battery pack See manual section 15.1 Integrated UPS (optional) . 17.3. Replacing the touchscreen protective film See manual section 15.8 Protective film for touchscreen (optional) DLT-V73 Series User Manual V1.00 158 / 172...
  • Page 159: Troubleshooting

    Troubleshooting 18. Troubleshooting DLT-V73 Series User Manual V1.00 159 / 172...
  • Page 160 Operating system Operating system or image damaged must be reinstalled No WLAN connection Connection deactivated Activate connection in the Control Panel AP access problem List ACL and check access rights to AP DLT-V73 Series User Manual V1.00 160 / 172...
  • Page 161 No network connection Connection deactivated Activate connection in the Control Panel Invalid network settings Check network and protocol settings Network problems Check status LEDs on RJ45 connection socket, plug connection and cable DLT-V73 Series User Manual V1.00 161 / 172...
  • Page 162: Guidelines And Certificates

    Guidelines and Certificates 19. Guidelines and Certificates DLT-V73 Series User Manual V1.00 162 / 172...
  • Page 163: Simplified Eu Declaration Of Conformity

    No.1, Alley 20, Lane 26, Rueiguang Road, Neihu District, Taipei 114, Taiwan, R.O.C. The importer: Advantech Europe B.V. Science Park Eindhoven 5708, 5692ER, Son en Breugel, The Netherlands Hereby, Advantech Co., Ltd. declares that the radio equipment type DLT-V73XXXXXXXXXXXXXXXX, DLTV73XXXXXXXXXXXXXXXX, DLT-V7310PXXXXXXXXXXXXXXXX, DLT-V7312PXXXXXXXXXXXXXXXX (X=0-9, A-Z, a-z, Any character, “-”...
  • Page 164: Usa/Canada: Fcc Part 15 Statement

    Any change or modification which is not expressly approved in the corresponding pages can lead to the withdrawal of the operating license for this device. FCC ID Please find the FCC ID on the device labels. DLT-V73 Series User Manual V1.00 164 / 172...
  • Page 165: Ices Canada

    We hereby confirm the conformity of our products compliant with the RoHS Directive 2011/65/EU of the European Parliament and Council of June 8, 2011 on the restriction of the use of hazardous substances in electrical and electronic equipment. DLT-V73 Series User Manual V1.00 165 / 172...
  • Page 166: Red (Radio Equipment Directive) 2014/53/Eu

    Guidelines and Certificates 19.5. RED (Radio Equipment Directive) 2014/53/EU With regard to the RED (Radio Equipment Directive) 2014/53/EU the statements in the declaration of conformity for the DLT-V73 Industrial Computer apply. DLT-V73 Series User Manual V1.00 166 / 172...
  • Page 167: Ce Marking

    Guidelines and Certificates 19.6. CE marking The devices of the DLT-V73 series were tested and fulfill the CE conformity requirements and carry the CE mark on the rear side of the device. DLT-V73 Series User Manual V1.00 167 / 172...
  • Page 168: Cnrohs

    Guidelines and Certificates 19.7. CNROHS DLT-V73 Series User Manual V1.00 168 / 172...
  • Page 169: Return Shipment Form

    [ ] Delivery was incomplete Missing parts: [ ] The following error occurs when operating the unit: [ ] Separate error report is enclosed Advantech Europe B.V. Service & Support Email: helpdesk.munich@advantech.de Phone: +49 (0)89 / 41 11 91 999 DLT-V73 Series User Manual V1.00...
  • Page 170 List of figures 21. List of figures DLT-V73 Series User Manual V1.00 170 / 172...
  • Page 171 Fig. 11-8: QUECTEL EM05/EM06 – Taskbar WWAN Option Cellular (Locked) ..108 Fig. 11-9: QUECTEL EM05/EM06 – Taskbar WWAN Option Cellular (Unlock SIM) . 109 Fig. 11-10: QUECTEL EM05/EM06 – Taskbar WWAN Option Cellular (Enter PIN) .. 110 DLT-V73 Series User Manual V1.00 171 / 172...
  • Page 172 Fig. 15.9: Full keyboard .................... 150 Fig. 15.10: 21-key keypad ..................150 Fig. 15.11: Keyboard mounting examples ..............150 Fig. 15.12: Example scanner bracket ................ 151 Fig. 15.13: Examples touch stylus ................152 DLT-V73 Series User Manual V1.00 172 / 172...

This manual is also suitable for:

Dlt-v7310pDlt-v7310rDlt-v7312pDlt-v7312rDlt-v7312d

Table of Contents