Table of Contents
Advertisement
Quick Links
Advertisement
Table of Contents

Subscribe to Our Youtube Channel
Related Manuals for Advantech DLT-M8110


Summary of Contents for Advantech DLT-M8110
-
Page 1: User Manual
User Manual DLT-M8110 Computer PWS-870 User Manual... - Page 2 Copyright The documentation and the software included with this product are copyrighted 2016 by AdvantechDLoG Co., Ltd. All rights are reserved. AdvantechDLoG Co., Ltd. reserves the right to make improvements in the products described in this manual at any time without notice. No part of this manual may be reproduced, copied, translated or transmitted in any form or by any means without the prior written permission of AdvantechDLoG Co.,Ltd.
-
Page 3: Declaration Of Conformity
Declaration of Conformity CE Conformity Statement Radio products with the CE alert marking comply with the R&TTE Directive (1999/5/ EC) issued by the Commission of the European Community. Compliance with this directive implies conformity to the following European Norms (in brackets are the equivalent international standards) ... -
Page 4: Technical Support And Assistance
The firmware setting is not accessible by the end user. FCC ID : M82-DLM8110WL Technical Support and Assistance Visit the AdvantechDLoG website at http://support.advantech.com where you can find the latest information about the product. Contact your distributor, sales representative, or Advantech's customer service... -
Page 5: Safety Instructions
AC adapter while it is inside a carrying case. Use only the AC adapter, power cord, and batteries that are approved for use with this DLT-M8110. Use of another type of battery or AC adapter may cause risk of fire or explosion. ... -
Page 6: Battery Safety
Battery Safety RTC Battery Caution RISK OF EXPLOSION IF BATTERY IS REPLACED BY AN INCORRECT TYPE. DISPOSE OF USED BATTERIES ACCORDING TO THE INSTRUCTIONS. Do not place the battery incorrectly as this may cause danger of explosion. Dispose of used batteries according to the manufacturer's instructions. ... -
Page 7: Rugged And Ready To Go
Chapter 1 Rugged and Ready to Go... -
Page 8: Symbols Used In This Manual
This user manual outlines all you need to know to set up and use your DLT-M8110. If you have any further questions or queries, contact our technical support team via our website: http://www.advantechdlog.com/... -
Page 9: Optional Accessories
• AC power adaptor • 2x slim Batteries • Safety notes • Quick start guide Optional Accessories • Desk docking station • Vehicle docking station • Big battery • Battery charger... -
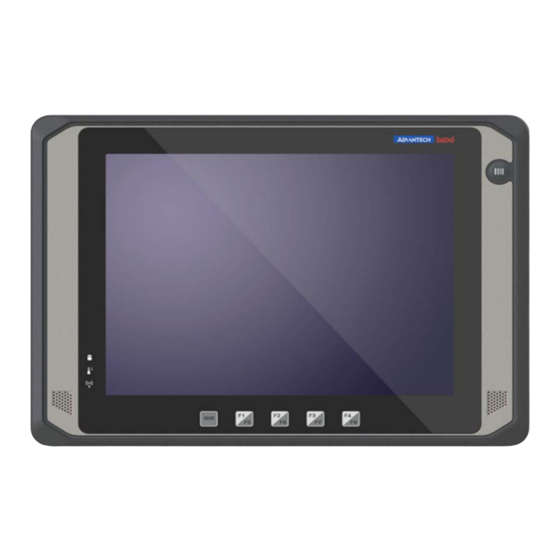
Page 10: Front View
Exploring the DLT-M8110 Front View 1 5 6 7 8 9 2 4 3 Component Barcode/camera trigger button Speaker 8 programmable function keys Shift LED WiFi LED Bluetooth LED Storage LED Power LED Temperature LED... -
Page 11: Rear View
Rear View 1 2 3 Component Camera Battery Hand strap... -
Page 12: Side Views
Side Views 1 2 Component USB 3.0 DC-in connector... -
Page 13: Top View
Top View 2 1 Component Barcode scanner Power on/off button Bottom View 1 Component Docking connector... - Page 14 Chapter 2 Getting Started & Making Connections...
-
Page 15: Connecting The Power
Connecting the Power Before using your DLT-M8110, you must fully charge the battery. Connect the power adapter as shown and leave to charge for: • A minimum of 2 hours when using thin battery • A minimum of 5 hours when using think battery ... - Page 16 Chapter 3 Turning on & Controlling the DLT-M8110...
-
Page 17: Using The Touch Screen
1. Press and hold the power button to turn on the DLT-M8110. Controlling the DLT-M8110 Using the Touch Screen The DLT-M8110 is equipped with touch screen technology, for ease of use when you are on the go. Simply tap the screen with your finger to select icons and run applications. - Page 18 WiFi access requires a separate purchase of a service contract with a wireless service provider. Contact a wireless service provider for more information. The DLT-M8110 comes pre-loaded with WLAN module, you can send and receive signals to a WiFi network then synchronize files.
- Page 19 A wireless network can be added either when the network is detected or by manually entering settings information. Before doing these steps, determine if authentication information is needed. 1. Click the wireless connection icon in the notification area. 2. Turn on WiFi and select one of the wireless connections and click Connect. 3.
-
Page 20: Making Bluetooth Connections
The wireless connection icon in the notification area shows a connected status whenever a wireless connection is present. Making Bluetooth Connections The DLT-M8110 comes with built-in Bluetooth functionality that allows you to connect and communicate with other Bluetooth-enabled devices. Setting Up Bluetooth Follow these instructions to set up a Bluetooth connection. - Page 21 2. In notification area, tap Bluetooth logo and select Add a Device.
- Page 22 3. Select Bluetooth device and tap Next to add Bluetooth device. 4. Select Next for both DLT-M8110 and the blue tooth device after passkey is confirmed. 5. The Bluetooth device is successfully added into DLT-M8110.
- Page 23 6. To view Bluetooth device added, tap Show Bluetooth Devices. It is recommended that you use a passkey to prevent unauthorized access to your DLT-M8110.
- Page 24 Chapter 4 Using MDevice utility...
- Page 25 MDevice for DLT-M8110 MDevice is a useful tool for user to get DLT-M8110 basic system information and control DLT-M8110 easily Install MDevice Utility By launching the installer (SetupMDevice.msi), user can simply install MDevice Utility. 1. Double Click installer to trigger install process 2. Click Next ...
- Page 26 3. Modify install folder if necessary and set who can use this tool; then click Next again ...
- Page 27 4. Click Next ...
- Page 28 5. The installation is processing, please wait till it finished. 6. Install Completely ...
- Page 29 After install ... 1. Every time device boots up, MDevice Utility will be launched automatically. 2. MDeviceUtility link will appear in Desktop 3. MDevice_Utility and Uninstall links will appear in program menu ...
- Page 30 Launch MDevice Utility By double clicking the MDevice_Utility link in Desktop or clicking the link in user program menu, user can launch the utility manually. The utility will run at background. User can start to configure the utility or terminate it by bellow steps: Start Step1. Right Click MD icon in System tray: Step2. Choose Start Config Tool ...
- Page 31 2. Terminate the utility Step1. Right Click icon in System tray: Step2. Choose Close Login...
- Page 32 In this form, user can decide which mode the utility will be. For User mode, user can simply click "Read only without password". For Administrator mode, user should input the ADMIN password and click "OK". For Service mode, user are asked to input a one‐time password, which generated by Key‐Generate tool. Login Permission There are three modes in MDevice Utility. Use Mode: User is able to view the whole setting items, but not allowed to change the setting. Corresponding icons: . Administrator Mode: User is able to view the whole setting items, but only allowed to set limited setting items. Some of the setting items are impossible to changed. ...
- Page 33 Corresponding icons: Service Mode: User is able to view/modify the whole setting items. Corresponding icons: Menu In menu form, user can go into each setting by simply click the button. Note: Change Password is hidden in user mode. ...
-
Page 34: System Information
System Information In this form, user is able to watch the system information. Only in service mode, user can click the icon to configure the S/N. And then, user can back to menu page by clicking or . Power Setting... - Page 35 In this form, user can configure the power setting. Switch‐On: To configure which source is allowed to turn on the device. Switch‐Off: To configure which source is allowed to turn off the device. Screen Display: To configure the behavior while receiving ignition off event. Block input: While receiving ignition off event, all the inputs (ex. touch, keyboard, mouse) will be blocked. Show counter: While receiving ignition off event, utility will show a count down dialog to notify the user. Time Delay Seconds: To configure the delay seconds. ...
- Page 36 Ignition Off Delay: The waiting time to trigger a OS shutdown event while ignition off. Hard Off Delay: The waiting time to trigger a power shutdown event while ignition off. Battery Capacity Threshold : To configure the percentage threshold of battery for switch‐on/off event. Sensor Temperature Threshold : To configure the temperature threshold of each senor for switch‐on/off event. And then, user can back to menu page by clicking or . Function Key Setting ...
-
Page 37: Module Setting
This form is for setting or viewing the function of each function key. In Section 1: User can switch the type of function. There are 4 types of function user can set: VK codes: The function key which is set to this type will send virtual key codes which supports max to 3 combination of keys. Program: The function key which is set to this type will trigger a application. Text: The function key which is set to this type will send a plain text. Camera: The function key which is set to this type will launch the camera application. In Section 2: User can set the details of the function in this section. In Section 3: User can switch the function key. Module Setting... -
Page 38: Antenna Setting
WLAN: Enable/Disable WiFi Bluetooth: Enable/Disable BT Camera: Enable/Disable Camera Barcode: Enable/Disable Barcode G‐sensor auto rotate: Enable/Disable G‐sensor auto rote feature Antenna Setting... -
Page 39: Brightness Setting
This form is for selecting Antenna. Brightness Setting... -
Page 40: Network Startup
This form is for setting brightness in external power mode or battery mode. Network Startup... - Page 41 Network startup feature will check the whether device is connected with server at boot‐up stage and take action according to the check result. Enable Network Startup: Checked if user want to enable this feature Programs for Startup: It's for setting the startup program list, user can add program by clicking Add program ... button, or remove program by Removed program button. Network Adapter: To specify a network adapter for the network checking event. Server IP‐address(PING) : It's for setting the server IP. Time Waiting for network : It's for setting the waiting time for network, if devices cannot connect to server within the time limit, the check result of network is failed. Validate adapter availability at startup: Checked if user need to check the adapter as well. ...
-
Page 42: Change Password
Start programs even without network: Checked, if user need to launch the startup programs which list in Programs for Startup, even the checking result is failed. Show info dialog: It is for setting the text information which will be shown during checking network. Touch Configuration Capacitance touch sensitive : It's for setting the sensitive of touch. It's only available when device is using capacitance touch. Resisted Touch Calibration: It's for touch calibration. It's only available when device is using Resisted touch. Change Password... - Page 43 This form is for changing the ADMIN password.
-
Page 44: Maintenance
Chapter 5 Maintenance... -
Page 45: Maintaining The Battery
LCD screen cleaner. Cleaning the DLT-M8110 1. Turn off the DLT-M8110 and unplug the power cord. 2. Wipe the screen and exterior with a soft, damp cloth moistened only with water. Do not use liquid or aerosol cleaners on the screen, as these will discolor the finish and damage the screen. - Page 46 Chapter 6 Appendix...
-
Page 47: Specifications
Specifications Feature Specifications Intel Atom Baytrail-I, E3827 (1.75GHz) CPU & Chipset Single SO-DIMM, DDR3L-1067, Up to 4GB. Memory SQF MSATA 820 MLC (-40 ~ 85°C), SLC option Storage 10.4" XGA (1024 x768) LED Backlight LCD (340 bits) Display Gorilla Glass for PCAP touch solution or Chemical Tempered Glass for Resistive Touch Panel touch solution (Optional) Sensor... - Page 48 810G). Description: Drop: 26 drops from 1.22 m onto concret EN60721 5M3 certified CE/FCC/SAR/R&TTE/Telecom Safety UL/CB / LVD Accessories Vehicle Docking Station Desk Docking Station Big Battery Battery charger Dimensions 304mm (W) x 221mm (D) x 31.84mm (H) (w/thin battery) Weight 1.3kg without hand strap...
-
Page 49: Led Status
LED Status Power / Thermal LED DUT on/off Green LED Orange LED Red LED Remark OFF OFF OFF OFF System OFF (S5) ON Static OFF OFF System ON (S0) ON Blinking OFF OFF System SLEEP (S3) ON OFF OFF Static Over Temperatur e ON OFF OFF Blinking ... - Page 50 ON x Static OFF OFF System On (S0) Battery > 30% ON OFF Static OFF Battery Charging ON OFF OFF OFF Battery Full ON x Blinking OFF OFF Battery < 30% light 0.5sec,dark 0.5sec ON x OFF Blinking OFF Battery < 10% light 0.2sec,dark 0.8sec ...
- Page 51 Removed ...
Need help?
Do you have a question about the DLT-M8110 and is the answer not in the manual?
Questions and answers