Table of Contents
Advertisement
Quick Links
Advertisement
Table of Contents

Related Manuals for Strymon BRIG


Summary of Contents for Strymon BRIG
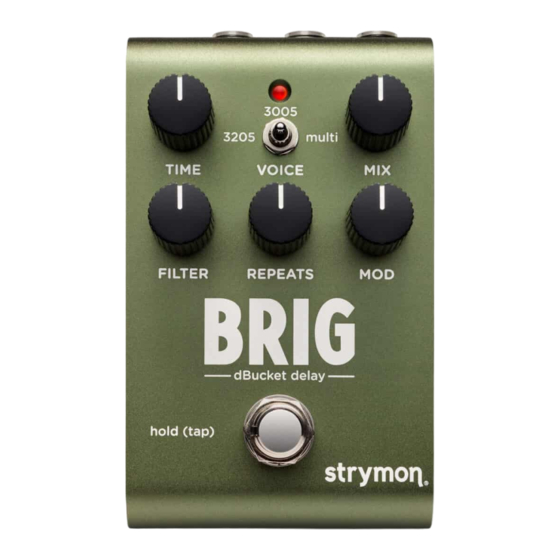
- Page 1 dBucket delay USER MANUAL...
-
Page 2: Table Of Contents
Configuring Brig for MultiSwitch Plus ����������������������������������������������������������������������� 22 Configuring MultiSwitch Plus for Brig ����������������������������������������������������������������������� 23 Using MultiSwitch Plus in Preset Mode �������������������������������������������������������������������� 24 Saving Brig Presets with MultiSwitch Plus �������������������������������������������������������������� 24 Using MultiSwitch Plus in TAP-FAVORITE-INFINITE Mode �������������������������������������� 25 MIDI Functionality ������������������������������������������������������������������������������������������� 26 Configuring Brig to Use MIDI �������������������������������������������������������������������������������������... -
Page 3: Knobs And Switches
Knobs and Switches Front Panel Controls VOICE The 3-way toggle switch selects the chip style and configuration� This affects tonal character and time range: 3205: (left position) 30–300ms� Recreates the character of vintage delay pedals that used a single low voltage MN3205 BBD chip for gritty repeats—great for slap back, leads, and sci-fi sounds�... - Page 4 Knobs and Switches Front Panel Controls LED INDICATOR Blinks at the tempo of the delay TIME when the effect is engaged� Use the FOOTSWITCH to engage and disengage the effect� Also flashes additional colors when configuring Power Up Mode features (see page 9)�...
-
Page 5: Onboard Tap Mode
Knobs and Switches Onboard Tap Mode Press and hold the FOOTSWITCH for 1 second to enter/exit Onboard Tap Mode and tap quarter notes to set your delay time�* The LED will flash BLUE to indicate the tempo� Maximum tap range is 2 seconds� The TIME knob sets the TAP DIVISION when in Tap Mode�... -
Page 6: Rear Panel I/O And Control
JFET stereo preamp� Mono and Stereo I/O Cable Connections The Brig IN and OUT jacks can accept either TS or TRS type 1/4” cables for mono or stereo connections, respectively: NOTE: With a TRS stereo connection, the Tip carries the left signal and the Ring carries the right signal�... - Page 7 Brig’s IN and OUT� Set the I/O Selector switch to mono� Mono In - Stereo Out: To feed a mono signal into Brig, use a TS cable to Brig’s IN� Connect a TRS + dual TS cable to Brig’s OUT to route Brig’s stereo signal to a stereo pedal�...
- Page 8 • 9VDC • 250mA minimum (Adapter sold separately�) EXP/MIDI Multifunction communication jack for external control of Brig’s features and functions� Can be set to operate in one of the following modes� (See “Configuring the EXP/MIDI Jack” on page 13 for details�)
-
Page 9: Power Up Modes
Power Up Modes Bypass Mode for Mono I/O With the rear I/O Mode Selector set to mono, the Brig pedal is set for True Bypass as the default�* Setting Brig to Buffered Bypass Mode preserves the high frequency response of your instrument’s signal through your pedal chain and long cable runs�... -
Page 10: Spillover Mode
Power Up Modes Spillover Mode Setting Brig to Spillover Mode allows the wet delay signal of the currently selected preset to “spill” into bypass—or into the next loaded preset if you’re using a Multiswitch Plus or MIDI for preset switching�... -
Page 11: Dry Signal
• Kill Dry Mode mutes the analog dry path signal, allowing the MIX knob to strictly control the “wet” effect output level� This is often preferable if using Brig within an amp’s parallel effects loop or a mixer’s aux or effects send�... -
Page 12: Led Brightness
LED Brightness You can adjust the brightness of Brig’s LED to optimize visibility in any environment or lighting conditions� Press and hold the FOOTSWITCH for at least 2 seconds while powering up Brig� Once the LED flashes RED, release the footswitch�... -
Page 13: Configuring The Exp/Midi Jack
Power Up Modes Configuring the EXP/MIDI Jack Press and hold the FOOTSWITCH for at least 2 seconds while powering up Brig� Once the LED flashes RED, release the footswitch� 3005 multi 3205 TIME VOICE FILTER REPEATS dBucket Delay hold (tap) - Page 14 “Configuring Brig to Use MIDI” on page 26�) • MIDI - Full MIDI functionality is available by sending MIDI Program Change messages via 1/4” TRS MIDI connection using a Strymon Conduit or MIDI EXP cable� Up to 300 presets are available via MIDI� (See “Saving Presets in MIDI Mode”...
-
Page 15: External Control
TRIPLET, EIGHTH, DOTTED EIGHTH, and QUARTER note� TIME NOTE: Incoming MIDI Clock will also be sent to Brig’s MIDI Out when the MIDI Out is set to THRU� See page 30� pg 15... -
Page 16: Expression Pedal Setup
NOTE: Your expression pedal assignment is saved per Favorite setting or MIDI preset� NOTE: If Brig is set to respond to MIDI EXPRESSION and the EXP/MIDI jack is set to MIDI Mode, you can send MIDI CC# 100 with values 0 (heel) to 127 (toe) to perform the expression pedal setup�... -
Page 17: Favorite Switch Setup And Compare Mode
Dial in your desired sound� To save your sound as the new Favorite setting, press and hold the Brig footswitch for at least 3 seconds, until the LED blinks GREEN� BLUE Then, press and hold the Brig footswitch until the LED lights save the Favorite setting�... - Page 18 Favorite Switch Setup and Compare Mode (continued) Compare Mode With the Favorite or MIDI preset recalled, as a knob or switch is adjusted, the LED flashes GREEN when the current knob or toggle switch position matches the setting of the preset� NOTE: Power Up Mode settings are applied globally and not stored individually per preset�...
-
Page 19: Tap And Infinite Mode Jumper Switch Configuration
The Strymon MiniSwitch includes an internal jumper switch that must be changed from its factory FAV/BOOST Mode setting to work for Brig’s Tap and Infinite switching� Follow these steps to configure the MiniSwitch’s jumper switch� Unscrew the four screws on the bottom of the MiniSwitch chassis�... -
Page 20: External Tap Mode Switch Setup
13 or more info�) Connect an external switch with a TRS cable to the EXP/MIDI jack� Tap in a tempo in quarter notes to set the delay time� The Brig pedal’s LED will flash BLUE to indicate the tempo� Maximum tap range is 2 seconds�... -
Page 21: Infinite Mode Switch Setup
Connect a MiniSwitch or other external momentary footswitch with a TRS cable to provide infinite delay repeats on demand, whenever the switch is held� NOTE: Your Strymon MiniSwitch’s internal jumper switch must be changed from the factory-default FAV/BOOST Mode to the TAP Mode setting for Infinite Mode Switch functionality—see page 19�... -
Page 22: Configuring Brig For Multiswitch Plus
Turn the MIX knob all the way clockwise to set the EXP/MIDI jack to MIDI Mode� The LED should be BLUE� Press the Brig FOOTSWITCH to exit and store the MIDI CHANNEL, the MIDI OUTPUT setting, and the EXP/MIDI Jack Mode�... -
Page 23: Configuring Multiswitch Plus For Brig
Configuring MultiSwitch Plus for Brig Configure MultiSwitch Plus for use with Brig for either PRESET Mode for preset selection or CUSTOM Mode for TAP - FAVORITE - INFINITE control� Connect a TRS cable to Brig’s EXP/MIDI jack� For PRESET Mode - Press and hold the A footswitch on MultiSwitch... -
Page 24: Using Multiswitch Plus In Preset Mode
Step on an illuminated switch to bypass Brig� Saving Brig Presets with MultiSwitch Plus Dial in the sound that you would like to save as your preset on Brig� Press and hold the Brig FOOTSWITCH for at least 3 seconds, until its LED blinks GREEN�... -
Page 25: Using Multiswitch Plus In Tap-Favorite-Infinite Mode
Using MultiSwitch Plus in TAP-FAVORITE-INFINITE Mode Controlling Brig features using MultiSwitch Plus� • Tap on footswitch A to set the TAP TEMPO rate for your Brig repeats to follow� • Press and release footswitch B to load your designated FAVORITE preset�... -
Page 26: Midi Functionality
MIDI Functionality Configuring Brig to Use MIDI Using MIDI unlocks a set of tools that can be used to load any of Brig’s 300 preset locations using a suitable MIDI controller or interface connected to the Brig EXP/MIDI jack� This requires a Strymon MIDI EXP cable or a MIDI controller/interface, such as Strymon Conduit, with at least one quarter-inch output�... - Page 27 Configuring Brig to Use MIDI (continued) STEP 1 – SET EXP/MIDI JACK TO MIDI MODE Press and hold the FOOTSWITCH for at least 2 seconds while powering up Brig� Once the LED flashes RED, release the footswitch� 3005 multi 3205...
- Page 28 MIDI Program Change message� Once a message is received, the pedal will be set to the MIDI channel that carried the message and exits the Power Up Mode to allow you to begin using Brig� (If you’ve successfully configured MIDI Channel 4-16, you can skip item on the next page�)
- Page 29 (and the LED will light RED) if MIDI is properly connected and configured� NOTE: If you are only sending data to Brig using the Strymon MIDI EXP cable, the MIDI OUT Mode must be set to OFF� (See...
- Page 30 Turn the FILTER (MIDI OUT) knob to select what kind of MIDI data is sent from Brig to other MIDI devices� The LED will flash momentarily to indicate your selection� • OFF: (default, minimum) - No MIDI messages are sent out of Brig�...
-
Page 31: Saving Presets In Midi Mode
LED lights BLUE� To save the current state of the pedal to any preset location, send the unit a MIDI Program Change on Brig’s currently selected MIDI channel� For example: • Send MIDI Program Change #10 to save the preset to the corresponding memory location on the pedal�... -
Page 32: Midi Specifications
Change 1 instead of 0� In these setups, increment the MIDI Program Change locations above by one� The Brig pedal always powers up in MIDI Patch Bank 0, so if you plan to stay within the first 127 presets, simply send a standard MIDI Program Change message to load a preset�... -
Page 33: Midi Ccs
MIDI Specifications (continued) MIDI CCs PARAMETER RANGE ENUMERATION Bank Select (0=Bank 1, 1=Bank 2, 3=Bank 3) Voice (1=3205, 2=3005, 3=multi) Time 0-127 Filter 0-127 Repeats 0-127 0-127 0-127 Tap Division (0=triplet, 1=eighth, 2=dotted eighth, 3=quarter) Footswitch 0, 127 (0=release, 1-127=press) 0, 127 (any value) Infinite... -
Page 34: Factory Reset
Performing a Factory Reset restores the pedal to its factory default Power Up functions, and replaces all stored presets with their factory default settings� Press and hold the FOOTSWITCH for at least 2 seconds while powering up Brig� Once the LED flashes RED, release the footswitch� 3005 multi 3205... -
Page 35: Factory Default Settings
Factory Reset (continued) Factory Default Settings FEATURE FACTORY DEFAULT SETTING Bypass Mode: True Bypass Spillover Mode: Off Dry Signal: Digital LED Brightness: Maximum Assigned to Expression Mode and configured to EXP/MIDI Jack: control the MIX knob MIDI Channel: 1 MIDI OUT Mode: Off MIDI Expression: On pg 35... -
Page 36: Features
• Full-featured MIDI capability (bi-directional Continuous Controller & Program Change messages and 300 presets) • USB-C jack for performing firmware updates and connection to Strymon Nixie editor software • +10dBu maximum input level easily handles instrument and line level signals •... -
Page 37: Specifications
Specifications FEATURE SPECIFICATION VALUE Input Impedance: 1 Meg Ohm Output Impedance: 100 Ohm A/D & D/A: 24-bit 96kHz Max Input Level: +10 dBu Signal/Noise: 116 dB typical Bypass Switching: True Bypass (electromechanical relay switching) Dimensions: 4�5” deep x 2�7” wide x 2�2” tall Power Adapter Requirements Use an adapter with the following rating: 9VDC, center negative, 250mA minimum�... -
Page 38: Appendix 1: Sample Settings
Appendix 1: Sample Settings pg 38... - Page 39 Sample Settings Classic Mod Delay 11 O’Clock Slap 3005 3005 3205 multi 3205 multi TIME VOICE TIME VOICE FILTER REPEATS FILTER REPEATS MIDI Program Change 0 MIDI Program Change 1 MiniSwitch Favorite MultiSwitch Plus A Always On Verby 3005 3005 3205 multi 3205...
-
Page 40: Appendix 2: Power Up Modes Quick Reference
Appendix 2: Power Up Modes Quick Reference pg 40... - Page 41 All power up functions persist through power cycles� Press and hold theBrig FOOTSWITCH for at least 2 seconds while powering up Brig� Once the LED flashes RED, release the FOOTSWITCH� Adjust the desired functions with the controls noted below�...
- Page 42 Power Up Modes - Quick Reference (continued) POWER UP MODE OPTIONS MIDI CHANNEL Turn the TIME knob - status shown on the LED • 1: GREEN (default, minimum knob position) page 28 for an illustrated • 2: AMBER (10 o’clock knob position) description�...
-
Page 43: Strymon Non-Transferable Limited Warranty
In no event will Strymon be liable for more than the amount of the purchase price, not to exceed the current retail price of the product�... -
Page 44: Safety And Compliance Information
4) Consult the dealer or an experienced radio/TV technician for help� © 2023 Damage Control Engineering, LLC� Strymon, the Strymon logo, and Damage Control Engineering are trademarks or registered trademarks of Damage Control Engineering, LLC� in the U�S� and/or other jurisdictions�...
Need help?
Do you have a question about the BRIG and is the answer not in the manual?
Questions and answers