
Subscribe to Our Youtube Channel
Related Manuals for Rinnai Evolve 952


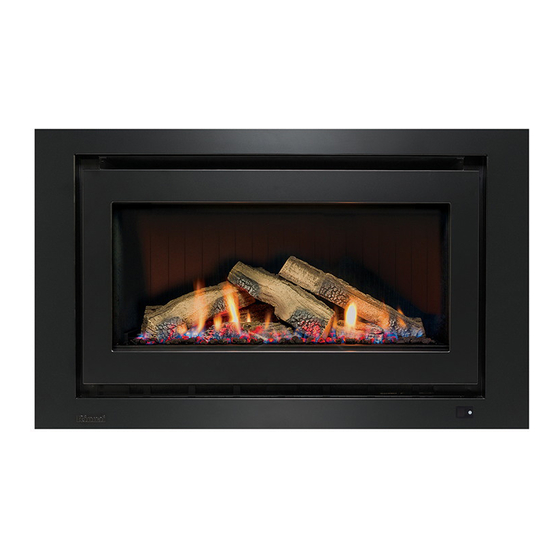
Summary of Contents for Rinnai Evolve 952
- Page 1 Models: RHFE952ETRN RHFE952ETRL RHFE1253ETRN RHFE1253ETRL Evolve 952 / 1253 Installation guide...
- Page 2 Important Appliance must be installed with a Rinnai approved flue system. This appliance shall be installed in accordance with: Manufacturer’s installation instructions Current: AS/NZS 5601 Gas Installations AS/NZS 5263 Gas Appliances General Requirements AS/NZS 3000 Electrical Standards AS/NZS 3500 Plumbing and Drainage Standards For use with Natural Gas or Universal LPG as indicated on the appliance.
-
Page 3: Table Of Contents
Contents Before you start ............4 Specification ............5 Dimensions ............6 Gas supply............7 Electrical supply............7 Wall penetration ............8 Framing dimensions ..........9 Clearances from combustibles ......10 TV installation ............12 Flueing options .............13 Evolve installation overview........14 Connection flue system ........15 Install heater into enclosure........16 Removing and replacing the glass panel .....17 Install burn media - log set ........18 Adding the granules..........20... -
Page 4: Before You Start
Failure to follow these instructions could cause a malfunction of the appliance. This could result in serious injury and/or property damage. Flue installation guide These instructions are to be used in conjunction with the Rinnai Arriva and Evolve flue installation guide supplied with the flue kits. Carton contents The components for the Evolve are supplied in three separate cartons (four if a mesh guard is purchased). -
Page 5: Specification
Specification Inbuilt power flued convection fan heater operated by a simple infra-red remote or by the Rinnai Wi-Fi app that allows full thermostatic control, as well as other features such as timers. Different burn media options are available. Specification summary Gas connection ½... -
Page 6: Dimensions
Dimensions (mm) Evolve 952 1020 Glass dimensions 700 x 305 Evolve 1253 1255 1320 Glass dimensions: 1000 x 305 | Evolve 952/1253 Installation Guide: 13115-F 06-22... -
Page 7: Gas Supply
Consult a qualified electrician if direct wiring is required as it must comply with AS/NZS 5601.1 and AS/NZS 3000 and other relevant local regulations. Evolve 952/1253 Installation Guide: 13115-F 06-22 | 7... -
Page 8: Wall Penetration
Centreline of enclosure Gas supply penetration Ø 80~100 430 (right) 420 (left) Base of enclosure Evolve 1253 Flue pipe penetration Centreline of enclosure Gas supply penetration Ø 80~100 580 (right) 570 (left) Base of enclosure | Evolve 952/1253 Installation Guide: 13115-F 06-22... -
Page 9: Framing Dimensions
Framing dimensions The main points governing location are flueing and warm air distribution. The Rinnai Evolve has an integrated zero clearance box that isolates the appliance from combustible materials. This means it can be installed directly into a decorative fireplace constructed from materials such as wood or plaster. -
Page 10: Clearances From Combustibles
For every 50 mm of added mantel depth there must be an additional 100 mm of clearance from the edge of the glass. For example: Mantel depth A: clearance required 300 mm 500 mm 350 mm 600 mm 400 mm 700 mm | Evolve 952/1253 Installation Guide: 13115-F 06-22... - Page 11 The below diagrams are to assist people who are determining the clearance area around the Evolve without having the unit on site. Evolve 952 1500 Minimum above fire Clearance Glass width Clearance Evolve 1253 1800 Minimum above fire 1000 Clearance Glass width Clearance Evolve 952/1253 Installation Guide: 13115-F 06-22 | 11...
-
Page 12: Tv Installation
TV is not to be installed above a fireplace. Rinnai does not accept any responsibility for damage to a 400 mm TV resulting from the use of minimum this information. | Evolve 952/1253 Installation Guide: 13115-F 06-22... -
Page 13: Flueing Options
1 m. For example, if an installation has three 90° bends, the maximum length can be 5.5 m. The adaption flue (EVOKIT03) is counted as one 90° bend. For lowest cost, optimal performance, ease of installation and servicing, Rinnai recommend direct flued installations are considered before all other options. -
Page 14: Evolve Installation Overview
Two hand-holds, either side of the unit, have been added to help move and 10. Complete the installation lift the fire into place. checklist in the operation guide and complete customer handover. | Evolve 952/1253 Installation Guide: 13115-F 06-22... -
Page 15: Connection Flue System
Connect flue system Consult the Rinnai Arriva and Evolve flue installation guide supplied with the Arriva/Evolve flue kits for detailed flue installation instructions. For connection of the flue to the heater refer information below. Removing the pipe clamp, extension tube and exhaust pipe Before installing the heater into the enclosure the pipe clamp, telescopic extension tube, and exhaust pipe need to be removed so there is room to connect the flue system. -
Page 16: Install Heater Into Enclosure
Please note: The unit is supplied with the heater condensate already connected. Telescopic extension tube Flue locking clamp Flue exhaust Flange screw position—11 in total Flue condensate pipe connection The engine comes with the heater condensate already connected. | Evolve 952/1253 Installation Guide: 13115-F 06-22... -
Page 17: Removing And Replacing The Glass Panel
The glass panel needs to be replaced after installing the burn media and before commissioning. Front panel of the Evolve showing the four screw positions for removing and replacing the glass panel Evolve 952/1253 Installation Guide: 13115-F 06-22 | 17... -
Page 18: Install Burn Media - Log Set
The unit must never be used with broken logs or other burn media (except those specifically designed for the Evolve). Evolve 952 burner bed - locating pin - locating bracket Evolve 1253 burner bed | Evolve 952/1253 Installation Guide: 13115-F 06-22... - Page 19 Place onto the locating pin of log seven and swivel Place onto the locating pin of log four and slot onto the OVER log 4. The end rests into the burner slot. right front locating bracket. Evolve 952/1253 Installation Guide: 13115-F 06-22 | 19...
-
Page 20: Adding The Granules
Be careful to avoid getting the wire wool anywhere near the flame rod. If you find that the fire is cutting out, there is a good chance that it is a strand of wool shorting out the flame rod. | Evolve 952/1253 Installation Guide: 13115-F 06-22... -
Page 21: Install Burn Media - Stones
N.B: The flame rod and pilot position has changed, these photos depict an older model. 1. From the stone set identify the five front grey 2. Place the five grey cutout stones on the burner cutout stones. brackets at the front as shown below. Evolve 952/1253 Installation Guide: 13115-F 06-22 | 21... - Page 22 (refer image on coloured burn media guide sheet), as this will cause a blockage and the unit will not start. Adding the wire wool, refer note on the bottom of p.20. | Evolve 952/1253 Installation Guide: 13115-F 06-22...
- Page 23 Add the wire wool Add the granules Refer step 8 on previous page, and image below. Refer note on the bottom of p.20, and image below. Evolve 952/1253 Installation Guide: 13115-F 06-22 | 23...
-
Page 24: Commissioning
On initial startup the Wi-Fi module in the fire scans for a Wi-Fi Wi-Fi LED network, and if at first it doesn’t work it will only scan again after ten Wi-Fi module reset hole position minutes. | Evolve 952/1253 Installation Guide: 13115-F 06-22... -
Page 25: Install The Inner And Outer Frame
3. Rotate the bottom of the inner frame in towards the engine body allowing the magnets to secure the inner frame to the engine. Two latches are positioned either side, at the top of the engine Top of combustion chamber Inner frame tabs Inner frame Magnets Magnet slot Evolve 952/1253 Installation Guide: 13115-F 06-22 | 25... -
Page 26: Test Operation And Lighting Sequence
It is the responsibility of the installer to check that under normal conditions of the appliance, all flue gases are exhausted to the outside atmosphere, and that there is no spillage of combustion gases into the room. If the appliance cannot be made to perform correctly please contact Rinnai. Normal flame pattern Abnormal flame pattern... -
Page 27: Wiring Diagram
3 2 1 w w bk bk bl r OH.TH1 R.TH w bl FR2 FR1 SV 4 SV 3 SV 2 SV 1 SV4 952/1252 only ON/OFF DISPLAY UNIT CONTROL DISPLAY UNIT Evolve 952/1253 Installation Guide: 13115-F 06-22 | 27... - Page 28 Rinnai.co.nz Tel: 0800 746 624 http://www.youtube.com/rinnainz Evolve 952 / 1253 installation guide 13115-F http://facebook.com.rinnainz...
Need help?
Do you have a question about the Evolve 952 and is the answer not in the manual?
Questions and answers