Table of Contents
Advertisement
Quick Links
This manual is intended for integrators, programmers, and maintenance personnel who will be
installing and maintaining a PAC-5x07 controller system.
ISaGRAF PAC Series of ICP DAS includes:
μPAC:
μPAC-5007/5107/5207/5307
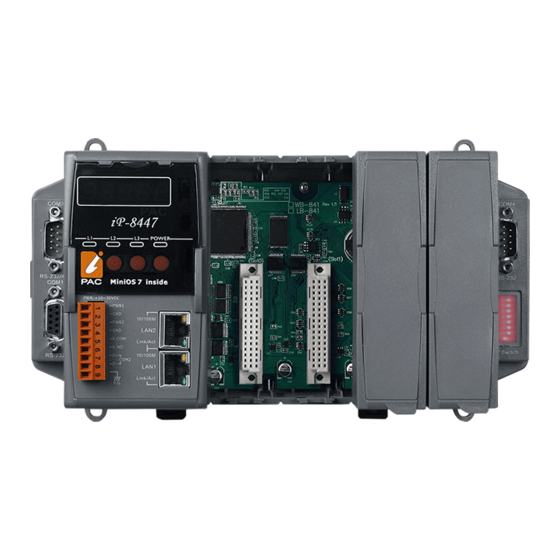
iPAC:
WinPAC: WP-8147, WP-8447, WP-8847 (WinCon: W-8347, W-8747)
ViewPAC: VP-25W7, VP-23W7, VP-2117
XPAC:
Legal Liability
ICP DAS CO., LTD. assumes no liability for any and all damages that may be incurred by
the user as a consequence of this product. ICP DAS CO., LTD. reserves the right to
change this manual at any time without notice.
ICP DAS CO., LTD. constantly strives to provide our customers with the most reliable and
accurate information possible regarding our products. However, ICP DAS CO., LTD.
assumes no responsibility for its use, or for any infringements of patents or other rights
of third parties resulting from its use.
Trademark & Copyright Notice
The names of products are used for identification purposes only, and are the registered
trademarks of their respective owners or companies.
Technical Service:
Please contact local agent or email problem-report to
New information can be found at
Please visit
Written by Chun Tsai, Spike Huang & Janice Hong, R&D dept., ICP DAS
Copyright © May. 2010, by ICP DAS CO., LTD. All Rights Reserved.
Getting Started: PAC-5007/5107/5207/5307 Ver. 1.1, 12/2011
Getting Started of
μPAC-5007/5107/5207/5307
μPAC-7186EG, μPAC-7186PEG, I-7188EG, I-7188XG,
iP-8447, iP-8847, I-8437-80, I-8837-80, I-8417, I-8817,
XP-8047-CE6, XP-8347-CE6, XP-8747-CE6
www.icpdas.com > FAQ > Software > ISaGRAF
service@icpdas.com
.
www.icpdas.com
.
for Frequently Asked Questions.
.
1
ICP DAS
Advertisement
Table of Contents

Related Manuals for ICP DAS USA ISaGRAF PAC Series


Summary of Contents for ICP DAS USA ISaGRAF PAC Series
- Page 1 Getting Started of μPAC-5007/5107/5207/5307 This manual is intended for integrators, programmers, and maintenance personnel who will be installing and maintaining a PAC-5x07 controller system. ISaGRAF PAC Series of ICP DAS includes: μPAC: μPAC-7186EG, μPAC-7186PEG, I-7188EG, I-7188XG, μPAC-5007/5107/5207/5307 iPAC: iP-8447, iP-8847, I-8437-80, I-8837-80, I-8417, I-8817,...
-
Page 2: Table Of Contents
Table of Contents Getting Started of μPAC-5007/5107/5207/5307 ..............1 Table of Contents ........................2 Reference Guide ........................4 Performance Comparison Table of ISaGRAF PACs ..............5 Specifications: μPAC-5x07(D) ....................6 Chapter 1. Typical Application..................... 1-1 μPAC-5007/5107/5207/5307 Comparison Table ..........1-1 Local &... - Page 3 3.11 Set I-7000 and I-87K Remote I/O by DCON Utility ..........3-17 3.12 Link to I-7000 and I-87K Remote I/O Modules ..........3-21 3.13 Create Two Modbus Master/Slave Links ............3-22 3.14 Link to HMI Interface Device ................3-23 3.15 Backup & Restore an ISaGRAF Project .............. 3-24 3.16 Dimension &...
-
Page 4: Reference Guide
Reference Guide ISaGRAF User’s Manual (English Manual): CD-ROM: \napdos\isagraf\8000\english_manu\ "user_manual_i_8xx7.pdf" & "user_manual_i_8xx7_appendix.pdf" or http://www.icpdas.com/products/PAC/i-8000/getting_started_manual.htm ISaGRAF 進階使用手冊 (Chinese Manual): CD-ROM: \napdos\isagraf\8000\chinese_manu\ "chinese_user_manual_i_8xx7.pdf" & "chinese_user_manual_i_8xx7_appendix.pdf" or http://www.icpdas.com/products/PAC/i-8000/getting_started_manual.htm Hardware Manual: PAC-5x07: CD\NAPDOS\uPAC-5000\document\ or ftp://ftp.icpdas.com.tw/pub/cd/8000cd/napdos/upac-5000/document/ ISaGRAF Resource on the Internet: Newly updated ISaGRAF IO libraries, drivers, demo, and manuals can be found at http://www.icpdas.com/products/PAC/i-8000/isagraf.htm Industrial Ethernet Switch: NS-205 / NS-208 / NS-205PSE Best choice for Industrial Ethernet Communication. -
Page 5: Performance Comparison Table Of Isagraf Pacs
Performance Comparison Table of ISaGRAF PACs Please click on the link or follow the below steps: ISaGRAF Comparison Table 1. www.icpdas.com 2. Click here to go to the ISaGRAF page 3. Comparison Table Getting Started: PAC-5007/5107/5207/5307 Ver. 1.1, 12/2011 ICP DAS... -
Page 6: Specifications: Μpac-5X07(D)
Specifications: μPAC-5x07(D) Models μPAC-5007(D) μPAC-5107(D) μPAC-5207(D) μPAC-5307(D) System Software MiniOS7 Development Software ISaGRAF Ver. 3 IEC61131-3 standard Languages LD, ST, FBD, SFC, IL & FC ISaGRAF Max. Code Size 64 KB Software 2 ~ 25 ms for normal program Scan Time 10 ~ 125 ms (or more) for complex or large program CPU Module 80186 or compatible (16-bit and 80 MHz) - Page 7 * For μPAC-5107(D)/5307(D) Channels 16 channels all-in-view tracking Sensitivity 159 dBm Cold start: 42 sec.; Acquisition Rate warm start: 35 sec.; reacquisition rate: 0.1 sec. Position: 25 m CEP (S/A off); Accuracy Velocity: 0.1 sec. (S/A off); Time: ± 1 ms Protocol NMEA GSM/GPRS...
- Page 8 Max. 2 COM Ports: COM1, COM2 and COM3 (*). Modbus RTU/ASCII Master (To connect to other Modbus Slave devices) Protocol Max. Modbus_xxx Function Block amount for 2 ports: 128. Modbus RTU Slave Max. 2 COM Ports, COM1 and one of (COM2, COM3) (*). Protocol For connecting ISaGRAF, PC/HMI/OPC Server &...
-
Page 9: Chapter 1. Typical Application
Chapter 1. Typical Application 1.1 μPAC-5007/5107/5207/5307 Comparison Table Memory Model Flash SRAM Ethernet GPS GPRS RS-232/RS-485 Expansion μPAC-5007 μPAC-5107 512 KB 80186 10/100 512 KB 768 KB Battery-backup Base TX SRAM μPAC-5207 μPAC-5307 All of the following applications are applicable to μPAC-5x07(D) PAC. The μPAC-5007D is used in following diagram. -
Page 10: Multi-Hmi Application
1.3 Multi-HMI Application 1.4 Active Data Acquisition & Auto-Report System μPAC-5x07 can use UDP/IP Client protocol to auto-report acquisition data & control data to local or to remote internet PC/Server. Advantage: Each PAC in the different location doesn't require a fixed Internet IP. ... -
Page 11: Data Logger
1.5 Data Logger ICP DAS provides a freeware “UDLoader.exe” to load the data stored in battery-backup SRAM via RS-232 or Ethernet port. 1.6 Modbus Converter of Remote I/O Modules μPAC-5x07 can be a Modbus RTU Serial and TCP/IP converter of I-7000 & I-87K series I/O ... -
Page 12: Data Exchange Through Ethernet Or Rs-485
1.7 Data Exchange through Ethernet or RS-485 Each μPAC-5x07 can send or receive data to each other via the Ebus (Ethernet) or Fbus (RS-485) communication mechanism on the same network. 1.8 Send Email with an Attached File μPAC-5x07 can send Email with one attached file via Ethernet Port. The maximum file size is ... -
Page 13: Sms: Short Message Service
1.9 SMS: Short Message Service Short message can be sent in multiple language format (such as Chinese, English... others) Please refer to www.icpdas.com > FAQ > Software > ISaGRAF Ver.3 (English) μPAC-5207/5307 has built-in GPRS, no external GSM/GPRS modem required. ... -
Page 14: Connecting Other Device Via Modbus Master
1.11 Connecting other Device via Modbus Master μPAC-5x07 supports up to 2 COM ports of Modbus RTU/ASCII Master protocol to integrate with other Modbus devices. RS-485: RS-232: Note: COM3 ~ COM8 is optional from XW-Board (XW5xx), expansion RS-232/RS-422/RS-485 board. μPAC-5x07 can plug one I/O Expansion board inside the main box. -
Page 15: Gps Applications: Isagraf Pac Plus I-87211W Or Gps-721
1.12 GPS Applications: ISaGRAF PAC plus I-87211W or GPS-721 μPAC-5007/5207 can support one I-87211W card or GPS-721 as GPS I/O. (The PAC can communicate with the GPS-721 by RS-485/232; the I-87211W can plug into Remote I/O Expansion units) For doing auto-time-synchronization and getting local longitude and latitude. ... -
Page 16: Zigbee Wireless Solution
1.13 ZigBee Wireless Solution ISaGRAF PAC plus ZB-2550P and ZB-2551P (ZigBee to RS-232/485 Converters) can apply wireless communication, reduce the wiring cost, and achieve the mission of remote I/O control and data acquisition. Please refer to www.icpdas.com > FAQ > Software > ISaGRAF Ver.3 (English) Getting Started: PAC-5007/5107/5207/5307 Ver. -
Page 17: Chapter 2. Software Programming
Chapter 2. Software Programming 2.1 Step 1 – Installing ISaGRAF Software There are two kinds of software to be installed in PC before user can program on the PAC-5x07 PAC system. They are: A. ISaGRAF Workbench and B. ICP DAS Utilities for ISaGRAF User has to purchase at least one pcs. - Page 18 3. Click on the windows [Start] > [All Programs] > [ISaGRAF 3.x] > [Projects] to start the ISaGRAF software. Note1: You must install the hardware protection device (dongle) provided with the ISaGRAF software on your computer parallel port for ISaGRAF program to achieve fully authorized functionality.
- Page 19 Important Notice for Windows NT Users: If your computer is using the “Windows NT” OS, you will need to add one line to the file in the ISaGRAF Workbench folder. C:\isawin\exe\isa.ini You can use any ASCII based text editor to open the "isa.ini" file. Locate the [WS001] header in the file (it should be at the top of the file).
-
Page 20: Step 2 - Installing Icp Das Utilities For Isagraf
2.2 Step 2 – Installing ICP DAS Utilities for ISaGRAF “ICP DAS Utilities for ISaGRAF” consists of 3 major functions: I/O libraries (for PAC-5x07 and other ISaGRAF PAC) Modem_Link utility Auto-scan I/O utility Note: Make sure you have installed the ISaGRAF Workbench program, IF NOT, please refer to before continuing. -
Page 21: Chapter 3. Hardware System & Setting
Chapter 3. Hardware System & Setting 3.1 Connect Your PC to COM1 Port The COM1 port of the μPAC-5x07 is a Modbus Slave port which can talk with HMI software or for the ISaGRAF workbench to download the ISaGRAF project. COM1: RS-232: One PC/HMI can only link to COM1: RS-232 port of one μPAC-5x07. -
Page 22: Connect Your Pc To Com2 Port
3.2 Connect Your PC to COM2 Port One PC or HMI can link through COM2: RS-485 port to MANY μPAC-5x07 if each of them on the same RS-485 network has a unique NET-ID. COM2: RS-485: I-7520R RS-232/485 Converter COM2: RS-485 19200, 8, N, 1 PC / HMI RS-232 NET-ID=... -
Page 23: Connect Your Pc To Ethernet Port
3.3 Connect Your PC to Ethernet Port The Ethernet port of the μPAC-5x07 PAC provides Modbus TCP/IP Slave protocol. It can be used to connect to the PC or HMI software. Up to 6 PC/HMI can talk to one μPAC-5x07 at the same time through the Ethernet port. Industrial Ethernet Switch NS-205/208(PSE) PC / HMI... - Page 24 After you click on "Setup" button, an "Ethernet Link Parameters" dialog box will appear. Set the "Port Number" to "502" and enter the Internet address (IP) of your μPAC-5x07 PAC. (Please refer to Section 3.9 Once you have entered the appropriate information, click on "OK" button, and now you have configured your PC to communicate with the μPAC-5x07 through the Ethernet port.
-
Page 25: How To Update Hardware Driver
3.4 How to Update Hardware Driver Our newly released driver can be obtained from the below website. http://www.icpdas.com/products/PAC/i-8000/isagraf.htm Steps: We use ver. 1.00 of μPAC-5307’s driver as an example to show how to view and upgrade the driver. Download the Driver: 1. - Page 26 EX: Using computer’s COM5 to link to μPAC-5307. As shown below: B115200 P0 D8 S1 B115200 P0 D8 S1 Xautoexec.bat Xisa5307.exe Xautoexec.bat Xisa5307.exe 5. Switch the “Init*” to “ON” then power it up. 6. If the connection is OK, “uPAC-5001>” messages will appear on the screen. Upgrade ISaGRAF Embedded Driver: 7.
- Page 27 View the OS Version & Date: 9. Type "ver" to see the current OS version and date. View the Driver Version & PAC Settings: Type "isa5307 *p=" to see the current driver version, PAC settings and instruction description. Note 1: Please depend on the PAC model to type the instruction. (Ex. isa5307 *p=) Note 2: After typing this instruction, you have to reboot to continue other step.
-
Page 28: Set Net-Id For Controller System
3.5 Set NET-ID for Controller System Each μPAC-5x07 has a NET-ID Number. The valid Number is from 1 to 255. The default No. is 1. Net-ID must be unique in the same RS-485 network. To set the NET-ID No., please follow below steps. Related Files &... -
Page 29: Set Baud Rate For Com1
3.6 Set Baud Rate for COM1 Related Files & Hardware Connection: (We use μPAC-5307 as an example) 1. Create a file folder named "μPAC-5307" in your hard drive. (Ex. "c:\ μPAC-5307") 2. Copy the following listed files under “μPAC-5307” folder: CD: \Napdos\ISaGRAF\μPAC-5000\Driver\5307\1.00\ 3. -
Page 30: Set Com1 To Non-Modbus-Slave For Μpac-5X07
3.7 Set COM1 to Non-Modbus-Slave for μPAC-5x07 The COM1 of μPAC-5x07 supports Modbus RTU Slave protocol by default. User can free it as a Non-Modbus-Slave port for other usage. For example, user may write his own defined protocol on COM1 or use COM1 as a Modbus Master port. Related Files &... - Page 31 Free COM1: 7. Type "isa5307 *f=1" to free COM1 (free COM1 as Non-Modbus-Slave) Please type the instruction according to the controller model. (Ex. isa5307 *f=1) 8. Exit the "7188xw" screen; else the COM1/COM2 is always in use. 9. Switch the “Init*” to “OFF” then power it up. Important Notice: If user wants to change COM1 back to a Modbus RTU Slave port again, follow the same steps as above and then type...
-
Page 32: Set Com2 Or Com3 As A Modbus Rtu Slave Port
3.8 Set COM2 or COM3 as a Modbus RTU Slave Port μPAC-5x07 can install XW5xx expansion board to have a COM3 or more COM Port. User can customize one of COM2/COM3 to supports Modbus RTU Slave protocol. Note: COM2/COM3 is “Non-Modbus RTU Slave Port” by default. Related Files &... - Page 33 Set COM2 or COM3 as Modbus RTU Slave: 7. Type "isa5307 *x=PB" to set the baud rate of COM2/3 and as a Modbus RTU Slave port. "P" means the COM Port number. (P = 2 or 3), "B" means the baud rate. (B = 0 ~ 9) 1=2400, 2=4800, 3=9600,...
-
Page 34: Set Ip & Mask & Gateway For Μpac-5X07
3.9 Set IP & MASK & Gateway for μPAC-5x07 Related Files & Hardware Connection: (We use μPAC-5307 as an example) 1. Create a file folder named "μPAC-5307" in your hard drive. (Ex. "c:\ μPAC-5307") 2. Copy the following listed files under “μPAC-5307” folder: CD: \Napdos\ISaGRAF\μPAC-5000\Driver\5307\1.00\ 3. - Page 35 8. Type "mask" to see the current address mask. Type "mask xxx.xxx.xxx.xxx" to set a new address mask. Ex. > mask 255.255.0.0 9. Type "gateway" to see the current gateway address. Type "gateway xxx.xxx.xxx.xxx" to set a new gateway address. Ex.
-
Page 36: Delete An Isagraf Project From The Pac
3.10 Delete an ISaGRAF Project from the PAC If there is a project exists in the PAC, user may use ISaGRAF Workbench to download a new one to replace it. By some reasons, user may want to delete the ISaGRAF project from the μPAC-5x07 PAC, please follow the steps below. -
Page 37: Set I-7000 And I-87K Remote I/O By Dcon Utility
3.11 Set I-7000 and I-87K Remote I/O by DCON Utility μPAC-5x07 can link up to 128 pcs ICP DAS's remote I/O modules - "I-7000" and “I-87K” series remote I/O modules. Pre-set : Before linking I-7000 and I-87K modules, user must use DCON Utility to pre-set each I-7000 and I-87K remote module to has a unique address (NET-ID) and the same Baud rate (included the PAC) in this μPAC-5x07 PAC system. - Page 38 Step 2: Set I/O module to the initial state Every new module has the factory default settings (as figure 1) for user’s convenient use. If you use an old one and you don’t know the configuration of the module, please set the I/O module to the initial state (as figure 2).
- Page 39 Step 3: Select COM Port & Baud Rate to Search Execute the [ DCON Utility ] : 1. Click “COM Port” menu to select the COM port and Baud rate to search. Select multiple baud rate, protocol or checksum options if you do not know the module’s setting, but it will take more serch time.
- Page 40 3. Now, you can set the Address, Baud rate and Checksum. After configuration, you must click “Setting” to save the settings. 4. You have completed the setting; please adjust the DIP Switch to “OFF” position and restart the power. Finally, you can serch the module again to comfirm settings. Follow the steps to comfirm the settings.
-
Page 41: Link To I-7000 And I-87K Remote I/O Modules
3.12 Link to I-7000 and I-87K Remote I/O Modules μPAC-5x07 PAC system can use its COM2: RS-485 port to link to ICP DAS's "I-7000" and “I-87K” series Remote I/O modules. This configuration can be very useful in applications that require distributed Remote I/O throughout the system. Note: You can link up to 64 pcs of I-7000 or I-87K series Remote I/O modules to one μPAC-5x07 PAC. -
Page 42: Create Two Modbus Master/Slave Links
3.13 Create Two Modbus Master/Slave Links μPAC-5x07 can support max. two Modbus "Slave" (COM1, 2, 3) or two Modbus "Master" (COM1 or 2/3) ports at the same time for various kinds of application. COM3: The COM3 of μPAC-5x07 is on the plugged XW-Board XW5xx. RS-232 (with one XW503, XW504...XW-board) or RS-485 (with one XW511... -
Page 43: Link To Hmi Interface Device
3.14 Link to HMI Interface Device The COM1: RS-232 port of the μPAC-5x07 can be used to interface with additional Human Machine Interface (HMI) devices such as touch screen displays. ICP DAS provides a series of touch screen displays, such as the "Touch" series. This product comes in various size and model. -
Page 44: Backup & Restore An Isagraf Project
3.15 Backup & Restore an ISaGRAF Project For user’s archiving purposes, ISaGRAF Workbench provides the backup and restore functions. Sometimes, you would like to compress your projects to someone, such as e-mail to: service@icpdas.com for technical support. Backup an ISaGRAF Project 1. -
Page 45: Dimension & Mounting For Μpac-5X07
3.16 Dimension & Mounting for μPAC-5x07 Unit: mm Front View Back View Top View Bottom View DIN-Rail Mounting Piggyback Mounting Getting Started: PAC-5007/5107/5207/5307 Ver. 1.1, 12/2011 3-25 ICP DAS... -
Page 46: Chapter 4. Isagraf Demo
Chapter 4. ISaGRAF Demo 4.1 Writing a Simple ISaGRAF Program Note: The following is a step-by-step example on how to create a ladder logic (henceforth referred as "LD") program and download it to PAC-5x07 PAC. If you do not install the “ISaGRAF Workbench”... -
Page 47: 1: Start Isagraf - Project Management
4.1.1: Start ISaGRAF – Project Management First, start the ISaGRAF Workbench software, please click on the Windows [Start] > [All Programs] > [ISaGRAF 3.x] > [Projects], as shown below. 4.1.2: Creating an ISaGRAF Project Group Click the "Select Program Group" tool button then click "New Group" button. Key in the name for the new group you wish to create then click on "OK". -
Page 48: 3: Creating A New Isagraf Project
4.1.3: Creating a New ISaGRAF Project To create a new ISaGRAF project, click the "Create New Project" then enter the name for the new project. You can enter additional information for your project by clicking on the [Edit] > [Set Comment Text]. -
Page 49: 4: Declaring The Isagraf Project Variables
4.1.4: Declaring the ISaGRAF Project Variables Before you start creating an ISaGRAF program, you must first declare the variables that will be used in the ISaGRAF program. Declaring Boolean: 1. Click "Dictionary" tool button. 2. Click "Booleans" tab to declare the Boolean variable which required in program. 3. - Page 50 In this screen, you have declared the Boolean variable. The Initial state is displayed here. Note: The other fields behind the “Name” provide the programmer with detail information for this variable. Note: Ensure that you have declared the proper attribute of the variable. If you need to change the attribute, just double click on the variable name to reassign it.
- Page 51 Quick Declaration: There are three outputs used in this example named “OUT01”, “OUT02”, and “OUT03”. For these sequentially ordered variables, ISaGRAF provides a quick and easy way to declare them. 1. Click "Quick Declaration" tool button. 2. In the "Numbering" area, “From”...
- Page 52 Declaring Timer: Please follow the similar way to declare the timer variable (TMR1). 1. Click "Timers" tab in the “Global…” window and double-click the colored area to open the "Timer Variable" window. 2. Type "TMR1" as the name, “Blinking Timer" as the comment and set the attribute as "Internal", and Initial Value as “T #1s".
-
Page 53: 5: Creating The Example Ld Program
4.1.5: Creating the Example LD Program Once all of the variables have been properly declared, you are now ready to create the example LD program. Please follow the steps to start this process. 1. Click the "Create New Program" button and the "New Program" window will appear. 2. -
Page 54: 6: Editing The Example "Ld1" Program
4.1.6: Editing the Example "LD1" Program When you double click on the "LD1", the "Quick LD Program" window will appear. Please click [Edit] > [Insert Rung] (as shown below) to insert a basic LD rung. Or you could click the "F2 (Contact on the left)" tool button to insert a rung quickly. Click the "F4 (Parallel contact)"... - Page 55 Next, click the “Coil” (as diagram below) and click the "F2 (Contact on the left)" tool button to insert a new “Contact”. Coil Then, click the “Contact” (as diagram below) and click the "Coil/contact type" tool button to set the attribute as “Normal Close”. Normal Close Click "F7 (Block on the right)"...
- Page 56 Finally, click the “output coil” to the right side of LD program and click the “F5 (Coil)” twice to add two “coil” under the first one. Now we are ready to specify the variables. Double-click the outside of "CYCLE" and the “Select variable”...
-
Page 57: 7: Connecting The I/O
PLC hardware manufacturer should be responsible to embed the “ISaGRAF kernel” in their respective controller so that the ISaGRAF program operates properly. The ICP DAS ISaGRAF PAC Series, programmable automatic controller, provides a powerful and flexible industrial controller system. Connecting I/O Equipment: You have created the ISaGRAF example program. - Page 58 2. Click the “Equipments” and double-click “xw107” to select it. (If you have no XW-107, click any slot and select “xboo_io: Boolean I/O for simulation”) Important Notice: “0” slot is reserved for I/O expansion boards (XW-board) inside the controller. 2. For Remote I/O modules, you can use any slot and select the “Equipments” as “bus7000”.
- Page 59 As diagram below, you have completed it. Connecting Output: To connect the output attributed variables to “XW107”, please click “DO8” and double click on the right side of channel “1”. Select the variable name that corresponds to the channel, and click “Connect” button. Finally, click “Close” to close the window. Remember to click the "Save"...
-
Page 60: Compiling & Simulating The Example Project
4.2 Compiling & Simulating the Example Project Note: In order to ANY and EVERY ISaGRAF program to work properly inside the ISaGRAF PAC Series systems, the programmer should be responsible for selecting the correct "Compiler Options". You MUST select the "ISA86M: TIC Code For Intel" option as described below. -
Page 61: 2: Simulating The Ld Project
If some red error message listed in the “Code Generator” window, please double-click the message to go into the LD1 program to modify it. Finally, re-compile it again. 4.2.2: Simulating the LD Project A powerful program debug feature of the ISaGRAF software is able to simulate the program. -
Page 62: 3: Running The Simulation Program
In the "Debug Programs" window, double-click "LD1" to open the “Quick LD Program” window. You can see the LD program you have created. 4.2.3: Running the Simulation Program: When you open the “Quick LD Program” window, you will see the LD1 Program. Getting Started: PAC-5007/5107/5207/5307 Ver. - Page 63 States of the Program: As diagram above, "SW1" and "SW2" are the Normal Open switches that have not been energized so their color is blue. The "SHUT" is a Normal Close switch and its color is red because it is energized. Now, the light statuses in the I/O simulator window are OFF. Description of the Simulation: In the example, if either “SW1”...
- Page 64 4. Click "Timers" tab in the "ISaGRAF Global Variables" window. 5. Double-click "TMR1" to open "Write Timer Variable" window. 6. Change "t#1s" to “t#500ms" in the "Enter New Value:" field. 7. Finally, click "Write" button. Now when you click on “SHUT” button (green button) in the I/O simulator the “OUT01 ~ 03”...
-
Page 65: Debug & Download The Example Project
4.3 Debug & Download the Example Project The last step required to run the LD example program on the μPAC-5x07 PAC systems is to download the project to the controller (frequently referred to as the "Target" platform). Before this download can be accomplished you must first establish communications between your development PC and μPAC-5x07 controller. - Page 66 Debugging the Example LD Project Before you download the LD project to the μPAC-5x07 controller system, you must first verify that your development PC and the μPAC-5x07 PAC system are communicating with each other. To verify proper communication, click on the "Debug" button in the "ISaGRAF Programs"...
- Page 67 If the message in the "ISaGRAF Debugger" says "Disconnected", it means the connection between PC and μPAC-5x07 is failed. The connection is not success. The most common causes of connection failure are the COM Port between each other is not plugged in or the settings of communication parameters are not correct. When this occurs, please follow the following steps to troubleshoot the problem: 1.
- Page 68 When the program is downloaded successfully, the following window will appear. Running the Example LD Program: You can observe the real time I/O status from the ISaGRAF windows while you are running the example LD program. First, click on the "I/O Connection" button in the “Debugger programs”...
- Page 69 Another way to view the real-time operation status is from “Quick LD program” window. At present, the switch 1 ("SW1") is “ON” and the “SHUT” is “OFF”, so the “OUT01 ~ 03” will be blinking per second. (Turn on and turn off) Note: The "SHUT"...
-
Page 70: Appendix
Appendix ISaGRAF User Manual & Demo Program & FAQ The related ISaGRAF manuals and demo programs are all in your μPAC-5X07 CD. You can also follow the steps below to view the latest information and FAQ in ISaGRAF website. The Download Page for ISaGRAF Resource 1. -
Page 71: Using Modbus Tcp/Ip Protocol To Control Isagraf Controllers With Vb
3. Click “Manual” 4. Click “Demo Files” 5. Click “FAQ” Demo Files: 4. Click the “Demo Files” icon to download the ISaGRAF demo program. You can download all the files in CD or FTP: PAC-5X07 CD-ROM: \napdos\ISaGRAF\upac5000\demo or ftp://ftp.icpdas.com.tw/pub/cd/8000cd/napdos/isagraf/upac-5000/demo/ 5. Click the “FAQ” icon to view the latest ISaGRAF frequently asked questions. You can also refer to: www.icpdas.com >... -
Page 72: 10-Ch Thermocouple Input Module
10-ch Thermocouple Input Module 10-ch thermocouple input module is a brand new designed module different from the 8-ch normal module in the industrial area. ICP DAS supply I-7018Z I-87018Z of 10-ch Thermocouple Input Module and they all meet the RoHS Standard. They are the best Thermocouple Input Module choices for ISaGRAF PACs. -
Page 73: Xw-107 (I/O Expansion Board)
XW-107 (I/O Expansion Board) Each μPAC-5x07 PAC can plug an XW-board inside it to add I/O channel or RS-232/422/485 COM Port. In Section 4.1, we use XW107 to add digtal input and ouput channel. The following describes its specifications and PIN assignment. Please refer to website for more information.
Need help?
Do you have a question about the ISaGRAF PAC Series and is the answer not in the manual?
Questions and answers