Table of Contents
Advertisement
Quick Links
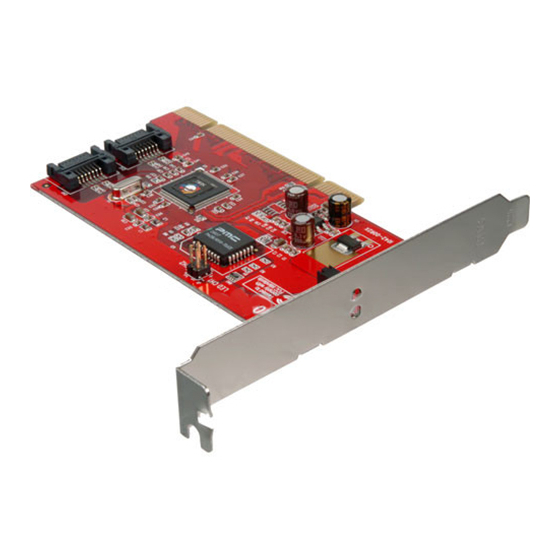
Introducing the SATA II-150 PCI RAID
The SATA II-150 PCI RAID is an ultra high-speed two
channel Serial ATA Generation II RAID controller for use
in PCI enabled systems.
Features and Benefits
•
Compliant with PCI 2.3
•
Compliant with Serial ATA 1.0 specifications and
complement of SATA II optional features
•
Supports RAID 0 (stripe) for performance and RAID
1 (mirror) for data protection
•
Supports two SATA channels and data transfer rate
up to 1.5Gb/s (150MB/s)
•
Supports Native Command Queuing (NCQ) and
SATA TCQ commands
•
Onboard bus master engine relieves the system
processor and enhances system performance
•
Features independent 256-byte FIFOs per channel
for host reads and writes
•
Breaks the 137GB barrier! Works with various
brands of large capacity Serial ATA hard disks
•
Supports SATA hard disk hot-plugging
System Requirements
•
Pentium or equivalent PC with an available
PCI slot
•
Windows 2000/XP/Server 2003
04-0412B
SATA II-150 PCI RAID
Quick Installation Guide
1
Advertisement
Table of Contents

Subscribe to Our Youtube Channel
Related Manuals for SIIG SC-SA3012-S1


Summary of Contents for SIIG SC-SA3012-S1
-
Page 1: Quick Installation Guide
SATA II-150 PCI RAID Quick Installation Guide Introducing the SATA II-150 PCI RAID The SATA II-150 PCI RAID is an ultra high-speed two channel Serial ATA Generation II RAID controller for use in PCI enabled systems. Features and Benefits • Compliant with PCI 2.3 •... -
Page 2: Hardware Installation
Package Contents • SATA II-150 PCI RAID and spare low profile bracket • 2 SATA data cables and one dual-connector SATA power cable • Driver CD and this quick installation guide Layout HDD LED pins (Front chassis LED; connects horizontally) Activity LED Figure 1. -
Page 3: Raid Arrays
Turn OFF the power to your computer and any other connected peripheral devices. Unplug the power cord from the back of the computer. Remove your computer’s cover. Remove the slot bracket from an available PCI slot. To install the card, carefully align the card's bus connector with the selected PCI slot on the motherboard. - Page 4 Select Create, then press Enter. Select RAID 0, then press spacebar. Select chunk size from 8k, 16k, 32k, 64k , 128k or 256k, then press spacebar. Create name, press Enter. When asked Expand RAID 0 to maximum capacity, select No, then press Enter. Select Exit, then press Enter.
- Page 5 For Existing Hard Drives with Data During boot press Ctrl+R to enter the RAID BIOS. Select Disk, press Enter. Select Reserved for RAID, then press Enter. Select the single hard drive then press Enter. When asked, All data in selected drive will lost! Continue (Yes/No)?, select Yes, then press Enter.
- Page 6 Rebuilding a Failed Mirror Set When a failure to one member occurs, you will be notified either by the RAID BIOS during boot or by the Initio SATA RAID Manager while in Windows. The steps below will guide you in rebuilding a failed mirror set. For Offline Mirror Rebuild (SATA RAID BIOS) Replace the failed drive(s) with one of equal or greater capacity, then start the computer.
- Page 7 Click Rebuild Array, then click OK. The mirror will rebuild. Rebuild time is dependent on the size of the mirror set. Deleting RAID Arrays As the BIOS boots press Ctrl+R when prompted to enter the RAID BIOS. Select RAID, then press Enter. Select the Delete, then press Enter.
-
Page 8: Driver Installation
Driver Installation This section provides information on how to install the SATA II-150 PCI RAID drivers. Windows 2000 For A New Installation A new installation of Windows 2000 requires a floppy disk for the driver installation. To make this floppy disk, copy the contents of the Floppy folder, found on the driver CD, onto a blank floppy disk then follow the directions below. - Page 9 For An Existing Installation Setup the RAID array prior to driver installation and boot up to Windows. At Found New Hardware Wizard, click Next. Select Search for a suitable driver for my device (recommended), then click Next. Insert the driver CD, check CD-ROM drives, uncheck the other boxes, click Next, then click Next again.
- Page 10 Insert the floppy disk, then press Enter. Select Initio INIC162x S-ATA RAID Controller For Windows XP/Server 2003, then press Enter. Press Enter to finish driver installation, then follow the on-screen instructions to complete the Windows installation. When Windows resumes, go to Initio SATA RAID Manager GUI on page 11 and install the RAID utility.
- Page 11 To Verify Windows 2000/XP/2003 Installation Right click My Computer and click Manage. Select Device Manager. Double click SCSI and RAID controllers, then double click either Initio INIC162x S-ATA Raid Controller or Initio RAID Interface to display driver properties. A message This device is working properly is displayed in the dialog box, the driver has been correctly installed.
- Page 12 Blank Page...
- Page 13 Blank Page...
- Page 14 Blank Page...
-
Page 15: Technical Support And Warranty
A lifetime manufacturer warranty supplied with this product is offered by SIIG, Inc. Please see SIIG website for more warranty details. If you should happen to encounter any problems with this product, please follow the procedures below. -
Page 16: Fcc Compliance Statement
Fremont, CA 94538-3152 SATA II-150 PCI RAID is a trademark of SIIG, Inc. SIIG and SIIG logo are registered trademarks of SIIG, Inc. Microsoft and Windows are registered trademarks of Microsoft Corporation. Pentium is a registered trademark of Intel Corporation. Other names used in this publication are for identification only and may be trademarks of their respective companies.
Need help?
Do you have a question about the SC-SA3012-S1 and is the answer not in the manual?
Questions and answers