Table of Contents
Advertisement
Quick Links
Advertisement
Table of Contents

Related Manuals for Insportline Airbike Lite


Summary of Contents for Insportline Airbike Lite
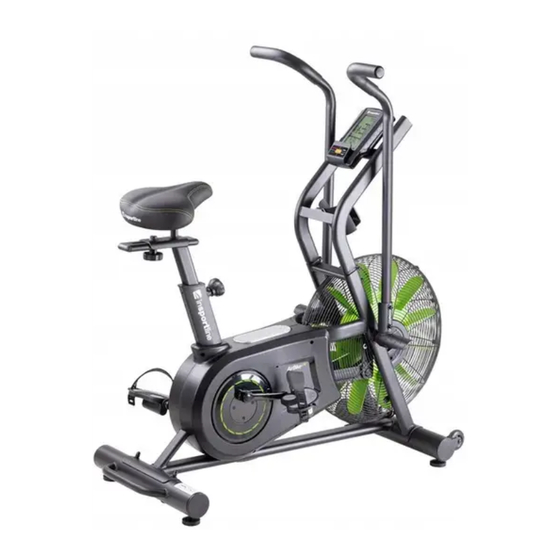
- Page 1 USER MANUAL – EN IN 19896 Air Exercise bike inSPORTline Airbike Lite...
-
Page 2: Table Of Contents
CONTENTS SAFETY INSTRUCTIONS ........................3 DIAGRAM ..............................4 PARTS LIST ............................6 ASSEMBLY ............................. 7 MOVING ..............................13 CONSOLE ............................. 14 USE ............................... 22 EXERCISING INSTRUCTIONS ......................23 CORRECT BODY POSTURE ....................... 24 MAINTENANCE ............................ 24 STORAGE ............................. 24 IMPORTANT NOTICE ........................... 24 ENVIRONMENT PROTECTION ...................... -
Page 3: Safety Instructions
SAFETY INSTRUCTIONS • Read all instruction in this manual before using this equipment and keep it for future references. • Use the machine only for its intended use as described in this manual. • Inspect and tighten all the loose parts before this equipment is used. •... -
Page 4: Diagram
DIAGRAM... -
Page 6: Parts List
PARTS LIST Name Qty. Name Qty. Washer d12*Φ24*2 Console Screw M5*10 End cap End cap Seat post Kabel Seat holder Console holder Seat Screw M5*15*Ф8.5 Rear stabilizer Screw M4*10*Φ8 Bottle holder Screw M8*20*S5 45L/R Front fan cover 1set Spring washer d8 46L/R Rear fan cover 1set... -
Page 7: Assembly
Spacer Φ25*Φ20.1*4 Washer d8*Φ32*2 Pulley Nylon nut M8*H7.5*S13 Axle 74L/R Chain cover 1set Screw M6*16*S5 75L/R Crank 1set Belt Crank cover Plastic pedal Magnet φ15*7 Spring d17 Gasket Φ12.5 Bearing 6203-2RS Safety ring D40 Wave washer d10*Φ15*0.3 Screw M6*16*S10 Tablet holder Washer d6*Φ20*2 Allen key S5 Small crank... - Page 8 STEP 2 Attach the seat post (38) to the main frame (30) and secure with the hand screw (32). Attach the seat holder (39) to the seat post (38) with the hand screw (35) and washer (36). Attach the seat (40) to the seat holder (39).
- Page 9 STEP 3 Loosen the 4 screws (8), 4 washers (9 and 10) from the console holder (5). Connect the cables (62 and 40). Insert the extra cables into the main frame (30) and then attach the console holder (5) to the main frame (30) and secure with 4 screws (8), 4 washers (9 and 10).
- Page 10 STEP 4 Loosen the 2 screws (6 and 2) from the console holder (5). Attach the bottle holder (7) to the console holder (5) with 2 screws (6). Connect the cables (4 and 1a). Attach the console (1) and tablet holder (94) to the console holder (5) with 4 screws (2).
- Page 11 STEP 5 Loosen the 4 screws (8), 4 spring washers (9) and 4 arc washer (10) from the swing rod (26). Attach the handles (27 L / R) to the swing rod (26). Attach the pedal plates (23 L / R) and handles (27 L / R) to the swing rod (26 L / R) with 4 screws (8), 4 spring washers (9) and 4 arc washers (10).
- Page 12 STEP 6 Attach the left pedal (31L) to the left crank (75L) counterclockwise, tighten with wrench. Attach the right pedal (31R) to the right crank (75R) clockwise, tighten with wrench.
-
Page 13: Moving
MOVING To move, lift the rear stabilizer (41) and place the machine on the transport wheels (17). Then move the device to the desired location. -
Page 14: Console
CONSOLE DISPLAY Display current RPM from 0 to 199 SPEED Display current speed to 99.9 km/h (mil/h) TIME Time count up to 1:59:59 after 1 minute, if the goal is not set Time count down from 1:59:59 after 1 minute to 00:00:00 if the goal is set DISTANCE Display distance from 0.0 to 999.9 km or mile the value counts up or down depending on the settings. - Page 15 BUTTONS START Starts a quick program or starts a paused program STOP Stops / pauses the program Resets the settings Hold for 2 seconds to reset DOWN Decrease values: distance, calories, heart rate, time and age Increase values: distance, calories, heart rate, time and age Target distance Quick access to target distance program Target calories...
- Page 16 Pic. 4 Pic. 5 Pic. 6 Pic. 7 Pic. 8 Pic. 9 Pic. 10 Pic. 11...
- Page 17 Pic. 12 Pic. 13 Pic. 14 Pic. 15 Pic. 16 Pic. 17 Pic. 18 Pic. 19 PROGRAMS: MANUAL, INTERVAL, TARGET DISTANCE / CALORIES / H.R / TIME MANUAL MODE 1. In standby mode, press START to start the quick program, a beep sounds. The total time, distance, calories, watts, speed and revolutions per minute will be counted up (Pic.
- Page 18 INTERVAL 20/10 1. Press INTERVAL and select INTERVAL 20/10, press ENTER and INTERVAL 20/10 will light up and a beep will sound for 1 second. 2. The countdown starts for 3 seconds and a beep sounds, READY lights up on the display and 00/08 is displayed (Pic.
- Page 19 beep sounds for 2 seconds and the console enters standby mode. Press START to return to the program. 7. Press STOP to end the workout, a beep sounds for 1 second, and displays total time, distance and calories for 30 seconds, watts, speed and rpm change to average and amaximal values for 5 seconds each (Pic.
- Page 20 10. Press STOP to end the workout, a beep sounds for 1 second, and displays total time, distance and calories for 30 seconds, watts, speed and rpm change to average and amaximal values for 5 seconds each (Pic. 18-19). 11. Press PROGRAM to select the program. Pic.
- Page 21 6. Press STOP to stop the program, TIME displays total training time, DISTANCE displays total distance, CALORIES displays burned calories, watts, speed and rpm and changes to average and maximum every 5 seconds (Pic. 18-19). Pic. 35 Pic. 36 Pic. 37 Pic.
-
Page 22: Use
Pic. 39 Pic. 40 SETTINGS Press and hold START and ENTER for 2 seconds to hear a beep. SPEED, M / H, and KM / H are displayed (Pic. 41-42). Use the UP / DOWN buttons to select KM / H or M / H, press the ENTER button to confirm. If the console does not detect any signal for 30 seconds, it enters standby mode. -
Page 23: Exercising Instructions
The bicycle saddle must be set so that you can hold the ergonomically shaped handles when sitting. You should not have fully extended hands. You can damage your muscles. To ensure a comfortable and comfortable exercise, put your feet on the pedal. Nowadays, all modern pedals are equipped with straps for fastening and stabilizing of the foot. -
Page 24: Correct Body Posture
Hamstring stretched Sit and outstretch your right leg. Rest the sole of your left foot against the inside of your right tight. Stretch out your right arm along your right leg as far as you can. Hold for 15 seconds and relax. Repeat all with your left leg and left arm. -
Page 25: Environment Protection
• This exercise bike is not suitable for medical purpose. It can also not be used for healing purposes. • The heart rate monitor is not a medical device. It provides only approximate information about your average heart rate, and any suggested pulse rate is not medically binding. Accumulated data may not always be accurate regarding uncontrollable human and environmental factors. - Page 26 CRN: 26847264 VAT ID: CZ26847264 Phone: +420 556 300 970 E-mail: eshop@insportline.cz reklamace@insportline.cz servis@insportline.cz Web: www.inSPORTline.cz inSPORTline s.r.o. Headquaters, warranty & service center: Električná 6471, Trenčín 911 01, SK CRN: 36311723 VAT ID: SK2020177082 Phone: +421(0)326 526 701 E-mail: objednavky@insportline.cz...
- Page 27 Web: www.inSPORTline.sk...
Need help?
Do you have a question about the Airbike Lite and is the answer not in the manual?
Questions and answers