Primera Inscripta User Manual
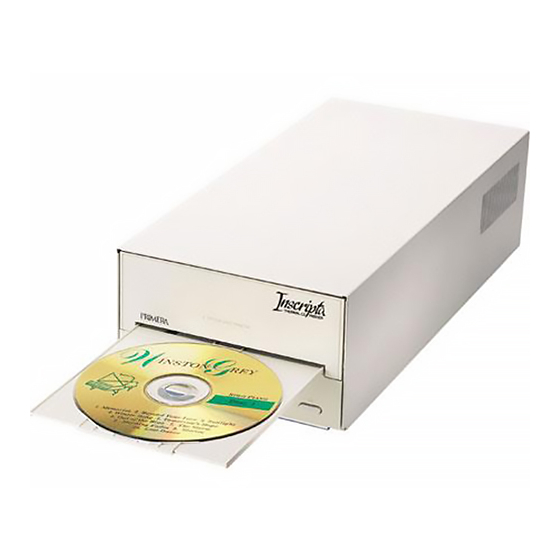
Optical disc printer
Hide thumbs
Also See for Inscripta:
- Operator's manual (18 pages) ,
- Installation instructions (2 pages)
Table of Contents
Advertisement
Quick Links
Download this manual
See also:
Operator's Manual
Advertisement
Table of Contents

Related Manuals for Primera Inscripta


Summary of Contents for Primera Inscripta
- Page 1 111501-510152-(03) Optical Disc Printer User’s Manual © 2001 All rights reserved.
- Page 2 This device complies with part 15 of the FCC rules. Operation This equipment has been tested and found to comply with This digital apparatus does not exceed the Class B limits for radio noise If you will be mounting the Optical Disc Printer internally...
-
Page 3: Hardware Setup
Read Me First! Congratulations on the purchase of your new Optical Disc Printer. If you are an experienced PC user and you wish to begin printing with your new printer immediately, please refer to the quick start instructions listed below. For more complete information regarding all aspects of your printer's operation, please refer to later chapters of this User's Manual. -
Page 4: Software Installation
ECP . SOFTWARE INSTALLATION Once you have physically set up your printer, the next step is to install the appropriate software you'll need for printing. The included CD contains all of the necessary software. At a minimum, you must install the printer driver appropriate for your computer's specific operating system (Windows®... - Page 5 Click on the Start button on the task bar, point to Settings, and select Printers. Double-click on the Add Printer icon. This will launch the Add Printer Wizard. Click Next, then click Next again. Click the Have Disk button.
- Page 6 LPT port driver. Select "no." If installing on Windows 95, answer "yes." IMPORTANT! Once the printer driver software is installed, the Image Placement values labeled on your printer's rear panel must be entered into the printer driver's Calibrate window. These values have been optimized specifically for your printer and allow images to be centered on a 120mm disc when printed.
- Page 7 If you have any questions about the operation of the Optical Disc Printer or its software, please first consult the User's Manual or the on-line Help. If you can not resolve your issue, contact the Technical Support Department according to the contact information listed on the Technical Support sheet included with this printer.
- Page 8 viii...
-
Page 9: Table Of Contents
B. Installing an Ink Ribbon ...6 C. Loading Blank CD Media...10 D. Printing a Self Test ...11 Section 3: Using the Optical Disc Printer with Windows A. Connecting the Printer to Your Computer ...12 B. Installing the Printer Driver...13 C. Installing the 32-Bit Spooler for Windows 95/98/Me...14 D. -
Page 11: Section 1: Getting Started
Place the printer in a location with adequate air circulation to prevent internal heat build up. • Do not place the printer near heat sources such as radiators or air ducts, or in a place subject to direct sun-light, excessive dust, mechanical vibration or shock. -
Page 12: Identifying The Parts
CDs. This button also is pressed and held while power is applied in order to perform a self-test. Also, the printer can be reset while unit’s power is on by pressing and holding this button. The Ribbon Cartridge Eject Button is pressed to remove the... -
Page 13: Applying Power
3. Plug the power cord of the adapter into an available wall outlet. Once the power cord is connected, the printer will automatically turn ON as indicated by the illuminating and blinking every two seconds. This is the printer's normal "waiting"... -
Page 14: Section 2: Ink Ribbons And Optical Media
This ribbon contains a minimum of 700 prints. However, you can actually get more than 700 prints per ribbon because the printer has a built-in ribbon-saver mechanism. The head will lift over areas not printed at the bottom of the disc and stop the ribbon from advancing, thus saving 30% or more. -
Page 15: Printer Driver
IMPORTANT NOTES: DVD-Rs present a special situation for the Optical Disc Printer. Some DVD-Rs are manufactured with a raised stacking ring on both sides. DO NOT USE THESE TYPES OF DVD-Rs. You can damage the printer's thermal print head unless you use a DVD-R with the stacking ring removed from one side. -
Page 16: Installing An Ink Ribbon
INSTALLING AN INK 1. With power on, press the Tray Eject Button to eject the tray. Remove the tray from the printer by pulling it forward. 2. Press the Ribbon Cartridge Eject Button. The Cartridge 3. Carefully Remove the Ribbon Cartridge by pulling it forward. - Page 17 4. Confirm that the end of the plastic front panel labeled "Optical Disc Printer" is closest to you. This is the Supply End. The other end is the Take- Up End. 5. Lift up the front Ribbon Hold-Down Bracket. Supply End 6.
- Page 18 8. Insert a new ribbon in with the new, full supply of the ribbon in the slots towards you. Place the take-up reel in the slots located in the end of the printer away from you. 8 Ink Ribbons and Optical Media...
- Page 19 9. Close the Ribbon Hold-Down brackets on both the Supply End and the Take-Up End. 10. Turn the Ribbon Cartridge insert it firmly into the printer. Make sure that it docks securely so that the mating connector on the rear of the Ribbon Cartridge mates correctly. INDEX...
-
Page 20: Loading Blank Cd Media
C. LOADING BLANK CD MEDIA The Optical Disc Printer is capable of printing onto a variety of 120mm optical custom trays, you can even print onto CD-R business cards or other shapes of media. Each of these items is loaded one at a time, before the start of each print job. -
Page 21: Printing Aself Test
D. PRINTING A SELF TEST Now that the printer is set up and print supplies are loaded, a self test should be performed to check for proper operation of the printer. A sample of the self-test print is shown below. -
Page 22: Section 3: Using The Optical Disc Printer With Windows
Section 3: CONNECTING THE PRINTER TO YOUR COMPUTER The Optical Disc Printer is designed to be used with nearly any PC running Windows 95/98/Me or Windows XP . The printer is equipped with a standard 8-bit Centronics-type parallel port. This port is the means through which it receives data from your computer. -
Page 23: Installing The Printer Driver
2. Click on the Start button on the task bar, point to Settings, and select Printers. 3. Double-click on the Add Printer icon. This will launch the Add Printer Wizard. Click Next, then click Next again. 4. Click the Have Disk button. -
Page 24: Installing The 32-Bit Spooler For Windows 95/98/Me
Placement values labeled on your printer's rear panel must be entered into the printer driver's page 22). These values have been optimized specifically for your printer and allow images to be centered on a CD when printed. NOTE: Before installing updated printer driver versions, always delete the existing printer driver version from your system. - Page 25 To do this, select 32-Bit Print Spooler from the list of programs in the Add/Remove Programs Properties window and click on the Add/Remove button. Using the Optical Disc Printer with Windows 15 INDEX...
- Page 26 The Settings tab tells you the port and printer to which you are printing and allows you to configure the timeout settings. In most instances, these settings will rarely need to be changed.
-
Page 27: Setting Up The Printer Driver
The Job Queue tab appears only when a print job is being sent to the printer. This tab tells you the name and status of each job in the queue and shows you the order in which the jobs will print if you have sent multiple jobs to the printer. -
Page 28: Media Tab
NOTE: Most applications allow you to change these printer driver options from their "Print" and/or "Printer Setup" screens. This means that you don't have to go back to the main printer setup window each time you want to change a setting or option in the printer driver. -
Page 29: Image Size
Printable-surface discs formulated for ink-jet printing are not suitable for printing by the Optical Disc Printer. Also keep in mind that many formulations of lacquer are used on different brands of media. Some may be more compatible than others with the Optical Disc Printer. -
Page 30: Device Options Tab
Select the ribbon option that matches the type of ribbon currently loaded in the printer from the list that appears. Before you begin to use the printer, you must install the proper ribbon. See Section 2 for details on how to do this. - Page 31 Windows 95/98/Me. When selected, this option allows the printer driver to bypass the Windows 95/98/Me print manager and to send all print data directly to the printer. This option devotes all of your system resources to the current print job, thereby increasing overall print speed.
-
Page 32: Calibrate Tab
Windows 95/98/Me and if the included 32-Bit Print Spooler software has been installed. When selected, this option allows the printer driver to send all print jobs to the 32-Bit Print Spooler rather than to the Windows system print spooler. -
Page 33: Printing A Cd
With the Center Size set to 0 the inner circle will be 1.77 inches or 45 mm. Click on the Test Print button to send a test print to the printer. Before clicking, make sure you have a Monochrome Black resin... - Page 34 NOTE: In order for your Optical Disc Printer to print properly, some type of media must be installed. If you accidentally attempt to print without installing any media, the CD Tray will eject and the printer will pause until media is loaded and the CD Tray is closed again.
-
Page 35: Section 4: Interpreting The Printer's Led Status Light
LED Status Light LED Status Light printer. It can tell you a lot about what is happening inside the printer. To accurately interpret what it means when the light is on, off, or flashing, please refer to the following chart:... -
Page 36: Section 5: Maintaining The Printer
Reinstall the ribbon, insert the Ribbon Cartridge into the printer, and print a disc. If the white, vertical line is still evident, you may need to replace the print head. -
Page 37: Cleaning The Cd Tray And Printer Casing
Five different rubber rollers inside your printer may eventually become dirty after extended use. The diagram below shows their location. Four are located inside the printer's base unit, the other one is located on the colored, making them easy to locate. -
Page 38: Clearing A Media Jam
OFF and then back on again; press the CD Tray button again. If this does not work, turn the printer power OFF and gently try to clear or remove the CD media manually. You may need to eject the completely in order to clear the media. -
Page 39: Section 6: Technical Specifications
Power Requirement: Mechanical: Certifications: Warranty: Technical Specifications Optical Disc Printer Thermal Transfer 305 x 305 dpi or 610 x 305 dpi (12 dots per mm) 0.5" per second (5-10 seconds/pass, depending upon percentage of coverage) 4.488" (114mm) Standard lacquer-finish CD-R, CD-RW, CD-ROM;... -
Page 40: Appendix A: Interfacing Information
This section describes the pin assignments and signal specifications for each of these ports as well as for the printer's auxiliary interface B. 6-PIN MINI-DIN The 6-pin mini-DIN auxiliary interface is used for connecting the printer with auxiliary equipment such as a CD transporter or auto-loader. -
Page 41: Appendix B: Oem Internal Mounting
Appendix B: It is recommended that only qualified OEMs mount the Inscripta inside a duplicating tower, autoloader or full-height drive bay. The integration will require physical mounting, possible modification of the drive bay, power connection and a means to deliver parallel data and control signals to the unit. -
Page 42: Power Connection
B. POWER CONNECTION It will be necessary to supply the printer with power from the Power Adapter or an equivalent power source. If you choose not to use the Power Adapter supplied with the printer, make certain that your power source is capable of consistently delivering +24VAC DC at 2.5 amps. -
Page 43: Index
PC, Connecting Printer to...12 Power Input Port ...2 Power, Applying...3 Print Quality ...5, 10, 21, 27 Printer Driver ...1, 5, 13, 17, 19, 21, 23, 24, 25 Printing a CD ...23 Quick Start (Read Me First) ...iii Resolution...vi, 21, 24, 29 Ribbon Cartridge...2, 6, 7, 9, 25, 26, 27, 28... - Page 44 Ribbon Type...20, 29 Ribbon, Installing...6 Rollers ...27 Self Test...11 Software Installation ...iv, v Specifications...29, 30 SureThing Software...vi Technical Support ...28, 32 Thermal Print Head...5, 10, 26 Two-Color Ribbon ...4, 24 Write Direct to Port ...21, 22 34 Index...
- Page 48 Printed in the United States of America P/N 510152...
Need help?
Do you have a question about the Inscripta and is the answer not in the manual?
Questions and answers