
Related Manuals for Primera Impressa IP60


Summary of Contents for Primera Impressa IP60
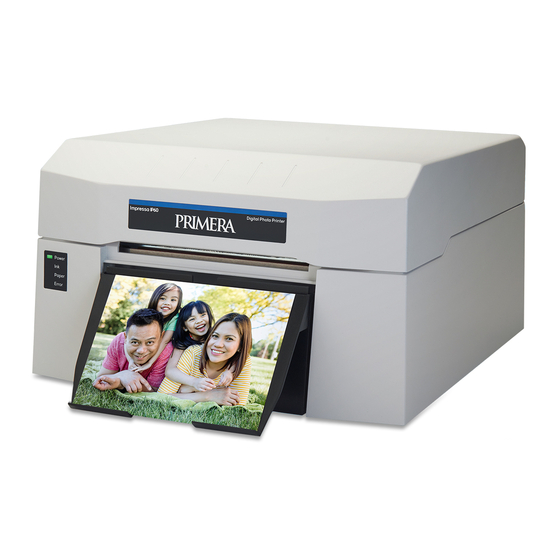
- Page 1 Power Paper Error User's Manual © 2018 All rights reserved For the most recent version of this manual please visit http://www.primera.com/...
- Page 2 Notices : The information in this document is subject to change without notice. NO WARRANTY OF ANY KIND IS MADE WITH REGARD TO THIS MATERIAL, INCLUDING, BUT NOT LIMITED TO, THE IMPLIED WARRANTIES OF MERCHANTABILITY AND FITNESS FOR A PARTICULAR PURPOSE.
- Page 3 Interactive Feature in this PDF Document There are interactive features that allow you to jump to different locations within the document. Each listing in the Table of Contents is interactive. Place the cursor on either the text or the page number. A small hand with a pointing finger icon appears.
-
Page 4: Table Of Contents
B. Using the Cost Estimator ..............16 C. Replacing Ink Cartridges/Low Ink Warning .......18 Section 4: Printing from a PC ..............21 A. Printing from Primera Snap ............21 B. Printer Settings .................. 27 C. Adjusting Print Alignment and Cut Strip Size ......29 Section 5: Printing from a Mac ..............31... -
Page 5: Section 1: Getting Started
INDEX Section 1: Getting Started THANK YOU… for choosing an Impressa IP60 Photo Printer. The IP60 will stunning photo-realistic photographs directly onto a variety of approved media. This User's Manual is your complete step-by- step guide to quickly and easily setting up and printing with your new Printer! A. -
Page 6: Unpacking And Inspection
INDEX B. UNPACKING AND INSPECTION While unpacking your printer, inspect the carton to ensure that no damage has occurred during shipping. Make sure that all supplied accessories are included with your unit. The following items are included in the supply box: 1. -
Page 7: Identifying The Parts
The Error LED will illuminate when there is an Error that requires viewing in the Primera PrintHub software. Open the software to view the error message. The Cut Waste Bin holds all of the cuts strips between photos. - Page 8 INDEX This illustration shows the input ports and power switch found on the rear panel of the printer. Rear Media Access Power Port Power Switch 4 Getting Started...
-
Page 9: Photo Tray
INDEX This illustration shows the interior of the printer. Top Cover Photo Paper (Media) Pressure Rollers Cartridge Carrier Cut Waste Bin Photo Tray Getting Started 5... -
Page 10: Installing/Removing The Photo Tray
INDEX D. INSTALLING/REMOVING THE PHOTO TRAY • The photo tray is used to hold 4x6 or 2x6 photos after printing. • If you are printing larger photos remove the photo tray to prevent feed and cut problem. To remove the photo tray, lift up until the pegs are clear of the waste cut bin and then pull out. -
Page 11: Installing/Removing The Cut Waste Bin
INDEX E. INSTALLING/REMOVING THE CUT WASTE BIN The cut waste bin captures the strip of paper which is cut before and after a photo is printed. This bin should be emptied every time you finish a roll of photo paper. To remove the cut waste bin first remove photo tray. -
Page 12: Section 2: Photo Paper
INDEX Section 2: Photo Paper The IP60 accepts ONLY Primera photo paper which contains a Smart Chip that identifies the media and the remaining paper. This has several advantages. • The cartridges and driver settings are calibrated to work specifically with the installed paper. - Page 13 INDEX Roll Specifications 6" Wide 6" Outer Diameter Smart 3" Inner Chip Diameter Core Photo Paper...
-
Page 14: Installing Photo Paper
INDEX B. INSTALLING PHOTO PAPER 1. Open the cover of the IP60. 2. Locate a roll of paper. 3. Using your pointer fingers and thumbs grasp the roll with both hands. Rest your thumbs on the top of the roll and place your index fingers into the plastic cores on each side. - Page 15 INDEX 4. The chip will automatically orient itself so that it is located at the top of the plastic chip carrier. Insert it into the corresponding slot on the right side of the printer. Chip Carrier Slot 5. Insert the pin on the left side of the roll into the slot on the left side of the printer.
- Page 16 INDEX 6. Once the roll is installed, place your pointer fingers on each side of the roll. Use your thumbs to slowly turn the roll forward and guide the leading edge of the paper into the feed area. Using your pointer fingers as a guide keep the loose edge of the paper lined up with the rest of the roll.
- Page 17 INDEX First, there should be an equal space on the left and right side of the paper in the feed area. Equal gap on each side Second check the alignment of the paper relative to the feed rollers in the printer area. The amount of paper visible should be equal across from left to right.
-
Page 18: Removing A Roll Of Paper
INDEX 8. If the space on either side of the paper in the feed area is not equal or the paper in the print area is not equally visible, follow the instructions in the next section to unload the paper. Then repeat the loading process until the paper is aligned. -
Page 19: Section 3: Primera Printhub
PrintHub accesses most of the information it uses from the printer itself so the printer must be turned on and communicating for the program to be useful. 2. Go to Start - Programs - Primera Technology - Primera PrintHub. Adjust alignment, sensor mode, output mode and advanced settings. -
Page 20: Monitoring Ink Levels
INDEX A. MONITORING INK LEVELS Ink levels can be monitored at any time by using the PrintHub. Immediately after printing starts the PrintHub will display the ink levels in the upper right corner of the application. Ink is displayed in 10% increments. Example 100% to 90% to 80% etc. B. - Page 21 INDEX To see a printable/saveable report click on the document icon next to the job you want to see. A report will display the information. You can print or save the report from this screen. You can also change the currency using the drop down, change the job name or adjust the cost from this screen.
-
Page 22: Replacing Ink Cartridges/Low Ink Warning
INDEX C. REPLACING INK CARTRIDGES / LOW INK WARNING You can replace cartridges at any time or wait for the Low Ink Warning to prompt you to replace cartridges. The first and only ink low warning will occur at 0% ink remaining. To change a cartridge, follow this procedure: 1. - Page 23 INDEX 3. Remove the cartridge. 4. Locate a new cartridge and remove it from its packaging. Remove the foil outer package and the tape covering the nozzles. Remove Tape PrintHub...
- Page 24 INDEX 5. Place the new cartridge into the empty carriage. Note: When installing the cartridge, tilt the cartridge at a slight backward angle of approximately 30 degrees. Side View 6. Make sure the cartridge is pushed back far enough so the ridge on the cartridge is behind the spring-loaded pusher on the lid.
-
Page 25: Section 4: Printing From A Pc
A. PRINTING FROM PRIMERA SNAP Primera Snap installs automatically with the IP60 software installer. To open the software search for “Snap” or click on the Windows Icon in the lower left. You will find Primera Snap under “P”. Overview Portrait mode... - Page 26 INDEX Orientation/Print Direction When you drag or browse to a file, Primera Snap will choose the best orientation that fits the current aspect ratio. For example, if your image is a 300 dpi JPG at 1800 pixels x 1200 the software will choose a 6 inch wide x 4 inch wide portrait image.
- Page 27 INDEX If you change the orientation to Landscape, the print direction arrow will switch to the right side and the landscape icon will change to blue. The size will also change to 6 inches x 8 inches. However, since in this example the image aspect ratio does NOT match the 6x8 size, the image will automatically be cropped.
- Page 28 Any image may be cropped by hovering over the corners of the image until a double arrow appears. Once the arrows appears, click and drag to move the crop lines. Primera Snap will automatically maintain the size that is currently set.
- Page 29 6x12, 6x2 (photo strips) or Panoramic 6 x 24 (or less). Primera Snap will always set one of the measurements to 6 inches and then choose the closest size to match the aspect ratio.
- Page 30 Printing from Primera Snap To print, click on the print Icon in the upper right corner of the software. All available Primera Printers will appear here. For example, if you have two IP60 printers each loaded with a different type of photo paper, both will appear on this list.
-
Page 31: Printer Settings
INDEX B. PRINTER SETTINGS If you are printing from Primera Snap, Print setting can be found right before printing after clicking the Print Icon and selecting the printer. When printing from other programs you will have slightly different options and may be presented with the following screen. - Page 32 The sizes that indicate + Overbleed have a .06” overbleed added to the displayed size. When printing from Primera Snap the size setting is chosen during the image setup so it is not available from the settings screen. The following sizes are available: 6x2, 6x4, 6x6, 6x8, 6x2 + Overbleed, 6x4 + Overbleed, 6x6 + Overbleed, 6x 8 + Overbleed, 6x12, 6x18 and 6 x 24.
-
Page 33: Adjusting Print Alignment And Cut Strip Size
INDEX • Launch Print Hub. Click this setting open the Primera Print Hub. • Details. Click this settings to view the driver version, firmware version, total printed photos on the printer, view various printer calibration settings and view or reset the print counter. - Page 34 Finally, it is also possible to remove white space around the photo by increasing the overbleed in the print Setup when printing from Primera Snap. However, it is best to overbleed as little as possible to avoid ink waste and over saturation of the printer ink pads.
-
Page 35: Section 5: Printing From A Mac
INDEX Section 5: Printing from a Mac (Coming Soon) Printing from a Mac... -
Page 36: Section 6: Troubleshooting And Maintenance
INDEX Section 6: Troubleshooting and Maintenance Important Note: Before determining print quality leave the photo uncov- ered for at least 15 minutes so the ink can fully dry. If photos are stored as a stack immediately after printing, uneven drying will occur where the ink drys more at the edges than the middle. -
Page 37: Poor Print Quality - Cleaning The Cartridge
INDEX 6. Copper Contacts. Clean the copper contacts on the back of the print carriage and the Copper contacts on the print head with contacts rubbing alcohol and a paper towel. 7. Image Resolution (DPI). Try another Image. Perhaps the resolution of the current image is not sufficient for a quality print.. - Page 38 INDEX 3. Determine if printing is now acceptable by printing your image. If the sample has missing colors or voids within a color strip, remove the cartridge from the printer and proceed to step 4. 4. Prepare items needed for procedure. A Glass of Water Two Paper Towels folded four times each...
- Page 39 INDEX 6. Place one paper towel on cartridge nozzles. Gently press the paper towel with your finger. Leave the paper towel on the nozzles for 30-40 seconds. Cartridge Nozzles Place one paper Gently press Leave paper towel on nozzles paper towel with towel on nozzles finger for 30-40 seconds...
-
Page 40: Interpreting The Printer's Indicator Lights
INDEX 8. Dry cartridge. Dry excess water from cartridge. Ensure cartridge contacts are completely dry. Printer damage may result if cartridge contacts are not completely dry 9. Verify cartridge is now functioning properly by printing your label. C. INTERPRETING THE PRINTER’S INDICATOR LIGHTS Most error messages will appear on your computer screen via the PrintHub application or the Printer Utility (Mac). -
Page 41: Technical Support
Open the software. Click on the Help Menu - Contents Email Support www.primera.com/customer-support Phone Support 763-475-6669 (Mon - Fri 8 a.m. - 6 p.m CST) Chat Support www.primera.com - look for the chat prompt on lower right Troubleshooting and Maintenance... -
Page 42: Section 7: Technical Specifications
Window 7, 8, 10, Mac OS X 10.9+ (coming soon) Data Interface: USB 2.0 Printing Software: Primera Snap included; can also be used with most other popular label design and graphics programs Electrical Rating: 12VDC, 5.0A Power Requirements: 100-240VAC, 50/60 Hz, 60 watts... -
Page 43: Index
INDEX Index Align Print Head................32 Alignment Tab .................29 Color Matching ..............26, 28, 38 Cost Estimator ................. 16 Crop ....................21, 24 DPI ....................33 Error LED ..................3, 36 Ink LED ..................3, 36 Ink Saturation ..................28 Installing Photo Paper ..............10 Cost .....................15, 16 Panoramic ..................8, 25 Paper LED ..................3, 36 Paper Size ..................28... - Page 44 Printed in the United States of America...
Need help?
Do you have a question about the Impressa IP60 and is the answer not in the manual?
Questions and answers