Table of Contents
Advertisement
Quick Links
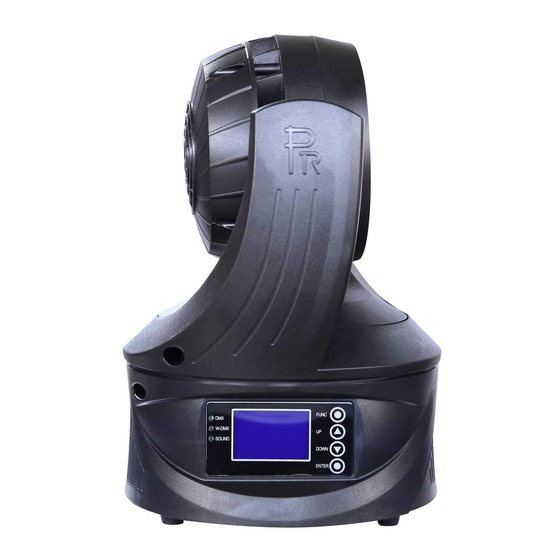
XLED 250 BEAM
PR-8113
This product manual contains important information about the safe installation and use of this product. Please
read and follow these instructions carefully before installing and using the product and keep this manual in a
safe place for future reference.
PR LIGHTING LTD.
http://www.pr-lighting.com
Advertisement
Table of Contents

Summary of Contents for PR Lighting XLED 250 BEAM
- Page 1 XLED 250 BEAM PR-8113 This product manual contains important information about the safe installation and use of this product. Please read and follow these instructions carefully before installing and using the product and keep this manual in a safe place for future reference.
-
Page 2: Table Of Contents
INDEX SAFETY INFORMATION AND WARNINGS ------------------------------------------------------------------------------------ PRODUCT INSTALLATION ----------------------------------------------------------------------------------------------------------- POWER SUPPLY CONNECTION ----------------------------------------------------------------------------------------------------- DMX CONTROL CONNECTION ---------------------------------------------------------------------------------------------------- DMX TERMINATOR --------------------------------------------------------------------------------------------------------------------- PRODUCT FUNCTION SETUP ------------------------------------------------------------------------------------------------------ TO SET THE DMX START ADDRESS ---------------------------------------------------------------------------------------------- STAND-ALONE MODE ----------------------------------------------------------------------------------------------------------------- MASTER/SLAVE MODE --------------------------------------------------------------------------------------------------------------- SOUND OPERATION---------------------------------------------------------------------------------------------------------------------- OPERATION MENU --------------------------------------------------------------------------------------------------------------------- DMX PROTOCOL ----------------------------------------------------------------------------------------------------------------------- INDICATION OF LED DIGITAL TUBE ---------------------------------------------------------------------------------------------... -
Page 3: Safety Information And Warnings
SAFETY INFORMATION AND WARNINGS After receiving product, please unpack and check if there are any damages caused by transportation. Do not use the fixture if transportation damages occur and contact the manufacturer or the dealer as soon as possible. The product is only for indoor use, IP20. Use only in dry locations. Keep this device away from rain and moisture, excessive heat, humidity and dust. -
Page 4: Product Installation
PRODUCT INSTALLATION SAFETY CORD CLAMP WARNING: Please run the safety cord through safety hole and make sure that the cord is property secured. Take 1 clamp and 1 the safety cord out from the package and mount 1 clamp on the BOTTOM of fixture with 2 retainers attached to the clamp. -
Page 5: Power Supply Connection
POWER SUPPLY CONNECTIONS Connect the power cord as follows: L (live) =brown E (earth) =yellow/green N (neutral) =blue Please be advised to notice power supply’s voltage and frequency meet what are described on the nameplate of the product. It is recommended that each unit be power connected separately so that they may be individually switched on and off. -
Page 6: Dmx Terminator
DMX TERMINATOR In the Controller mode, at the last fixture in the chain, the DMX output has to be connected with a DMX terminator. This prevents electrical noise from disturbing and corrupting the DMX512 control signals. The DMX terminator is simply a Canon connector with a 120Ω (ohm) resistor connected across pins 2 and 3, which is then plugged into the output socket on the last fixture in the chain. -
Page 7: To Set The Dmx Start Address
Press button UP or DOWN to change the parameters (increase or decrease the numbers) Press button FUNC, it will return to the upper menu one by one. If the button not pressed, the system will go back to display status automatically. -
Page 8: Sound Operation
SOUND OPERATION To select different level(1-100) of sound sensitivity based on different operating environment under sound operation under Note: If several fixtures in series under Master/Slave mode, Only Master responds to external sound. OPERATION MENU Level 1 Level 2 Level 3 Level 4 Standard:1~506 DMX Address... - Page 9 Display Contrast 0~18 (Default:9) XXXX Power On Hours Display time Head Sensor XXXX Information Software Version 1.0.1 Self Test Lamp Pan Location 0-255 0-127: Stop 128-191: Pan Speeds in CW from slow to fast Test Mode 192-255 : Pan Speeds Manual Test in CCW from slow to fast...
-
Page 10: Dmx Protocol
Note: 1. There is only one projector to be set as a Master in a signal cable if Master’s functions used, Please disable DMX control signal. 2. When multiple projectors’ work together in synchronous control state, Parameters can be transmitted from the master projector to the slave projector such as DMX channel mode, Display setting status ( Contrast setting exclude ) and operation mode ( User memory data is include ) . -
Page 11: Maintenance
Explanations for logo on top-right of the LCD display: Slave Master DMX512 Mode Preset Memory Sound Operation User’s Memory Test Memory Buttons are Locked, buttons are unlocked and lock logo disappears after “Enter” button Lock Logo pressed more than 3 seconds MAINTENANCE If the Fixture does not function, check if the fuses on the power socket of the unit is broken or not, if broken, they should only be replaced by fuses of the same specification. -
Page 12: Technical Data
TECHNICAL DATA VOLTAGES: 100V~240V AC,50/60Hz LIGHT SOURCE: TYPE: LUMINUS PHLATELIGHT LED LIFE SPAN: 50,000 Hrs POWER CONSUMPTION: 120W@220V HEAD MOVEMENT: 0°or Endless, 270°or Endless Pan: 72 Tilt : Pan Tilt Swap and Invert Function Auto-position correction and magnet positioning function STROBE: Electronic strobe, 0-25 F.P.S LENS ANGLE:... - Page 13 SIZES: LIGHT OUTPUT : 1/10 Maximum): Field Angle( LUX (lx) 23853 5963 2650 1491 DISTANCE (M) SQUARE SIZE (M) 0.23 0.46 0.68 0.91 1.14 13/16...
-
Page 14: Component Order Codes
COMPONENT ORDER CODES NAME PART NO. QUANTITY REMARK HQ255-2W02 POWER SUPPLY 192010180 1 PCS 150020215 CBT-90-W 071100069 FIXED FOCUS LENS 270041037 5x20 3.15A FUSE 1 PCS 290151337 HTD-297-3M TILT/ PAN BELT 2 PCS 7015 FAN 030060087 1 PCS MGT7012HB-W20 4010 FAN 030060093 2 PCS HA4010V4-000C-999... -
Page 15: Circuit Diagram
CIRCUIT DIAGRAM 15/16... - Page 16 PR LIGHTING LTD. 1582 Xingye Avenue, Nancun Panyu Guangzhou, 511442 China TEL: +86-20-3995 2888 FAX: +86-20-3995 2330 P/N: 320020255 Version: 20140820 16/16...


Need help?
Do you have a question about the XLED 250 BEAM and is the answer not in the manual?
Questions and answers