Table of Contents
Advertisement
Quick Links
XLED 6019
PR-8129
This product manual contains important information about the safe installation and use of this product. Please
read and follow these instructions carefully before installing and using the product and keep this manual in a
safe place for future reference.
PR LIGHTING LTD.
http://www.pr-light ing.com
Advertisement
Table of Contents

Related Manuals for PR Lighting XLED 6019


Summary of Contents for PR Lighting XLED 6019
- Page 1 XLED 6019 PR-8129 This product manual contains important information about the safe installation and use of this product. Please read and follow these instructions carefully before installing and using the product and keep this manual in a safe place for future reference.
-
Page 2: Table Of Contents
Any damage caused by improper use will not be assumed by the manufacturer and / or dealer. Note: For the products made by Guangzhou PR lighting Ltd, the warranty for the whole product is one year starting from the delivery date but the light source is not within the warranty. -
Page 3: Safety And Warnings
1. SAFETY AND WARNINGS NOTE Before a projector’s installation, power-on, operation and maintenance, please carefully read the safety information hereinafter! The following safety signs are used in the user manual. Warning User Electrical Protective Flames High Goggles Manual shock Gloves Temperature When unpacking , check if there is transportation damage before using the projector. -
Page 4: Cleaning And Maintenance
cord supplied through the safety cord holes for safety support. Before any installation, maintenance and cleaning work, please ensure the projector is disconnected from ● power mains. ℃ After running for 30minutes, the temperature of the housing of the projector is 55 .After stable operation , ●... -
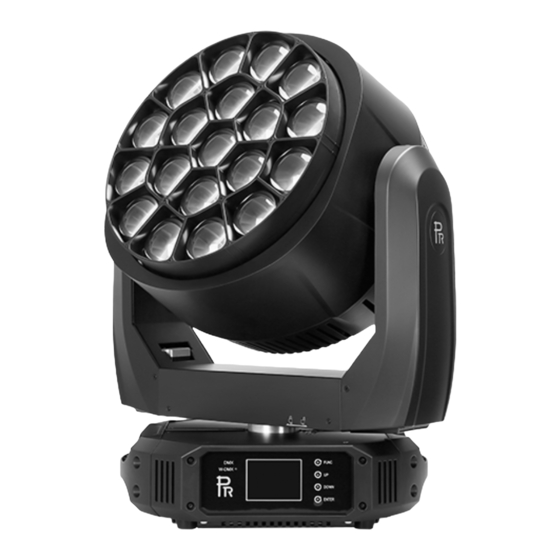
Page 5: Appearance
3. APPEARANCE 4. INSTALLATION RIGGING ● While transportation of the fixture, please lock both Pan and Tilt well; Before the use of the fixture, please unlock both. It’s forbidden to run the fixture while it’s locked. Take 2clamp and 1 the safety cord out from the package and mount 1 clamp on the BOTTOM of fixture with 2 retainers attached to... -
Page 6: Power Connections
the clamp. Hang the fixture on the steel truss and fasten the retainers attached to the clamp. Always ensure that the location that you are going to mount the unit is secure and is strong enough to support the weight of the unit (See the WARNING as shown above) To pass SAFETY CORD through the SAFETY HOLE on the back cover of the base of the fixture for safety! Always ensure that the unit is firmly anchored to avoid vibration and slipping whilst functioning. -
Page 7: Dmx Terminator
DMX TERMINATOR ● In the Controller mode, at the last projector in the chain, the DMX output has to be connected with a DMX terminator. This prevents electrical noise from disturbing and corrupting the DMX control signals. The DMX terminator is simply an XLR connector with a 120 (ohm) resistor connected across pins 2 and 3, which is then plugged into the output socket on the last projector in the chain. -
Page 8: Dmx Wirelsess Control
address 037 and so on. Launch the projector. Press button ENTER more than 2seconds to unlock panel. Press button ENTER to display DMX address; Press button UP and DOWN, you can set the address; Press button ENTER to confirm; after powered on next time, the default will be last value saved Press button FUNC, it will return to the upper menu DMX WIRELESS CONTROL (Optional) ●... -
Page 9: Operation Menu
6. OPERATION MENU 1st level menu 2nd level menu 3rd level menu 4th level menu 1-494 Portset Reset Are You Sure Standard 19 DMX Mode EXTENDED92 Normal Time Out Loss of DMX Hold Last Value XLR First XLR Only Wireless Mode Wireless Only Wireless First WirelessTo XLR... - Page 10 Touch Regulate Pan DMX Invert Option Set Tilt DMX Invert Pan Tilt Swap Power On Hours XXXX MainBoard X.X.X Pan&Tilt X.X.X Software Version Driver 1 X.X.X Driver 2 X.X.X Fan Board X.X.X Touch Board Display Board Pan and Tilt Info Temperature Driver 1 Driver 2...
- Page 11 Y Hall Error Lens-RHall Error Zoom Hall Error Out-X MEMS ralves Out-Y Out-Z Self test Open Strobe Strobe 1 Strobe 2 All off Green Blue Lamp White Test mode Yellow Cyan Purple All on Stop Rotating Lens Rotating Rotating Reverse Rotating Zoom 0-255 Pan Location...
- Page 12 Pan&Tilt Speed 0-255 0-255 DMX Operation Preset Memory Strobe 0-255 0-255 Dim Speed 0-255 0-255 Move Effec 0-255 Color Maco 0-255 0-255 Operatio Mode Green 0-255 User Memory Blue 0-255 White 0-255 Zoom 0-255 Lens Rotation 0-255 Pan Location 0-255 Tilt Location 0-255 P&T Speed...
-
Page 13: Dmx Protocol
7. DMX PROTOCOL Standard Extended Function Description Mode Mode Value Strobe 001-127 Pulse Strobe from slow to fast 128-255 Strobe from slow to fast Dimmer 000-255 Linear Dimmer from dark to bright Dimmer in 16 bit 000-255 Dimmer in 16 bit precision Dimmer Speed 000-255 From slow to fast... - Page 14 Area 16 Red 000-255 Area 16linear change from dark to bright 000-255 Area 17linear change from dark to bright Area 17 Red 000-255 Area 18linear change from dark to bright Area 18Red 000-255 Area 19linear change from dark to bright Area 19 Red 000-255 Area 1 linear change from dark to bright...
-
Page 15: Led Indication
Area3 White 000-255 Area 3linear change from dark to bright 000-255 Area 4linear change from dark to bright Area 4 White 000-255 Area 5linear change from dark to bright Area 5 White 000-255 Area 6linear change from dark to bright Area 6 White 000-255 Area 7linear change from dark to bright... -
Page 16: Technical Data
10. TECHNICAL DATA VOLTAGES 100V~240V AC,50/60Hz POWER CONSUMPTION 1400W@220V LIGHT SOURCE LED: OSRAMS: 60W RGBW LED(SMT), Four in One Power: 60W,19pcs Color temperature: Linear change from 2700K to 10000K Rated life 50000hrs COLORS Linear RGBW ,color mixing with unlimited colors, macros DIMMER 0-100% linearly adjustable STROBE:... - Page 17 Total hours, DMX channel number, software versions are displayed and display inversion HOUSING: High temperature engineering-plastic, IP20 WEIGHT: 29.5Kg AMBIENT TEMPERATURE Maximum ambient temperature: 40 °C SIZES: LIGHT OUTPUT : 3.3 °lux 472413 118103 52490 29526 18897 13123 60 °lux 6666 1667 DISTANCE (m)
- Page 18 The illustration of LED lamp area distribution 1.LED lamp area from area1 to area19 2.The illustration is the initial status of the projector after reset. The initial status of the projector after reset. :1~6 LED lamp board distribution :1~6 DIP switch distribution. ⑤...
-
Page 19: Circuit Diagram And Pcb Connections
11. CIRCUIT DIAGRAM AND PCB CONNECTIONS CIRCUIT DIAGRAM ●... -
Page 20: Pcb Connections
PCB CONNECTIONS ● 1. 1-channel LED Driver Control Board of PR-8129 Name Power Input DMX Signal output DMX Signal Input Name Motor output 2. Motor driver board of PR-8129 Fan1 Fan2 DMX Signal output DMX signal input Thermal sensor input DMX output MS2 magnet sensor MS4 magnet sensor... - Page 21 3. Pan and Tilt board of PR-8129 Name X magnet sensor Y magnet sensor X motor output Power input Y motor output Y opt-coupler sensor X opt-coupler sensor DMX Signal input DMX Signal output 4. Master board of PR-8129 Name Thermal sensor DMX Signal output DMX Signal input...
-
Page 22: Component Order Codes
5. 3 channel LED driver board of PR-8129 Name DMX Signal output DMX Signal input Power input 12. COMPONENT ORDER CODES NAME PART NO. REMARKS 14HY5201-14W-100 STEPPING MOTOR 030040248 17HDC1217Y-110NE STEPPING MOTOR 030040256 24HED4002-28M STEPPING MOTOR 030040264 AD09224HB257900 PWM SPEED ADJUSTABLE FAN 030060074A PFC0252B1-E01C-QB9 0.45A 4400 转... - Page 24 PR LIGHTING LTD. 1582 Xingye Avenue, Nancun Panyu Guangzhou, 511442 China TEL: +86-20-3995 2888 FAX: +86-20-3995 2330 P/N: 320020521 Version: 20171104...
Need help?
Do you have a question about the XLED 6019 and is the answer not in the manual?
Questions and answers