Table of Contents
Advertisement
Quick Links
*Older VFD3 & VHX control boxes with a 3.5mm Aux port will not work with the BIM-22-3
Table of Contents:
Introduction / Understanding Sensor Modes
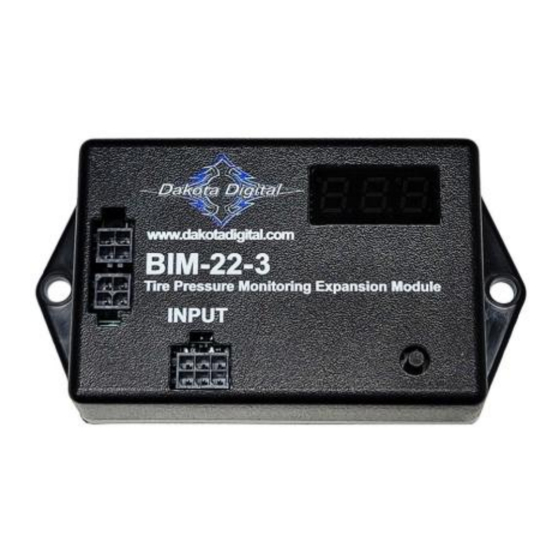
Bus Interface Module for TPMS
(Tire Pressure Monitoring System)
[1]
Page 2
Page 3
Page 4
Page 5
Page 7
Page 9
Page 11
Page 12
Page 13
Page 14
Page 16
MAN #650793
Advertisement
Table of Contents
Troubleshooting

Related Manuals for Dakota Digital BIM-22-3


Summary of Contents for Dakota Digital BIM-22-3
-
Page 1: Table Of Contents
BIM-22-3 Bus Interface Module for TPMS (Tire Pressure Monitoring System) *Older VFD3 & VHX control boxes with a 3.5mm Aux port will not work with the BIM-22-3 Table of Contents: Introduction / Understanding Sensor Modes Page 2 Display Screens / Sensor Location and Warning Levels Page 3 Sensor Location and Warning Levels –... - Page 2 The BIM-22-3 should be installed in a location where its display and switch are accessible in the event a new TPMS sensor needs to be installed in the system (see BIM Learn Sensors Mode). In situations where TPMS reception is not adequate inside the interior of the vehicle, the weatherproof TPMS Receiver Module can be mounted outside on the chassis near the center of the vehicle for better reception of the RF transmission signals from the TPMS sensors.
-
Page 3: Display Screens / Sensor Location And Warning Levels
If the dash system will not display one or more pressures, as it does not understand the new parts. The BIM-22-3 will have to be stepped through the Special Operating Modes to learn all the sensors, on page XX. -
Page 4: Bim-22-3
RELEASE is displayed – then release. 4. Press and hold either switch when 5. Tap either switch to highlight one of the four BIM-22-3 corners BIM-22-3). a. Each corner sensor is associated to a BIM channel. -
Page 5: Sensor Location And Warning Levels - Vhx
7. If FOUND xx and 00 ERRORS shown (X=should be the number of BIM channels used): a. One BIM-22-3 will read: FOUND 04 and 00 ERRORS. b. If a BIM-22-3 is used with a BIM-19-2 the scan should read: FOUND 08 and 00 ERRORS. c. Tap SW1 (I) until BIM SCAN is shown. - Page 6 Locating sensors on a VHX system: From Step 19 of the previous page 1. Tap SW1 (I) once when the LCD displays TIRE LOCATE SKIP. 2. The display will switch to TIRE LOCATE BEGIN. a. The second LCD will show the wheel location and possibly no pressure readings yet. 3.
-
Page 7: Sensor Location And Warning Levels - Vfd3 And Vfd3X
4. Press and hold SW1 (I) when BIM and are displayed. 5. Keep holding to display SCAN X and -. a. X = the number of BIM channels found, 4 will be displayed for only a BIM-22-3. 6. Release the SW1 (I) to display SCAN and ... - Page 8 Locating sensors on a VFD3 or VFD3X system: From Step 19: SKIP and are displayed. Tap SW1 (I) once to change the display to BEGIN and . Press and hold SW1 (I) to change the display to FILL LO and -. 2 ...
-
Page 9: Special Operating Modes / Bim-22-3 Menus
Special Operating Modes: The BIM-22-3 has special operating modes that can be used for configuration or for reporting information on its display for trouble-shooting purposes. Note: Display Pressures Mode and Display Battery Status Mode will not function correctly until the sensors are in service mode. See Understanding the Different Sensor Modes - Page 2 for information on how to get the sensors into service mode. - Page 10 Select Sensor Set Mode. If one buys an additional set of sensors for replacement or for a different application, the BIM-22-3 must know which set of sensors it will be using. It can only work with four sensors at any one time.
-
Page 11: Bim Learn Sensor Mode []
To begin the learn process for the left rear sensor press and hold the switch on the BIM-22-3 as you did for the sensors above. Then reduce the pressure in the left rear tire by greater that 2 PSI. The BIM-22-3 will continue displaying the blinking “-“... -
Page 12: Bim Locate Sensor Mode [] / Troubleshooting Quick Tips
BIM Locate Sensors Mode: Locating sensor positions on the vehicle can be done via a Dakota Digital instrument system or it can be done on the BIM-22-3 before the instruments are installed. The procedure below explains how to do this using the BIM-22-3. The sensors are shipped marked with colors indicating which tire on the vehicle they are to be mounted (LF = Red, RF = Green, LR = Blue, and RR = Yellow). -
Page 13: Troubleshooting
BIM repeatedly displays This error message occurs when the Note that this BIM display message will occur on VHX, VFD3, and BIM-22-3 does not receive vehicle speed VFD3X systems during the locate procedure because those systems then from a control box or a BIM-01-2. -
Page 14: Technical Specs / Compatibility List
4 (one for each sensor) Default BIM ID numbers 3 - 6 Control Box Compatibility - The following versions of software (or newer) are required to function with the BIM-22-3 (Note: All RTX systems support this option): Control Box / Dash... - Page 15 NOTES: [15] MAN #650793...
-
Page 16: Warranty / Service
SERVICE AND REPAIR DAKOTA DIGITAL offers complete service and repair of its product line. In addition, technical support is available to help you work through any questions or problems you may be having installing one of our products. Please read through the Troubleshooting Guide. There, you will find the solution to most problems.
Need help?
Do you have a question about the BIM-22-3 and is the answer not in the manual?
Questions and answers