Advertisement
Quick Links
PRODUCT DETAILS:
Part Number:
ECU Number:
Tail Harness Length Required:
TBM/Lug Part Number:
Wiring Part Number:
FITTING DETAILS:
Towbar Installation Time:
Wiring Installation Time:
Total Installation Time:
Bumper Cut Required:
49-75 Pacific Drive Keysborough, VIC 3173
Phone: 1800 812 017
Email: info@haymanreese.com.au
Rev:
A
03351RW
Maximum Towing Braked:
04826
Maximum Towing Unbraked:
1200mm
Maximum Static Ball Load:
21236
102242-WL
40 Mins.
Hayman Reese SmartCODE Solution Required:
30 Mins.
RPA Disable/Other:
70 Mins.
Note:
Yes
Page
INSTALLATION INSTRUCTIONS
PART NUMBER
•
Electric Brake = Blue Connector
•
Tail Length 1200mm
• RPA disable use tail 04943
1
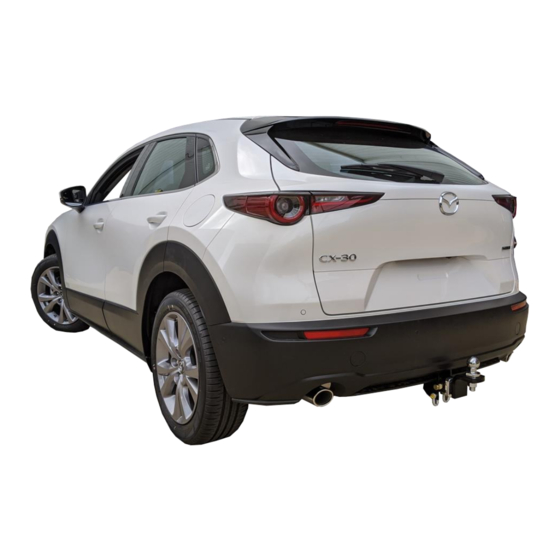
TOWBAR
03351RW
MAZDA CX30 DM CL4
1200
kg
750
kg
120
kg
NO
YES
Issue Date:
09-07-20
Advertisement

Related Manuals for Hayman Reese 03351RW


Summary of Contents for Hayman Reese 03351RW
- Page 1 Maximum Static Ball Load: TBM/Lug Part Number: 21236 Wiring Part Number: 102242-WL FITTING DETAILS: Towbar Installation Time: 40 Mins. Hayman Reese SmartCODE Solution Required: Wiring Installation Time: 30 Mins. RPA Disable/Other: Total Installation Time: 70 Mins. Note: • Electric Brake = Blue Connector Bumper Cut Required: •...
-
Page 2: Installation Instructions
1. 2. Do not, drill, cut, weld or otherwise modify the towbar. FOR TOWING PURPOSES ONLY - This towbar is designed and tested by Hayman Reese to adhere to ADR 62/02 which provides only for the expected load demands of towing. - Page 3 TOWBAR INSTALLATION INSTRUCTIONS PART NUMBER 03351RW MAZDA CX30 DM CL4 TOWBAR ASSEMBLY DIAGRAM ITEM DESCRIPTION MAZDA CX30 DM CLASS 4 SIDE ARM ASSY RHS SIDE ARM ASSY LHS TRAILER BALL MOUNT BOLT HEX HD M12x50x1.75P NUT HEX HD M12x1.75P WASHER PLAIN 1/2"...
- Page 4 TOWBAR INSTALLATION INSTRUCTIONS PART NUMBER 03351RW MAZDA CX30 DM CL4 1. Remove cargo cover, cargo floor liner, spare wheel and accessories Lift up to remove the rear latch trim 2. Pull the upper trim to the centre of the vehicle to unclip.
- Page 5 TOWBAR INSTALLATION INSTRUCTIONS PART NUMBER 03351RW MAZDA CX30 DM CL4 4. Open the tail gate Remove 3x plastic cover Remove 4x screws Pull rear ward to remove the tail light assembly Repeat for other side 5. Remove 3x scrivet clips inside the wheel guard Repeat for other side 6.
- Page 6 TOWBAR INSTALLATION INSTRUCTIONS PART NUMBER 03351RW MAZDA CX30 DM CL4 7. Remove 2x scrivet clips under the bumper 8. Unscrew 2x screws Repeat for other side 9. Proceed to the RHS inner boot section and locate the sensor harness connector.
- Page 7 TOWBAR INSTALLATION INSTRUCTIONS PART NUMBER 03351RW MAZDA CX30 DM CL4 11. Unscrew 8x nuts and discard the impact beam and nuts. 12. Insert the side arm into the chassis. Loosely insert 2x bolts and 2x washer through the chassis hole and into the side arm.
- Page 8 TOWBAR INSTALLATION INSTRUCTIONS PART NUMBER 03351RW MAZDA CX30 DM CL4 14. Place masking tape on the bumper outer skin Mark and cut out an area as shown to clear the hitch box. Cut measurement to start from the edge of bumper.
- Page 9 TOWBAR INSTALLATION INSTRUCTIONS PART NUMBER 03351RW MAZDA CX30 DM CL4 15. On the RHS, patch in the RHS branch patch connectors (1) in between the vehicle wiring (2) and the tail light wiring (3). 16. Route the LHS patch across to the LHS tail light connectors.
- Page 10 TOWBAR INSTALLATION INSTRUCTIONS PART NUMBER 03351RW MAZDA CX30 DM CL4 22. Using an alcohol wipe, clean a suitable area on the LHS inner sheet metal (1) and the underside of the ECU (04826). 23. Connect the trailer patch 12-way connector (2) to the ECU.
- Page 11 TOWBAR INSTALLATION INSTRUCTIONS PART NUMBER 03351RW MAZDA CX30 DM CL4 29. Remove the cover on the LHS kick panel (1). 30. Route the orange wire towards the fuse box (2). 31. On the vehicle fuse box (1), remove the vehicle fuse 15 Amp Fuse (F16) (2) and discard.
- Page 12 TOWBAR INSTALLATION INSTRUCTIONS PART NUMBER 03351RW MAZDA CX30 DM CL4 38. Secure tail harness to towbar. 39. Route tail harness up through chassis and previously drilled 30mm hole. 40. Seat grommet in 30mm hole and route to trailer harness blue connector on patch loom Note: Keep harness routing clear of all sharp edges, moving parts and places of extreme heat.
-
Page 13: Customer Information
TOWBAR MAINTENANCE AND CARE: 1. Hayman Reese recommend that the towbar LUG or TBM (tow ball Mount) Pull Pin and R-clip are removed and stored when not in use. Removal of LUG or TBM (tow ball mount) is advisable when not in use to assist with any of the following. - Page 14 VEHICLE’S GLOVEBOX AFTER INSTALLATION HAYMAN REESE SMART PIN Your Hayman Reese towbar is equipped with Smart Pin technology to help reduce towbar tongue rattle in most driving conditions. Please ensure below instructions are understood and routine maintenance is carried out to ensure best towing experience.
Need help?
Do you have a question about the 03351RW and is the answer not in the manual?
Questions and answers