
Related Manuals for Light Sky PEARL WASH


Summary of Contents for Light Sky PEARL WASH
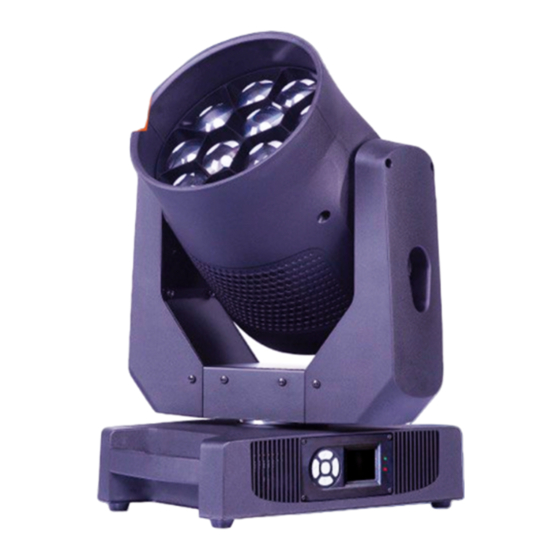
- Page 1 E-mail: PEARL WASH Address: No. 43, Yunfeng Road, Xiuquan Street, Huadu District, Guangzhou, China Please read these user manual carefully before use!
-
Page 2: Table Of Contents
Contents 1. Safety information.......................2 2. Technical information....................4 3. Attachment and body size..................6 4. Installation and connecting..................7 5. Control panel......................9 6. Menu setting.......................10 7. Channel function......................12 8. Circuit connecting diagram..................17 9. Cleaning and maintenances..................18 10.Troubeshooting......................19 11.Duty exonerative and copyright protection............20 Congratulations on choosing our company product! We thank you for your custom. ◆Please note that this product, as all the others in the rich my company range, has been designed and made with total quality to ensure excellent performance and best meet your expectations and requirements. -
Page 3: Safety Information
■This lighting fixture is for professional use only - it is not for household use; ■lnstallation Make sure all parts for fixing the projector are in a good state of repair. Make sure the point of anchorage is stable before positioning the projector. The safety chain must be prgperly hooked onto the fitting and secured to the framework. - Page 4 80℃ ■Temperature of the external surface The maximun temperature that can be reached on the external surface of the fitting, in a thermally steady state,is 80℃about。 Avoid contact bypersons and materials. Allow the fixture to cool for at least 5 minutes before handling. ■Maintenance Before starting any maintenance work or cleaning the luminaire, the power supply to the luminaire must be disconnected.
-
Page 5: Technical Information
MOVEMENT Electrical specifications and connections ● Power supply: Electronic auto-ranging ● Pan/ Tilt movement: 540°/270° ● Input voltage range: 100-240V 50/60Hz; ● Pan / Tilt Resolution:2.11°/1.05° ● Power rating:500W PF985; Pan/Tilt : Standard and speed adjustable ● Power in connector: Neutrik power ●... - Page 6 Distance spot diameter and illumination diagram 55°Lux(fc) 332(30) 97(9) 72(6.7) 33(2) 894(83.1) 390(36.2) 215(20) 102(4) 191(17.8) 75(7) 42(3.9) 20(0.1) 1136(105.6) 466(43.3) 256(23.8) 97(5) RBGL 2100(195.2) 703(65.3) 398(37) 162(9) 7°Lux(fc) 6115(568.3) 2204(204.8) 1381(128.3) 554(51.5) 16711(1553) 6282(583.8) 3928(365.1) 1576(146.5) 3150(292.8) 1194(111) 751(69.8) 302(28.1) 23600(2193) 8935(830.4)
-
Page 7: Attachment And Body Size
ATTACHMENT AND BODY SIZE power cord... -
Page 8: Installation And Connecting
INSTALLATION AND CONNECTING Installing the projector- Fig. 3 The projector can be installed on the floor resting on special rubber feet, on a truss or on the ceiling or wall. WARNING:with the exception of when the projector is positioned on the floor, the safety rope must be fitted. This must be securely fixed to the support structure of the projector and then connected to the fixing point at the centre of the base. - Page 9 power in power end The N terminal is connected with the blue line. Ground The L terminal is connected with the brown line. The stage lighting power supply can not be more than 3pcs pre line, ● different types of lamps are connected as follows: connection to the eiectricty mains must be carried out by a qualified electrical ●...
-
Page 10: Control Panel
signal end DMX512 in Up arrowhead:page up Down arrowhead:page down Left arrowhead:reduce Right arrowhead:increase Enter:OK function Display Exit:in the choice screen 1. DMX settings 2. Information 3.Personal 4. Manual control 5. Service... -
Page 11: Menu Setting
Main menu I menu II menu III menu Address: 001-512 Standar Channel → → Extend Setting Blackout Stae → Auto Hold Total time → ****H Light time → ****H Temperature → **℃ Fan1 speed → ****R Fan2 speed → ****R MCU 1(XY) OK/OFF MCU 2(Zoom) - Page 12 Main menu I menu II menu III menu Silent Fan mode → Standar Hot. Chinese Language → English Display Back. → Forward Display Dir. → Reverse 1.Pan 000/255 2.Pan Fine 000/255 3.Tilt 000/255 4.Tlit Fine 000/255 5.Function 000/255 6.Dimmer 000/255 7.Dimmer fine 000/255 8.Strobe 000/255 9.Red 000/255...
-
Page 13: Channel Function
CHANNEL FUNCTION(V1.0) Channel Value/DMX percentage Function Note 26CH 0-255 0%...100% PAN FINE 0-255 0%...100% TILT 0-255 0%...100% TILT 0-255 0%...100% FUNCTION No Fuction - 127 - 255 Reset DIMMER 0-255 Dimmer 0%...100% 0- 127 FINE DIMMER 128-255 Dimmer 0%...100% Strobe 0- 3 Light ON 4- 103... - Page 14 Channel Value/DMX percentage Function Note Effect Macro 0- 10 No Fuction 11- 20 Macro1 21- 30 Macro2 31- 40 Macro3 41- 50 Macro4 51- 60 Macro5 61- 70 Macro6 71- 80 Macro7 81- 90 Macro8 91- 100 Macro9 101- 110 Macro10 111 - 120 Macro11...
- Page 15 Channel Value/DMX percentage Function Note 38CH 0-255 0%...100% PAN FINE 0-255 0%...100% TILT 0-255 0%...100% TILT FINE 0-255 0%...100% FUNCTION 0- 127 No Fuction 128-255 Reset DIMMER 0-255 Dimmer 0%...100% DIMMER FINE Dimmer Fine 0%...100% Strobe 0- 3 Light ON 4- 103 Strobe Frequency 104- 107...
- Page 16 Channel Value/DMX percentage Function Note Lime GREEN 0-255 0- 100% Lime green dimmer from dark to bright RED- 4 0-255 0- 100% Red dimmer from dark to bright GREEN- 4 0-255 0- 100% green dimmer from dark to bright BLUE- 4 0-255 0- 100% Blue dimmer from dark to bright Lime GREEN...
- Page 17 Channel Value/DMX percentage Function Note Strobe Back 0-255 Macro Speed from slow to fast Red Back 0-255 0- 100% Red dimmer from dark to bright Green Back 0-255 0- 100% Green dimmer from dark to bright Blue Back 0-255 0- 100% Blue dimmer from dark to bright Back Lime green 0-255...
-
Page 18: Circuit Connecting Diagram
-17-... -
Page 19: Cleaning And Maintenances
CLEANING AND MAINTENANCES ■1.In order to ensure the projector could work normally. It should be kept clean always . The lens should also be regularly cleaned to maintain an optimum light output. Do not use any type of solvent on lens. It will damage the projector. ■2.Suggestion: The continue usage of the light don't exceed 4 hours. -
Page 20: Troubeshooting
It is recommended some solution for some normal trouble shooting. Any inextricability problems should always be handling by the professional person. Disconnect the power supply before maintenance the light. ■ LED off / LED: 1.Please check if install the suitable voltage. 2.Please check whether the led will reach the end of their life can explode;... -
Page 21: Duty Exonerative And Copyright Protection
■ The lamp belongs to consumption products that is not guarantee to keep it in good repair. ■ Any products broken that didn't according to the instruction is not guarantee to keep it in good repair. ■ Any products broken that didn't according to the instruction is not guarantee to keep it in good repair.
Need help?
Do you have a question about the PEARL WASH and is the answer not in the manual?
Questions and answers