Huawei BTS3900A Installation Manual
Hide thumbs
Also See for BTS3900A:
- Installation manual / instruction manual (29 pages) ,
- Quick installation (20 pages) ,
- Commissioning manual (20 pages)

Related Manuals for Huawei BTS3900A


Summary of Contents for Huawei BTS3900A
- Page 1 BTS3900A(Ver.B) Installation Guide Issue Date 2011-10-25 HUAWEI TECHNOLOGIES CO., LTD.
- Page 2 All other trademarks and trade names mentioned in this document are the property of their respective holders. Notice The purchased products, services and features are stipulated by the contract made between Huawei and the customer. All or part of the products, services and features described in this document may not be within the purchase scope or the usage scope.
-
Page 3: About This Document
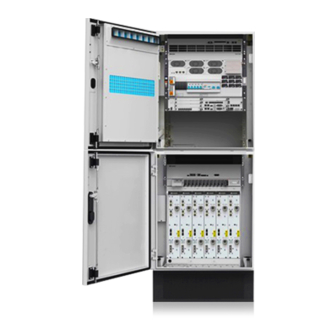
Installation Guide About This Document About This Document Overview This document describes installation of the BTS3900A (Ver.B) (referred to as the BTS3900A in this document) cabinet, boards, modules, and cables. It also provides checklists for hardware installation. Product Version The following table lists the product version related to this document. - Page 4 7 Checking the Installed Cables and Modules The internal modules and cables are installed in the BTS3900A cabinet before delivery. You need to check whether the modules and cables work properly on site. 8 Installing the Base This section describes the procedure and precautions for installing a base on the concrete floor.
- Page 5 Examples of information displayed on the screen are in Courier New. Command Conventions The command conventions that may be found in this document are defined as follows. Issue 01 (2011-10-25) Huawei Proprietary and Confidential Copyright © Huawei Technologies Co., Ltd.
- Page 6 Press the keys in turn. For example, pressing Alt, A means the two keys should be pressed in turn. Mouse Operations The mouse operations that may be found in this document are defined as follows. Issue 01 (2011-10-25) Huawei Proprietary and Confidential Copyright © Huawei Technologies Co., Ltd.
- Page 7 Press the primary mouse button twice continuously and quickly without moving the pointer. Drag Press and hold the primary mouse button and move the pointer to a certain position. Issue 01 (2011-10-25) Huawei Proprietary and Confidential Copyright © Huawei Technologies Co., Ltd.
-
Page 8: Table Of Contents
BTS3900A(Ver.B) Installation Guide Contents Contents About This Document........................ii 1 Changes in the BTS3900A (Ver.B) Installation Guide............1 2 Preparing for Installation......................2 2.1 Preparing Tools and Meters..........................3 2.2 Skills and Requirements for Onsite Personnel....................3 3 Information About the Installation...................5 3.1 Configuration of the BTS3900A Cabinet......................6 3.2 Application Scenario of the BTS3900A Cabinet.....................13... - Page 9 12.9 Installing the Batteries and Related Cables....................147 13 Installation Checklist......................150 14 Performing the Power-On Check..................153 15 Subsequent Operations......................156 15.1 Sealing the Cable Holes on the Base......................157 15.2 Applying Touch-Up Paint..........................158 Issue 01 (2011-10-25) Huawei Proprietary and Confidential viii Copyright © Huawei Technologies Co., Ltd.
-
Page 10: Changes In The Bts3900A (Ver.b) Installation Guide
Installation Guide 1 Changes in the BTS3900A (Ver.B) Installation Guide Changes in the BTS3900A (Ver.B) Installation Guide This chapter describes the changes in the BTS3900A (Ver.B) Installation Guide. 01 (2011-10-25) This is the first official release. Issue 01 (2011-10-25) Huawei Proprietary and Confidential... -
Page 11: Preparing For Installation
2.2 Skills and Requirements for Onsite Personnel Onsite personnel must be qualified and trained. Before performing any operation, onsite personnel must be familiar with correct operation methods and safety precautions. Issue 01 (2011-10-25) Huawei Proprietary and Confidential Copyright © Huawei Technologies Co., Ltd. -
Page 12: Preparing Tools And Meters
2.2 Skills and Requirements for Onsite Personnel Onsite personnel must be qualified and trained. Before performing any operation, onsite personnel must be familiar with correct operation methods and safety precautions. Issue 01 (2011-10-25) Huawei Proprietary and Confidential Copyright © Huawei Technologies Co., Ltd. - Page 13 2 Preparing for Installation Before the installation, pay attention to the following items: The customer's technical engineers must be trained by Huawei and be familiar with the proper installation and operation methods. The number of onsite personnel depends on the engineering schedule and installation environment.
-
Page 14: Information About The Installation
Multiple cabinets can be configured and installed for the BTS3900A to meet the requirements of different RFU configurations, backup power capacity, and transmission space. In addition, different configurations of cabinets can be used for the BTS3900A in the 110 V AC/220 V AC power supply scenario and -48 V DC power supply scenario. -
Page 15: Configuration Of The Bts3900A Cabinet
3.1 Configuration of the BTS3900A Cabinet To meet requirements in different outdoor environments, multiple cabinets with different functions are provided by Huawei for distributed macro base stations. The Advanced Power module with heat exchanger (APM30H) and Radio Frequency Cabinet (RFC) provides space and surge protection and enables power distribution and heat dissipation for the BBU3900 and RFU. - Page 16 220 V AC power supply scenarios. BBU3900 Mandatory The BBU3900 processes the baseband signals and enables interaction between the base station and the BSC or RNC. Issue 01 (2011-10-25) Huawei Proprietary and Confidential Copyright © Huawei Technologies Co., Ltd.
- Page 17 1 U space at the bottom of the cabinet. Configurations of the RFC Figure 3-2 shows the exterior and configurations of the RFC. Issue 01 (2011-10-25) Huawei Proprietary and Confidential Copyright © Huawei Technologies Co., Ltd.
- Page 18 RF signals, data processing, and signal combination and division. Configurations of the TMC11H There are two types of TMC11Hs: Issue 01 (2011-10-25) Huawei Proprietary and Confidential Copyright © Huawei Technologies Co., Ltd.
- Page 19 UELP or UFLP. To protect monitoring signals, an SLPU configured with two USLP2s may be configured, which is installed in the 1 U space under the BBU, Issue 01 (2011-10-25) Huawei Proprietary and Confidential Copyright © Huawei Technologies Co., Ltd.
- Page 20 Configurations of the IBBS200D Figure 3-4 shows the exterior and configurations of the IBBS200D. Figure 3-4 Exterior and configurations of the IBBS200D Table 3-4 describes the configurations. Issue 01 (2011-10-25) Huawei Proprietary and Confidential Copyright © Huawei Technologies Co., Ltd.
- Page 21 Configurations of the IBBS200T Figure 3-5 shows the exterior and configurations of the IBBS200T. Figure 3-5 Exterior and configurations of the IBBS200T Table 3-5 describes the configurations. Issue 01 (2011-10-25) Huawei Proprietary and Confidential Copyright © Huawei Technologies Co., Ltd.
-
Page 22: Application Scenario Of The Bts3900A Cabinet
Multiple cabinets can be configured and installed for the BTS3900A to meet the requirements of different RFU configurations, backup power capacity, and transmission space. In addition, different configurations of cabinets can be used for the BTS3900A in the 110 V AC/220 V AC power supply scenario and -48 V DC power supply scenario. - Page 23 Cabinet Configuration Principles A single BTS3900A can be configured with a maximum of 12 RFUs. That is, more than 12 RFUs must be configured in different BTS3900As. A single BTS3900A can be configured with a maximum of two cabinet assemblies, and a cabinet assembly must be installed side by side with a default distance of 40 mm.
- Page 24 Figure 3-7 Configurations of the cabinets without backup power Figure 3-8 shows the configurations of the cabinets with different TRX configurations if 0.5 h/ 2 h backup power is required. Issue 01 (2011-10-25) Huawei Proprietary and Confidential Copyright © Huawei Technologies Co., Ltd.
- Page 25 Figure 3-9 Configurations of the cabinets with 4 h/6 h/8 h backup power -48 V DC Power Supply Scenario Figure 3-10 shows the configurations of cabinets with different TRX configurations in the -48 V DC power supply scenario. Issue 01 (2011-10-25) Huawei Proprietary and Confidential Copyright © Huawei Technologies Co., Ltd.
-
Page 26: Installation Clearance Requirements For The Bts3900A
Figure 3-10 Configurations of cabinets with -48 V DC power supply 3.3 Installation Clearance Requirements for the BTS3900A The BTS3900A supports three installation modes: single cabinet installation, combined cabinet installation, and stack cabinet installation. When two cabinets are combined, the minimum distance between the cabinets is 40 mm, and the maximum distance between the cabinets is 150 mm. -
Page 27: Unpacking The Equipment
The total number does not tally with the Find out the cause and report any missing packing list articles to the local Huawei office. Step 2 Check the exterior of the packing case. If ... Then ... The outer packing is intact... - Page 28 ----End Issue 01 (2011-10-25) Huawei Proprietary and Confidential Copyright © Huawei Technologies Co., Ltd.
-
Page 29: Obtaining The Esn
BBU. In this case, you must take the label and record the site information on the side labeled Site, as shown in Figure 5-2. Figure 5-1 Obtaining the ESN (1) Issue 01 (2011-10-25) Huawei Proprietary and Confidential Copyright © Huawei Technologies Co., Ltd. - Page 30 Installation Guide 5 Obtaining the ESN Figure 5-2 Obtaining the ESN (2) Step 2 Report the ESN to the engineer for the commissioning of the base station. ----End Issue 01 (2011-10-25) Huawei Proprietary and Confidential Copyright © Huawei Technologies Co., Ltd.
-
Page 31: Installation Procedure
BTS3900A(Ver.B) Installation Guide 6 Installation Procedure Installation Procedure The installation procedure for the BTS3900A involves installing the base, the cabinet, the optional modules, and the cables, checking the installation, performing the power-on check, and doing some subsequent operations. Figure 6-1 shows the installation procedure for the BTS3900A. - Page 32 BTS3900A(Ver.B) Installation Guide 6 Installation Procedure Figure 6-1 Installation procedure Issue 01 (2011-10-25) Huawei Proprietary and Confidential Copyright © Huawei Technologies Co., Ltd.
-
Page 33: Checking The Installed Cables And Modules
You need to check whether the modules and cables are securely installed on site. 7.2 Checking the BTS3900A (-48 V DC) Cabinet The internal modules and cables are installed in the BTS3900A (-48 V DC) cabinet before delivery. You need to check whether the modules and cables are securely installed on site. -
Page 34: Checking The Bts3900A (Ac) Cabinet
7 Checking the Installed Cables and Modules 7.1 Checking the BTS3900A (AC) Cabinet The internal modules and cables are installed in the BTS3900A (AC) cabinet before delivery. You need to check whether the modules and cables are securely installed on site. - Page 35 BTS3900A(Ver.B) Installation Guide 7 Checking the Installed Cables and Modules Figure 7-1 Power cables and equipotential cables installed in the BTS3900A (AC) cabinet Issue 01 (2011-10-25) Huawei Proprietary and Confidential Copyright © Huawei Technologies Co., Ltd.
- Page 36 BTS3900A(Ver.B) Installation Guide 7 Checking the Installed Cables and Modules Table 7-1 Power cables and equipotential cable installed in the BTS3900A (AC) cabinet Cable One End The Other End Connector Installation Connector Installation Position Position Input power OT terminal EPS/AC...
- Page 37 BTS3900A(Ver.B) Installation Guide 7 Checking the Installed Cables and Modules Figure 7-2 Signal cables installed in the BTS3900A (AC) cabinet Issue 01 (2011-10-25) Huawei Proprietary and Confidential Copyright © Huawei Technologies Co., Ltd.
- Page 38 BTS3900A(Ver.B) Installation Guide 7 Checking the Installed Cables and Modules Table 7-2 Signal cables installed in the BTS3900A (AC) cabinet Cable One End The Other End Connect Installation Connec Installation Position Position Environment DB50 PMU/COM DB50 Fan box in the...
-
Page 39: Checking The Bts3900A (-48 V Dc) Cabinet
CPRI cable, see Inserting and Removing CPRI Cables. 7.2 Checking the BTS3900A (-48 V DC) Cabinet The internal modules and cables are installed in the BTS3900A (-48 V DC) cabinet before delivery. You need to check whether the modules and cables are securely installed on site. - Page 40 Check whether the equipotential cables in the cabinet are securely installed and the power cables are properly installed by referring to Figure 7-3 Table 7-4, and check whether the screws are tight. Issue 01 (2011-10-25) Huawei Proprietary and Confidential Copyright © Huawei Technologies Co., Ltd.
- Page 41 BTS3900A(Ver.B) Installation Guide 7 Checking the Installed Cables and Modules Figure 7-3 Power cables and equipotential cables installed in the BTS3900A (-48 V DC) cabinet Issue 01 (2011-10-25) Huawei Proprietary and Confidential Copyright © Huawei Technologies Co., Ltd.
- Page 42 BTS3900A(Ver.B) Installation Guide 7 Checking the Installed Cables and Modules Table 7-4 Power cables and equipotential cable installed in the BTS3900A (-48 V DC) cabinet Cable One End The Other End Connector Installation Connector Installation Position Position Input power Parallel...
- Page 43 BTS3900A(Ver.B) Installation Guide 7 Checking the Installed Cables and Modules Figure 7-4 Signal cables installed in the BTS3900A (-48 V DC) cabinet Issue 01 (2011-10-25) Huawei Proprietary and Confidential Copyright © Huawei Technologies Co., Ltd.
- Page 44 BTS3900A(Ver.B) Installation Guide 7 Checking the Installed Cables and Modules Table 7-5 Signal cables installed in the BTS3900A (-48 V DC) cabinet Cable One End The Other End Connector Installation Connector Installation Position Position Monitoring RJ-45 CMUA/ RJ-45 BBU/UPEU/ signal cable...
- Page 45 BTS3900A(Ver.B) Installation Guide 7 Checking the Installed Cables and Modules Table 7-6 Transmission cables installed in the BTS3900A Cable One End The Other End Connecto Installation Connect Installation Position Position E1/T1 surge DB26 BBU/GTMU/E1 DB25 SLPU/UELP/ protection connector connector INSIDE...
-
Page 46: Installing The Base
Determine the position for installing the cabinet according to the engineering design and 3.3 Installation Clearance Requirements for the BTS3900A. On the concrete pad, mark holes to determine the installation position of the base, as shown Figure 8-1. Issue 01 (2011-10-25) Huawei Proprietary and Confidential Copyright © Huawei Technologies Co., Ltd. - Page 47 After marking all the holes, use the measuring tape to check whether the distances between the holes are accurate. Step 3 Drill holes at the anchor points, and then install the expansion bolt assemblies, as shown in Figure 8-2. Issue 01 (2011-10-25) Huawei Proprietary and Confidential Copyright © Huawei Technologies Co., Ltd.
- Page 48 Use a rubber mallet to hammer the expansion bolt until the expansion tube is buried into the hole, and then tighten the bolt. Remove the bolt, spring washer, and flat washer counterclockwise. Issue 01 (2011-10-25) Huawei Proprietary and Confidential Copyright © Huawei Technologies Co., Ltd.
- Page 49 (1) Level (2) Adjusting pad Step 6 Use a torque wrench to tighten the bolts with the tightening torque of 45 N·m, as shown in Figure 8-5. Issue 01 (2011-10-25) Huawei Proprietary and Confidential Copyright © Huawei Technologies Co., Ltd.
- Page 50 Figure 8-6 Removing the front cover plate Step 8 Remove the baffle plate from either side of the base (by taking the left side as an example), as shown in Figure 8-7. Issue 01 (2011-10-25) Huawei Proprietary and Confidential Copyright © Huawei Technologies Co., Ltd.
- Page 51 Step 10 If an RFC needs to be installed on the base, the mounting blocks need to be fixed on the base, as shown in Figure 8-9. NOTE The mounting blocks are placed in the accessory package of the RFC. Issue 01 (2011-10-25) Huawei Proprietary and Confidential Copyright © Huawei Technologies Co., Ltd.
- Page 52 BTS3900A(Ver.B) Installation Guide 8 Installing the Base Figure 8-9 Fixing the mounting blocks (1) Bolt (2) Spring washer (3) Flat washer (4) Mounting block ----End Issue 01 (2011-10-25) Huawei Proprietary and Confidential Copyright © Huawei Technologies Co., Ltd.
-
Page 53: Installing The Cabinet
9 Installing the Cabinet Installing the Cabinet About This Chapter When installing the BTS3900A cabinet on site, select an appropriate method based on the outdoor conditions. 9.1 Installing a Cabinet on the Base This section describes the procedure and precautions for installing a cabinet of the BTS3900A on a base. -
Page 54: Installing A Cabinet On The Base
BTS3900A(Ver.B) Installation Guide 9 Installing the Cabinet 9.1 Installing a Cabinet on the Base This section describes the procedure and precautions for installing a cabinet of the BTS3900A on a base. Procedure Installing the BTS3900A on the base Remove the four plastic screws from the top of the cabinet, and then install the lifting... - Page 55 Lift the cabinet onto the base, and then align the cabinet with the base, as shown in Figure 9-3. WARNING Two installers are required for lifting the cabinet. Issue 01 (2011-10-25) Huawei Proprietary and Confidential Copyright © Huawei Technologies Co., Ltd.
- Page 56 9 Installing the Cabinet Figure 9-3 Lifting the cabinet onto the base Remove the ropes and lifting lugs, and then install the plastic screws, as shown in Figure 9-4. Issue 01 (2011-10-25) Huawei Proprietary and Confidential Copyright © Huawei Technologies Co., Ltd.
- Page 57 Use two M12x30 bolts to secure the cabinet on the base, and then use a torque wrench to tighten the bolts, as shown in Figure 9-5. Figure 9-5 Securing the BTS3900A on the base (1) M12x30 bolt (2) Spring washer (3) Flat washer...
- Page 58 Lift the cabinet onto the base, and then align the cabinet with the base, as shown in Figure 9-6. Figure 9-6 Lifting the IBBS200D onto the base Use four M12x30 bolts to secure the cabinet on the base, as shown in Figure 9-7. Issue 01 (2011-10-25) Huawei Proprietary and Confidential Copyright © Huawei Technologies Co., Ltd.
-
Page 59: Installing Cabinets In Stack Mode
(4) Gasket with an oblong hole ----End 9.2 Installing Cabinets in Stack Mode The BTS3900A cabinets can be stacked as follows: the APM30H/TMC11H is stacked on the RFC, the TMC11H is stacked on the IBBS200D/IBBS200T, or two IBBS200Ds/IBBS200Ts are stacked. - Page 60 Figure 9-10. Figure 9-10 Stacking the cabinet Step 5 Use a torque wrench to tighten the four M12x30 bolts in the cabinet, as shown in Figure 9-11. Issue 01 (2011-10-25) Huawei Proprietary and Confidential Copyright © Huawei Technologies Co., Ltd.
- Page 61 Installation Guide 9 Installing the Cabinet Figure 9-11 Tightening the bolts (1) M12x30 bolt (2) Spring washer (3) Flat washer (4) Gasket with an oblong hole ----End Issue 01 (2011-10-25) Huawei Proprietary and Confidential Copyright © Huawei Technologies Co., Ltd.
-
Page 62: Installing The Pgnd Cable And Equi-Potential Cable
Yellow and green cable, 16 mm Equi-potential M6 OT terminal M6 OT terminal Yellow and green cable, cable 16 mm This document is based on the following two scenarios. Issue 01 (2011-10-25) Huawei Proprietary and Confidential Copyright © Huawei Technologies Co., Ltd. - Page 63 Figure 10-1 Installing the OT terminal in the correct manner Connect the other end of the PGND cable to the external grounding copper bar, as shown Figure 10-2. Issue 01 (2011-10-25) Huawei Proprietary and Confidential Copyright © Huawei Technologies Co., Ltd.
- Page 64 Determine the installation position of the equi-potential cable in each cabinet, as shown in Figure 10-3 Figure 10-4. For details, see Step Figure 10-3 Installing the equi-potential cable (scenario 1) Issue 01 (2011-10-25) Huawei Proprietary and Confidential Copyright © Huawei Technologies Co., Ltd.
- Page 65 Requirements, and then use cable ties to bind the cable. Step 5 Attach labels to the installed cable. For details, see Attaching a Sign Plate Label. ----End Issue 01 (2011-10-25) Huawei Proprietary and Confidential Copyright © Huawei Technologies Co., Ltd.
-
Page 66: Installing Optional Modules
EPS subrack, the fuse on the port need to be replaced if it cannot meet the high-current requirement. Replacing the fuse that controls the port for supplying power to the BBU disrupts all the services carried by the base station. Issue 01 (2011-10-25) Huawei Proprietary and Confidential Copyright © Huawei Technologies Co., Ltd. -
Page 67: Installing The Slpu
USLP2. Table 11-1 Mapping relationship between the pins in the input and output ports on the USLP2 Input Output Label Label IN0.1 OUT1 OUT1.1 Issue 01 (2011-10-25) Huawei Proprietary and Confidential Copyright © Huawei Technologies Co., Ltd. - Page 68 Step 1 Install cable racks on both sides of the SLPU and ensure that the mounting ears are on the same plane as the SLPU panel, as shown in Figure 11-3. Issue 01 (2011-10-25) Huawei Proprietary and Confidential Copyright © Huawei Technologies Co., Ltd.
- Page 69 SLPU, as shown in Figure 11-4. Figure 11-4 Installing the SLPU Step 3 Install the surge protection transfer cable for monitoring signals, as shown in Figure 11-5. Issue 01 (2011-10-25) Huawei Proprietary and Confidential Copyright © Huawei Technologies Co., Ltd.
- Page 70 Figure 11-6 Connections of surge protection cables for monitoring signals Step 4 Install the external dry-contact monitoring signal cables, as shown in Figure 11-7. Figure 11-7 External dry-contact monitoring signal cables Issue 01 (2011-10-25) Huawei Proprietary and Confidential Copyright © Huawei Technologies Co., Ltd.
-
Page 71: Installing The Emua
DB9 male connector RJ45 connector Black signal cable Procedure Step 1 Use four screws to install the EMUA in the APM30H cabinet, as shown in Figure 11-8. Issue 01 (2011-10-25) Huawei Proprietary and Confidential Copyright © Huawei Technologies Co., Ltd. - Page 72 DC output terminal on the EPS labeled LOAD7 in the cabinet. Step 3 Figure 11-10 shows the connection of the EMUA monitoring signal cable. Issue 01 (2011-10-25) Huawei Proprietary and Confidential Copyright © Huawei Technologies Co., Ltd.
-
Page 73: Installing The Emua In The Tmc11H
M4 OT terminal Cord end Black, 1.5 mm , two cable for cable terminal wires in black and blue NEG(-) cable M4 OT terminal Cord end EMUA terminal Issue 01 (2011-10-25) Huawei Proprietary and Confidential Copyright © Huawei Technologies Co., Ltd. - Page 74 PWR1 of the EMUA power cable. Connect the OT terminal at the other end of the power cable to the DC output terminal labeled LOAD7 on the DCDU-03. Issue 01 (2011-10-25) Huawei Proprietary and Confidential Copyright © Huawei Technologies Co., Ltd.
-
Page 75: Optional) Installing A Ac Heater
11-14. If an SOU is installed in the cabinet, an AC heater must be installed above the SOU, as shown in Figure 11-15. Figure 11-14 Position for installing an AC heater (1) Issue 01 (2011-10-25) Huawei Proprietary and Confidential Copyright © Huawei Technologies Co., Ltd. - Page 76 AC power input terminals labeled L and N in the junction box in the TMC11H, as shown inFigure 11-17 Issue 01 (2011-10-25) Huawei Proprietary and Confidential Copyright © Huawei Technologies Co., Ltd.
-
Page 77: Optional) Installing The Gps Surge Protector
Step 4 Label the installed cables. For details, see Attaching a Cable-Tying Label. ----End 11.4 (Optional) Installing the GPS Surge Protector This section describes the procedure and precautions for installing the GPS surge protector and related cables. Issue 01 (2011-10-25) Huawei Proprietary and Confidential Copyright © Huawei Technologies Co., Ltd. - Page 78 GPS port on the USCU. CAUTION There are six mounting holes on the satellite receiver. You need to install only three screws on the receiver, as shown in Figure 11-20 Issue 01 (2011-10-25) Huawei Proprietary and Confidential Copyright © Huawei Technologies Co., Ltd.
- Page 79 Step 3 Install the USCU equipped with the satellite receiver into the BBU, and tighten the screws on the USCU to 0.6 N·m. Step 4 Install the GPS clock signal cable on the support, as shown in Figure 11-21. Issue 01 (2011-10-25) Huawei Proprietary and Confidential Copyright © Huawei Technologies Co., Ltd.
- Page 80 Figure 11-22 Installing the support on the cabinet Step 6 Connect the GPS clock signal cable to the GPS port on the USCU, as shown in Figure 11-23. Issue 01 (2011-10-25) Huawei Proprietary and Confidential Copyright © Huawei Technologies Co., Ltd.
- Page 81 The figure of the GPS surge protector is for reference only. The actual appearance may be different. Step 8 Install the GPS jumper, as shown in Figure 11-25. Issue 01 (2011-10-25) Huawei Proprietary and Confidential Copyright © Huawei Technologies Co., Ltd.
-
Page 82: Installing The Ddf
– s indicates the terminating position of protection grounding cables. Procedure Step 1 Connect the twisted pair cables at the side of the DDF. Connect the other end of the twisted pair cables to BBU. Issue 01 (2011-10-25) Huawei Proprietary and Confidential Copyright © Huawei Technologies Co., Ltd. - Page 83 Use the IDC tool to install the wires of the twisted pair cables to the terminating position of the digital modules, as shown in Figure 11-26. Step 3 Arrange the cables on DDF, as shown in Figure 11-26. Issue 01 (2011-10-25) Huawei Proprietary and Confidential Copyright © Huawei Technologies Co., Ltd.
- Page 84 When the cables on both sides of the DDF box are connected, the wire connection order depends on the actual situation and ensures that wires in the same color are connected, as shown in Figure 11-26. Issue 01 (2011-10-25) Huawei Proprietary and Confidential Copyright © Huawei Technologies Co., Ltd.
-
Page 85: Replacing The Fuse
The authorized personnel are permitted to enter the site. The required keys are available. Context Figure 11-28 shows the installation position of the fuse and spare fuse box in the EPS subrack. Issue 01 (2011-10-25) Huawei Proprietary and Confidential Copyright © Huawei Technologies Co., Ltd. -
Page 86: Huawei Proprietary And Confidential
Step 2 Take the extraction tool out of the mounting ear on the right side of the EPS subrack. Figure 11-29 shows the exterior and position of the extraction tool. Issue 01 (2011-10-25) Huawei Proprietary and Confidential Copyright © Huawei Technologies Co., Ltd. - Page 87 Step 4 Place the faulty fuse into an ESD box or bag. Step 5 Take the fuse from the spare fuse box, as shown in Figure 11-31. Issue 01 (2011-10-25) Huawei Proprietary and Confidential Copyright © Huawei Technologies Co., Ltd.
- Page 88 Fill in the fault form with the details of the replaced component. Issue 01 (2011-10-25) Huawei Proprietary and Confidential Copyright © Huawei Technologies Co., Ltd.
-
Page 89: Installing The Cables
UMTS standard. 12.5 Installing the Monitoring Signal Cables The BTS3900A cabinet is delivered with boards installed, and the signal cables in the cabinet are already installed. The cross-cabinet monitoring signal cables need to be installed on site. - Page 90 GU (BBU0)+L(G) (BBU1) or GL (BBU0)+U(G) (BBU1). 12.9 Installing the Batteries and Related Cables This section describes the procedure and precautions for installing the batteries and related cables. Issue 01 (2011-10-25) Huawei Proprietary and Confidential Copyright © Huawei Technologies Co., Ltd.
-
Page 91: Cabling Requirements
Power cables, transmission cables, and signal cables are routed separately. Multiple power cables must be bound when routed. Power cables must be installed in the position specified in engineering design documents. Issue 01 (2011-10-25) Huawei Proprietary and Confidential Copyright © Huawei Technologies Co., Ltd. -
Page 92: Installing The Cable Outlet Module For The Cabinet
Context Cable module of RFC There is a cable module at each side of the RFC, as shown in Figure 12-1. Issue 01 (2011-10-25) Huawei Proprietary and Confidential Copyright © Huawei Technologies Co., Ltd. - Page 93 Cable module of TMC11H There is a cable outlet module at both left and right sides of each TMC11H cabinet or IBBS200D/ IBS200T, as shown in Figure 12-3. Issue 01 (2011-10-25) Huawei Proprietary and Confidential Copyright © Huawei Technologies Co., Ltd.
- Page 94 (13) Cable hole for a Boolean alarm signal cable, or TMC and IBBS's FAN/TEC) an E1/T1 cable (7) Cable hole for an fiber optic cable (14) Cable holes for RS485 signal cables Issue 01 (2011-10-25) Huawei Proprietary and Confidential Copyright © Huawei Technologies Co., Ltd.
- Page 95 Lead the cable through the cable hole with an aperture matching the cross-sectional area of the cable in order that the sealing is effective, as shown in Figure 12-6. Issue 01 (2011-10-25) Huawei Proprietary and Confidential Copyright © Huawei Technologies Co., Ltd.
-
Page 96: Installing The Power Cable
This section describes the procedure and precautions for installing the external input power cable. Context The BTS3900A cabinet is delivered with boards installed, and the power cables in the cabinet are already installed. The external input power cables need to be installed on site. NOTE The color and appearance of the power cable is for reference only. - Page 97 12 Installing the Cables The PGND cable is installed. Context The power supply to the BTS3900A can be 220 V AC three-phase, 220 V AC single-phase, and 110 V dual-live-wire power. Table 12-1 describes the input power cables for the APM30H delivered by default in different power supply scenarios.
- Page 98 Figure 12-7 Installing the APM30H's 220 V AC three-phase power cable on the EPS (1) Short-circuiting bar (2) L1 wire (3) L2 wire (4) L3 wire (5) N wire (6) PE wire Issue 01 (2011-10-25) Huawei Proprietary and Confidential Copyright © Huawei Technologies Co., Ltd.
- Page 99 12 Installing the Cables Figure 12-8 Installing the APM30H's 220 V AC single-phase power cable on the EPS (1) L wire (2) PE wire (3) N wire Issue 01 (2011-10-25) Huawei Proprietary and Confidential Copyright © Huawei Technologies Co., Ltd.
- Page 100 TMC11H and other equipment from the APM30H. The power cables between the APM30H and the TMC11H are optional, which are delivered and used with the TMC11H. Issue 01 (2011-10-25) Huawei Proprietary and Confidential Copyright © Huawei Technologies Co., Ltd.
- Page 101 Before installing the power cables, remove the protecting hood from the DC input wiring terminal block on the DCDU-03. After the cables are installed, reinstall the protecting hood. Issue 01 (2011-10-25) Huawei Proprietary and Confidential Copyright © Huawei Technologies Co., Ltd.
- Page 102 12.1 Cabling Requirements, and then use cable ties to bind the cable. Step 5 Attach labels to the installed cable. For details, see Attaching a Sign Plate Label. Issue 01 (2011-10-25) Huawei Proprietary and Confidential Copyright © Huawei Technologies Co., Ltd.
- Page 103 OT terminal (16 Black batteries , M6) , M6) Power RTN(+) wire Easy power OT terminal (2.5 Black cable for receptacle (pressfit , M4) the fan in type) connector Issue 01 (2011-10-25) Huawei Proprietary and Confidential Copyright © Huawei Technologies Co., Ltd.
- Page 104 OT terminal at the other end to the RTN(+) and NEG(-) wiring terminals near the BAT label in the power distribution box in the lower IBBS200D/IBBS200T, as shown in Figure 12-12. Issue 01 (2011-10-25) Huawei Proprietary and Confidential Copyright © Huawei Technologies Co., Ltd.
- Page 105 APM30H, and then link the OT terminal at the other end to the RTN(+) and NEG(-) wiring terminals near the TEC/FAN label in the power distribution box in the lower IBBS200D, as shown in Figure 12-13. Issue 01 (2011-10-25) Huawei Proprietary and Confidential Copyright © Huawei Technologies Co., Ltd.
- Page 106 OT terminal at the other end to the L and N terminals in the junction box on the left of the corresponding IBBS200D for the heating film, as shown in Figure 12-14. Issue 01 (2011-10-25) Huawei Proprietary and Confidential Copyright © Huawei Technologies Co., Ltd.
- Page 107 The power cable for the heating film must be led into the power supply box for the heating film from the top, not from the bottom. Issue 01 (2011-10-25) Huawei Proprietary and Confidential Copyright © Huawei Technologies Co., Ltd.
- Page 108 If the LOAD2 terminal is used, the LOAD4 terminal is recommended. In this case, the fuse for the LOAD4 terminal needs to be replaced for the MCB requirement of the IBBS. For details about the replacement, see 11.6 Replacing the Fuse. Issue 01 (2011-10-25) Huawei Proprietary and Confidential Copyright © Huawei Technologies Co., Ltd.
- Page 109 The power cables between the APM30H and the IBBS200T are the power cable for the batteries, power cable for the fan in the IBBS200D, and power cable for the heating film in the IBBS200D. Issue 01 (2011-10-25) Huawei Proprietary and Confidential Copyright © Huawei Technologies Co., Ltd.
- Page 110 Power L wire OT terminal (1.5 OT terminal (1.5 Black, two wires in cable for brown (L wire) and , M4) , M4) blue (N wire) heating Issue 01 (2011-10-25) Huawei Proprietary and Confidential Copyright © Huawei Technologies Co., Ltd.
- Page 111 APM30H configured with the BBU, and then link the OT terminal at the other end to the RTN(+) and NEG(-) wiring terminals near the BAT label in the power distribution box in the lower IBBS200D/IBBS200T, as shown in Figure 12-17. Issue 01 (2011-10-25) Huawei Proprietary and Confidential Copyright © Huawei Technologies Co., Ltd.
- Page 112 EPS in the primary APM30H, and then link the OT terminal at the other end to the RTN (+) and NEG(-) wiring terminals near the TEC/FAN label in the power distribution box in the lower IBBS200D, as shown in Figure 12-18. Issue 01 (2011-10-25) Huawei Proprietary and Confidential Copyright © Huawei Technologies Co., Ltd.
- Page 113 APM30H, and then link the OT terminal at the other end to the L and N terminals in the junction box on the left of the corresponding IBBS200D for the heating film, as shown in Figure 12-19. Issue 01 (2011-10-25) Huawei Proprietary and Confidential Copyright © Huawei Technologies Co., Ltd.
- Page 114 The power cable for the heating film must be led into the power supply box for the heating film from the top, not from the bottom. Issue 01 (2011-10-25) Huawei Proprietary and Confidential Copyright © Huawei Technologies Co., Ltd.
- Page 115 Link the easy power receptacle (pressfit type) connector at one end of the power cable for the TEC cooler in the upper IBBS200T to the DC output terminal labeled LOAD3 on the Issue 01 (2011-10-25) Huawei Proprietary and Confidential Copyright © Huawei Technologies Co., Ltd.
-
Page 116: Installing The Power Cable For The -48 V Cabinet
, M6) d with equipment power from external equipme Input RTN(+) wire OT terminal (2.5 Parallel terminal Black power , M6) cable for TMC11 (supplie d with power Issue 01 (2011-10-25) Huawei Proprietary and Confidential Copyright © Huawei Technologies Co., Ltd. - Page 117 Before installing the power cables, remove the protecting hood from the DC input wiring terminal block on the DCDU-01. After the cables are installed, reinstall the protecting hood. Issue 01 (2011-10-25) Huawei Proprietary and Confidential Copyright © Huawei Technologies Co., Ltd.
- Page 118 Before installing the power cables, remove the protecting hood from the DC input wiring terminal block on the DCDU-03. After the cables are installed, reinstall the protecting hood. Figure 12-23 Installing the input power cable for the TMC11H on the DCDU-03 Issue 01 (2011-10-25) Huawei Proprietary and Confidential Copyright © Huawei Technologies Co., Ltd.
-
Page 119: Installing The Transmission Cables
Step 1 Connect one end of the E1/T1 cable to the OUTSIDE port on the UELP, as shown in Figure 12-24 Figure 12-25. NOTE For details about how to connect the E1/T1 cable, see Transmission Cable Connections. Issue 01 (2011-10-25) Huawei Proprietary and Confidential Copyright © Huawei Technologies Co., Ltd. - Page 120 Step 3 Route the cable along the right of the cabinet by referring to 12.1 Cabling Requirements, and then use cable ties to bind the cable. Step 4 Label the installed cables by referring to Attaching an L-Shaped Label. ----End Issue 01 (2011-10-25) Huawei Proprietary and Confidential Copyright © Huawei Technologies Co., Ltd.
-
Page 121: Installing The Fe/Ge Cable
The descriptions about the installation positions and routes of the FE/GE cables in the -48 V DC cabinet and in the APM30H are the same. For details, see Figure 12-26. Figure 12-26 Installing the FE/GE cable (1) Issue 01 (2011-10-25) Huawei Proprietary and Confidential Copyright © Huawei Technologies Co., Ltd. - Page 122 Make the shield layer of the FE/GE cable in full contact with the ground clip, and tighten the M4 screws on the clip until the tightening torque reaches 1.2 N·m. Figure 12-28 Installing a grounding clip Issue 01 (2011-10-25) Huawei Proprietary and Confidential Copyright © Huawei Technologies Co., Ltd.
-
Page 123: Installing The Fe/Ge Optical Cable
For details about how to connect the FE/GE optical cable, see Transmission Cable Connections. Step 2 Insert one end of the FE/GE optical cable into the optical module, as shown in Figure 12-29. Figure 12-29 Installing the FE/GE optical cable Issue 01 (2011-10-25) Huawei Proprietary and Confidential Copyright © Huawei Technologies Co., Ltd. -
Page 124: Installing The Monitoring Signal Cables
----End 12.5 Installing the Monitoring Signal Cables The BTS3900A cabinet is delivered with boards installed, and the signal cables in the cabinet are already installed. The cross-cabinet monitoring signal cables need to be installed on site. 12.5.1 Installing the Monitoring Signal Cables for AC-Type Cabinet This section describes the procedure and precautions for installing cross-cabinet monitoring signal cables in various AC power supply scenarios. - Page 125 MON0 port on the UEIU in the BBU in the APM30H and the other end to the COM_IN port on the CMUA in the fan box of the extension APM30H, as shown in Figure 12-32. Issue 01 (2011-10-25) Huawei Proprietary and Confidential Copyright © Huawei Technologies Co., Ltd.
- Page 126 APM30H. Connect one end of the cable to the COM_IN port on the CMUA on the cabinet door of the IBBS200D/IBBS200T and the other end to the COM_485 port on the PMU in the APM30H, as shown in Figure 12-33. Issue 01 (2011-10-25) Huawei Proprietary and Confidential Copyright © Huawei Technologies Co., Ltd.
- Page 127 Step 4 If two RFCs, two APM30Hs, and two IBBS200Ds/IBBS200Ts are configured on site, three more monitoring signal cables are required. Figure 12-34 shows the configurations of the cabinets. Issue 01 (2011-10-25) Huawei Proprietary and Confidential Copyright © Huawei Technologies Co., Ltd.
- Page 128 IBBS200T. Connect one end of the cable to the COM_485 port on the PMU in the extension APM30H and the other end to the COM_IN port on the CMUA on the cabinet door of the extension IBBS200D/IBBS200T. Issue 01 (2011-10-25) Huawei Proprietary and Confidential Copyright © Huawei Technologies Co., Ltd.
- Page 129 If a site is configured with one RFC, one APM30H, and one TMC11H, one monitoring signal cable between the TMC11H and the RFC is required on site. Issue 01 (2011-10-25) Huawei Proprietary and Confidential Copyright © Huawei Technologies Co., Ltd.
- Page 130 Step 4 If two RFCs, two APM30Hs, and one TMC11H are configured on site, two more monitoring signal cables are required. Figure 12-37 shows the configurations of the cabinets. Issue 01 (2011-10-25) Huawei Proprietary and Confidential Copyright © Huawei Technologies Co., Ltd.
- Page 131 TMC11H and the other end to the COM_IN port on the CMUA in the fan box of the extension RFC, as shown in Figure 12-36. Issue 01 (2011-10-25) Huawei Proprietary and Confidential Copyright © Huawei Technologies Co., Ltd.
- Page 132 Step 1 Install the monitoring signal cable for the batteries between the IBBS200D/IBBS200T and the APM30H. Connect one end of the cable to the COM_IN port on the CMUA on the cabinet door Issue 01 (2011-10-25) Huawei Proprietary and Confidential Copyright © Huawei Technologies Co., Ltd.
- Page 133 RFC. Connect one end of the cable to the COM_IN port on the CMUA in the fan box of the TMC11H and the other end to the COM_OUT port on the CMUA in the fan box of the RFC, as shown in Figure 12-41. Issue 01 (2011-10-25) Huawei Proprietary and Confidential Copyright © Huawei Technologies Co., Ltd.
- Page 134 Figure 12-41 shows the configurations of the cabinets. Figure 12-41 Configurations of two RFCs, two APM30Hs, two IBBS200Ds/IBBS200Ts, and one TMC11H Issue 01 (2011-10-25) Huawei Proprietary and Confidential Copyright © Huawei Technologies Co., Ltd.
- Page 135 ----End Scenario: 1 RFC+1 APM30H+2 IBBS200Ds/IBBS200Ts If a site is configured with one RFC, one APM30H, and two IBBS200Ds/IBBS200Ts, two monitoring signal cables are required on site. Issue 01 (2011-10-25) Huawei Proprietary and Confidential Copyright © Huawei Technologies Co., Ltd.
- Page 136 APM30H. Connect one end of the cable to the COM_IN port on the CMUA on the cabinet door of the lower IBBS200D/IBBS200T and the other end to the COM_485 port on the PMU in the APM30H, as shown in Figure 12-44. Issue 01 (2011-10-25) Huawei Proprietary and Confidential Copyright © Huawei Technologies Co., Ltd.
- Page 137 Step 5 If two RFCs, two APM30Hs, and four IBBS200Ds/IBBS200Ts are configured on site, four more monitoring signal cables are required. Figure 12-45 shows the configurations of the cabinets. Figure 12-45 Configurations of two RFCs, two APM30Hs, and four IBBS200Ds/IBBS200Ts Issue 01 (2011-10-25) Huawei Proprietary and Confidential Copyright © Huawei Technologies Co., Ltd.
- Page 138 Attach labels to the installed cables. For details, see Attaching an L-Shaped Label. Run each cable that leave the cabinet in a PVC corrugated pipe, and then tie the pipe to the cable hole in the cabinet. ----End Issue 01 (2011-10-25) Huawei Proprietary and Confidential Copyright © Huawei Technologies Co., Ltd.
- Page 139 APM30H. Connect one end of the cable to the COM_IN port on the CMUA on the cabinet door of the lower IBBS200D/IBBS200T and the other end to the COM_485 port on the PMU in the APM30H, as shown in Figure 12-48. Issue 01 (2011-10-25) Huawei Proprietary and Confidential Copyright © Huawei Technologies Co., Ltd.
- Page 140 RFC. Connect one end of the cable to the COM_IN port on the CMUA in the fan box of the TMC11H and the other end to the COM_OUT port on the CMUA in the fan box of the RFC, as shown in Figure 12-49. Issue 01 (2011-10-25) Huawei Proprietary and Confidential Copyright © Huawei Technologies Co., Ltd.
- Page 141 Figure 12-50 shows the configurations of the cabinets. Figure 12-50 Configurations of two RFCs, two APM30Hs, four IBBS200Ds/IBBS200Ts, and one TMC11H Issue 01 (2011-10-25) Huawei Proprietary and Confidential Copyright © Huawei Technologies Co., Ltd.
- Page 142 Attach labels to the installed cables. For details, see Attaching an L-Shaped Label. Run each cable that leave the cabinet in a PVC corrugated pipe, and then tie the pipe to the cable hole in the cabinet. ----End Issue 01 (2011-10-25) Huawei Proprietary and Confidential Copyright © Huawei Technologies Co., Ltd.
-
Page 143: Installing The Monitoring Signal Cable For The -48 V Dc Cabinet
RFC and the other end to the COM_IN port on the CMUA in the fan box of the extension RFC, as shown in Figure 12-53. Issue 01 (2011-10-25) Huawei Proprietary and Confidential Copyright © Huawei Technologies Co., Ltd. - Page 144 RFC and the other end to the COM_IN port on the CMUA in the fan box of the secondary TMC11H, as shown in Figure 12-54. Issue 01 (2011-10-25) Huawei Proprietary and Confidential Copyright © Huawei Technologies Co., Ltd.
- Page 145 Step 4 If two RFCs and two TMC11Hs are configured on site, one more monitoring signal cable is required. Figure 12-55 shows the configurations of the cabinets. Figure 12-55 Configurations of two RFCs and two TMC11Hs Issue 01 (2011-10-25) Huawei Proprietary and Confidential Copyright © Huawei Technologies Co., Ltd.
- Page 146 Two BBUs are configured in a triple-mode base station. The new BBU is installed in the TMC11H cabinet at the right-hand side, and it does not have monitoring functions. For details about monitoring principles, see Monitoring Principles for the Cabinets. Issue 01 (2011-10-25) Huawei Proprietary and Confidential Copyright © Huawei Technologies Co., Ltd.
- Page 147 CMUA in the fan box of the extension TMC11H and the other end to the COM_IN port on the CMUA in the fan box of the extension RFC, as shown in Figure 12-58. Issue 01 (2011-10-25) Huawei Proprietary and Confidential Copyright © Huawei Technologies Co., Ltd.
-
Page 148: Installing The Rf Jumper
The RF jumper connects the RFU to the antenna system for signal exchange between the NodeB and the antenna system. Prerequisite The tools and materials, such as a cable cutter, PVC insulating tape, and a wrench or torque wrench, are ready. Issue 01 (2011-10-25) Huawei Proprietary and Confidential Copyright © Huawei Technologies Co., Ltd. - Page 149 Figure 12-59 Route of the RF jumper Step 3 Install the RF jumper, as shown in Figure 12-61 Figure 12-60. Figure 12-60 Installing the RF jumpers on the interconnected RFUs Issue 01 (2011-10-25) Huawei Proprietary and Confidential Copyright © Huawei Technologies Co., Ltd.
- Page 150 Use a 32 mm wrench or torque wrench to fix the two DIN connectors from bottom to top. Ensure that the tightening torque reaches 25 N·m to 35 N·m. Issue 01 (2011-10-25) Huawei Proprietary and Confidential Copyright © Huawei Technologies Co., Ltd.
- Page 151 Use rubber caps to seal the idle cable holes in the cable outlet module. Insert the metal piece, and then tighten the screw. Issue 01 (2011-10-25) Huawei Proprietary and Confidential Copyright © Huawei Technologies Co., Ltd.
-
Page 152: Installing The Cpri Cable (Optional)
Step 2 Insert the SFP connector at one end of the CPRI cable into the CPRI port on the board panel of the BBU. NOTE For details about how to remove and insert the CPRI cable, see Inserting and Removing CPRI Cables. Issue 01 (2011-10-25) Huawei Proprietary and Confidential Copyright © Huawei Technologies Co., Ltd. - Page 153 Step 4 Insert the SFP connector at the other end of the CPRI cable into the CPRI0 port on the RFU panel, as shown in Figure 12-64. Step 5 Route the cables by referring to 12.1 Cabling Requirements and use cable ties to bind the cables. Issue 01 (2011-10-25) Huawei Proprietary and Confidential Copyright © Huawei Technologies Co., Ltd.
-
Page 154: Optional) Installing Inter-Bbu Signal Cable
Step 2 Route the cable through the cable hole on the right of the power cabinet, through the cable hole on the left of the RF cabinet, and then to the BBU1 in the extension power cabinet, as shown in Figure 12-66 12.1 Cabling Requirements. Issue 01 (2011-10-25) Huawei Proprietary and Confidential Copyright © Huawei Technologies Co., Ltd. - Page 155 The TX and RX ports on one UCIU must be connected to the TX and RX ports, respectively. Step 4 Attach labels to the installed cables. For details, see Attaching an L-Shaped Label. ----End Issue 01 (2011-10-25) Huawei Proprietary and Confidential Copyright © Huawei Technologies Co., Ltd.
-
Page 156: Installing The Batteries And Related Cables
Otherwise, the batteries may be burnt, and the installers may be injured. Figure 12-67 Installing the batteries Issue 01 (2011-10-25) Huawei Proprietary and Confidential Copyright © Huawei Technologies Co., Ltd. - Page 157 Tighten the screws to secure the baffle plate until the tightening torque reaches 1.2 N·m (10.62 lbf·in.). Step 3 Install the power cable for the batteries, as shown in Figure 12-69. Issue 01 (2011-10-25) Huawei Proprietary and Confidential Copyright © Huawei Technologies Co., Ltd.
- Page 158 Figure 12-70 shows the routes of the power cables in the battery cabinet. Figure 12-70 Routes of the power cables for the batteries ----End Issue 01 (2011-10-25) Huawei Proprietary and Confidential Copyright © Huawei Technologies Co., Ltd.
-
Page 159: Installation Checklist
Item No redundant tapes or cable ties are left on the cables. No tapes, tails of cable ties, paper, or packing bags are left around the cabinet. Issue 01 (2011-10-25) Huawei Proprietary and Confidential Copyright © Huawei Technologies Co., Ltd. - Page 160 The voltage of a 12 V battery cell ranges from 10.8 V to 14.1 V. l The total voltage of the batteries ranges from 43.2 V to 56.4 V. Issue 01 (2011-10-25) Huawei Proprietary and Confidential Copyright © Huawei Technologies Co., Ltd.
- Page 161 The idle port that no cable is connected to is properly protected. The connectors of the RF cables are fixed in position to avoid false connection that may cause an abnormal voltage standing wave ratio (VSWR). Issue 01 (2011-10-25) Huawei Proprietary and Confidential Copyright © Huawei Technologies Co., Ltd.
-
Page 162: Performing The Power-On Check
DC power supply scenario by referring to the power-on check in the AC power supply scenario. Figure 14-1 shows the power-on check procedure. Issue 01 (2011-10-25) Huawei Proprietary and Confidential Copyright © Huawei Technologies Co., Ltd. - Page 163 BTS3900A(Ver.B) Installation Guide 14 Performing the Power-On Check Figure 14-1 Power-on check procedure Issue 01 (2011-10-25) Huawei Proprietary and Confidential Copyright © Huawei Technologies Co., Ltd.
- Page 164 BTS3900A(Ver.B) Installation Guide 14 Performing the Power-On Check NOTE For details about how to check the DIP switches on the boards, see the BTS3900A Hardware Description. Issue 01 (2011-10-25) Huawei Proprietary and Confidential Copyright © Huawei Technologies Co., Ltd.
-
Page 165: Subsequent Operations
After all the cables are installed, you need to seal the cable holes of the base. 15.2 Applying Touch-Up Paint The paint on the surface is intact. If any paint is damaged, you must apply touch-up paint to avoid erosion. Issue 01 (2011-10-25) Huawei Proprietary and Confidential Copyright © Huawei Technologies Co., Ltd. -
Page 166: Sealing The Cable Holes On The Base
Step 2 Use fireproof clay to seal the cable holes of the base, as shown in Figure 15-2. Figure 15-2 Sealing the cable holes of the base by using the fireproof clay (1) Fireproof clay (2) PVC corrugated pipe Issue 01 (2011-10-25) Huawei Proprietary and Confidential Copyright © Huawei Technologies Co., Ltd. -
Page 167: Applying Touch-Up Paint
The paint coating should be as thin as possible. No drops are allowed on the paint coating, and the surface should be smooth. Step 4 Perform subsequent operations after the repaired paint coating is exposed in the air for 30 minutes. Issue 01 (2011-10-25) Huawei Proprietary and Confidential Copyright © Huawei Technologies Co., Ltd. - Page 168 The color of the repaired paint coating area should be consistent with that of the surrounding areas, without obvious edges and bulges, and the original damage should no longer be distinguishable. In addition, there should be no paint peeled off. ----End Issue 01 (2011-10-25) Huawei Proprietary and Confidential Copyright © Huawei Technologies Co., Ltd.
Need help?
Do you have a question about the BTS3900A and is the answer not in the manual?
Questions and answers