Intel Server System R1000GZ Service Manual
Hide thumbs
Also See for Server System R1000GZ:
- Technical product specification (76 pages) ,
- Quick installation user's manual (20 pages)

Related Manuals for Intel Server System R1000GZ


Summary of Contents for Intel Server System R1000GZ
- Page 1 ® Intel Server System R1000GZ/GL Family Service Guide ® A Guide for Technically Qualified Assemblers of Intel identified Subassemblies/Products Order Number: G24884-003...
- Page 2 Intel products are not designed, intended or authorized for use in any medical, life saving, or life sustaining applications or for any other application in which the failure of the Intel product could create a situation where personal injury or death may occur. Intel may make changes to specifications and product descriptions at any time, without notice.
-
Page 3: Safety Information
Consignes de sécurité Lisez attention toutes les consignes de sécurité et les mises en garde indiquées dans ce document avant de suivre toute instruction. Consultez Intel Server Boards and Server Chassis Safety ® Information sur le Intel Server Deployment Toolkit 3.0 CD ou bien rendez-vous sur le site http://www.intel.com/support/motherboards/server/sb/cs-010770.htm. - Page 4 Take care to grip with, but not squeeze, the pliers or other tool you use to remove a jumper, or you may bend or break the pins on the board. ® Intel Server System R1000GZ/GL Service Guide...
-
Page 5: Preface
® information, and instructions on how to add and replace components on the Intel Server System R1000GZ/GL family products. For the latest revision of this manual, go to http://www.intel.com/support. -
Page 6: Table Of Contents
Installing a Hard Disk Drive into 2.5” Hard Drive Carrier ........... 26 Removing and Installing the PCI Riser Assembly ................ 27 Removing the PCI Riser Assembly ..................27 Installing the PCI Riser Assembly ..................28 Installing and Removing a PCI Add-in Card ................28 ® Intel Server System R1000GZ/GL Service Guide... - Page 7 Clearing the Password....................... 46 Restoring the BIOS Defaults ..................... 46 Appendix A: Technical Reference ................ 47 Power Supply Input Voltages .................... 47 Power Supply Output Voltages ..................47 System Environmental Specifications ................47 ® Intel Server System R1000GZ/GL Service Guide...
- Page 8 Table of Contents Appendix B: Regulatory and Compliance Information ......... 49 Appendix C: Getting Help ................... 50 Warranty Information ....................... 50 ® Server Issue Report Form ............. 51 Appendix D: Intel ® viii Intel Server System R1000GZ/GL Service Guide...
- Page 9 Server System R1000GZ/GL ....................1 ® Figure 2. Intel Server System R1000GZ/GL Components ................. 3 Figure 3. 3.5" Hard Drive Bay - 4 Drive Configuration ................3 Figure 4. 2.5" Hard Drive Bay - 8 Drive Configuration ................3 Figure 5. Front Panel Options ........................4 Figure 6.
- Page 10 Figure 70. Replacing a system fan ......................41 Figure 71. Removing the backplane ......................42 Figure 72. Installing the backplane ......................42 Figure 73. Installing the Rack Handle ......................43 Figure 74. Removing the Rack Handle ....................... 43 ® Intel Server System R1000GZ/GL Service Guide...
- Page 11 Table 1. Server System References....................... v ® Table 2. Intel Server System R1000GZ/GL Feature Summary ..............1 Table 3. Hard Disk Drive Options ........................ 9 Table 4. BIOS Setup: Keyboard Command Bar ..................45 Table 5. Power Supply Output Capability ....................47 Table 6.
-
Page 13: Server System Features
Server System Features 1 Server System Features ® This chapter briefly describes the main features of the Intel Server System R1000GZ/GL family. This includes illustrations of the products, a list of the server system features, and diagrams showing the location of important components and connections on the server systems. - Page 14 Value rack mount rail kit – Intel Product Code – AXXVRAIL Supported Rack Mount Kit Accessory Options Cable Management Arm – Intel Product Code – AXX1U2UCMA (*supported with AXXPRAIL only) 2-post fixed mount bracket kit – Intel Product Code – AXX2POSTBRCKT ®...
-
Page 15: Server System Components
Server System R1000GZ/GL Components ® Hot Swap Hard Drive Bay and Front Panel Options Figure 3. 3.5" Hard Drive Bay - 4 Drive Configuration Figure 4. 2.5" Hard Drive Bay - 8 Drive Configuration ® Intel Server System R1000GZ/GL Service Guide... -
Page 16: Front Panel
NIC – 2 RMM4 NIC Port NIC – 3 I/O Module Ports/Connectors (Optional) NIC – 4 Add-in adapter slots via Riser Card 1 and Riser Card 2 Figure 6. Back Panel Feature Identification ® Intel Server System R1000GZ/GL Service Guide... -
Page 17: Server Board Components
Server Board Components This section helps you identify the components and connectors on the server board. Figure 7. Server Board Connector and Component Locations ® * For server systems integrated with Intel Server Board S2600GZ only. ® Intel Server System R1000GZ/GL Service Guide... -
Page 18: Intel ® Light-Guided Diagnostics
System Fan – 6 Fault LED CATERR LED System Fan – 5 Fault LED System Power Good LED System Fan – 4 Fault LED ® Figure 8. Intel Light-Guided Diagnostic LEDs - Server Board ® Intel Server System R1000GZ/GL Service Guide... - Page 19 CPU fault. J - DIMM Fault LEDs on the server board help identify failed and failing DIMM slots. The DIMM fault LEDs turn on (amber) if there is a DIMM fault. ® Intel Server System R1000GZ/GL Service Guide...
-
Page 20: System Recovery Jumpers
If pins 2-3 are selected, the Integrated BMC Force Update Mode is BMC Force Update (J2D1) enabled. These pins should be selected on 1-2 for normal system operation. Figure 9. Configuration Jumpers ® Intel Server System R1000GZ/GL Service Guide... -
Page 21: Peripheral Devices
45 ° ® Note: The Intel Server System R1000GZ/GL does not support all SAS or Serial ATA (SATA) hard drives. For a web link to a list of supported hard drives, see “Additional Information and Software”. ®... -
Page 22: Figure 11. Front View Of Front Bezel
• Slimline DVD-ROM Drive: AXXSATADVDROM • Slimline DVD-RW Drive: AXXSATADVDRWROM Note: For a complete list of supported peripherals, go to http://serverconfigurator.intel.com. Bezel The front bezel is available as optional accessory for the server system: Figure 11. -
Page 23: Figure 13. 4 X 3.5-Inch Hard Drive Backplane Components (Rear View)
For instructions on installing the ® ® Intel Remote Management Module 4, see “Installing and Removing the Intel Remote Management Module 4”. ® Intel Server System R1000GZ/GL Service Guide... -
Page 24: Hardware Installations And Upgrades
All references to left, right, front, top, and bottom assume the reader is facing the front of the chassis as it would be positioned for normal operation. ® Note: The Intel Server System R1208GZ is shown for illlustration purposes. Server components with the product family are identical. ® Intel Server System R1000GZ/GL Service Guide... -
Page 25: Cable Routing
Use the figures below to determine the correct cable routing. Note: Red lines are for power connection, dot lines are for optional device connection. ®® Intel Server System R1000GZ/GL Service Guide... -
Page 26: For System With 4 X 3.5" Hard Drive Bay
Hardware Installations and Upgrades For system with 4 x 3.5” hard drive bay: Figure 16. Cable Routing – 4 x 3.5” HDD ®® Intel Server System R1000GZ/GL Service Guide... -
Page 27: For System With 8 X 2.5" Hard Drive Bay
Hardware Installations and Upgrades For system with 8 x 2.5” hard drive bay: ® Note: To activate the port SCU1 (4-7) on the server board, a proper Intel RAID C600 Upgrade ® Key must be installed. For instructions, see Intel RAID C600 Upgrade Key Installation Guide. -
Page 28: Fan Connections
If your system includes a front bezel, follow these steps to remove the front bezel: 1. Unlock the bezel if it is locked. 2. Remove the left end of front bezel from rack handle (see letter “A”). ®® Intel Server System R1000GZ/GL Service Guide... -
Page 29: Installing The Front Bezel
1. Lock the right end of the front bezel to the rack handle (see letter “A”). 2. Rotate the front bezel clockwise till the left end clicks into place (see letter “B”). 3. Lock the bezel if needed. Figure 21. Installing the Front Bezel ®® Intel Server System R1000GZ/GL Service Guide... -
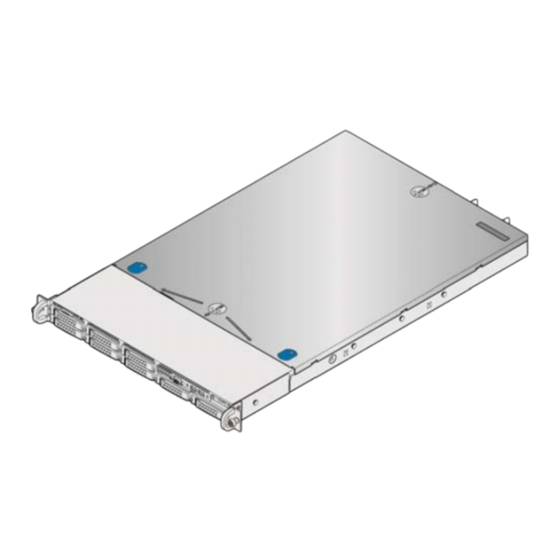
Page 30: Removing And Installing The System Cover
Place system cover onto the chassis and slide forward to engage recessed edge at front of cover (see letter “A”). Tighten the four screws (see letter “B”). Figure 23. Installing the System Cover ®® Intel Server System R1000GZ/GL Service Guide... -
Page 31: Removing And Installing The Air Duct
Figure 24. Removing the Air Duct Installing the Air Duct Align the two holes on the air duct with the alignment pins on the chassis and install the air duct into place. Figure 25. Installing the Air Duct ®® Intel Server System R1000GZ/GL Service Guide... -
Page 32: Removing And Installing Processor
(2) Avoid moving around unnecessarily. Caution: Protective socket cover needs to be removed for proper cooling of the processor; failure to remove the cover could result in damage to the system. ®® Intel Server System R1000GZ/GL Service Guide... -
Page 33: Figure 27. Installing Processor - Open The Socket Lever
Note: The underside of the processor has components that may damage the socket pins if installed improperly. Processor must align correctly with the socket opening before installation. DO NOT DROP processor into socket! 4. Remove the Cover. Press the cover to remove it. Save the protective cover. ®® Intel Server System R1000GZ/GL Service Guide... -
Page 34: Installing Processor Heatsink(S)
2. Align heatsink fins to the front and back of the chassis for correct airflow. Airflow goes from front-to-back of chassis (see letter “B”). Each heatsink has four captive fasteners and should be tightened in a diagonal manner using the following procedure: ®® Intel Server System R1000GZ/GL Service Guide... -
Page 35: Removing The Processor
4. Remove the processor. Installing and Removing Memory Installing Memory 1. Locate the DIMM sockets. Make sure the clips at either end of the DIMM socket(s) are pushed outward to the open position (see letter “A”). ®® Intel Server System R1000GZ/GL Service Guide... -
Page 36: Removing Memory
1. Remove the drive carrier by pressing the green button and opening the lever (see letter “A”). Slide the carrier out (see letter “B”). Figure 35. Installing Hard Disk Drive – Removing 3.5” HDD carrier ®® Intel Server System R1000GZ/GL Service Guide... -
Page 37: Figure 36. Installing Hard Disk Drive - Removing 3.5" Hdd Interface Bracket
HDD into the bracket to align the screw holes with the right and left rail (see letter “d3”). Secure the hard disk drive using the four screws for 2.5" HDD (see letter “d4”). Figure 38. Installing Hard Disk Drive – Installing 2.5” HDD ®® Intel Server System R1000GZ/GL Service Guide... -
Page 38: Installing A Hard Disk Drive Into 2.5" Hard Drive Carrier
Figure 41. Installing Hard Disk Drive – Removing plastic drive blank 3. Install the hard disk drive using the four screws as shown. Make sure the connector end of the drive matches the backplane connector (see letter “E”). ®® Intel Server System R1000GZ/GL Service Guide... -
Page 39: Removing And Installing The Pci Riser Assembly
Removing the PCI Riser Assembly Disconnect any cables attached to any add-in cards. Grasp the riser assembly with both hands and pull up to remove from system. Figure 44. Removing PCI Riser Assembly ®® Intel Server System R1000GZ/GL Service Guide... -
Page 40: Installing The Pci Riser Assembly
2. Remove the filler panel from the add-in card slot and remove the screw as shown (see letter “A”). 3. Insert add-in card until it seats in the riser connector (see letter “B”). 4. Secure add-in card with screw as shown (see letter “C”). ®® Intel Server System R1000GZ/GL Service Guide... -
Page 41: Removing A Pci Add-In Card
Replacing a PCI Riser Card Caution: PCI riser cards are NOT hot-swappable. Before removing or replacing the riser card, you must first take the server out of service, turn off all peripheral devices connected to the system, ®® Intel Server System R1000GZ/GL Service Guide... -
Page 42: Removing A Pci Riser Card
®® Intel Server System R1000GZ/GL Service Guide... -
Page 43: Installing A Slimline Optical Drive
Removing a Slimline Optical Drive 1. Remove the cables (see letter “A”). 2. Lift up the blue tab to release the optical drive (see letter “B”). 3. Slide the optical drive out (see letter “C”). ®® Intel Server System R1000GZ/GL Service Guide... -
Page 44: Installing And Removing Intel I/O Expansion Module
3. Attach the module to the server board connector (see letter “C”). 4. Secure the module with the three screws as shown (see letter “D”). ® Figure 53. Installing Intel I/O Expansion Module ®® Intel Server System R1000GZ/GL Service Guide... -
Page 45: Removing Intel ® I/O Expansion Module
® Installing the Intel RAID C600 Upgrade Key ® Locate the white 4-pin key header next to Riser Slot 1. Carefully pickup the Intel RAID C600 Upgrade Key. Match the Key and connector orientation and press down to install. ®... -
Page 46: Installing And Removing The Intel
Installing the Intel RMM4 Lite ® Locate the RMM4 Lite connector next to Riser Slot 1, carefully pickup the Intel RMM4 Lite module, match the alignment pin of the module and the connector on server board, then press to install. -
Page 47: Removing The Intel Rmm4 Nic
Installing the Intel RAID Smart Battery ® 1. Connect the cable between the BBU and the RAID card. For details, see Intel RAID Smart Battery User’s Guide. 2. Locate the BBU bracket inside the chassis. Align the tabs on the plastic battery holder with mounting holes on the BBU bracket (see letter “A”). -
Page 48: Removing The Intel Raid Smart Battery
If a filler panel is installed, use the 'finger hole' to remove the filler panel (see letter “A”). Figure 61. Removing the filler panel If a power supply is installed, push the green latch in the direction shown while pulling out of the system by the handle. ®® Intel Server System R1000GZ/GL Service Guide... -
Page 49: Installing And Removing The Server Board
2. Remove the four screws to release the air duct side wall (see letter “A”). 3. Lift the air duct side wall straight up to remove from the server board (see letter “B”). ®® Intel Server System R1000GZ/GL Service Guide... -
Page 50: Installing The Server Board
5. Lift the server board from the server system (see letter “D”). Figure 66. Removing the Server Board Installing the Server Board 1. Place the server board into the server system (see letter “A”). ®® Intel Server System R1000GZ/GL Service Guide... -
Page 51: Replacing The Backup Battery
When the battery starts to weaken, it loses voltage, and the server settings stored in CMOS RAM in the RTC (for example, the date and time) may be wrong. Contact your customer service representative or dealer for a list of approved devices. ®® Intel Server System R1000GZ/GL Service Guide... -
Page 52: Figure 69. Replacing The Backup Battery
5. Remove the new lithium battery from its package, and, being careful to observe the correct polarity, insert it in the battery socket. Note: You will need to run the BIOS Setup to restore the configuration settings to the RTC. ®® Intel Server System R1000GZ/GL Service Guide... -
Page 53: Replacing A System Fan
2. Disconnect all cables from the backplane. 3. Remove the screw (see letter “A”). 4. Pull up the backplane (see letter “B”). 5. Remove the backplane from the server chassis (see letter “C”). ®® Intel Server System R1000GZ/GL Service Guide... -
Page 54: Installing The Backplane
3. Slide the backplane into the server system guides (see letter “B”). 4. Secure the backplane with the screw as shown (see letter “C”). Figure 72. Installing the backplane 5. Connect cables to backplane, please refer to “Cable Routing” ®® Intel Server System R1000GZ/GL Service Guide... -
Page 55: Installing And Removing The Rack Handles
Figure 73. Installing the Rack Handle Removing the Rack Handles Remove the two screws holding the rack handle in place, and remove the rack handle from the server system as shown. Figure 74. Removing the Rack Handle ®® Intel Server System R1000GZ/GL Service Guide... -
Page 56: Server Utilities
To enter the BIOS Setup using a keyboard (or emulated keyboard), press the <F2> function key during boot time when the OEM or Intel Logo Screen or the POST Diagnostic Screen is displayed. The following instructional message is displayed on the Diagnostic Screen or under the Quiet Boot Logo Screen: Press <F2>... -
Page 57: Table 4. Bios Setup: Keyboard Command Bar
If “Yes” is highlighted and <Enter> is pressed, all changes are saved and the Setup is exited. If “No” is highlighted and <Enter> is pressed, or the <Esc> key is pressed, the user is returned to where they were before <F10> was pressed without affecting any existing values. ®® Intel Server System R1000GZ/GL Service Guide... -
Page 58: Upgrading The Bios
6. Return the BIOS Default jumper to the normal position (covering pins 1 and 2). 7. Close the server system. 8. Power up the system. The BIOS defaults settings are now restored and can be reset by going into the BIOS setup. ®® Intel Server System R1000GZ/GL Service Guide... -
Page 59: Appendix A: Technical Reference
Non-Operating Humidity 90%, non-condensing at 35°C Acoustic noise Sound power: 7.0 BA in operating conditions at typical office ambient temperature. (23 +/- 2 degrees C) Shock, operating Half sine, 2 g peak, 11 milliseconds ®® Intel Server System R1000GZ/GL Service Guide... - Page 60 Non-palletized free fall in height 24 inches ( ≧ 40 lbs to < 80 lbs) Shock, packaged Vibration, unpackaged 5 Hz to 500 Hz, 2.20 g RMS random ® +/-12 KV except I/O port +/- 8 KV per Intel Environmental test specification System Cooling Requirement in 460 Watt Max – 1570 BTU/hour BTU/Hr 750 Watt Max –...
- Page 61 Appendix B: Regulatory and Compliance Information Appendix B: Regulatory and Compliance Information Please refer to the Server Products Regulatory and Safety document for the product regulatory compliance reference. The document can be downloaded from http://www.intel.com/support/server. ®® Intel Server System R1000GZ/GL Service Guide...
- Page 62 — Server and chassis accessory parts list for ordering upgrades or spare parts — A searchable knowledgebase to search for product information throughout the support site If you are still unable to obtain a solution to your issue, send an email to Intel’s technical support center using the online form available at http://www.intel.com/support/feedback.htm?group=server.
- Page 63 FRU/SDR Version: Has the latest BIOS been tried? (Yes/No): Has the latest BMC been tried? (Yes/No): Has the latest RMM Firmware been tried? (Yes/No): Has the latest FRU/SDR been tried? (Yes/No): Processor information: ®® Intel Server System R1000GZ/GL Service Guide...
- Page 64 Add-in adapters (Example: NICs, Management Adapters, Serial Expansion Cards, PCI-Express* Adapters, RAID Controllers, SCSI Controllers, and so on): Type Slot Manufacturer Model Firmware Other third part hardware (Example: Example: KVM, Chassis, and so on): Description/Use Manufacturer Model Firmware ®® Intel Server System R1000GZ/GL Service Guide...
- Page 65 Has the latest RAID driver been tried? (Yes/No): RAID volumes configuration (disks & RAID level): RAID volume use (Boot device/Data Volume): Is BBU (Battery Backup Unit) installed? (Yes/No): BBU part number: Detailed description of issue: ®® Intel Server System R1000GZ/GL Service Guide...
- Page 66 ® Appendix D: Intel Server Issue Report Form Troubleshooting tried: Steps to replicate the issue: ®® Intel Server System R1000GZ/GL Service Guide...
- Page 67 Server Issue Report Form Issue impact statements: Do you have any potential Intel system, or component purchases that this issue is holding up? If yes, please provide a brief description below. Do you have systems already purchased that are not being delivered to your customers because of this issue? If yes, please provide a brief description below.
Need help?
Do you have a question about the Server System R1000GZ and is the answer not in the manual?
Questions and answers