
Subscribe to Our Youtube Channel
Related Manuals for Creality Laser Module


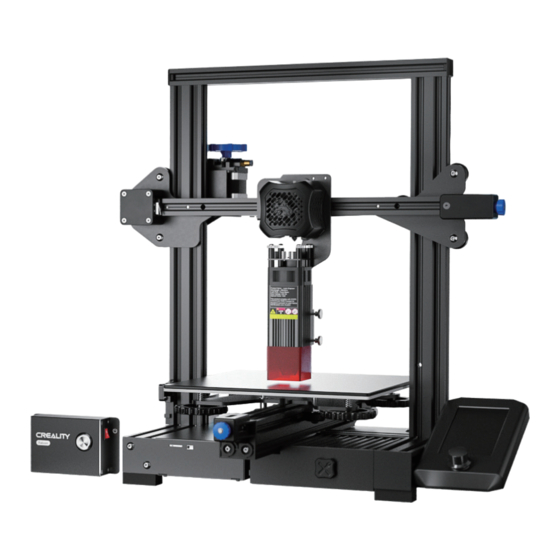
Summary of Contents for Creality Laser Module
- Page 1 Creality Laser Module Quick Start Guide Creality Laser Module 快速使用指南 V1.0 深 圳 市 创 想 三 维 科 技 股 份 有 限 公 司 SHENZHEN CREALITY 3D TECHNOLOGY CO., LTD.
-
Page 4: Firmware Upgrade
For a better experience in using our product, you can also learn how to use the engraving machine in the following ways: View the accompanied instructions and videos in the TF card. Visit our official website www.creality.com to find relevant software/hardware information,contact details,operation and maintenance instructions. 固件升级... - Page 5 使用安全须知 激光雕刻机在雕刻或切割材料时使用高密度激光束照射材料, 使材料表面产生高温, 目的是在不燃烧的情况下使材料气化。 但大 多数材料本质上是易燃的, 可能被点燃并形成明火, 明火可能烧毁机器及其周围环境。 请遵循以下操作原则: 1. 请勿将本产品放置在易燃易爆物品、 挥发性溶剂或高热源附近, 请将本产品放置在通风、 阴凉、 少尘的环境内。 2. 请勿在安装过程中使用其他产品电源线代替, 请使用本产品附带的电源线。 3. 定期在断电的情况下, 用干布清洁机身及激光模组。 4. 激光工作环境温度在 5°C-35°C, 避免在潮湿环境下使用本产品, 切勿在雷雨天气下使用本产品。 5. 如长时间不使用本产品, 请关闭本产品, 并断开电源线。 6. 本产品已连接电源时, 请勿用手或其他工具触碰电子相关区域。 严禁带电插拔激光模组线。 7. 本产品运行时, 请勿触碰正在运动的机械机构及激光模组。 8. 务必在加工材料下方放置激光无法穿透的平面物体, 如铝合金或不锈钢板 。 9.
-
Page 6: Safety Precautions
(used), abide by professional ethics, pay attention to safety obligations, and strictly prohibit the use of our products or equipment for any illegal purposes. Creality will not be responsible for any violators' legal liability under any circumstance. - Page 7 产品参数 Parameters 产品名称 Creality Creality Creality Laser module 1.6W Laser module 5W Laser module 10W Product Name 激光源 半导体激光器 semiconductor laser Laser Source 激光功率 1.6W Laser Power 激光波长 450±5nm 455±5nm Laser Wavelength 净重 1.0kg 1.1kg 1.1kg Net Weight 毛重 1.3kg 1.4kg 1.4kg Gross Weight 输入电压 100-240V~ 50-60Hz Input Voltage 输出电压...
- Page 8 电源开关 微动开关 Switch Microswitch 护目罩 Protective goggles 手拧螺丝 Thumb screw TF卡槽 活性炭吸烟棉 TF card slot Activated carbon Type-C接口 absorbing cotton Type-C interface 定焦条 Fixed focus bar 电源接口 护目罩 Packing list Protective goggles 1.6W、 5W 激光模组线框图 1.6W、 5W laser module wireframes...
- Page 9 1. Laser module*1 8. Allen wrench*1 1.6W、5W 2. 激光模组固定板*1 9. 多级定焦条*1(仅限10W激光模组) 2. Laser module fixing plate*1 9. Multi-level fixed focus bar*1 (Only for 10W laser module) 3. 控制盒组件*1 10. 黑色尼龙扎带*3 3. Control box kit*1 10. Black nylon cable tie*3 4. Type-C数据线*1 11.
- Page 10 2. 连接控制盒与打印机, 注意排线上的 X、 Y 标识;Z 对应激光模组线; 2. Connect the control box to the printer and pay attention to the “X” and “Y” labels on the cable. The “Z” corresponds to the laser module cable. 插入Y轴电机线 插入Y轴限位开关线 安装Y轴限位开关保护罩...
- Page 11 4. Install the laser module fixing plate (It should be vertical) and lock the screw; 5. 安装激光模组, 使用两颗手拧螺丝锁紧, 并插上带有 Z 标识的激光模组线: 5. Install the laser module, use two thumbscrews to lock it, and plug in the laser module cable with “Z”:...
- Page 12 ①.The Y-axis motor cable of Ender-3 s1, Ender-3 s1 pro, Ender-3 s1 plus needs to be placed on the side to prevent the cable from being pulled; Before installing the laser module fixing plate, you need to remove the extruder...
- Page 13 ②. Ender-3 neo、 Ender-3 v2 neo、 Ender-3 max neo 安装激光模组固定板时, 需要先将其略微倾斜才能安装到合适位置; ②. For Ender-3 neo, Ender-3 v2 neo, and Ender-3 max neo, when installing the laser module fixing plate it needs to be slightly tilted before it can be installed in the suitable position;...
- Page 14 1. 再次仔细阅读使用安全须知中的内容。 1. Read the contents in the “Safety precautions” again carefully. 2. 确保激光模组的保护镜片干净, 并正确调节激光模组焦距。 2. Make sure the protective lens of the laser module is clean and adjust the focal length of the laser module correctly. 1.6W、5W 保护镜片 protective lens 1.6W、...
- Page 15 10W 激光模组:请将多级定焦条放置在模组与加工材料之间, 按照定焦条表面的镭雕提示, 使激光模组护目罩底部与多级定焦 条对应位置相接触, 最后使用右侧的手拧螺丝将其锁紧。 例如雕刻或者切割 2mm 厚的椴木板或其它材料: 10W laser module: Please place the multi-level fixed focus bar between the laser module and the processed material.Follow the tips and make the bottom of the laser module contact with the corresponding surface of the multi-level fixed focus bar.Finally lock it with two hand screws on the right.For example,if you engrave...
- Page 16 配置参数 Configuration parameter $130 $131 机器型号 Machine model Ender-2 pro Ender-3 Ender-3 Pro Ender-3 neo Ender-3 max neo Ender-3 s1 Ender-3 s1 pro Ender-3 s1 plus Ender-3 V2 Ender-3 v2 neo CR-10 CR-10 mini 在线工作 Online operation 通过 Type-C 数据线, 实时连接控制盒与软件, 详情请参考 TF 卡中的随机资料。 注意:在线工作时, 请不要插入 TF 卡, 不要按 控制盒上的微动开关。 Connect the control box and use the software to operate the machine real time through the Type-C cable. For details, please refer to the information in the TF card.
- Page 17 离线工作 Offline working 1. 首先通过 LightBurn 软件生成雕刻文件 (.gcode/.gc/.g/.nc/.ngc) , 将文件保存至 TF 卡的根目录中 (机器默认读取 TF 卡第 一级目录中最新的雕刻文件, 建议删除第一级目录中其它雕刻文件) , 上电前将 TF 卡插入机器。 然后使用配套的电源适配器和电源 线连接机器, 最后打开控制盒左侧的红色电源开关。 1. First generate the engraving file (.gcode/.gc/.g/.nc/.ngc) through LightBurn software, and save the file to the root directory of the TF card (the machine reads the engraving file with the latest system modification date in the root directory of the TF card by default.
- Page 18 预览模式下, 再次按下微动开关, 机器进入雕刻模式, 此时激光头会发出强光, 机器开始雕刻, 指示灯常亮。 如果需要暂停雕刻, 请按下微动开关, 此时指示灯变成呼吸灯效果, 再次按下微动开关可以继续雕刻。 如果需要取消雕刻, 请长按微动开关 3 秒, 机器会发出“滴”一声, 随后机器复位, 复位完成机器发出“滴 ... 滴”两声, 进入待机模 式, 指示灯变成呼吸灯效果。 In preview mode, press microswitch again, it will enter engraving mode. At this time, the laser head will emit a corresponding level of laser power, the machine will start engraving with indicator light on.
- Page 19 Yes or No 放置金属保护板及雕刻材料 Placing metal protective plates 短按/Short Press and engraving materials 是否处于暂停模式 调整激光模组焦距 In pausing mode, Adjust focus of laser module Yes or No 修改GRBL配置参数并重启控制盒 是/YES 否/NO Modify the GRBL configuration parameters and restart the control box 继续雕刻...
- Page 20 Plug Laser Module wire 设置参数 放置金属保护板及雕刻材料 Setting parameters Placing metal protective plates and engraving materials 边框预览 调整激光模组焦距 Frame preview Adjust focus of laser module 使用Type-C数据线连接电脑和 控制盒 Use a Type-C data 开始雕刻 结束 cable to connect the Start engraving computer and the control box...
-
Page 21: Warranty
产品保修卡 产品寄回前请先联系售后专员,为正常进行售后处理,请务必填写此卡,并随机器寄回。 返修 □ 换货 □ 退货 □ 故障描述或退、换货原因和建议: 客户名称: 联系电话: 收件地址: 机器制造编码: 订单编号: 维修情况记录: 购买渠道:电商平台 □ 线下 □ 购买日期: 年 月 日 温馨提示:基本信息及返厂原因为客户必填项,维修情况记录部分为维修人员填写项。 WARRANTY Before returning the product and filling in a warranty, please contact after-sale person for going through after-sale formality.And attach this warranty card along with the returned machine. - Page 22 With the spirit of evangelists, we want to share the convenience of technology with everyone. 深圳市 创想三维科技股份有限公司 深圳市龙华区民治街道新牛社区梅龙大道锦绣鸿都大厦18F 公司网站:www.cxsw3d.com 服务热线:400 6133 882 0755-8523 4565 18F, JinXiuHongDu Building, Meilong Blvd., Longhua Dist., Shenzhen, China 518131 Official Website: www.creality.com Tel: +86 755-8523 4565 E-mail: info@creality.com cs@creality.com...
Need help?
Do you have a question about the Laser Module and is the answer not in the manual?
Questions and answers