Regency Fireplace Products S2400M Owners & Installation Manual
Freestanding woodstove
Hide thumbs
Also See for S2400M:
- Owners & installation manual (28 pages) ,
- Owners and installation manual (36 pages)
Table of Contents
Advertisement
Quick Links
www.regency-fire.com
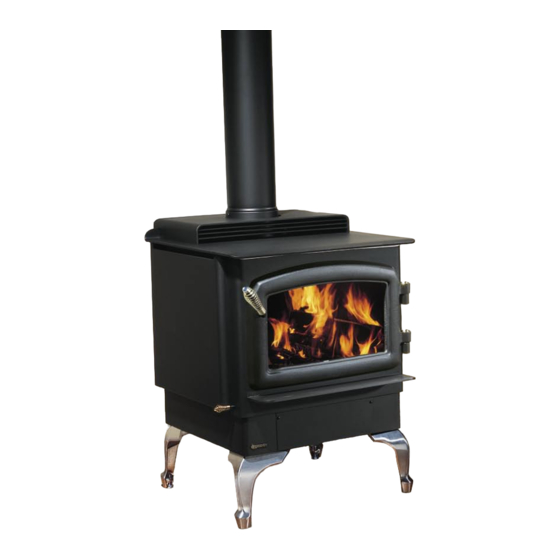
Freestanding Woodstove
Owners &
Installation Manual
MODELS:
F2400M
S2400M
Tested by:
Installer: Please complete the details on the back cover
and leave this manual with the homeowner.
Homeowner: Please keep these instructions for future reference.
918-154b
FPI FIREPLACE PRODUCTS INTERNATIONAL LTD. 6988 Venture St., Delta, BC Canada, V4G 1H4
02/15/06
Advertisement
Table of Contents

Subscribe to Our Youtube Channel
Related Manuals for Regency Fireplace Products S2400M


Summary of Contents for Regency Fireplace Products S2400M
- Page 1 Freestanding Woodstove Owners & Installation Manual MODELS: F2400M S2400M Tested by: Installer: Please complete the details on the back cover and leave this manual with the homeowner. Homeowner: Please keep these instructions for future reference. 918-154b FPI FIREPLACE PRODUCTS INTERNATIONAL LTD. 6988 Venture St., Delta, BC Canada, V4G 1H4...
- Page 2 Thank-you for purchasing a REGENCY FIREPLACE PRODUCT. The pride of workmanship that goes into each of our products will give you years of trouble-free enjoyment. Should you have any questions about your product that are not covered in this manual, please contact the REGENCY DEALER in your area.
-
Page 3: Table Of Contents
Important ...............8 Minimum Clearance To Combustible Materials .....8 F2400m Stove Main Assembly ........22 Stove Assembly Prior ToInstallation ......10 S2400m Step Stove Main Assembly ......23 Step-by-step Chimney And Connector Installation ..11 Pedestal, Bottom Shield & Leg Options ......24 MasonryChimney ............12 Firebrick ...............25... -
Page 4: Safety Label
SAFETY LABEL This is a copy of the label that accompanies each NOTE: Regency units are constantly being Regency Freestanding Woodstove (F2400M). improved. Check the label on the unit and if We have printed a copy of the contents here there is a difference, the label on the unit is the for your review. -
Page 5: Safety Label For S2400M
TESTED TO: UL1482 / ULC S627 / UL 737 REPORT NO: 219-S-02-2 THE S2400M MEETS UL737 STANDARD FOR FIREPLACE STOVES WHEN A FIRESCREEN IS PROVIDED. INSTALL AND USE ONLY IN ACCORDANCE WITH THE MANUFACTURER'S INSTALLATION AND OPERATING INSTRUCTIONS. CONTACT LOCAL BUILDING OR FIRE OFFICIALS ABOUT RESTRICTIONS AND INSTALLATION INSPECTION IN YOUR AREA. -
Page 6: Installation
INSTALLATION UNIT DIMENSIONS Regency Freestanding Woodstove... -
Page 7: Residential Installation
Refer to the Installation section within this manual. There are no performance differences with either the pedestal or legs. It is primarily a personal preference. Legs can F2400M, S2400M be either painted steel, painted cast, or gold plated cast. -
Page 8: Room Air
Rear Deflector 18" (457 mm) 12" (304 mm) 6.5" (165 mm) 30" (762 mm) 18.5" (469 mm) 19.5" (495 mm) Medium S2400M Step Stove 16" (406 mm) 11" (279 mm) 6" (152 mm) 28" (710 mm) 17.5" (444 mm) 17.5"... - Page 9 54" (1371 mm) 48" (1219 mm) with Rear Deflector 15" (381 mm) 6.5" (165 mm) 27" (685 mm) 13" (330 mm) 54" (1371 mm) 49" (1244 mm) Medium S2400M Step Stove 15" (381 mm) 5.5" (139 mm) 27" (685 mm) 12" (304 mm) 54"...
-
Page 10: Stove Assembly Prior Toinstallation
See Diagrams 2 & 3. Diagram 4 S2400M Side Shield Adjustment The left and right side shields are lowered for shipping and handling. It allows for a handhold on the top of the stove. -
Page 11: Step-By-Step Chimney And Connector Installation
INSTALLATION STEP-BY-STEP Leg and Bottom Shield Assembly 8) To complete your chimney installation, install the double wall connector pipe from the F2400M & S2400M CHIMNEY AND stove’s flue collar to the chimney support device. Bottom Shield 020-911 CONNECTOR 9) If you are using a horizontal connector,... -
Page 12: Masonrychimney
INSTALLATION MASONRY CHIMNEY Ensure that a masonry chimney meets the mini- mum standards of the National Fire Protection Association (NFPA) by having it inspected by a professional. Make sure there are no cracks, loose mortar or other signs of deterioration and blockage. -
Page 13: Combustible Wall Chimneyconnector Pass-Throughs
INSTALLATION COMBUSTIBLE WALL CHIMNEY CONNECTOR PASS-THROUGHS Method A: 12" (304.8 mm) Clearance to Combustible Wall Member: Using a minimum thickness 3.5" (89 mm) brick and a 5/8" (15.9 mm) minimum wall thickness clay liner, construct a wall pass-through. The clay liner must conform to ASTM C315 (Standard Specification for Clay Fire Linings) or its equivalent. -
Page 14: Recommended Heights For Woodstove Flue
INSTALLATION RECOMMENDED HEIGHTS FOR WOODSTOVE FLUE Simple rules on draft (refer to Table 1). 3) Add 4% overall for each 1000' above sea Recommended Flue Height level. Elevation Example a) Example b) 1) At sea level minimum height is 12' Example: a) 1000' 18.72'... -
Page 15: Mobile Home Installation
INSTALLATION MOBILE HOME INSTALLATION Once you have properly marked the position of In addition to standard installation instructions your unit and the floor protection as outlined in the following requirements are mandatory for installation in a mobile home. the Residential Installation items #1 through #8, a supply of fresh air has to be supplied to your 1) The stove must be permanently bolted to unit. -
Page 16: Listed Componentsfor Mobile Homeinstallation
ICC EXCEL 2100 tap it into place with a hammer. A tighter fit The Regency F2400M and S2400M Freestand- will ensure the tube will not move when the Qty.Part #... -
Page 17: Brick Installation
INSTALLATION BRICK INSTALLATION STEP-BY-STEP 4) Push the ash plug into the hole inside the firebox and replace all the bricks except OPTIONAL for the brick over the ash plug (see brick Firebrick is included to extend the life of your diagram in the Brick Installation section). - Page 18 INSTALLATION Blower/Fan (846-515) 1) Remove the two screws from the top of the fan housing. 2) Slide the fan up into the rear heat shield. 3) After aligning holes, secure the fan to the rear heat shield using the two screws removed earlier.
-
Page 19: Operating Instructions
OPERATING INSTRUCTIONS FIRST FIRE OPERATING 9) During the first few days it may be more difficult to start the fire. As you dry out your INSTRUCTIONS firebrick and your masonry flue, your draft When your installation is completed and in- will increase. -
Page 20: Fan Operation
OPERATING INSTRUCTIONS FAN OPERATION Push the ashes down the hole into the ash 4) If you have smoke detectors, prevent smoke drawer, the large pieces can be left in the spillage as this may set off a false alarm. firebox and burned during the next fire or Automatic removed through the door opening. -
Page 21: Maintenance
MAINTENANCE LATCH ADJUSTMENT MAINTENANCE 5) The chimney and chimney connector should be inspected at least once every two months during the heating season to determine is a It is very important to carefully maintain your The door latch may require adjustment as the creosote buildup has occured. -
Page 22: Parts List
PARTS LIST F2400M STOVE MAIN ASSEMBLY Part# Description Part# Description 846-913 Door Assy-Med Gold F2400M (no glass) 846-515 Complete Fan/Blower Assy (120 V) 846-915 Door Assy-Med Black F2400M (no glass) 910-684 Power Cord (120 V) 910-142 Thermodisc - Fan Auto ON/OFF 910-138 Manual/Auto Switch (2-way) 846-302... -
Page 23: S2400M Step Stove Main Assembly
PARTS LIST S2400M STEP STOVE MAIN ASSEMBLY Part# Description Part# Description 846-913 Door Assy- Medium Gold S2400M (no glass) 846-515 Complete Fan/Blower Assy (120 V) 846-915 Door Assy-Medium Black S2400M (no glass) 910-684 Power Cord (120 V) 846-302 Glass - Replacement - S2400M... -
Page 24: Pedestal, Bottom Shield & Leg Options
PARTS LIST PEDESTAL, BOTTOM SHIELD & LEG OPTIONS Part# Description 020-915 Pedestal - Medium 904-257 Large Magnet Catch Blanking Plate - Pedestal 850-100 Ashdrawer Kit - Pedestal Ashdrawer - Pedestal Ashdrawer Lid Assy 942-110 Ash Plug 820-249 Ash Plug Tool Handle 020-911 Bottom Shield - Medium Blanking Plate - Btm Shield... -
Page 25: Firebrick
PARTS LIST FIREBRICK Part# Description 902-111 Brick - Regular Full Size: 1-1/4" x 4-1/2" x 9" 802-147 Brick Partial: 1-1/4" x 4-1/2" x 3-1/2" 802-122 Brick Partial: 1-1/4" x 4-1/2" x 2" 802-152 Brick Partial: 1-1/4" x 2" x 9" Regency Freestanding Woodstove... - Page 26 NOTES Regency Freestanding Woodstove...
- Page 27 WARRANTY Regency Fireplace Products are designed with reliability and simplicity in mind. In addition, our internal Quality Assurance Team carefully inspects each unit thoroughly before it leaves our door. Regency Industries Ltd. is pleased to extend this limited lifetime warranty to the original purchaser of a Regency Product.
- Page 28 Regency fireplace products are designed with reliability and simplicity in mind. In addition, our internal Quality Assurance Team carefully inspects each unit thoroughly before it leaves our door. Fireplace Products International Ltd. is pleased to extend this Limited Lifetime Warranty to the original purchaser of a Regency Product.
Need help?
Do you have a question about the S2400M and is the answer not in the manual?
Questions and answers