Table of Contents
Advertisement
Quick Links
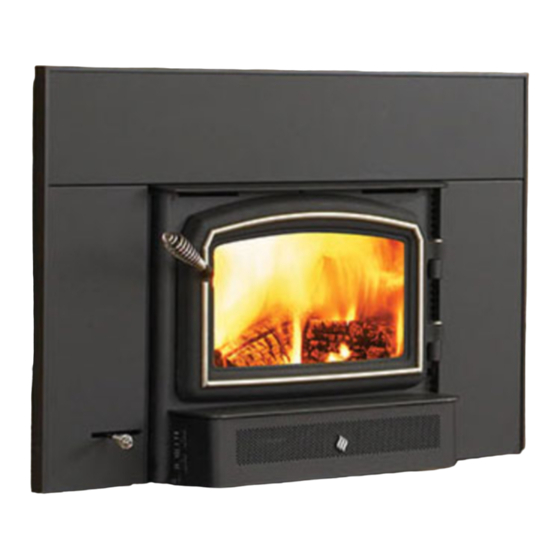
I1200S
Wood Insert
www.regency-fi re.com
Owners & Installation Manual
Tested by:
Installer: Please complete the details on the back cover
and leave this manual with the homeowner.
Homeowner: Please keep these instructions for future reference.
FPI FIREPLACE PRODUCTS INTERNATIONAL LTD. 6988 Venture St., Delta, BC Canada, V4G 1H4
918-665a
07/12/07
Advertisement
Table of Contents

Subscribe to Our Youtube Channel
Related Manuals for Regency Fireplace Products I1200S Wood Insert


Summary of Contents for Regency Fireplace Products I1200S Wood Insert
- Page 1 I1200S Wood Insert www.regency-fi re.com Owners & Installation Manual Tested by: Installer: Please complete the details on the back cover and leave this manual with the homeowner. Homeowner: Please keep these instructions for future reference. FPI FIREPLACE PRODUCTS INTERNATIONAL LTD. 6988 Venture St., Delta, BC Canada, V4G 1H4 918-665a 07/12/07...
- Page 2 Thank-you for purchasing a REGENCY FIREPLACE PRODUCT. The pride of workmanship that goes into each of our products will give you years of trouble-free enjoyment. Should you have any questions about your product that are not covered in this manual, please contact the REGENCY DEALER in your area.
-
Page 3: Table Of Contents
TABLE OF CONTENTS SAFETY LABEL OPERATING INSTRUCTIONS Safety Label ..............4 First Fire ..............16 Fan Operation .............17 Ash Disposal ...............17 UNIT DIMENSIONS Some Safety Guidelines ..........17 With Standard Flue Adaptor ..........5 MAINTENANCE With Offset Flue Adaptor ..........6 Creosote ..............17 INSTALLATION Maintenance of Gold-Plated Doors ......18 Door Gasket ..............18 Before Installing your Insert ...........7 Door Latch Adjustment ..........18... -
Page 4: Safety Label
SAFETY LABEL This is a copy of the label that accompanies each I1200S Wood Insert. We have printed a copy of the contents here for your review. NOTE: Regency units are constantly being improved. Check the label on the unit and if there is a difference, the label on the unit is the correct one. -
Page 5: Unit Dimensions
UNIT DIMENSIONS WITH STANDARD FLUE ADAPTOR 6" (152mm) Diameter STANDARD FLUE ADAPTOR (171-932) I1200 Regency Wood Insert... -
Page 6: With Offset Flue Adaptor
UNIT DIMENSIONS WITH OFFSET FLUE ADAPTOR 6" (152mm) Diameter OFFSET FLUE ADAPTOR (171-936) I1200 Regency Wood Insert... -
Page 7: Installation
INSTALLATION Regency Inserts are constructed with the high- CHIMNEY 6) Alteration of the fi replace in any manner is not est quality materials and assembled under strict permitted with the following exceptions; SPECIFICATIONS quality control procedures that ensure years of trouble free and reliable performance. -
Page 8: Masonry And Factory Built Fireplace Clearances
INSTALLATION MASONRY AND FACTORY BUILT FIREPLACE CLEARANCES The minimum required clearances to combustible materials when installed into a masonry or factory built fi replace are listed below. Adjacent Mantle** Side Minimum Minimum Minimum Unit Side Wall (to Top) Facing Facing Hearth Hearth Hearth Side... -
Page 9: Installing Your Insert
INSTALLATION INSTALLING 3) Install the unit by fi rst setting the rear of 7) Ensure that the unit is still level. the unit into the fi replace. See diagram YOUR INSERT 3. Ensure that the unit is centered in the 8) To complete the installation and to ensure a existing fi... -
Page 10: Installation Into Amasonry Fireplace
INSTALLATION INSTALLATION INTO A 4) If the fl oor of your fi replace is below the In Canada this fi replace insert must be level of the fi replace opening, adjust the installed with a continuous chimney liner MASONRY FIREPLACE insert's levelling bolts to accommodate the of 6"... -
Page 11: Faceplate, Trim & Optional Fan Support Installation
INSTALLATION FACEPLATE, TRIM & OPTIONAL BOTTOM FACEPLATE & FAN SUPPORT INSTALLATION Regular/Oversize Faceplate Installation: Optional Regular/Oversize Bottom Faceplate Installation: 1) Thread the black 1/4" x 3/4" long hex bolts into the faceplate mount- ing bracket as shown in Diagram 1, leaving them approximately 1/4" 4) Position the assembled faceplate side and top to the insert. - Page 12 INSTALLATION Regular/Oversize Faceplate Trim Installation: 12) Mount the completed faceplate / trim assembly to the insert. Ensure to align the side faceplate slots with the hex bolts in the mounting (Black Trim included with Regular/Oversize Faceplate brackets and tighten to secure in place. or Optional Brass Trim) 8) Measure the total height of the faceplate assembly and cut both the Fan Installation:...
- Page 13 INSTALLATION 15) Cut the bottom edge of the fan support (using a metal cutting blade) 18) Secure the fan support to the fan assembly using 4 self tapping to the length measured in step 14. screws. See Diagram 9. 16) Remove the fan assembly from the ash lip of the insert and position 19) Re-attach the fan/fan support assembly to the ash lip of the insert.
-
Page 14: Fan / Blower
INSTALLATION FAN / BLOWER Do not turn fan ON until your insert has Your fan should only be installed once the unit WARNING: reached operating temperature or at least is in place in order to prevent any damage to Electrical Grounding Instructions 30 minutes after starting fi... -
Page 15: Firebrick Assembly
INSTALLATION FIREBRICK ASSEMBLY BRICK FLUE BAFFLE & 4) Important: push both baffl e bricks so they are tight against the side walls and SECONDARY AIR TUBE to the back. Firebrick is included to extend the life of your insert and radiate heat more evenly. Check to INSTALLATION see that all fi... -
Page 16: Screen Door
INSTALLATION SCREEN DOOR 9) During the fi rst few hours it may be more FIRST FIRE diffi cult to start the fi re. As you dry out your fi re brick and your masonry fl ue (if Hook screen to the inside on the right side When your installation is completed and in- applicable), your draft will increase. -
Page 17: Fan Operation
OPERATING INSTRUCTIONS SOME SAFETY FAN OPERATION 15) Do not store any fuel closer than 2 feet from your unit. GUIDELINES The fan is to be operated only with the draft 16) Do not burn salt drift wood as it will corrode control rod pulled out at least 1/2"... -
Page 18: Maintenance Of Gold-Plated Doors
MAINTENANCE 3) Only burn seasoned wood! Avoid burning DOOR LATCH GLASS REMOVAL wet or green wood. Seasoned wood has ADJUSTMENT been dried at least one year. Allow the stove to cool before removing or replac- ing glass. Remove the door from the insert and 4) A small hot fi... -
Page 19: Parts List
PARTS LIST MAIN ASSEMBLY Part # Description 850-141 Black Door - Complete 850-142 Gold Door - Complete 850-143 Nickel Accent Door - Complete 850-144 Gold Accent Door - Complete 846-302 Glass - Replacement 936-243 7/8" Adhesive Tape Gasket 846-920 Glass Retainer Clips (set of 8) Screws - 1/4-20 x 3/8"... -
Page 20: Faceplates
PARTS LIST FACEPLATES Part # Description 171-920 Faceplate & Trim Set - Regular - Black 60) * Faceplate Right Side Regular / Oversize 171-924 Trim Set - Regular Brass 61) * Faceplate Left Side Regular / Oversize 62) * Faceplate Top Regular / Oversize 171-922 Faceplate &... -
Page 21: Firebrick
PARTS LIST FIREBRICK Part # Description 170-960 Complete Brick Set 70) * Brick Regular Full Size: 1-1/4" x 4-1/2" x 9" 76) * Brick Partial: 1-1/4" x 2" x 9" 81) * Brick Partial: 1-1/4" x 1-1/4" x 9" 84) * Brick Partial: 1-1/4"... - Page 22 NOTES I1200 Regency Wood Insert...
-
Page 23: Warranty
WARRANTY Regency Fireplace Products are designed with reliability and simplicity in mind. In addition, our internal Quality Assurance Team carefully inspects each unit thoroughly before it leaves our door. FPI Fireplace Products International Ltd. is pleased to extend this limited lifetime warranty to the original purchaser of a Regency Product. - Page 24 Regency fi replace products are designed with reliability and simplicity in mind. In addition, our internal Quality Assurance Team carefully inspects each unit thor- oughly before it leaves our door. Fireplace Products International Ltd. is pleased to extend this Limited Lifetime Warranty to the original purchaser of a Regency Product.
Need help?
Do you have a question about the I1200S Wood Insert and is the answer not in the manual?
Questions and answers