Table of Contents
Advertisement
Quick Links
Owners &
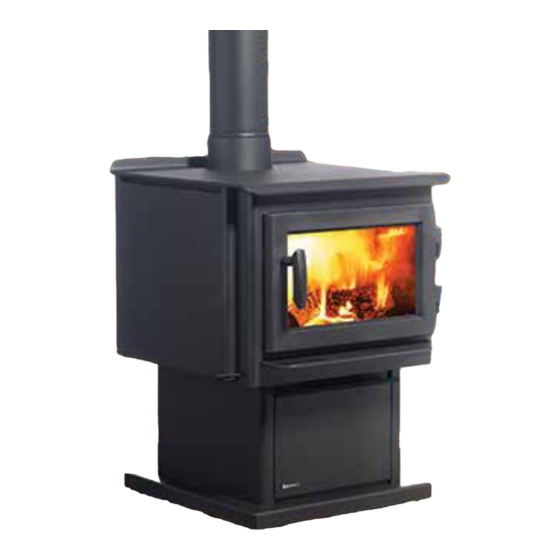
Freestanding Woodstove
Installation Manual
www.regency-fire.com
MODELS:
F2403M
S2403M
Tested by:
Installer: Please complete the details on the back cover
and leave this manual with the homeowner.
Homeowner: Please keep these instructions for future reference.
919-044c
FPI FIREPLACE PRODUCTS INTERNATIONAL LTD. 6988 Venture St., Delta, BC Canada, V4G 1H4
11.08.18
Advertisement
Table of Contents

Subscribe to Our Youtube Channel
Related Manuals for Regency Fireplace Products F2403M


Summary of Contents for Regency Fireplace Products F2403M
- Page 1 Owners & Freestanding Woodstove Installation Manual www.regency-fire.com MODELS: F2403M S2403M Tested by: Installer: Please complete the details on the back cover and leave this manual with the homeowner. Homeowner: Please keep these instructions for future reference. 919-044c FPI FIREPLACE PRODUCTS INTERNATIONAL LTD. 6988 Venture St., Delta, BC Canada, V4G 1H4...
- Page 2 Thank-you for purchasing a REGENCY FIREPLACE PRODUCT. The pride of workmanship that goes into each of our products will give you years of trouble-free enjoyment. Should you have any questions about your product that are not covered in this manual, please contact the REGENCY DEALER in your area.
-
Page 3: Table Of Contents
TABLE OF CONTENTS SAFETY LABEL OPERATING INSTRUCTIONS Safety Label for F2403M ..........4 Safety Label for S2403M ..........5 Operating Instructions ..........21 Draft Control ..............21 First Fire ..............21 DIMENSIONS Fan Operation..............22 Ash Disposal..............22 Unit Dimensions ............6 Safety Guidelinesand Warnings ........22 Wood Stove Outside Air Dimensions ......7... -
Page 4: Safety Label
SAFETY LABEL This is a copy of the label that accompanies each NOTE: Regency units are constantly being Regency Freestanding Woodstove (F2403M). improved. Check the label on the unit and if We have printed a copy of the contents here there is a difference, the label on the unit is the for your review. -
Page 5: Safety Label For S2403M
SAFETY LABEL NOTE: Regency units are constantly being This is a copy of the label that accompanies each Regency Medium Freestanding Step improved. Check the label on the unit and if Stove (S2403M). We have printed a copy of there is a difference, the label on the unit is the correct one. -
Page 6: Dimensions
DIMENSIONS UNIT DIMENSIONS F2403M Dimensions S2403M Dimensions 6-5/8” 27-3/8” (695mm) (152mm) 24-7/8” (632mm) 6-5/8” (168mm) 24-7/8” (609mm) 27-3/8” (685mm) To Ash Lip 24” (609mm) 32-1/4” (819mm) 29-1/8” (736mm) 24” (610mm) 6” (152mm) 34-3/8” (873mm) Regency Freestanding Woodstove... -
Page 7: Wood Stove Outside Air Dimensions
DIMENSIONS WOOD STOVE OUTSIDE AIR DIMENSIONS With pedestal from base of unit to centerline 4-1/2" (114mm) Rear Front With bottom heat shield from rear heat shield to centerline 6-3/4" (171mm) Rear Regency Freestanding Woodstove... -
Page 8: Installation
Clearances are different. See the Minimum Clearance to Combustible Materials chart in the Installation section of this manual. Generally you can get closer clearances with the airmate than with the rear heat deflector. F2403M Airmate OR Convection heat with Airmate vs. Radiant Heat with Rear Heat Deflector. The airmate pushes heat forward and into the Rear Heat Deflector room, the rear heat deflector deflects the heat upward. -
Page 9: Room Air
INSTALLATION ROOM AIR On pedestal units there are two locations where Note: Once the knockout is removed there outside air may be adapted to the unit. If us- are two tabs remaining. Bend both IMPORTANT ing the bottom of the pedestal, do not remove tabs out for ease of installation when attaching outside air. - Page 10 Min. Min.Hearth Unit Unit Center-line Width to Rear Wall Medium F2403M with Airmate 15" (381 mm) 5.5" (139 mm) 27" (685 mm) 12" (304 mm) 54" (1371 mm) 48" (1219 mm) with Rear Deflector 15" (381 mm) 6.5" (165 mm) 27"...
-
Page 11: Stove Assembly Prior To Installation
All units require either the pedestal or 4 legs at- and must be installed unless the optional airmate back (onto a soft surface to prevent scratch- tached to the base. The F2403M stove requires has been selected. It stops the heat radiated from ing). -
Page 12: Step-By-Step Chimney And Connector Installation
INSTALLATION STEP-BY-STEP Leg and Bottom Shield Assembly 8) To complete your chimney installation, install the double wall connector pipe from the F 2403M & S 2403M CHIMNEY AND stove’s flue collar to the chimney support device. Bottom Shield 020-911 CONNECTOR 9) If you are using a horizontal connector, INSTALLATION Legs (set of 4) -
Page 13: Masonry Chimney
INSTALLATION MASONRY CHIMNEY Ensure that a masonry chimney meets the mini- mum standards of the National Fire Protection Association (NFPA) by having it inspected by a professional. Make sure there are no cracks, loose mortar or other signs of deterioration and blockage. -
Page 14: Combustible Wall Chimney Connector Pass-Throughs
INSTALLATION COMBUSTIBLE WALL CHIMNEY CONNECTOR PASS-THROUGHS Method A: 12" (304.8 mm) Clearance to Combustible Wall Minimum chimney clearance to brick Member: and combustibles 2 in. (50.8mm) Using a minimum thickness 3.5" (89 mm) brick and a 5/8" (15.9 mm) Minimum clearance minimum wall thickness clay liner, construct a wall pass-through. -
Page 15: Recommended Heights For Woodstove Flue
INSTALLATION RECOMMENDED HEIGHTS FOR WOODSTOVE FLUE 3) Add 4% overall for each 1000' above sea Recommended Flue Height Simple rules on draft (refer to Table 1). level. Elevation Example a) Example b) 1) At sea level minimum height is 12' Example: a) 1000' 18.72'... -
Page 16: Mobile Home Installation
INSTALLATION MOBILE HOME INSTALLATION In addition to standard installation instructions Once you have properly marked the position of the following requirements are mandatory for your unit and the floor protection as outlined in installation in a mobile home. the Residential Installation items #1 through #8, a supply of fresh air has to be supplied to your 1) The stove must be permanently bolted to unit. -
Page 17: Listed Components For Mobile Homeinstallation
INSTALLATION LISTED COMPONENTS SIMPSON DURA-PLUS Slide the tube into the left hand side, as far Qty.Part # Description as possible and then bring it back into the FOR MOBILE HOME 6DVL8693 Connector Kit hole on the right hand side until it locks into position. -
Page 18: Stainless Steel Smoke Deflector Installation
INSTALLATION STAINLESS STEEL SMOKE DEFLECTOR ADJUSTMENT / REPLACEMENT The stainless smoke deflector is located in the upper front area of the firebox. The deflector is held in place with 2 bolts Prior to the first fire, ensure deflector is seated properly and secured with 2 hand tightened bolts. Smoke deflector installed with 2 bolts. -
Page 19: Screen Door
INSTALLATION BRICK INSTALLATION STEP-BY-STEP 4) Push the ash plug into the hole inside the firebox and replace all the bricks except OPTIONAL for the brick over the ash plug (see brick Firebrick is included to extend the life of your diagram in the Brick Installation section). - Page 20 INSTALLATION Blower/Fan (846-515) 1) Remove the two screws from the top of the #8 Groun Lug Grounding Ground wire fan housing. Lug Detail from fan Lockwasher 2) Slide the fan up into the rear heat shield. Star washer 3) After aligning holes, secure the fan to the rear Star washer heat shield using the two screws removed Ground wire...
-
Page 21: Operating Instructions
OPERATING INSTRUCTIONS INSTALLATION OPERATING FIRST FIRE ficult to start the fire. As you dry out your INSTRUCTIONS firebrick and your masonry flue, your draft When your installation is completed and inspected will increase. you are ready for your first fire. With your unit now correctly installed and safety 10) For those units installed at higher elevations inspected by your local authority, you are now... -
Page 22: Fan Operation
OPERATING INSTRUCTIONS FAN OPERATION Push the ashes down the hole into the ash 4) If you have smoke detectors, prevent smoke drawer, the large pieces can be left in the spillage as this may set off a false alarm. firebox and burned during the next fire or Automatic removed through the door opening. -
Page 23: Maintenance
MAINTENANCE MAINTENANCE 5) The chimney and chimney connector should LATCH ADJUSTMENT be inspected at least once every two months during the heating season to determine is a It is very important to carefully maintain your The door latch may require adjustment as the creosote buildup has occured. -
Page 24: Annual Maintenance
MAINTENANCE Annual Maintenance Completely clean out entire unit Annually Inspect air tubes, baffles and bricks Replace any damaged parts. Adjust door catch / latch If unable to obtain a tight seal on the door - replace door gasket seal. Readjust latch after new gasket installed. Inspect condition and seal of: Glass Gasket Door Gasket... -
Page 25: Parts List
Complete Fan/Blower Assy (120 V) 850-144 Door Assy - Gold Accent 910-684 Power Cord (120 V) 910-142 Thermodisc - Fan Auto ON/OFF 846-302 Glass - Replacement - F2403M 910-138 Manual/Auto Switch (2-way) 936-243 7/8" Adhesive Tape Gasket 910-140 Fan Speed Switch HI/OFF/LOW (3-way) 820-184... -
Page 26: S2403M Step Stove Main Assembly
PARTS LIST S2403M STEP STOVE MAIN ASSEMBLY Part# Description 948-102 Spring Handle - Small Gold 948-136 Spring Handle - Small Nickel 850-142 Door Assy - Gold Part# Description 850-141 Door Assy - Black 850-143 Door Assy - Nickel Accent 846-515 Complete Fan/Blower Assy (120 V) 850-144 Door Assy - Gold Accent... -
Page 27: Pedestal, Bottom Shield & Leg Options
PARTS LIST PEDESTAL, BOTTOM SHIELD & LEG OPTIONS Part# Description 020-915 Pedestal - Medium 904-257 Large Magnet Catch Blanking Plate - Pedestal 850-100 Ashdrawer Kit - Pedestal Ashdrawer - Pedestal Ashdrawer Lid Assy 942-110 Ash Plug 820-249 Ash Plug Tool Handle 020-911 Bottom Shield - Medium Blanking Plate - Btm Shield... -
Page 28: Firebrick
PARTS LIST FIREBRICK Part# Description 020-960 Brick Set - Complete 902-111 Brick - Regular Full Size: 1-1/4" x 4-1/2" x 9" Brick Partial: 1-1/4" x 4-1/2" x 3-1/2" Brick Partial: 1-1/4" x 4-1/2" x 2" Brick Partial: 1-1/4" x 2" x 9" Regency Freestanding Woodstove... - Page 29 NOTES Regency Freestanding Woodstove...
-
Page 30: Warranty
WARRANTY Limited Lifetime Warranty FPI Fireplace Products International Ltd. (for Canadian customers) and Fireplace Products U.S., Inc. (for U.S. customers) (collectively referred to herein as “FPI”) extends this Limited Lifetime Warranty to the original purchaser of this appliance provided the product remains in the original place of installation. The items covered by this limited warranty and the period of such coverage is set forth in the table below. - Page 31 WARRANTY All warranty claims must be submitted by the dealer servicing the claim, including a copy of the Bill of Sale (proof of purchase by you). All claims must be complete and provide full details as requested by FPI to receive consideration for evaluation.
- Page 32 WARRANTY Limitations of Liability: The original purchaser’s exclusive remedy under this warranty, and FPI’s sole obligation under this warranty, express or implied, in contract or in tort, shall be limited to replacement, repair, or refund, as outlined above. IN NO EVENT WILL FPI BE LIABLE UNDER THIS WARRANTY FOR ANY INCIDENTAL OR CONSEQUENTIAL COMMERCIAL DAMAGES OR DAMAGES TO PROPERTY.
- Page 33 WARRANTY Product Registration and Customer Support: Thank you for choosing a Regency Fireplace. Regency strives to be a world leader in the design, manufacture, and marketing of hearth products. To provide the best support for your product, we request that you complete a product registration form found on our Web Site under Customer Care within ninety (90) days of purchase.
- Page 36 Installer: Please complete the following information Dealer Name & Address: ______________________________________________ ___________________________________________________________________ Installer: ___________________________________________________________ Phone #: ___________________________________________________________ Date Installed: ______________________________________________________ Serial No.: __________________________________________________________ Printed in Canada Regency and Classic are trademarks of FPI Fireplace Products International Ltd. © Copyright 2018, FPI Fireplace Products International Ltd. All rights reserved.
Need help?
Do you have a question about the F2403M and is the answer not in the manual?
Questions and answers