Advertisement
Available languages
Available languages
Quick Links
Advertisement

Related Manuals for Bompani BI640YB/P


Summary of Contents for Bompani BI640YB/P
- Page 1 BI640YB/P BI505FE/I ISTRUZIONI DI FUNZIONAMENTO E INSTALLAZIONE DEL FORNO COMBINATO INDIPENDENTE...
- Page 2 Gentili Clienti, il nostro obiettivo quello di offrire prodotti di alta qualità che superino le vostre aspettative. Il vostro elettrodomestico è stato prodotto in stabilimenti moderni e ne è stata testata la qualità. Questo manuale è redatto per aiutare ad utilizzare l'apparecchio prodotto secondo la più...
- Page 3 INDICE: 1. PRESENTAZIONI E DIMENSIONI DEL PRODOTTO 2, AVVERTENZE 3, INSTALLAZIONE E PREPARAZIONE ALL'USO 4, INSTALLAZIONE DEL FORNO 5, PULIZIA E MANUTENZIONE 6, ASSISTENZA E TRASPORTO...
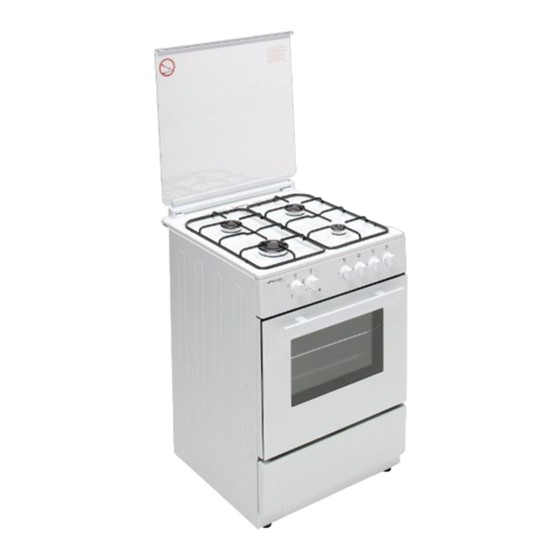
- Page 4 PARTE 1: PRESENTAZIONE E DIMENSIONI DEL PRODOTTO PRESENTAZIONE : Elenco delle componenti: 1- Coperchio del piano di 10- Griglia per grill cottura 11- Bruciatore semi rapido 2- Pannello di controllo del 12- Bruciatore rapido Piano di cottura 13- Bruciatore ausiliario 3- Porta del forno 14- Griglie del piano di cottura MODELLO...
- Page 5 2. AVVERTENZE PER LA SICUREZZA LEGGERE CON ATTENZIONE E PER INTERO QUESTE ISTRUZIONI PRIMA DI UTILIZZARE IL DISPOSITIVO E CONSERVARLE COME RIFERIMENTO FUTURO IN UN LUOGO COMODO, QUANDO NECESSARIO. QUESTO MANUALE È REDATTO PER PIÙ DI UN MODELLO. IL VOSTRO DISPOSITIVO POTREBBE NON AVERE ALCUNE DELLE FUNZIONI SPIEGATE NEL PRESENTE MANUALE.
- Page 6 - Per bruciatori con un coperchio, eventuali perdite dovrebbero essere rimosse dal coperchio prima di aprirlo. Si dovrebbe inoltre consentire alla superficie del bruciatore di raffreddarsi prima di chiudere il coperchio. - L'apparecchiatura non prevede l'utilizzo mediante un timer esterno o un telecomandato - Per evitare che il dispositivo si rovesci, installare le staffe di stabilizzazione.
- Page 7 Il dispositivo è stato prodotto conformemente agli standard locali e internazionali e alle normative applicabili. Gli interventi di manutenzione e riparazione devono essere eseguiti da tecnici di assistenza autorizzati. Gli interventi di installazione e riparazione eseguiti da tecnici non autorizzati potrebbero mettervi in pericolo.
- Page 8 ATTENZIONE: L'uso di una apparecchiatura di cottura a gas comporta la produzione di calore e umidità e prodotti della combustione all'interno della stanza in cui viene installata. Verificare che la cucina sia ben ventilata, in particolare mentre il dispositivo è in uso. Tenere aperti i normali fori di ventilazione o installare un dispositivo di ventilazione meccanica (cappa di estrazione meccanica).
- Page 9 ATTENZIONE: I coperchi in vetro possono rompersi quando sono caldi. Spegnere tutti i bruciatori prima di chiudere il coperchio. Si dovrebbe inoltre consentire alla superficie del bruciatore di raffreddarsi prima di chiudere il coperchio. Quando il portello o il vassoio del forno sono aperti, non lasciare niente su di essi.
- Page 10 Parte 3: INSTALLAZIONE E PREPARAZIONE ALL'USO Questo forno moderno, pratico e funzionale, prodotto cone parti e materiali di ottima qualità, soddisferà tutte le esigenze dell'utente. Leggere questo manuale per non avere alcun problema in futuro e poter ottenere ottimi risultati. Le informazioni che seguono sono le regole necessarie per l'installazione e le procedure di manutenzione corrette.
- Page 11 Queste prese d'aria devono avere una sezione trasversale di 100cm3 efficace per il passaggio dell'aria. (possono essere aperte una o più prese d'aria). Questo foro (questi fori) deve essere aperto, non ostruito. Di preferenza questi fori devono essere vicini alla parte inferiore e sul lato opposto dei fumi dei gas bruciati svuotati.
- Page 12 REGOLAZIONE DEI PIEDINI Ýl forno poggia su 4 piedini regolabili. Quando il forno viene posizionato nel punto in cui resterà, verificare che sia ben bilanciato. In caso contrario, regolarlo girando, ove necessario, i piedini in senso orario. Attraverso i piedini, è possibile sollevare l'apparecchio di massimo 5mm. Se i piedini sono regolati correttamente, non muovere l'apparecchio tirandolo ma sollevandolo verso l'alto.
- Page 13 COLLEGAMENTO ELETTRICO E SICUREZZA Tutti i tipi di forni indipendenti, in cui vi sono dei terminali per collegamento fisso, devono essere installati conformemente alle istruzioni. Questo dispositivo deve essere installato da una persona qualificata conformemente all'ultima edizione delle normative nazionali del paese di destinazione e in linea con le istruzioni del produttore. Il dispositivo non contiene alcuno strumento per lo scollegamento dalla rete elettrica di alimentazione.
- Page 14 Single-phase Monofase tubo di scarico connection 220-240 V~ H05 VV-F 220-240 V~ H05 VV-F 50x50 Gas oven 50x50 Duel fuel 50x50 Duel fuel combined model 50x50 Forno a gas 50x50 modello 50x50 modello combinato (forno elettrico with gas hob combined model (Electric oven with gas hob and one electric con piano di cottura combinato (forno...
- Page 15 3.6 AVVERTENZE E MISURE GENERALI Il dispositivo è stato prodotto conformemente agli standard locali e internazionali e alle normative applicabili. Gli interventi di manutenzione e riparazione devono essere eseguiti da tecnici di assistenza autorizzati. Lavori di installazione e riparazione non nel rispetto delle regole possono essere pericolosi.
- Page 16 Fig.6 Fig.7 Fig.8 Fig.9 Regolazione della posizione per la fiamma ridotta: La lunghezza della fiamma nella posizione minima viene regolata con una vite a testa piatta sulla valcola. Per le valvole con FFD, la vite si trova sul lato dell'asse della valvola. Per le valvole senza FFD, la vite si trova all'interno dell'asse della valvola.
- Page 17 USO DEI BRUCIATORI A GAS Accensione dei bruciatori a gas: Per capire quale manopola controlla qual bruciatore, verificare il simbolo di posizione sopra alla manopola: Accensione manuale: Nel caso in il dispositivo non sia dotato di strumenti di accensione o in caso di guasti a livello di rete elettrica, seguire la seguente procedure.
- Page 18 Bruciatore rapido: 22-26cm bruciatore medio: 14-22cm bruciatore ausiliario: 12-18cm Verificare che le punte delle fiamme non escano dalla circonferenza esterna della pentola, in quanto ciò potrebbe danneggiare gli accessori di plastica intorno alla pentola (maniglie, ecc.). Quando i bruciatori non vengono usati a lungo, spegnere sempre la valvola di alimentazione principale del gas.
- Page 19 AVVERTENZA Quando si usa per la prima volta o quando la piastra non è stata in uso a lungo sarà necessario eliminare l'eventuale umidità che si potrebbe essere accumulata sugli elementi elettrici della piastra attivandola al minimo per circa 20 minuti. Usare solo pentole col fondo piatto e con una base sufficientemente spessa.
- Page 20 USO DEL FORNO Interruttore selezione funzione forno: consente di selezionare la funzione del forno. Ogni posizione della manopola selettore attiva la funzione indicata sul simbolo di quella posizione. La spiegazione di ogni simbolo viene indicata nella seguente tabella. Per funzioni diverse da luce forno e defrost le funzioni selezionate non saranno attivate a meno che non venga regolata la temperatura con la manopola del termostato, in posizione diversa da “0”.
- Page 21 Funzioni del forno: Le funzioni del forno, che possono essere selezionate con l'interruttore di selezione del forno, sono riepilogate nella seguente tabella. La spia del forno inizia a funzionare. Il termostato del forno, le spie di avvertenza e i riscaldatori inferiore e superiore iniziano a funzionare.
- Page 22 Funzione Scongelatore: Il processo di scongelamento può iniziare mettendo il cibo congelato nel forno e impostando l'interruttore sul marchio indicato. Questo è un programma che non cuoce il cibo ma aiuta solo a scongelarlo in breve tempo. Metere il cibo da scongelare sul terzo ripiano dal basso, quello a griglia. Metere un vassoio sul fondo del forno per raccogliere l'acqua causata dallo scongelamento.
- Page 23 Risparmio energetico Durante l'uso delle cucine elettriche è necessario usare pentole con basi piatte. Scegliere una pentola delle dimensioni adatte. Servendosi di un coperchio si ridurranno i tempi di cottura. Ridurre al minimo i liquidi o i grassi per ridurre i tempi di cottura. Quando il liquido inizia a bollire, ridurre il calore.
- Page 24 4.3 Accessori usati nel forno Il forno è già dotato di accessori. Sarà inoltre possibile acquistare accessori acquistati separatamente ma devono essere resistenti al calore e alle fiamme. Sarà inoltre possibile usare piatti di vetro, stampi per torte, vassoi speciali adatti per essere usati in forno. Fare attenzione alle istruzioni d'uso del produttore degli accessori.
- Page 25 Parte 5: PULIZIA E MANUTENZIONE DEL FORNO PULIZIA Prima di pulire il forno, assicurarsi che tutti gli interruttori siano spenti e che l'apparecchio sia freddo. Scollegare l'apparecchio. Controllare se i detergenti usati per pulire il forno sono appropriati e raccomandati dal produttore. Non usare detersivi a base di polveri o creme caustiche o abrasive, lana d'acciaio o strumenti taglienti perché...
- Page 26 MANUTENZIONE Cambio della lampadina del forno Come prima cosa scollegare il forno e verificare che sia freddo. Rimuovere la lampadina dopo averne rimosso la copertura anteriore. Mettere la nuova lampadina resistente a 300C al posto di quella rimossa (230 V, 25 Watt, Tipo E14). Rimettere il vetro di protezione della lampadina.
- Page 27 Parte 6: ASSISTENZA E TRASPORTO Requisiti prima di contattare l'assistenza Se il forno non funziona;. Il forno potrebbe essere staccato o potrebbe esserci un black out. Sui modelli dotati di un timer, l'ora potrebbe non essere regolata. Se il forno non si scalda. Il calore potrebbe essere non regolato con l'interruttore di controllo del riscaldatore del forno.
- Page 28 Tabella iniettore: NG LPG G30 28-30mbar 7.5 kW 545 g/h II2H3+ IT Class: 1 G20 20 mbar G30/G31 28‐30/37 mbar BRUCIATORE RAPIDO Diametro nominale Classificazione nominale 2,75 Consumo in 1 ora 261,9 l/h 218,1 g/h BRUCIATORE MEDIO Diametro nominale Classificazione nominale 1,75 1,75 Consumo in 1 ora 166,7 l/h 127,2 g/h BRUCIATORE MEDIO Diametro nominale Classificazione nominale 1,75 1,75 Consumo in 1 ora 166,7 l/h 127,2 g/h BRUCIATORE AUSILIARIO...
- Page 29 Marchio di fabbrica BI640YB/P Modello Consumo di energia a carico Classe di efficienza energetica standard E (kWh) E < 0.80 A (Alta efficienza) 0.80 < E < 1.00 1.00 < E < 1.20 1.20 < E <1.40 1.40 < E < 1.60 1.60 <...
- Page 31 Per Assistenza Tecnica Autorizzata e Ricambi Originali rivolgersi al numero unico* i chiamando il numero unico: massimo di 5,42 centesimi di euro al minuto (iva inclusa) per la sola rete fissa. Non è possib chiamata dai telefoni cellulai. Oppure visitare il sito www.bompani.it * al costo massimo di 2 centesimi di euro al minuto (iva inclusa) anche da cellulare. CONDIZIONI DI GARANZIA Le Condizioni di Garanzia sono consultabili sul nostro sito www.bompani.it ...
- Page 32 BI640YB/P INSTRUCTIONS D'UTILISATION NOTICE D'UTILISATION DU FOUR DE TYPE AUTOSTABLE...
- Page 33 Chère cliente, cher client, Notre objectif est de vous offrir des produits de qualité supérieure qui vont au-delà de vos attentes. C'est pourquoi nous les fabriquons dans des infrastructures modernes soigneusement et particulièrement testées pour leur qualité. Ce manuel contient toutes les informations nécessaires à l'utilisation de cet appareil conçu avec une technologie de pointe, en toute confiance et efficacité.
- Page 34 TABLE DES MATIÈRES PRÉSENTATION ET DIMENSIONS DU PRODUIT 2. AVERTISSEMENTS 3. INSTALLATION ET PRÉPARATION À L'UTILISATION 4. INSTALLATION DU FOUR 5. NETTOYAGE ET ENTRETIEN 6. SERVICE APRES-VENTE ET TRANSPORT...
- Page 35 PARTIE 1 : PRÉSENTATION ET DIMENSIONS DU PRODUIT PRÉSENTATION: Description de l'appareil Couvercle Brûleur du gril 11- Brûleur semi rapide 2- Table de cuisson 12- Brûleur rapide 3- Panneau de commande 13- Brûleur auxiliaire 4- Poignée de la porte du four 14- Grilles de rotection 5- Pieds DIMENSIONI (cm)
- Page 36 2. CONSIGNES DE SÉCURITÉ LISEZ INTEGRALEMENT ET ATTENTIVEMENT CES INSTRUCTIONS AVANT DE COMMENCER A UTILISER VOTRE APPAREIL. GARDEZ BIEN CE MANUEL CAR VOUS POUVEZ LE CONSULTER EN CAS DE BESOIN. CE MANUEL EST CONÇU POUR ETRE UTILISE PAR PLUSIEURS MODELES. CERTAINS FONCTIONNALITES DECRITES DANS CE MANUEL PEUVENT ETRE INACTIVES AVEC VOTRE VERSION.
- Page 37 - Pour les plaques à couvercle, tout déversement doit être enlevé du couvercle avant l'ouverture de la plaque. Avant de poser le couvercle, il faut s'assurer que la surface de la plaque s'est refroidie. - Cet appareil ne doit pas être actionné par une minuterie externe ou par une télécommande séparée du système.
- Page 38 - La fabrication de votre appareil respecte toutes les normes et réglementations nationales et internationales en vigueur en la matière. - Les travaux de maintenance et d'entretien doivent être effectués exclusivement par des techniciens qualifiés. Les travaux de réparation et d'entretien effectués par des personnes non qualifiés vous exposent à...
- Page 39 - Ne jamais laisser le four sans surveillance lors de la cuisson avec des huiles fluides. En cas d'extrême chauffage, l'huile peut s'enflammer. Ne versez jamais de l'eau sur les flammes qui sont causées par de l'huile. Posez le couvercle de la marmite ou de la casserole qui a pris feu pour étouffer les flammes tout en veillant à...
- Page 40 • Toujours poser les ustensiles de cuisson au centre de la zone de cuisson et positionner les poignées de telle sorte qu'elles ne puissent pas gêner ou être attrapées par un enfant. • N'utilisez pas les zones de cuisson avec des casseroles vides ou sans casseroles. •...
- Page 41 Pendant le nettoyage et l'entretien • Arrêtez toujours le fonctionnement de la cuisinière avant le nettoyage ou l'entretien, en la débranchant, ou en éteignant l'interrupteur principal. • Ne retirez jamais les boutons de commande pour nettoyer le panneau de commande. •...
- Page 42 Ces trous d'air doivent avoir au moins une section transversale de 100cm efficace pour la transition de l'air (un trou d'air ou plus peut être ouvert.) Ce(s) trou(s) doi(ven)t être ouvert(s) pour ne pas être obstrué(s). Ils doivent de préférence être situés tout près du fond et à l'opposé des fumées qui s'échappent des gaz brûlés qui ont été...
- Page 43 RÉGLAGE DES PIEDS Votre cuisinière possède 4 pieds réglables. Après avoir installé le four où il sera utilisé, vérifié s'il est en équilibre. Si ce n'est pas le cas, vous pouvez procéder à un réglage de ses pieds en les tournant dans le sens horaire.
- Page 44 BRANCHEMENT ÉLECTRIQUE ET SÉCURITÉ TTous les fours autostables dotés de bornes de connexion permanente avec bloc de branchement. L'appareil doit être installé par une personne qualifiée conformément à la toute récente édition des règlements IEE en vigueur dans le pays de destination et en conformité avec les consignes du fabricant. L'appareil ne prévoit aucun moyen de débranchement à...
- Page 45 Single-phase Connexion monophase connection 220-240 V~ H05 VV-F 220-240 V~ H05 VV-F 50x50 Gas oven 50x50 Duel fuel 50x50 Duel fuel combined model 50x50 four à gaz Double modèle combiné 50x50 à essence Double modèle combiné with gas hob combined model (Electric oven with gas hob and one electric avec table de 60x60 à...
- Page 46 AVERTISSEMENTS ET MESURES GÉNÉRAUX La fabrication de votre appareil obéit aux standards et à la réglementation applicables dans votre localité et sur le plan international. Les travaux d'entretien et de réparation doivent être effectués uniquement par des techniciens agréés. Les travaux d'installation et de réparation réalisés sans suivre les instructions peuvent représenter un danger.
- Page 47 Figure 6 Figure 7 Figure 8 Figure 9 Réglage de la position de flamme réduite : La longueur de la flamme à la position minimale peut s'ajuster à l'aide d'une vis plate située sur le robinet. Pour les robinets avec FFD, la vis se trouve sur le côté de la tige du robinet. Pour les robinets sans FFD, la vis se trouve à...
- Page 48 UTILISATION DES BRÛLEURS À GAZ Allumage des brûleurs: Pour savoir quel bouton va avec quel brûleur, vérifiez le symbole de la position au-dessus du bouton Allumer manuellement : Si votre appareil n'est doté d'aucune aide favorisant l'allumage ou si le réseau électrique est en panne, respectez les procédures présentées ci-dessous : Pour allumer l'un des brûleurs, appuyez et tournez son bouton dans le sens antihoraire jusqu'à...
- Page 49 Brûleur rapide : 22-26cm Brûleur intermédiaire : 14-22cm Brûleur auxiliaire : 12-18cm Veillez à ce que les pointes des flammes ne sortent pas de la circonférence externe du récipient, au risque d'endommager également les accessoires en plastique qui se trouvent tout autour (poignée, etc.).
- Page 50 ATTENTION Lorsque la plaque est utilisée pour la première fois, ou si elle n'a pas été utilisée pendant une période de temps prolongée, vous devez éliminer toute humidité accumulée autour des composants électriques de la plaque en allumant la plaque au minimum pendant près de 20 minutes. Utilisez uniquement des casseroles à...
- Page 51 UTILISATION DE LA PARTIE FOUR Bouton de sélection de la fonction du four: Ce bouton vous permet de sélectionner la fonction du four. Chaque position du bouton sélecteur active la fonction indiquée sur le symbole qui se trouve à cette position. L'explication de chaque symbole figure dans le tableau présenté...
- Page 52 Fonctions du four : Les fonctions du four, que vous pouvez sélectionner grâce au bouton de fonction du four, sont résumées dans le tableau ci-après: La lampe du four s'allume. Le thermostat de votre four, les voyants lumineux et les résistances supérieures et inférieures s'allument.
- Page 53 Fonction de déglaçage: Vous pouvez démarrer le processus de dégivrage en introduisant les denrées congelées dans votre four et en tournant le bouton sur le signe spécifié. Ce programme ne cuit pas les aliments, il sert juste à les décongeler rapidement. Placez les aliments à décongeler sur une grille, sur le troisième niveau en partant du bas.
- Page 54 Économie d'énergie Lors de l'utilisation de plaques électriques, il est nécessaire de recourir aux casseroles Avec fond plat. Choisissez un ustensile de taille appropriée. L'utilisation d'un couvercle d'ustensile réduira la durée de cuisson. Réduire la quantité de liquide pour réduire le temps de cuisson. Réduire le réglage de la chaleur lorsque le liquide commence à...
- Page 55 Accessoires utilisés dans le four Le four est livré avec des accessoires. Cependant, vous pouvez également utiliser des accessoires achetés sur le marché, qui doivent pour cela être résistants à la chaleur et aux flammes. Vous avez par ailleurs la possibilité d'utiliser des récipients en verre, des moules à gâteaux, des plaques de four spéciales appropriées pour utilisation à...
- Page 56 Partie 5 : NETTOYAGE ET ENTRETIEN DU FOUR NETTOYAGE Veillez à ce que tous les boutons de contrôle soient éteints et que l'appareil soit refroidi avant d'effectuer le nettoyage du four. Débranchez l'appareil. Contrôlez si les produits de nettoyage sont approuvés et recommandés par le fabricant avant de les utiliser.
- Page 57 ENTRETIEN Changement de l'ampoule Tout d'abord, débranchez le four de l'alimentation électrique et veillez à ce qu'il refroidisse. Retirez également l'ampoule après avoir retiré le couvercle devant la lampe. Placez la nouvelle ampoule, résistante à 300°C à la place de l'ancienne ampoule (230 V, 25 Watts, Type E14). Mettez le couvercle de verre de la lampe en place.
- Page 58 Partie 6 : SERVICE APRES-VENTE ET TRANSPORT Avant de contacter le service Si le four ne fonctionne pas; Le four peut être débranché, il peut y avoir une coupure de courant. Pour les modèles équipés d'une minuterie, l'heure n'est peut-être pas réglée. Le four ne chauffe pas ;...
- Page 59 Tableau de l'injecteur : NG LPG G30 28-30mbar 7.5 kW 545 g/h II2H3+ IT Class: 1 G20 20 mbar G30/G31 28‐30/37 mbar BRÛLEUR RAPIDE Repère d’injecteur (1/100 mm) Puissance Nominale(Kw) 2,75 Débit Nominal 261,9 l/h 218,1 g/h BRÛLEUR INTERMÈDIAIRE Repère d’injecteur (1/100 mm) Puissance Nominale(Kw) 1,75 1,75 Débit Nominal 166,7 l/h 127,2 g/h BRÛLEUR INTERMÈDIAIRE Repère d’injecteur (1/100 mm) Puissance Nominale(Kw) 1,75 1,75 Débit Nominal 166,7 l/h...
- Page 60 Le symbole figurant sur le produit ou sur son emballage indique qu'il ne doit pas être traité comme les autres ordures ménagères. Au contraire, ils doivent être acheminés aux points de collecte indiqués pour recyclage des équipements électriques et électroniques. En veillant à ce que le présent produit soit mis au rebut de façon appropriée, vous contribuerez ainsi à...
- Page 61 BI640YB/P OPERATING AND INSTALLATION INSTRUCTIONS OF DUAL FUEL FREESTANDING OVEN...
- Page 62 Dear Customer, Our goal is to offer you products with high quality that exceed your expectations. Your appliance is produced in modern facilities carefully and particularly tested for quality. This manual is prepared in order to help you use your appliance that is manufactured by the most recent technology, with confidence and maximum effciency.
- Page 63 CONTENTS: 1.PRESENTATION SIZES OF PRODUCT 2. WARNINGS 3. INSTALLATION AND PREPARATIONS FOR USE 4. INSTALLATION OF OVEN 5. CLEANING AND MAINTENANCE 6. SERVICE AND TRANSPORT...
- Page 64 PART 1: PRESENTATION AND SIZES OF PRODUCT PRESENTATION : Part of List: 1- Cooktop Cover 10- Grill Broiler 2- Cooktop Semi-Rapid Burner 3- Control Panel Rapid Burner 4- Oven Door Handle Auxillary Burner 5- Drawer Cover Hobe Grids DIMENSIONI (cm) 6- Supply leg Semi-Rapid Burner 7- Oven Door...
- Page 65 PART 2 SAFETY WARNINGS READ THESE INSTRUCTIONS CAREFULLY AND COMPLETELY BEFORE USING YOUR APPLIANCE, AND KEEP IT IN A CONVENIENT PLACE FOR REFERENCE WHEN NECESSARY. THIS MANUAL IS PREPARED FOR MORE THAN ONE MODEL IN COMMON. YOUR APPLIANCE MAY NOT HAVE SOME OF THE FEATURES THAT ARE EXPLAINED IN THIS MANUAL. PAY ATTENTION TO THE EXPRESSIONS THAT HAVE FIGURES, WHILE YOU ARE READING THE OPERATING MANUAL.
- Page 66 - WARNING: If the surface is cracked, switch off the appliance to avoid the possibility of electric shock. - For hobs incorporating a lid, any spillage should be removed from the lid before opening. And also the hob surface should be allowed to cool before closing the lid.
- Page 67 - WARNING: Ensure that the appliance is switched off before replacing the lamp to avoid the possibility of electric shock. - CAUTION: Accessible parts may be hot when the cooking or grilling is in use. Young children should be kept away. •...
- Page 68 During usage • When you first run your oven a certain smell will emanate from the insulation materials and the heater elements. For this reason, before using your oven, run it empty at maximum temperature for 45 minutes. At the same time you need to properly ventilate the environment in which the product is installed.
- Page 69 Part 3: INSTALLATION AND PREPARATION FOR USE This modern, functional and practical oven, that was manufactured with the parts and materials of highest quality, will meet your cooking needs in every aspect. You must surely read this manual so that you don't have any problem in future and to be able to have satisfactory results.
- Page 70 These air holes must have at least the effective cross section of 100cm3 for fresh air circulation (One or more air holes can be opened.). This hole (or holes) must be opened so that they are not blocked. Preferably they must be placed close to the bottom and at opposite side of the smokes of the burned gases that were emptied.
- Page 71 ADJUSTMENT OF FEET Your oven stands on 4 adjustable feet. When the oven is placed where it will be used, check if the oven is balanced. If it is not balanced, you can make the adjustment by turning the feet clockwise if required. It is possible to raise the appliance maximum 5mm by the feet.
- Page 72 ELECTRICAL CONNECTION AND SAFETY All types free standing ovens in which termýnals for permanent connectýon by means of terminal block. This appliance must be installed by a qualified person in accordance with the latest edition of the national regulations in the destination country and in compliance with the manufacturer instructions The appliance does not incorporate any means for disconnection from power supply.
- Page 73 Single-phase connection 220-240 V~ H05 VV-F 50x50 Gas oven 50x50 Duel fuel 50x50 Duel fuel combined model with gas hob combined model (Electric oven with gas hob and one electric (Electric oven with gas hotplate) hob) Cable 3x1 mm 3x1,5 mm 3x2,5 mm crossectional area...
- Page 74 GENERAL WARNINGS AND MEASURES Your appliance is produced in accordance with the local and international standards and regulations applicable. The maintenance and repair works must be made only by authorized service technicians. The installation and repair works without following proper knowledge may endanger you. While your appliance operates, its outside surfaces heat up.
- Page 75 Figure 7 Figure 6 Figure 9 Figure 8 Adjusting The Reduced Flame Position : The flame length in the minimum position is adjusted with a flat screw located on the valve. For valves with FFD, the screw is located on the side of the valve spindle. For valves without FFD, the screw is located inside the valve spindle.
- Page 76 USE OF GAS BURNERS Ignition of the burners: To determine which knob controls which burner, check the position symbol above the knob.: Manual Ignition: If your appliance is not equipped with any ignition aid or in case there is a failure in the electricity network, follow the procedures listed below: To ignite one of the burner, press and turn its knob counter-clockwise so that the knob is in max.
- Page 77 Rapid Burner: 22-26cm Medium Burner: 14-22cm Auxiliary Burner: 12-18cm Make sure that the tips of the flames do not spread out of the outer circumference of the pan, as this may also harm the plastic accessories around the pan (handles etc.) When the burners are not in use for prolonged periods, always turn the main gas control valve off.
- Page 78 WARNING When the operating for the first time or whenever the hotplate has not been used for prolonged of time it is necessary to eliminate any humidity which may have accumulated around the electrical elements of the plate by operating the hotplate on its lowest setting for about 20 minutes. Use only flat pans and with a sufficiently thick base.
- Page 79 USE OF OVEN PART Oven Function Selector Switch: Enables you to select the function of the oven. Each position of the selector knob activates the function that is shown on the symbol of that position. The explanation of each symbol is given in the table below. For functions other than oven light and defrost, the function you have selected will not be activated unless you adjust the temperature with thermostat knob, to a position other than “0”.
- Page 80 Oven Functions: Oven functions, which can be selected by the oven function switch, are summarized in the following table: Your oven's lamp starts to operating. Your oven's thermostat and warning lamps and lower and upper heaters start operating. Your oven's thermostat and warning lamps and grill heater and chicken turning function start operating.
- Page 81 Ice Metter Function: You can start the defrosting process by placing the frozen food into your oven and turning the switch onto the determined sign. This is a program that does not cook the food, just helps to defrost them in a short time.
- Page 82 Energy Saving During use of electrical cookers, it is required to use saucepans having flat bases. Choose a cookware of proper size. Using a cookware lid will reduce cooking times. Minimize the amount of liquid or fat to reduce cooking times. When liquid starts boiling, reduce the heat setting.
- Page 83 Accessories Used in Oven The oven already supplied with accessories. You can also use accessories you purchase from the market, but they must be heat and flame resistant. You can also use glass dishes, cake molds, special oven trays that are appropriate for use in oven. Pay attention to the using instructions by the manufacturer of those acessories.
- Page 84 Part 5 : CLEANING AND MAINTENANCE OF YOUR OVEN CLEANING Be sure that all control switches are off and your appliance cooled before cleaning your oven. Plug off the appliance. Check whether they are appropriate and recommended by the manufacturer before using the cleaning materials on your oven.
- Page 85 MAINTENANCE Change of Oven Lamp At first plug the oven off from electric supply and make sure that oven is cool. Remove the bulb after removing the cover in front of lamp. Assemble the new bulb resistant to 300 C to the place of the bulb that you removed (230 V, 25 Watt, Type E14).
- Page 86 Part 6 : SERVICE AND TRANSPORT Requirements Before Contacting to Service If the oven does not operate; The oven may be plugged off, there has been a blow-out. On models fitted with a timer, time may not be regulated. If the oven does not heat; The heat may be not adjusted with oven's heater control switch.
- Page 87 Injector Table: NG LPG G30 28-30mbar 7.5 kW 545 g/h II2H3+ IT Class: 1 G20 20 mbar G30/G31 28‐30/37 mbar LARGE BURNER DIA. of INJECTOR (1/100mm) NOMINAL RATING (KW) 2,75 CONSUMPTION 261,9 l/h 218,1 g/h MEDIUM BURNER DIA. of INJECTOR (1/100mm) NOMINAL RATING (KW) 1,75 1,75 CONSUMPTION 166,7 l/h 127,2 g/h MEDIUM BURNER DIA. of INJECTOR (1/100mm) NOMINAL RATING (KW) 1,75 1,75 CONSUMPTION 166,7 l/h 127,2 g/h SMALL BURNER...
- Page 88 The symbol on the product or on its packaging indicates that this product may not be treated as household waste. Instead it shall be handed over to the applicable collection point for the recycling of electrical and electronic equipment. By ensuring this product is disposed of correctly, you will help prevent potential negative consequences for the environment and human health, which could otherwise be caused by inappropriate waste handling of this product.
Need help?
Do you have a question about the BI640YB/P and is the answer not in the manual?
Questions and answers