Table of Contents
Advertisement
Advertisement
Table of Contents

Subscribe to Our Youtube Channel
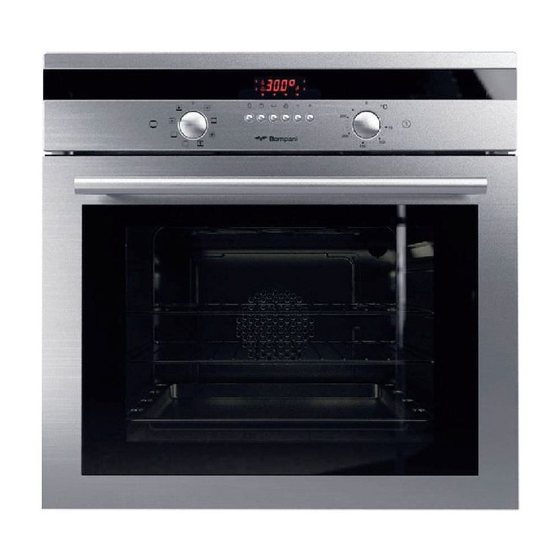
Summary of Contents for Bompani BO243
- Page 1 INSTRUCTION M A N U A L...
-
Page 2: Table Of Contents
Index 1. GENERALITIES....................................5 2. USER INTERFACE WITH TOUCH KEYS AND DISPLAY......................5 2.1..Key.functions....................................5 2.2..“Time”.key.cyclical.functions.................................5 3. APPLIANCE OPERATION................................6 3.1..CLOCK.SETTING..................................6 3.2..TURNING.OVEN.ON/OFF................................6 3.3..TIMER......................................6 3.4..SEMI-AUTOMATIC.COOKING.TIME.FUNCTION........................6 3.5..SEMI-AUTOMATIC.COOKING.END.FUNCTION........................6 3.6..AUTOMATIC.FUNCTION................................6 3.7..COOKING.END.MODE................................6 3.8..CLOCK.DISPLAY.SYMBOLS...............................7 3.8.1..Pot......................................7 3.8.2..Auto......................................7 3.8.3..Bell......................................7 3.9..COOKING.MODES.SELECTION..............................7 3.9.1..Special.Booster.Fast.Pre-Heat.<TBD>.Program>................ - Page 3 Introduction Congratulations.on.your.purchase.of.an.oven.from.the.BOMPANI.iTALIA.collection..This.new.product,.designed.and.produced.with. quality.materials,.combining.innovation.and.technology,.is.intended.to.assist.you.in.putting.your.recipes.into.practice..We.therefore. ask.that.you.read.and.follow.the.easy.instructions.which.will.enable.you.to.achieve.excellent.results.right.from.the.very.first.times:.they. contain.important.information.concerning.the.safety,.use.and.maintenance.of.the.appliance. This.instruction.manual.covers.the.various.versions.of.the.product..Kindly.ignore.the.sections.relating.to.accessories.or.instruments. not.featured.on.the.appliance.you.have.purchased. BOMPANI ITALIA . accepts no responsibility for injury or damage deriving from poor installation or incorrect use of the ap- pliance. When.contacting.your.dealer.for.spare.parts,.it.is.essential.to.state.the.model.number.and.the.serial.number,.on.the.nameplate.visible. when.the.oven.door.is.opened. Appliance.producers.are.required.to.comply.with.a.variety.of.regulations,.and.with.this.in.mind,.when.possible,.in.the.production.of.its. appliances.BOMPANI ITALIA.includes.innovative.features.intended.to.further.improve.safety.and.environmental.protection. All.BOMPANI ITALIA..products.therefore.comply.with: Directive.2006/95/EC.applying.to.electrical.products.operating.on.low.voltage.. •.The.directive.requires.electrical.and.electronic.materials.intended.for.use.at.voltages.between.50-1000.VAC.and.75-1500.VDC.to. be.constructed.to.proper.standards.concerning.safety.both.in.the.home.and.in.industrial.contexts..The.Directive.applies.to.electrical. appliances.in.general,.and.its.main.aim.is.to.prevent.all.risks.relating.to.the.use.of.electricity; •.EUROPEAN.REGULATION.1935/2004,.covering.materials.and.objects.intended.for.contact.with.foods;...
- Page 4 Instructions BEFORE USING THE APPLIANCE, READ THE INSTRUCTIONS CAREFULLY AND KEEP THEM IN A SAFE PLACE FOR FUTURE REFERENCE FOR YOUR SAFETY Each.user.is.responsible.for.using.the.appliance.purchased.correctly.and.keeping.it.in.good.condition. •.The.appliance.must.not.be.used.if.damaged.(see.After-Sales.Service). •.All.repairs.must.be.carried.out.by.one.of.the.manufacturer’s.authorised.service.centres,.using...original.spare.parts..Failure.to. comply.with.these.rules.may.reduce.the.appliance’s.safety. •.The.appliance.may.only.be.connected.to.the.electrical.mains.by.authorised.personnel.in.accordance.with.all.relevant.regulations. concerning.electricity.supplies,.and.the.legislation.containing.building.regulations.in.force.in.the.various.countries. •.Disconnect.the.appliance.from.the.electrical.mains.before.carrying.out.any.cleaning.or.servicing.operations. •.Do.not.disconnect.the.plug.from.the.power.socket.by.pulling.on.the.power.supply.cable;.disconnect.it.gently.to.avoid.breaking.the. electrical.wires.inside. •.Take.care.not.to.place.the.power.supply.cables.in.contact.with.parts.which.heat.up.during.use.or.which.might.cause.crushing. •.Never.keep.inflammable,.explosive.or.non.heat-proof.items.such.as.paper,.rags.or.detergents.inside.the.oven;.they.may.catch.fire. when.the.oven.is.used. •.Although.our.product.complies.with.the.regulations.concerning.surface.temperatures.(“cold..door”),.children.should.be.kept.away. from.the.oven’s.control.panel.and.door.when.it.is.in.operation. •.Always.wear.oven.gloves.when.placing.pans.in.or.removing.them.from.the.oven.. •.Always.keep.an.eye.on.foods.when.cooking,.since.the.oils.and.fats.used.are.easily.inflammable..Remove.fat.deposits.and.other. food.residues.before.using.the.oven.again. •.Do.not.place.heavy.items.on.the.open.oven.door;.this.may.damage.the.hinges... •.Damage.caused.by.failure.to.comply.with.these.instructions.is.not.covered.by.the.warranty..entitlement.
-
Page 5: Generalities
Instructions 1. GENERALITIES WARNING : Installation.must.be.carried.out.by.qualified.individuals,.who.must.follow.the.instructions.indicated.in.this.booklet.and. those.provided.for.by.law.(Law.n.46,.dated.03/05/1990..-.System.Safety.Standards). 2. USER INTERFACE WITH TOUCH KEYS AND DISPLAY 88 - 88 Boost Time 2.1 Key functions FUNCTION.KEY.(description.from.right.to.left) 1.0/I.Turns.on.the.oven.and.activates.the..-/+.key.for.cooking.method.selection 1.+.0-n.Child.safety:.press.the.0/I.for.4.seconds.. 2.+.Increases.the.time.and.selects.the.cooking.method 3.–.Decreases.the.time.and.selects.the.cooking.method 4.Time:.selects.the.time.functions.in.sequence(.see.following.table) 5.Boost:.Fast.pre-heat.option. 6.+.Increases.the.temperature 7.–.Decreases.the.temperature Automatic.repeat.combined.with.the.“-“.and.“+”.keys.if.kept.pressed:.one.increment.every..500.ms.during.the.first.second,.one.incre- ment.every.200.ms.to.follow.. 2.2. “Time” key cyclical functions If.repeatedly.pressed,.the.following.sequence.will.be.displayed: Pulse Displayed.after. -
Page 6: Appliance Operation
Instructions 3. APPLIANCE OPERATION When.the.control.is.first.turned.on,.the.display.shows.the.clock.set.at.12:00,.which.can.be.increased.by.one.unit.every.minute..The. oven.is.off.and.the.possible.operations.for..unblocking.it.are:.the.“Clock.setting”.procedure.or,.in.alternative,.directly.turning.it.on...The. detailed.operations.for.setting.the.clock,.the.timer,.duration,.and.end.of.cooking.process.are.indicated.in.the.relevant.paragraphs.that. follow..Through.a.single.setting.key,.the.oven.cyclically.enters.into.the.display.and.modification.mode.(shown.on.the.flashing.display),. in.which.the.“+”.and.“-“.keys.are.activated.to.correct.the.value.indicated.on.the.display...This.value.is,.however,.accepted.after.4.sec- onds.from.the.last.time.the.key.is.pressed.(the.display.stops.flashing). 3.1..CLOCK.SETTING Scroll.through.the.menu.with.the.Timer.Mode.key.until.“hour”.is.displayed,.and.set.it.using.the.“+”.and.“-“.keys..The.clock.can.only.be. set.with.the.oven.in.stand-by. 3.2..TURNING.OVEN.ON/OFF Press.and.release.the.“O/I”.key..“ON”.will.appear.on.the.central.display,.the.symbol.lights.up,.as.well.as.the.light.inside.the.oven..If. after.a.minute.a.cooking.mode.was.not.selected,.the.oven.and.the.symbol.turn.off,.and.“OFF”.will.appear.on.the.display..To.turn.the. oven.off.during.cooking,.press.and.release.the.0/l.key..With.the.key.activated,.it.must.be.released.at.least.1”.after.being.pressed. 3.3..TIMER This.function.does.not.interact.with.loads,.and.it.is.always.available.regardless.of.the.state.the.oven.is.in..Press.the.“Time”.key,.the. bell.symbol.lights.up,.and.the.display.shows.what.is.explained.in.paragraph.2.2..Set.the.desired.value.in.minutes.using.the..“+”.and. “-“.keys,.up.to.a.maximum.of.180.minutes...After.4.seconds.without.increasing.or.decreasing.,the.information.is.accepted,.and.the.bell. remains.lit..Once.the.time.set.has.lapsed,.an.acoustic.signal.is.heard,.and.the.bell.symbol.flashes..To.stop.both.the.acoustic.signal. and.the.flashing.symbol,.just.press.any.key;.its.associated.function.is.normally.not.carried.out.(it.is.only.needed.to.stop.the.signal).. 3.4..SEMI-AUTOMATIC.COOKING.TIME.FUNCTION Turn.the.oven.on,.as.indicated.in.paragraph.3.2..Pres.and.release.the.“Time”.key,.until.“dur”.appears...Set.the.time.required.for.cooking. using.the.“+”.and.“-“.keys,.up.to.a.maximum.of.180.minutes..Select.a.cooking.function.among.those.available,.as.indicated.in.paragraph. 3.9:.the.oven.will.suggest.a.predetermined.temperature..The.temperature.can.be.changed..After.4.seconds.from.the.last.time.the.key. was.pressed,.the.oven.turns.on.for.the.time.set..After.the.time.defined.has.ended,.the.oven.enters.the.Cooking.Ended.mode. 3.5..SEMI-AUTOMATIC.COOKING.END.FUNCTION Turn.on.the.oven.as.indicated.in.paragraph.3.2..Press.the.“Time”.key.until.“End”.appears...Use.the.“+”.and.“-“.to.set.the.cooking.end. time,.which.must.occur.within.the.next.23h59m..To.enter.the.time,.the.same.steps.should.be.followed.as.those.for.the.clock.setting. (current.time)..After.4.seconds.from.the.last.time.the.key.was.pressed,.the.oven.turns.on.for.the.time.set..A.cooking.function.among. those.available.can.always.be.selected..The.oven.suggests.a.predetermined.temperature..The.temperature.can.be.changed..Once. the.time.specified.has.bee.reached,.the.oven.enters.into.the.Cooking.End.mode 3.6..AUTOMATIC.FUNCTION Turn.the.oven.on.as.indicated.in.paragraph.3.2..Press.and.release.the.“Time”.key.until.“dur”.appears..Set.the.cooking.time.required. using.the.“+”.and.“-“.keys,.until.a.maximum.of.180.minutes..Press.the.“Time”.key.again.until.“End”.appears..Use.the.“+”.and.“-“.keys.to. set.the.cooking.end.time,.which.must.occur.within.the.next.23h59m...After.4.seconds.from.the.last.time.the.key.was.pressed,.the.oven. enters.the.delayed.start.mode:.it.will.then.automatically.turn.on.for.the.length.of.time.specified.and.will.stop.at.the.stop.time.specified,. entering.the.Cooking.end.mode..Even.during.the.delayed.start.phase,.the.temperature.and.the.function.are.both.displayed,.and.both. can.be.changed..All.the.oven.loads.are.deactivated.once.the.oven.must.start..The.symbol.will.show.the.element.selected,.but.will. -
Page 7: Clock.display.symbols
Instructions 3.8..CLOCK.DISPLAY.SYMBOLS 3.8.1. Pot If.lit,.it.indicates.that.the.cooking.function.is.active,.even.in.manual.mode..The.“Light”.and.“Defrost”.functions.are.not.considered.cook- ing.functions,.therefore,.it.remains.off..If.this.symbol.is.flashing,.it.indicates.the.end.of.the.timed.cooking.phase..During.the.delayed. start.mode,.it.remains.off,.and.then.lights.up.when.cooking.starts. 3.8.2. Auto This.is.normally.off..If.lit,.it.indicates.that.a.cooking.time.has.been.selected.(the.oven.is.not.in.manual.mode),.therefore,.it.is.completed. with.the.Pot.symbol..If.flashing,.it.indicates.the.end.of.the.timed.cooking.phase. 3.8.3. Bell Normally.off..If.lit,.it.indicates.that.the.timer.is.active..If.flashing,.it.indicates.that.the.timer.has.end. -
Page 8: Cooking.modes.selection
Instructions 3.9..COOKING.MODES.SELECTION By.pressing.the.“+”.or..“-“.key,.what.is.indicated.in.column.1.appears.on.the.central.display.of.the.clock.for.3.seconds.ever.10.(al- ternating.with.the.clock),.on.the.symbol,.what.is.indicated.in.column.2.appears.on.the.symbol,.and.the.default.value.appears.on.the. temperature.display. Functions.electric. oven Light Pr.01 Oven.Static Pr.02 Top.heating.element Pr.03 Bottom.heating.ele- ment Pr.04 Grill Pr.05 Grill.strenghened Pr.06 Grill.strenghened.fan Pr.07 Oven.Static.+.fan Pr.08 Oven.fan.circular Pr.09 Pizza.(Bottom.+.fan) Pr.10 Defrost .--- Circolar.+Bottom.+.fan. <TBD> Safety device In.order.to.prevent.the.appliance.from.overheating,.the.oven.is.fitted.with.a.safety.device.tripped.in.the.event.of.a.main.thermostat. failure..This.cuts.off.the.electricity.supply:.do.not.attempt.to.repair.the.fault.yourself;.call.your.nearest.Service.Centre. The.oven.should.be.left.to.heat.up.for.at.least.10.minutes.before.food.for.cooking.is.placed.inside.it. When.cooking.in.fan.mode,.two.shelves.can.be.filled.at.the.same.time..However,.if.the.amount.or.type.of.foods.is.changed,.cooking. times.also.change. - Page 9 Instructions Using the cooking functions Defrosting Turn.the.selector.knob.to.the.symbol. .and.leave.the.thermostat.on.zero.The.fan.in.the.bottom.of.the.oven.circulates.the.air.around. the.food.at.room.temperature.It.is.ideal.for.defrosting.any.type.of.food,.but.especially.for.delicate.foods.where.no.heat.is.required,. such.as:.frozen.cakes,.custard.or.cream.cakes.and.fruit.desserts. Conventional Cooking Turn.the.selector.knob.to.the. .symbol..and.set.the.thermostat.on.the.temperature.required..Heat.is.delivered.from.above.and. below,.and.the.food.is.cooked.evenly. Fan Cooking Turn.the.selector.knob.to.the. .symbol..and.set.the.thermostat.on.the.temperature.required..In.this.cooking.mode,.the.heat.inside. the.oven.is.circulated.through.it.by.a.fan..This.provides.more.uniform.heat.distribution,.and.thus.gentler.cooking..This.function.is.also. useful.for.cooking.several.dishes.at.once,.on.different.shelves..In.this.case.the.top.runners.and.the.third.runners.from.the.bottom. should.be.used..When.cooking.just.one.dish,.place.the.shelf.on.the.lowest.runners.for.the.best.results..This.function.is.ideal.for.cooking. soufflés,.which.need.delicate,.even.cooking.. Cooking meat and fish Meat.can.be.placed.in.oven-dishes.or.pans,.or.straight.on.the.shelf..If.using.only.the.shelf,.ALWAYS.pour.a.little.water.into.the.dripping. pan.and.fit.it.onto.the.runners.underneath.the.shelf..The.dripping.pan.will.collect.the.fats.which.melt.during.cooking,.and.the.water. will.prevent.the.fats.from.burning.and.generating.unpleasant.smells.or.smoke..White.meat,.poultry.and.fish.generally.require.cooking. at.a.medium.temperature.(between150.and.250.degrees);.to.cook.red.meat.“rare”,.use.temperatures.between.200.and.220.degrees. for.short.times. Cooking pizza To.cook.pizza,.use.the. .function:.this.programme.uses.the.bottom.heating.elements.and.the.fan..This.combination.heats.the.oven. quickly,.with.most.of.the.heat.delivered.from.underneath..If.more.than.one.shelf.is.used.at.a.time,.their.positions.must.be.swapped. halfway.through.the.cooking.process..The.recommended.temperature.is.220°.for.an.average.cooking.time.of.about.15-20.minutes. Cooking confectionery Cakes.need.a.medium.temperature,.from.160°.to.200°.C..Before.starting.cooking,.the.oven.should.be.left.to.warm.up.for.about.15.
-
Page 10: Special.booster.fast.pre-Heat.
Instructions 3.9.1. Special Booster Fast Pre-Heat <TBD> Program The.special.Booster.program.allows.for.fast.pre-heating.of.the.oven.through.a.particular.combination.of.loads.that.are.active.during. . pre-heating... Specificities.of.the.Booster.mode:. -.Can.only.be.selected.if.a.timed.cooking.mode.is.not.programmed. -.Cannot.be.activated.in.during.the.following.functions:. a).Grill b).Double.Grill c).Defrost/Chafing.area To.activate.the.Booster:. -.press.the.BOOST.key. -.on.the.clock.display,.“BOOST”.appears.flashing When.the.Booster.is.active: -.the.symbol.continues.to.display.the.function.normally.select,.but.the.Power.board..is.actually.informed.to.carry.out.a.different.com- bination.of.loads.. -.The..temperature.indicated.is.free.and.can.be.further.modified.. -.The.function.that.will.be.carried.out.at.the.end.of.the.Booster.cycle.cannot.be.changed. When.pre-heating.has.terminated,.“BOOST”.disappears,.and.the.Power.board.carries.out.the.function.that.is.actually.represented.by. the.symbol. To.deactivate.the.Booster.after.it.was.activated:. -.Press.“BOOST”..The.Booster.mode.is.deactivated,.and.the.actual.function.is.reset.. 3.9.2. Special Booster Super-Fast Pre-Heat Program Program.that.is.an.alternative.to.the.traditional.Fast.Pre-Heat.program..The.loads.selected.are.recurrent: -.Circulation.+.Fan..for.15.seconds -.Grill.+.Top.+.Fan..for.15.seconds.(Top.=.upper.resistance) -.Bottom.+.Top.+.Fan..for.15.seconds.(Bottom.=.lower.resistance 3.10..COOKING.TIME.SELECTION Using.the..“+”.and.“-”keys,.the.temperature.varies.between.the.minimum.and.the.maximum.expected.for.each.cooking.mode.with..Program -
Page 11: Tangential.fan.control
Instructions 3.14..PRE-HEATING.BAR This.bar.furnishes.pre-heating.indications,.and.signals.the.heating.phase.when.cooking.is.in.process..During.the.pre-heating.phase,. the.4.level.bar.visually.indicates.what.remains.to.reach.the.requested.set-point: i..If.k.>.75%:....1st,.2nd,.3rd..on;.4th..flashes ii..If.75%.>.k.>.50%:..1st,.2nd..on;.3rd.flashes;.4th..off iii..If.50%.>.k.>.25%:..1st.on,.2nd..flashes;.3rd,.4th..off iv..If.25%.>.k:....flashes;.2nd,.3rd,.4th..off At.the.end.of.the.pre-heating.phase,.and.during.the.cooking.phase,.the.bar.always.remains.lit:.1st,2nd,3rd.,4th..on 3.15..TANGENTIAL.FAN.CONTROL 3.15.1. Select a cooking cycle The..tangential.turns.on,.regardless.of.the.central.oven.temperature,.after.15.minutes.from.selection.or,.however,.even.before,.if.the. temperature.detected.on.the.probe.is.higher.than.the.“power.threshold”.value..During.the.“DEFROST”.function,.the.tangential.fan.is. immediately.activated. 3.15.2. Cooking cycle stop (Off, stand-by) When.a.cooking.cycle.ends,.an.observation.phase.begins,.which.lasts.20.minutes,.during.which.the.tangential.is.turned.off.if.the. temperature.is.lower.than.the.“power.threshold”.value.. After.these.20.minutes,.the.tangential.remains.off,.regardless.of.the.temperature. 3.15.3. Power board sensor automatic function A.temperature.sensor.is.installed.on.the.Power.board..When.it.detects.a.value.>80°C,.the.tangential.is.forcedly.activated,.regardless. of.the.previous.logistics.. 3.16..ANNULLING.COOKING.END.AND.LENGTH.SETTINGS. The.cooking.length.and.cooking.end.can.be.annulled.by.pressing.the.Funz.+.key.during.the.cooking.length.setting.phase:.the.oven. remains.on.and.is.automatically.set.to.the.indefinite.time.manual.function.mode,.as.described.in.the.paragraph...(…) . Otherwise,.the.oven.can.be.turned.off.completely.by.pressing.the.ON/OFF.key. 3.17..ANNULLING.TIMER.SETTINGS. -
Page 12: Maintenance
Instructions Cleaning Stainless Steel Care.and.cleaning.of.the.oven.you.have.purchased.are.important.to.keep.the.steel.bright.and.uniform.over.time..The.stainless.steel. used.for.the.manufacture.of.our.ovens.is.Silver.Ice,.finished.with.a.special.anti-fingerprint.treatment.that.keeps.it.shiny.even.after.use.. We.advise.you.never.to.use.abrasive.sponges,.scouring.pads,.wire.wool,.acids.or.products.which.might.scratch.the.surface..Clean. it.with.soft.cloths.and.ordinary,.absolutely.non-abrasive.washing-up.liquid;.creams.are.not.recommended.because.they.contain.tiny. abrasive.particles.which.might.leave.marks.on.the.steel. Cleaning Enamel and Glass Enamel.is.a.vitreous.finish.with.excellent.resistance.to.heat.and.acids..Like.glass,.it.may.be.damaged.by.prolonged.contact.with.acids,.so. spills.of.tomato.sauce,.lemon.and.vinegar.should.be.wiped.off.immediately..Use.bicarbonate.of.soda.or.non-abrasive.cream.cleaner for.the.most.stubborn.stains..Never.use.descaler.products:.they.might.cause.irreparable.damage.to.the.enamel..Oven.interiors.are. also.enamelled.and.must.be.cleaned.using.specific.products,.easily.available.from.retailers..It.is.best.to.clean.the.oven.after.each. use,.while.still.warm..We.advise.you.not.to.allow.dirt.to.build.up.over.time.since.it.is.more.difficult.to.remove.layers.of.dirt.and.there.is. a.risk.of.leaving.permanent.marks.on.the.enamel. Cleaning the Door Glass All.ovens.are.fitted.with.glass.doors.with.innovative,.extremely.convenient.characteristics..The.full-glass.on.the.inside.can.be.removed. easily.without.the.aid.of.any.tools:.the.screw-free.visible.fixing.system.guarantees.that.the.door.provides.the.easy.cleaning.only.glass. can.ensure..Proceed.as.follows.to.remove.the.glass.in.the.oven.door.correctly. •.Fully.open.the.door; •.apply.gentle.leverage.with.a.coin.or.a.flat-head.screwdriver.in.the.two.recesses.in.the.bottom.of.the.inside.of.the.door.simultaneou..sly; •.released.from.its.seat,.the.glass.can.be.extracted.from.the.recess.into.which.it.is.fitted: •.After.cleaning,.repeat.the.same.procedure.in.reverse.order.. WARNING:Take.care.to.reassemble.the.pieces.of.glass.in.the.correct.order;.the.inside.glass.has.a.special.heat-reflecting.finish! Do.not.clean.the.glass.door.of.the.oven.with.rough,.abrasive.materials.or.sharp.metal.scrapers,.since.they.may.scratch.the.surface. and.cause.the.glass.to.shatter. 4.2. Maintenance •.Disconnect.the.appliance.from.the.electrical.mains.by.disarming.the.fuses.before.carrying.out.any.cleaning.or.servicing.opera. ..tions. •.In.the.event.of.failure,.please.first.of.all.check.the.fuses.of.the.household.electricity.supply.system. •.If.the.problems.are.not.caused.by.the.power.supply,.kindly.contact.your.Authorised.Service.Centre..,.stating.the.model.of.the.appliance. and.the.serial.number.stated.on.the.nameplate. -
Page 13: Regulations, General Safety And Environmetal Protection
Instructions 5. REGULATIONS, GENERAL SAFETY AND ENVIRONMENTAL PROTECTION REGULATIONS 5.1. 5.1.1 DISPOSAL: PACKAGING AND DECOMMISSIONED APPLIANCE •.The.user.is.responsible.for.consigning.the.obsolete.appliance.to.his.disposal.facility;.otherwise,.he.will.be.liable.to.prosecution.under. the.relevant.waste.disposal.legislation. •.Appropriate.separate.disposal.ready.for.recycling.of.decommissioned.appliances,.and..environment-friendly.processing.and.disposal. of.waste,.help.to.prevent.possible.harmful.impacts.on.the.environment.and.health.and.encourage.the.recycling.of.the.materials.of. which.the.product.consists. •.For.more.detailed.information.on.the.waste.disposal.systems.available,.contact.your.lo.cal.waste.disposal.service,.or.the.shop.from. which.the.appliance.was.purchased. DIRECTIVE.2002/96/EC.(WEEE):.INFORMATION.FOR.USERS This.information.is.intended.only.for.the.owners.of.appliances.which.carry.the.symbol.shown.in.Fig..A.on.the.adhesive.technical.data. label.fitted.to.the.product.(serial.number.label). This.symbol.indicates.that.the.product.is.classified,.under.the.relevant.regulations.as.electrical.or.electronic.equipment.and.is.compliant. with.EU.Directive.2002/96/EC.(WEEE)..Therefore,.at.the.end.of.its.useful.life,.it.must.be.handled.separately.from.household.waste;. it.can.be.consigned.free.of.charge.to.a.recycling.centre.for.electrical.and.electronic.equipment.or.returned.to.the.dealer.on.purchase. of.an.equivalent.new.appliance. Italian.Decree.Law.151/05,.which.implements.the.EU.guidelines,.extends.the.principle.of.Producers’.responsibility.to.the.electrical. and.electronic.products.sector..Producers.are.responsible.for.implementing.and.operating.a.system.for.disposing.of.the.waste.ge- nerated.by.the.electrical.and.electronic.equipment.they.offer.for.sale..Producers.are.therefore.responsible.for.collecting.WEEE.from. the.collection.points.(public.and.private),.transporting.them.to.suitable.treatment.centres,.and.the.subsequent.recycling.and.reuse.of. the.materials. ..Fig.A 5.1.2 MATERIALS IN CONTACT WITH FOODS. EUROPEAN.REGULATION.No.1935/2004:.INFORMATION.FOR.USERS. -
Page 14: For The Installation Engineer
Instructions •.Do.not.spray.aerosols.in.the.vicinity.of.this.appliance.while.iy.is.in.operation. WARNING:.Do.not.touch.the.oven.heating.element. WARNING:.Make.sure.that.the.appliance.is.switched.off.before.changing.the.light.bulb.to.avoid.electric.shock. 5.3 ENVIRONMENTAL PROTECTION AND SAVING .•.Using.the.oven.between.late.afternoon.and.early.morning.helps.to.reduce.demand.peaks. .•.Keeping.the.oven.door.gaskets.clean.and.in.good.condition,.so.that.they.adhere.to.the..door.firmly,.reduces.heat.loss. 6.FOR THE INSTALLATION ENGINEER The appliance must be installed by a qualified person, who must follow the instructions provided in this manual and in the regulations:Law n. 46 of 05.03.1990 – Regulations on the Safety of Systems 6.1. -
Page 15: General Precautions
Instructions •.if.the.appliance.is.supplied.without.a.cable,.use.a.type.H05RR-F.or.H05V2V2-F.cable.of..suitable.gauge.(see..Fig..2.–.page.17); The.installer.is.responsible.for.making.the.electrical.connection.correctly.and.for.compliance.with.safety.regulations..The.electrical. connection.diagrams.are.provided.in.Fig..2.–.page.17. IMPORTANT WARNING: The.manufacturer.cannot.be.held.responsible.for.any.damage.caused.by.failure.to.comply.with.the.instructions.provided.and.the. relevant.regulations.and.standards. 7. GENERAL PRECAUTIONS 7.1. Oven Accessories The.accessories.provided.in.the.oven.are: 1..The.shelf,.which.supports.the.pans.for.cooking.confectionery.or.roasts,.or.on.which.meat.for.grilling.is.placed.directly. 2..The.drip.pan.under.the.grill.is.used.to.collect..juices,.which.drip.from.the.food.that.is.cooked.directly.on.the.grill..The.drip.pan.can. also.be.used.for.cooking.. 3..The.oven.can.be.equipped.also.with.a.glass.baking.tray..This.is.to.be.used.only.on.the.wire.shelf..placed.on.the.first.top.level.or. on.the.lower.bottom.one..It.must.never.be.introduced.either.on.the.side.racks.directly.or.on.the.two.central.pull-out.oven.runners. 7.2. “Pull-Out Oven Runners” Kit Some.versions.of.the.appliance.are.fitted.with.telescopic.runners. They.are.extremely.convenient.when.cooking,.since.they.allow.shelves.to.be.pulled.right.out,.and.stopped.in.the.fully.extracted.position. This.convenient.aid.allows.foods.to.be.checked.with.no.risk.of.burns,.and.ensures.more.thorough.cleaning. The.oven.can.be.fitted.with.a.“Pull-Out.Runner”.kit.on.request. This.optional.can.be.ordered.from.your.dealer. 8. ASSISTANCE – DIAGNOSTIC MODE When.the.oven.is.in.the.Power-up.state.(flashing.clock),.the.test.mode.can.be.activated.by.simultaneously.pressing.the.TEMPER+. and..the.EDITION+.keys.for.5.seconds. 8.1..Phase.1.–.Display.Board All.the.display.segments.are.all.turned.on..If.a.key.is.pressed,.the.code.associated.to.this.key.is.temporarily.displayed,.to.then.return. to.display.all.the.segments..The.automatic.repetition.is.activated.for.keys.equipped.with.this.function... If.a.key.is.not.pressed.for.approx..10.seconds,.the.oven.passes.to.the.next.phase. -
Page 16: Over-Heating
Instructions 9.2. Over-heating When.the.thermal.probe.on.the.Power.board.detects.a.room.temperature.of.>100°C,.all.the.thermal.elements.of.the.oven.automatically. turn.off..If.this.persists.for.more.than.1.minute,.the.clock.display.shows.“STOP”,.and.every.command.on.the.key.board.is.ignored.until. the.temperature.goes.below.this.limit....... -
Page 17: Figures
Figures CONNECTION DIAGRAM 230.V. ..TWO-PHASE........Wire.gauge: >.3,5.kW..3x2,5.mm 2,2.-.3,5.kW..3x1,5.mm 0.-.2,2.kW ...3x1..mm... - Page 20 BOMPANI ITALIA Spa. - Via Emilia Est, 1465 41100 Modena - Italy Tel + 39 059 282278 - Fax +39 059 281774 www.bompani.it - bompani_italia@bompaniitalia.it Ed. 07/03/2011 335425...


Need help?
Do you have a question about the BO243 and is the answer not in the manual?
Questions and answers