Chapters
Table of Contents

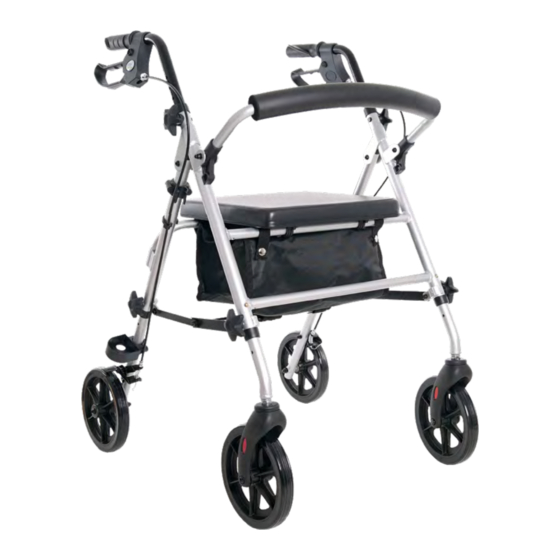
Related Manuals for Vitea Care ROCKY


Summary of Contents for Vitea Care ROCKY
- Page 1 Podpórka ułatwiająca chodzenie 4-Wheel aluminum rollator Wersja/Version: ROCKY Typ/Type: VCBK Instrukcja używania Instructions for use Wydanie/Edition: EJ 2.2023 przejdź do go to strona 2 page 17...
-
Page 2: Table Of Contents
Spis treści Wstęp �������������������������������������������������������������������������������������������������������� 3 Wskazania ...........................4 Przeciwwskazania ........................4 Opis produktu ������������������������������������������������������������������������������������������ 4 Wykaz elementów w opakowaniu ..................5 Użytkowanie �������������������������������������������������������������������������������������������� 5 Montaż i rozkładanie podpórki ..................5 System hamulcowy .........................7 Regulacja siły hamowania ....................8 Regulacja ustawienia wysokości rączek ................8 Składanie ............................9 Mocowanie kuli/laski ......................9 Pokonywanie przeszkód (progi, krawężniki) ..............9 Bezpieczeństwo użytkowania ����������������������������������������������������������������... -
Page 3: Wstęp
Wstęp Składana podpórka czterokołowa, wyposażona w dwa stałe koła tylne z hamulcem i blokadą kół oraz dwa przednie koła obrotowe. Umożliwia łatwe poruszanie się po każdej powierzchni, wewnątrz i na zewnątrz budynku. UWAGA Zawsze należy przestrzegać podstawowych środków ostrożności według informacji podanych poniżej, dotyczących bezpieczeństwa podczas korzystania z wyrobu. -
Page 4: Wskazania
Wskazania Podpórki rehabilitacyjne są sprzętem pomocniczym ułatwiającym pionizację i poru- szanie się pacjentów o różnym typie zaburzeń motorycznych. Mogą być stosowane jako pomoc dla pacjentów po zabiegach chirurgicznych (operacje w obrębie kończyn dolnych) nie mogących posługiwać się kulami, nie wykazujących zaburzeń koordy- nacyjnych, pacjentów z lekką... -
Page 5: Wykaz Elementów W Opakowaniu
Wykaz elementów w opakowaniu Ilustracja 2. Elementy, które powinny znajdować się w opakowaniu. Użytkowanie Montaż i rozkładanie podpórki • Produkt pakowany jest w postaci do złożenia. • Po wyjęciu z opakowania należy sprawdzić czy zawiera ono wszystkie części zgodnie z wykazem elementów zamieszczonym powyżej. - Page 6 Ilustracja 4. Miejsca montaż kół jezdnych. Ilustracja 5. Śruby blokady regu- lacji siedziska i montażu kół. • W dolnych otworach ram bocznych należy zamontować koła (Ilustracja 4.). • Należy dostosować odpowiednią wysokość (dostępne 2-pozycje), taką samą dla każdego z czterech kół. •...
-
Page 7: System Hamulcowy
• Rączki powinny znajdować się na wysokości, która zapewni komfort oraz poczucie bezpieczeństwa dla użytkownika. Istotne jest, aby upewnić się, że obie rączki usta- wione są na tej samej wysokości. • Aby zmienić wysokość rączek należy odkręcić pokrętła do mocowania rączek, zdjąć podkładki, wyjąć... -
Page 8: Regulacja Siły Hamowania
Hamulec standardowy Hamulec postojowy Ilustracja 10. Obsługa hamulcy. Regulacja siły hamowania • Aby wyregulować siłę hamulca należy najpierw poluzować nakrętkę znajdująca się nad śrubą regulacyjną hamulca tuż nad kołem (Ilustracja 11.). Śruba regulacji Nakrętka Ilustracja 11. Regulacja hamulca. • Następnie przekręcić śrubę regulacyjną przeciwnie do ruchu wskazówek zegara aż do uzyskania właściwej siły hamulca. -
Page 9: Składanie
Składanie • W celu złożenia podpórki dla ułatwienia transportu, należy przy użyciu niewielkiej siły przyciągnąć do góry zawias rozporowy. Mocowanie kuli/laski • Po prawej stronie podpórki znajdują się dwa uchwyty na kulę/ laskę: dolny i górny. • Należy umieścić kulę/ laskę w uchwycie dolnym, a następnie wcisnąć w uchwyt •... - Page 10 • Podpórka nie zastąpi wózka, siedzisko służy tylko do chwilowego spoczynku. • Podczas postoju oraz korzystania z siedziska należy uruchomić hamulec postojowy obu kół tylnych. • Podpórka nie zastąpi wózka, siedzisko służy tylko do chwilowego spoczynku. • Siedzisko służy tylko do spoczynku dla jednego użytkownika, zabrania się stawania na nim.
-
Page 11: Parametry Techniczne
Parametry techniczne Maksymalna waga użytkownika 120 kg Maksymalna wysokość podpórki 970 mm Maksymalne obciążenie torby 1,5 kg Wysokość uchwytów do prowadzenia 800-970 mm Szerokość podpórki 595 mm Długość rozłożonej podpórki 720 mm Regulacja wysokości siedziska 510-560 mm Szerokość siedziska 350 mm Długość... -
Page 12: Serwis I Naprawa
Serwis i naprawa Przegląd należy wykonywać regularnie, powinien być poprzedzony dokładnym wyczyszczeniem produktu (tak aby ujawnić ewentualne ukryte uszkodzenia). W sytu- acji zaistnienia konieczności wykonania napraw lub jakichkolwiek pytań dotyczących produktu należy zwrócić się do dystrybutora. Pielęgnacja i konserwacja Czyszczenie •... -
Page 13: Plan Konserwacji
Plan konserwacji Częstotliwość Przedmiot kontroli Uwagi Należy sprawdzić, czy żadne Kontrola stanu technicznego Przed pierwszym elementy nie posiadają wszystkich elementów znaj- montażem widocznych uszkodzeń dujących się w opakowaniu mechanicznych Hamulce mogą ulec zużyciu, należy sprawdzać stan hamul- Przed każdym ców przed każdym użyciem. rozpoczęciem Kontrola kół... -
Page 14: Symbole
Symbole Wyrób medyczny Data produkcji (wydrukowana na produkcie) Producent (wytwórca) Dystrybutor Autoryzowany przedstawiciel w UE Conformité Européene (zgodność z wymogami UE) Numer katalogowy (do ponownego zamówienia) Numer seryjny Numer serii/partii Niepowtarzalny kod identyfikacyjny Zajrzyj do instrukcji używania Ostrzeżenie Możliwość zakleszczenia palców Chronić... -
Page 15: Dane Kontaktowe
Do użytku wewnątrz i na zewnątrz Trzymać z dala od światła słonecznego Maksymalne bezpieczne nachylenie Produkt przeznaczony jest do transportu samochodem Produkt nie jest przeznaczony do stosowania jako siedzenie do transportu w pojeździe silnikowym Maksymalna waga użytkownika Dane kontaktowe Producent mdh Sp. - Page 16 English version on next page viteacare.com...
- Page 17 Table of contents Introduction �������������������������������������������������������������������������������������������� 18 Indications ..........................19 Contraindications ........................19 Product description �������������������������������������������������������������������������������� 19 List of elements in the package ..................20 Usage ������������������������������������������������������������������������������������������������������� 20 Mounting and dismounting the rollator ............... 20 Braking system ........................22 Adjustment of braking ......................23 Height adjustment of handles ..................
-
Page 18: Introduction
Introduction Folding four-wheel aluminum rollator, equipped with two fixed rear wheels with brake and two front swivel wheels. It allows easy movement on any surface, indoors or outdoors. ATTENTION Always observe the basic precautions according to the information given below regarding safety when using the product. -
Page 19: Indications
Indications Rehabilitation supports are assistive equipment that facilitate the uprighting and movement of patients with different types of motor disorders. They can be used to help patients after surgical procedures (limb operations lower limbs) unable to use crutches, without coordination disorders, patients with mild lower limb dysfunction or weakness. -
Page 20: List Of Elements In The Package
List of elements in the package Figure 2. Elements that should be included in the package. Usage Mounting and dismounting the rollator • The product is packaged for assembly. • When removed from the packaging, check that it contains all the parts as listed above. •... - Page 21 Figure 4. Mounting locations for wheels. Figure 5. Locking screws for seat adjustment. • Fit the wheels into the lower holes at the side of the frame (Figure 4.). • Adjust the appropriate height (2 positions available), the same for each of the four wheels.
-
Page 22: Braking System
• The handles should be at a height that provides comfort and a sense of security for the user. It is important to make sure that both handles are set at the same height. • To change the height of the handles, unscrew the handle fixing knobs, remove the washers, remove the screws and slide the handle out or in of the frame as required. -
Page 23: Adjustment Of Braking
Standard brake Parking brake Figure 10. Brake operation. Adjustment of braking • To adjust the brake force, first loosen the nut located above the brake adjustment screw just above the wheel (Figure 11.). Adjustment screw Figure 11. Brake adjustment. • Then turn the adjustment screw counter-clockwise until the correct brake force is achieved. -
Page 24: Folding
Folding • To fold the rollator for ease of transport, pull the horizontal expansion hinge upwards using a small amount of force. Elbow crutches attachment • On the right side of the frame there are two crutches holders: a lower and an upper one. - Page 25 • The rollator is not a substitute for a wheelchair, the seat is only used for temporary rest. • While using the seat, apply the parking brake for both rear wheels. • The rollator is not a substitute for a pushchair, the seat is only used for temporary rest. •...
-
Page 26: Technical Specifications
Technical specifications Maximum user weight 120 kg Maximum support height 970 mm Maximum bag load 1.5 kg Height of guide handles 800-970 mm Support width 595 mm Length of the rollator when unfolded 720 mm Seat height adjustment 510-560 mm Seat width 350 mm Seat length... -
Page 27: Service And Repair
Service and repair The inspection should be carried out regularly and should be preceded by a thorough cleaning of the product (so as to reveal any hidden damage). If repairs are needed or if you have any questions about the product, please contact your distributor. Care and maintenance Cleaning •... -
Page 28: Maintenance Plan
Maintenance plan Frequency Subject of the inspection Comments Check that no components Before the first Checking the condition of all have visible mechanical installation components in the package damage Brakes can wear out, check the condition of the brakes Before each Wheel and brake inspection before each use. -
Page 29: Symbols
Symbols Medical device Production date (printed on the product) Manufacturer Distributor Authorised representative in the EU Conformité Européene (conformity with EU requirements) Catalogue number (to be reordered) Serial number LOT number Unique identification code Refer to the instructions for use Warning Possibility of jammed fingers Protect from moisture... - Page 30 For indoor/outdoor use Keep away from sunlight Maximum safe inclination The product is designed to be transported by car The product is not intended to be used as a seat for transport in a motor vehicle Maximum user weight viteacare.com...
- Page 31 Notes viteacare.com...
-
Page 32: Contact Details
Contact details Manufacturer mdh Sp. z o.o. Address: ul. Maratońska 104, 94-007 Łódź, Poland tel. +48 42 674 83 84, fax. +48 42 636 52 21 www.mdh.pl www.viteacare.com We reserve the right to make technical changes due to technical progress. viteacare.com...
Need help?
Do you have a question about the ROCKY and is the answer not in the manual?
Questions and answers