
Related Manuals for JENCO 3177MB


Summary of Contents for JENCO 3177MB
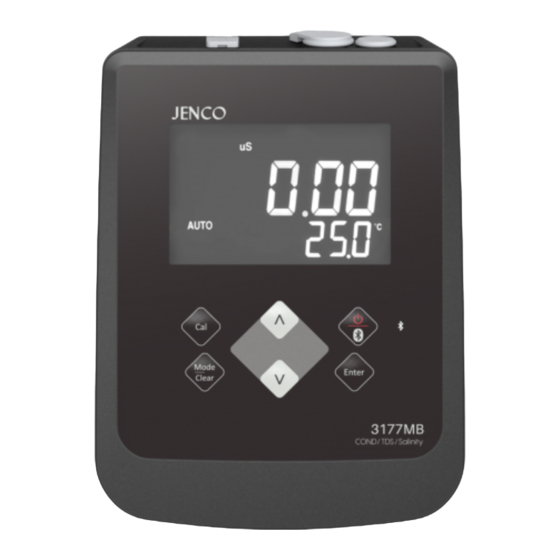
- Page 1 Operation Manual MODEL 3177MB Cond/TDS/Salt/Temperature Based Bluetooth Benchtop Meter 3177MB...
-
Page 2: Table Of Contents
CONTENTS GENERAL INTRODUCTION.........2 INITIAL INSPECTION............2 POWER INPUT..............2 INSTALLING THE BATTERIES........3 CONNECTORS..............3 DISPLAY & KEY FUNCTIONS........................A. Display ........5 B. Operational Keys Description MODES OF THE METER ..........6 OPERATIONAL PROCEDURES........7 ............7 A. Calibration Conductivity, Salinity, TDS Measurements ...9 Save, Recall And Delete Data ......10 .... -
Page 3: General Introduction
POWER INPUT The model 3177MB can be powered by an UL/CE approved 100 to 240 V AC adaptor as well as 6 “AAA” alkaline batteries. Check the label on the AC adaptor supplied with the meter to make sure that the AC line voltage is correct. -
Page 4: Installing The Batteries
INSTALLING THE BATTERIES To insert the batteries into the meter, follow the procedure outlined below. Use a Philip screw driver and unlock the battery cover by turning the screw driver in the counter clockwise direction. After unlocking the screw, take off the battery cover (Fig.1) Replace the old batteries with new ones and install them on the correct polarity position. -
Page 5: Display & Key Functions
DISPLAY & KEY FUNCTIONS A. Display Figure 3 : Active LCD screen for Conductivity, TDS and Salt 1. mS/cm- 7. mg/L- Millisiemens, indicates Milligrams/Liter indicates Conductivity measurement. TDS measurement. 2. BAT- 8. ppt- Low battery indicator. Parts per thousand, indicates Salinity measurement. -
Page 6: Operational Keys Description
B. Operational Keys Description Figure 4 Description Cal- In conductivity measure mode, press this key to go to the “Calibration” mode. Mode/Clear- Selects display mode. Pressing this key changes the display sequentially to display Conductivity, Salinity, TDS, Recall, Delete One and Delete All. Mode In the conductivity (salinity, TDS) mode, when the Clear... -
Page 7: Modes Of The Meter
lear lear Up & Down- In the calibration mode, these two keys are used to adjust the conductivity display value or K value. In the “Recall” mode, view saved data and data storage site number by pressing these keys. In the “Delete ALL” mode, select between the “YES”... -
Page 8: Operational Procedures
4. Recall modes: User can recall data saved in memory. 5. Delete One modes: User can delete one data saved in memory. 6. Delete ALL modes: User can delete ALL data saved in memory. OPERATIONAL PROCEDURES A. Calibration Calibration setup contains six sections: TDS Constant, Temperature Coefficient, Temperature Reference, Probe Basic Cell Constant, Standard Solutions Calibration and K Value Input. - Page 9 4. Rinse the conductivity probe in distilled water and immerse them in the standard solution. Allow temperature reading to stabilize, then press “Cal” key to enter the calibration mode. “CAL” and “ATC” icons appears on the LCD. [Note: Press “Enter” key to accept any values changes in each section and automatically advance to the next section.
-
Page 10: Conductivity, Salinity, Tds Measurements
preferably a standard in the middle range of the solutions to be measured. Immerse the probe (at least 2” to 3” or 5 to 7cm from the tip) without touching the sides of the calibration container. Shake the probe lightly to remove any air bubbles trapped in the conductivity cell. -
Page 11: Save, Recall And Delete Data
Press “Mode/Clear” key to exit “Delete” mode. D. Preparing Conductivity Standard Solutions Suitable conductivity standards are available commercially or the user can prepare them using research grade reagents. Here are some standard solutions the user can prepare to calibrate the probe of the model 3177MB. -
Page 12: App Navigation
3177MB device. Press the "Mode/Clear" key to go to the measure mode. Press and release the “Power/BLE” Key again to turn on the 3177MB Bluetooth connection. The Bluetooth light on the 3177MB will fast blink and it is ready for Bluetooth connection. - Page 13 When the App discovers and displays the 3177MB, tap the “Connect” button. d. Once the 3177MB is connected to the tablet, the device Bluetooth light will blink slowly. After the App has been installed, calibrate the 3177MB to ensure the best reading quality.
- Page 14 F. Calibration Screen The Calibration Screen displays past calibration data. From this screen, tap the “Calibrate” button and follow the step-by-step instructions to calibrate the 3177MB. (Fig.2) G. Settings Screen The Settings Screen displays the various settings that affects the measurements of the 3177MB. (Fig.3) Fig.1...
- Page 15 b. Tap the "Record Reading" button. At this moment the "Record Reading" button change to "Cancel Record" button. To stop recording, tap "Cancel Record" button. 4. Sync data a. Tap the “Saved” tab in the navigation bar. b. "Sync Data" button is displayed. Tap "Sync Data" button. c.
- Page 16 Tap the “Settings” tab in the navigation bar. c. Tap the "Pair" button. d. Wait for the App to discover the 3177MB. Tap the "Connect" button. I. Notes: 1. One meter can be paired to only one App at a time. To put an already-paired meter into pairing mode, one must first close the App it is paired to.
-
Page 17: Fcc Warning Statement
same App for normal operation. 6. Switching operation control between meter and App during calibration affects data integrity. Hence, recommended. 7. Log data on the meter can be in sync with the App saved data but not vise versa. FCC WARNING STATEMENT This device complies with Part 15 of the FCC Rules. -
Page 18: Error Displays And Troubleshooting
"over " during conductivity cell. measurements 1. Sample 1. Increase sample temperature temperature. < -10.0 ℃ undr 2. Replace cell. 2. Defective conductivity cell. [Note: If the meter still does not perform normally after the above measures are taken, call JENCO representative.]... -
Page 19: Specifications
SPECIFICATIONS Display Range Resolution Accuracy K=0.1 : 0.00 to 99.99 μS/cm 0.01 μS/cm, 100.0 to 200.0 μS/cm 0.1 μS/cm, K=0.475: 0.0 to 474.9 μS/cm Conductivity ±0.5% F.S. 1 μS/cm, 475 to 4749 μS/cm 0.01 mS/cm, 4.75 to 47.49 mS/cm 0.1 mS/cm 47.5 to 200.0 mS/cm K=0.1 : 0.00 to 99.99 mg/L 0.01 mg/L,... -
Page 20: Warranty
If you purchased the item from our JENCO distributors and it is under warranty, please contact them to notify us of the situation.
Need help?
Do you have a question about the 3177MB and is the answer not in the manual?
Questions and answers