
Related Manuals for JENCO 6010


Summary of Contents for JENCO 6010
- Page 1 OPERATION MANUAL JENCO MODEL 6010 MICROCOMPUTER BASED pH/mV/Temperature PORTABLE METER JENCO ELECTRONICS, LTD. MANUFACTURER OF PRECISION INSTRUMENTS...
-
Page 2: Table Of Contents
Page INITIAL INSPECTION GENERAL INTRODUCTION SPLASH RESISTANT INSTALLING THE BATTERIES TURNING ON/OFF THE INSTRUMENT KEY FUNCTIONS OF THE MODEL: 6010 OPERATIONAL PROCEDURES BUFFER TABLE SELECT pH CALIBRATION 1.Calibration with ATC in pH-AUTOLOCK mode 2.Calibration with MANual temperature compensation in pH AUTOLOCK mode 3.Calibration with ATC/Temp probe in pH mode... - Page 3 This enables the instrument to automatically sense the end point and "lock" the display to indicate the end point value of the a measurement. The 6010 can also be used in the non- AUTOLOCK mode. The AUTOLOCK and the user prompting features help eliminate...
-
Page 4: Initial Inspection
SPLASH RESISTANT The 6010 meter is housed in a water-tighten case but should not be used underwater as the pH probe is not waterproof. The water resistant feature is to prevent permanent damage to the instrument when accidentally drop into non-corrosive solutions. -
Page 5: Installing The Batteries
3. If unsatisfactory results are gained after doing the above, notify your JENCO representative for possible repair or replacement (See WARRANTY). INSTALLING THE BATTERIES Replace the battery when the BAT indicator appears on the LCD. The instrument can operate within specifications for approximately one hour after LO BAT appears. - Page 6 Once the batteries are installed correctly you can press the [ON/OFF] key to turn on or turn off the instrument. When the unit is not in use the user should turn off the instrument to save battery life.. ABOUT LCD DISPLAY 1.
-
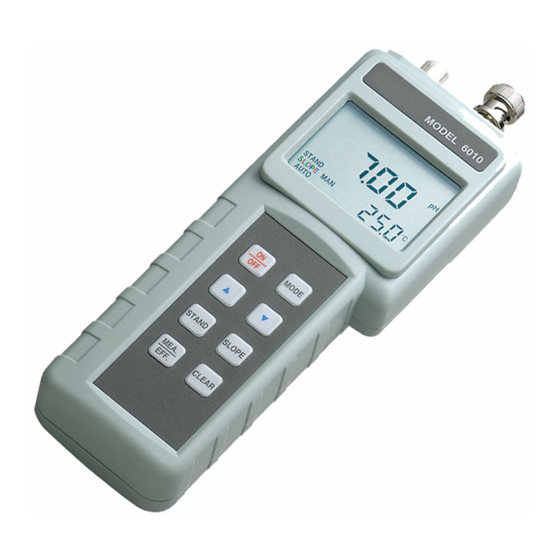
Page 7: Key Functions Of The Model 6010
8.pH/mV : Unit and mode indicators. 9.Main display for pH , mV and probe Efficiency values. 10.Temperature and unit display KEY FUNCTIONS OF THE MODEL 6010 1.[ON/OFF] key. The [ON/OFF] key turns the instrument ON or OFF. The pH calibration values will not be erased when the instrument turned off. -
Page 8: Operational Procedures
enter the temperature values. They have no effect on the instrument when operating in ATC mode. 5.[MEA./EFF.] key. a. The [MEA./EFF.] key is used to bring the instrument out of the AUTOLOCK condition when operating in pH-AUTOLOCK or mV-AUTOLOCK mode. b.Press and hold this key for 5 seconds, the large LCD will display the efficiency of the electrode. -
Page 9: Ph Calibration
There are two sets of buffer available for this unit : 7.00,4.01,10.01pH and 6.86,4.00,9.18pH. You can change the buffer set by turning OFF the unit then pressing and holding the [STAND] key as you turn ON the unit again. You can see what buffer set you are using if the unit is uncalibrated and you are in pH mode. - Page 10 (refer to table 1). When a stable reading is reached, the WAIT annunciator will stop flashing and stay off. The SLOPE annunciator will start to flash. This means that the standardization at buffer 7.00 (or 6.86) has been completed and the instrument is now ready to sloped at a second buffer.
-
Page 11: Calibration With Manual Temperature Compensation In Ph Autolock Mode
After two point calibration, pressing and holding the [MEA./EFF.] key for about 5 seconds will display the new electrode efficiency. If "Er 2" is displayed, check that the correct buffer is used and that the slope of the electrode is not off by more than 30% from the theoretical slope. - Page 12 the WAIT annunciator will flash. This means that the instrument is waiting for a stable reading. The display will be locked to the buffer value corresponding to the temperature of buffer 7.00 (or 6.86) as set in 2.2 (refer to table 1).
-
Page 13: Calibration With Atc/Temp Probe In Ph Mode
values of the two calibration buffers. The instrument is dual point calibrated and is now ready for measurements. After two point calibration, pressing and holding the [MEA./EFF.] key for about 5 seconds will display the new electrode efficiency. If "Er 2" is displayed, check that the correct buffer is used and that the slope of the electrode is not off by more than 30% from the theoretical slope. - Page 14 is completed and the instrument is ready to be sloped at a second buffer. The instrument will display the buffer value corresponding to the temperature of the buffer 7.00 (or 6.86) as measured in 3.2 (refer to table 1). If the reading still drifts, repeat 3.3 until a stable reading is obtained.
-
Page 15: Calibration With Manual Temperature Compensation In The Ph Mode
values of the two calibration buffers. The instrument is dual point calibrated and is now ready for measurements. After two point calibration, pressing and holding the [MEA./EFF.] key for about 5 seconds will display the new electrode efficiency. If "Er 2" is displayed, check that the correct buffer is used and that the slope of the electrode is not off by more than 30% from the theoretical slope. - Page 16 [STAND] key. the STAND annunciator will be on and the SLOPE annunciator will start to flash, indicating that the standardization at buffer 7.00 (or 6.86) is completed and the instrument is ready to be sloped at a second buffer. The instrument will display the buffer value corresponding to the temperature of the buffer 7.00 (or 6.86) set in 4.2 (refer to table 1).
-
Page 17: Ph Measurements
After two point calibration, pressing and holding the [MEA./EFF.] key for about 5 seconds will display the new electrode efficiency. If "Er 2" is displayed, check that the correct buffer is used and that the slope of the electrode is not off by more than 30% from the theoretical slope. -
Page 18: Measurement With Atc/Temp Probe In The Ph Non-Autolock Mode
Press the measure key. The WAIT annunciator will start flashing. This means the instrument is waiting for a stable reading. The pH will track the pH value as sensed by the pH electrode and the ATC/Temp probe. When the display changes less than 0.01 pH in about 10 seconds the autolock function will be activated. -
Page 19: Measurement With Manual Temperature Compensation In The Ph-Autolock Mode
Allow sufficient time for the display to stabilize. The instrument will display the pH value of the sample at the displayed sample temperature. If "OvEr/Undr" is displayed, the pH value measured is out of the “16.00/-2.00 pH” range. 3. Measurement with manual temperature compensation in the pH-AUTOLOCK mode. -
Page 20: Measurement With Manual Temperature Compensation In The Ph Non-Autolock Mode
is then "locked" and will not respond to further changes from the pH electrode. The "locked" display is the pH value of the sample at the set sample temperature. If "OvEr/Undr" is displayed, the pH value measured is out of the “16.00/-2.00 pH”... -
Page 21: Mv Measurements
“16.00/-2.00 pH” range. TEMPEARTURE MEASUREMENTS The model 6010 can be used to measure temperature independently with the ATC/Temp probe without using the pH electrode. 1. Place the ATC/Temp probe in the media to be measured. The measured temperature is displayed. -
Page 22: Measurement In The Mv Non-Autolock Mode
flash. This means the instrument is waiting for a stable reading. The display will track the mV value as sensed by the electrode,. When the display changes less than 1 mV within 10 seconds, the AUTOLOCK function will be activated. The WAIT annunciator will stop flashing and stay off. - Page 23 Allow sufficient time for the display to stabilize. The instrument will display the mV value of the sample. If "OvEr/Undr”" is displayed, the mV value measured is out of the “1250/-2000 mV” range. The instrument will display the correct value once the input mV is brought within range.
-
Page 24: Error Displays
4.07 6.83 8.99 4.08 6.97 9.80 4.09 6.84 8.97 4.10 6.98 9.78 Note : The actual reading of the instrument can differ from the values shown by ±0.01 pH. ERROR DISPLAYS MAIN DISPLAY POSSIBLE CAUSE(S) "Er 1" pH electrode offset is greater/less than +/-1.5 pH electrode is faulty. -
Page 25: Warranty
Dimensions (W x D x H ) 86 mm x 241 mm x 72 mm Weight 430 grams (Batteries included) WARRANTY Jenco Instruments, Inc. warranties the model 6010 for a period of one year, from date of purchase, against all defects in material and... - Page 26 Make sure that the instrument is properly packaged and insured against possible damage in shipment. Authorization must be obtained from a Jenco representative before returning items for any reason. SHANGHAI JENCO ELECTRONICS, LTD.
Need help?
Do you have a question about the 6010 and is the answer not in the manual?
Questions and answers