
Related Manuals for Huawei SmartLi-ESM-24020P1


Summary of Contents for Huawei SmartLi-ESM-24020P1
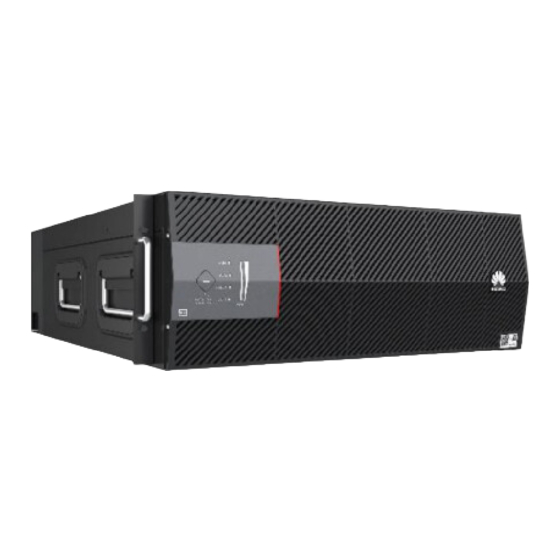
- Page 1 SmartLi-ESM-24020P1 Quick Guide Issue Date 2022-12-30 HUAWEI DIGITAL POWER TECHNOLOGIES CO., LTD.
- Page 2 Notice The purchased products, services and features are stipulated by the contract made between Huawei Digital Power Technologies Co., Ltd. and the customer. All or part of the products, services and features described in this document may not be within the purchase scope or the usage scope. Unless otherwise specified in the contract, all statements, information, and recommendations in this document are provided "AS IS"...
-
Page 3: About This Document
Quick Guide About This Document About This Document Purpose This document describes the energy storage module (ESM) SmartLi-ESM-24020P1 in terms of its installation, cable connection, and power-on commissioning. Figures used in this document are for reference only. Intended Audience This document is intended for: ●... - Page 4 Added the application scenarios of the UPS2000-G-15KRTL-01 and UPS2000- G-20KRTL-01. 2022-08-22 Added the configuration of 16 battery modules connected in parallel. 2022-06-30 This issue is the first official release. Issue 03 (2022-12-30) Copyright © Huawei Digital Power Technologies Co., Ltd.
-
Page 5: Table Of Contents
2.1 Checking Before Power-On..............................49 2.2 Connecting the Battery Supply............................49 2.3 Logging In to the App................................. 50 2.3.1 Used with the UPS2000-H-6/10KRTL-L........................50 2.3.2 Used with the UPS2000-G-15/20KRTL-01........................ 55 Issue 03 (2022-12-30) Copyright © Huawei Digital Power Technologies Co., Ltd. - Page 6 SmartLi-ESM-24020P1 Quick Guide Contents 2.4 Disconnecting the Battery Supply........................... 60 2.5 Recharge Requirements for Batteries with Low SOC....................61 A Lifting Trolley.........................63 B Acronyms and Abbreviations....................65 Issue 03 (2022-12-30) Copyright © Huawei Digital Power Technologies Co., Ltd.
-
Page 7: Installation And Cable Connection
1.2.1 Preparing Tools and Instruments The following table lists the common tools for installation and cable connection. Onsite technical personnel need to prepare required tools based on the actual operation procedure. Issue 03 (2022-12-30) Copyright © Huawei Digital Power Technologies Co., Ltd. - Page 8 Table 1-2 Hoisting and transport tools Lifting trolley Electric forklift Manual pallet truck Table 1-3 Hardware installation tools Phillips insulated Insulated torque Electric Utility knife torque socket Phillips screwdriver screwdriver screwdriver (M4/M6) Issue 03 (2022-12-30) Copyright © Huawei Digital Power Technologies Co., Ltd.
- Page 9 Diagonal pliers Crimping tool Hydraulic pliers Cord end terminal Cable cutter Heat gun RJ45 crimping crimping tool tool Electric hydraulic pliers Table 1-5 Measurement instruments Clamp meter Multimeter Network tester Issue 03 (2022-12-30) Copyright © Huawei Digital Power Technologies Co., Ltd.
-
Page 10: Preparing Cables
● The other end: port for connecting 04080149 (1.5 m) or the battery parallel cable 04081025 (10 m). A maximum of two 10 m cables can be configured and need to be purchased separately. Issue 03 (2022-12-30) Copyright © Huawei Digital Power Technologies Co., Ltd. -
Page 11: Power Cables
(connected to BOM number of the battery module or the cable is BBB box) 04152334 (within 0.5 m) or 04152334-001 (within 5 m), which needs to be purchased separately. Issue 03 (2022-12-30) Copyright © Huawei Digital Power Technologies Co., Ltd. - Page 12 BBB box to M6-90° bent terminal the UPS2000- (connected to the BBB H-6KRTL-L. Onsite box) preparation is ● The other end: OT-6 required. -M4-90° bent terminal (connected to the UPS2000-H-6KRTL- Issue 03 (2022-12-30) Copyright © Huawei Digital Power Technologies Co., Ltd.
- Page 13 ● The maximum output short-circuit current of a battery module is less than or equal to 4 kA (see the test method in section 5.2.4.4 in IEC 62040-1:2017). If an external switch is required, its maximum short-circuit current breaking capacity should be considered. Issue 03 (2022-12-30) Copyright © Huawei Digital Power Technologies Co., Ltd.
-
Page 14: Transportation, Unpacking, And Checking
----End 1.4 Installing Battery Modules D ANGER Ensure that the site is equipped with qualified fire extinguishing facilities, such as firefighting sands and carbon dioxide fire extinguishers. Issue 03 (2022-12-30) Copyright © Huawei Digital Power Technologies Co., Ltd. - Page 15 Ensure that batteries are from the same manufacturer and of the same model. Batteries of the same batch are recommended. NO TICE Battery modules cannot be stacked or placed upside down. Figure 1-2 Incorrect and correct placement of battery modules Issue 03 (2022-12-30) Copyright © Huawei Digital Power Technologies Co., Ltd.
-
Page 16: Rack-Mounted Installation
● The depth of the rack (from the outer side of the front door beam to the outer side of the rear door beam) must be at least 600 mm. Issue 03 (2022-12-30) Copyright © Huawei Digital Power Technologies Co., Ltd. - Page 17 Figure 1-3 Requirements for the distance between the upper and lower layers of the rack Figure 1-4 Distance between the door beam and the guide rail Figure 1-5 Required rack depth Issue 03 (2022-12-30) Copyright © Huawei Digital Power Technologies Co., Ltd.
- Page 18 Figure 1-7 Assembling the mounting ears reversely (1) Mounting ears with (2) Front of the washer (3) Rear of the washer handles Step 3 Install the mounting ears reversely assembled onto the battery module. Issue 03 (2022-12-30) Copyright © Huawei Digital Power Technologies Co., Ltd.
- Page 19 Issue 03 (2022-12-30) Copyright © Huawei Digital Power Technologies Co., Ltd.
- Page 20 Step 9 If multiple battery modules need to be installed, perform Step 1–Step 8 sequence, and install a filler panel between battery modules at the upper and lower layers. Issue 03 (2022-12-30) Copyright © Huawei Digital Power Technologies Co., Ltd.
-
Page 21: Tower-Mounted Installation
Figure 1-14 Installing a filler panel ----End 1.4.2 Tower-Mounted Installation Step 1 Assemble the footer and footer connectors. Figure 1-15 Assembling the footer and footer connectors Step 2 Remove the wiring cover. Issue 03 (2022-12-30) Copyright © Huawei Digital Power Technologies Co., Ltd. - Page 22 Figure 1-17 Removing mounting ears Step 4 Remove the captive screws from the wiring protective cover, and open the door covers on both sides of the wiring protective cover. Issue 03 (2022-12-30) Copyright © Huawei Digital Power Technologies Co., Ltd.
- Page 23 Figure 1-18 Removing screws and opening the covers Step 5 Install the wiring protective cover on the battery module. Figure 1-19 Installing the wiring protective cover Step 6 Fasten the handle on the right properly. Issue 03 (2022-12-30) Copyright © Huawei Digital Power Technologies Co., Ltd.
- Page 24 Step 7 Turn over the battery module using the left handle and place the module on the footers. Figure 1-21 Installing the battery module Step 8 Install rubber plugs. Issue 03 (2022-12-30) Copyright © Huawei Digital Power Technologies Co., Ltd.
-
Page 25: Installing Cables
Stay away from the equipment when preparing cables to prevent cable scraps from entering the equipment. Cable scraps may cause sparks and result in personal injury and equipment damage. Issue 03 (2022-12-30) Copyright © Huawei Digital Power Technologies Co., Ltd. - Page 26 (1) Power cable between battery modules and (2) Communications cable between battery the UPS modules and the UPS (3) Power cable between battery modules (4) Battery module parallel cable Issue 03 (2022-12-30) Copyright © Huawei Digital Power Technologies Co., Ltd.
-
Page 27: Used With The Ups2000-H-6/10Krtl-L (Without A Bbb Box)
The number and colors of cables in the figures are for reference only. 1.5.1.1 Installing Communications Cables Step 1 Install a communications cable between the battery module and the UPS. Issue 03 (2022-12-30) Copyright © Huawei Digital Power Technologies Co., Ltd. - Page 28 Step 2 If multiple battery modules are cascaded in a string, install parallel cables for the battery modules. Figure 1-26 Installing parallel cables between battery modules NO TICE Do not use a parallel cable to directly connect the UPS to the battery parallel port. Issue 03 (2022-12-30) Copyright © Huawei Digital Power Technologies Co., Ltd.
-
Page 29: Installing Power Cables
Step 2 Connect the PE cable, positive cable, and negative cable to the UPS in sequence. Figure 1-28 Connecting power cables to the UPS Step 3 Insert the cable terminal into the upper port of the battery module. Issue 03 (2022-12-30) Copyright © Huawei Digital Power Technologies Co., Ltd. - Page 30 Figure 1-30 Connecting power cables between battery modules Issue 03 (2022-12-30) Copyright © Huawei Digital Power Technologies Co., Ltd.
- Page 31 ● For the connection between a battery module and a UPS2000-H-10KRTL-L, the recommended rated current of the switch is 63 A. ----End Cable Connections in Typical Scenarios Figure 1-31 One UPS2000-H-6KRTL-L + one battery Issue 03 (2022-12-30) Copyright © Huawei Digital Power Technologies Co., Ltd.
- Page 32 SmartLi-ESM-24020P1 Quick Guide 1 Installation and Cable Connection Figure 1-32 One UPS2000-H-6KRTL-L + 16 batteries Figure 1-33 Two UPS2000-H-6KRTL-Ls connected in parallel + four non-shared batteries Issue 03 (2022-12-30) Copyright © Huawei Digital Power Technologies Co., Ltd.
-
Page 33: Used With The Ups2000-H-6/10Krtl-L (With A Bbb Box)
(2) Battery module Step 2 If multiple battery modules are cascaded in a string, install parallel cables for the battery modules. Figure 1-35 Installing parallel cables between battery modules Issue 03 (2022-12-30) Copyright © Huawei Digital Power Technologies Co., Ltd. -
Page 34: Installing Power Cables
Step 2 Remove the cover from the wiring port of each BBB box. Step 3 Connect the PE cable to the UPS. Figure 1-37 Connecting the PE cable to the UPS Step 4 Connect the PE cable to the BBB box. Issue 03 (2022-12-30) Copyright © Huawei Digital Power Technologies Co., Ltd. - Page 35 Figure 1-39 Connecting positive and negative cables to the UPS and BBB box Step 6 If there are multiple BBB boxes cascaded in a string, connect cables between them. Issue 03 (2022-12-30) Copyright © Huawei Digital Power Technologies Co., Ltd.
- Page 36 Figure 1-40 Connecting cables between BBB boxes Step 7 Connect cables first to the BBB box and then to battery modules. Figure 1-41 Connecting cables to the BBB box and battery modules ----End Issue 03 (2022-12-30) Copyright © Huawei Digital Power Technologies Co., Ltd.
- Page 37 SmartLi-ESM-24020P1 Quick Guide 1 Installation and Cable Connection Cable Connections in Typical Scenarios Figure 1-42 Two UPS2000-H-6KRTL-Ls connected in parallel + one BBB box + four shared batteries Issue 03 (2022-12-30) Copyright © Huawei Digital Power Technologies Co., Ltd.
- Page 38 SmartLi-ESM-24020P1 Quick Guide 1 Installation and Cable Connection Figure 1-43 Two UPS2000-H-6KRTL-Ls connected in parallel + four BBB boxes + 16 shared batteries Issue 03 (2022-12-30) Copyright © Huawei Digital Power Technologies Co., Ltd.
- Page 39 SmartLi-ESM-24020P1 Quick Guide 1 Installation and Cable Connection Figure 1-44 Four UPS2000-H-6KRTL-Ls connected in parallel + four BBB boxes + 16 shared batteries Issue 03 (2022-12-30) Copyright © Huawei Digital Power Technologies Co., Ltd.
-
Page 40: Used With The Ups2000-G-15/20Krtl-01 (Without A Bbb Box)
(2) Battery modules in the negative string NO TICE A maximum of eight battery modules can be connected in parallel in each positive or negative string. Do not connect 16 battery modules in a ring. Issue 03 (2022-12-30) Copyright © Huawei Digital Power Technologies Co., Ltd. - Page 41 (1) Battery modules in the positive string (2) Battery modules in the negative string NO TICE Do not use a parallel cable to directly connect the UPS to the battery parallel port. Issue 03 (2022-12-30) Copyright © Huawei Digital Power Technologies Co., Ltd.
-
Page 42: Installing Power Cables
Step 2 Connect the PE cable, positive cable, and negative cable to the UPS in sequence. Figure 1-48 Connecting power cables to the UPS Step 3 Insert the cable terminal into the upper port of the battery module. Issue 03 (2022-12-30) Copyright © Huawei Digital Power Technologies Co., Ltd. - Page 43 ● It is recommended that switches be installed for battery cables. Customers need to purchase switches by themselves. ● For the connection between a battery module and a UPS2000-G-15/20KRTL-01, the recommended rated current of the switch is 63 A. ----End Issue 03 (2022-12-30) Copyright © Huawei Digital Power Technologies Co., Ltd.
- Page 44 SmartLi-ESM-24020P1 Quick Guide 1 Installation and Cable Connection Cable Connections in Typical Scenarios Figure 1-51 One UPS2000-G-15KRTL-01 + two batteries Issue 03 (2022-12-30) Copyright © Huawei Digital Power Technologies Co., Ltd.
- Page 45 SmartLi-ESM-24020P1 Quick Guide 1 Installation and Cable Connection Figure 1-52 One UPS2000-G-15KRTL-01 + 16 batteries Issue 03 (2022-12-30) Copyright © Huawei Digital Power Technologies Co., Ltd.
-
Page 46: Used With The Ups2000-G-15/20Krtl-01 (With A Bbb Box)
(2) Battery modules in the negative string NO TICE A maximum of eight battery modules can be connected in parallel in each positive or negative string. Do not connect 16 battery modules in a ring. Issue 03 (2022-12-30) Copyright © Huawei Digital Power Technologies Co., Ltd. - Page 47 (1) Battery modules in the positive string (2) Battery modules in the negative string NO TICE Do not use a parallel cable to directly connect the UPS to the battery parallel port. Issue 03 (2022-12-30) Copyright © Huawei Digital Power Technologies Co., Ltd.
-
Page 48: Installing Power Cables
Figure 1-56 Connecting the PE cable to the UPS Step 4 Connect the PE cable to the BBB box. Figure 1-57 Connecting the PE cable to the BBB box Issue 03 (2022-12-30) Copyright © Huawei Digital Power Technologies Co., Ltd. - Page 49 Step 6 If there are multiple BBB boxes cascaded in a string, connect cables between them. Figure 1-59 Connecting cables between BBB boxes in a positive or negative string Step 7 Connect cables first to the BBB box and then to battery modules. Issue 03 (2022-12-30) Copyright © Huawei Digital Power Technologies Co., Ltd.
- Page 50 Figure 1-60 Connecting cables to the BBB box and battery modules ----End Cable Connections in Typical Scenarios Figure 1-61 Two UPS2000-G-15KRTL-01s connected in parallel + two BBB boxes + 8 shared batteries Issue 03 (2022-12-30) Copyright © Huawei Digital Power Technologies Co., Ltd.
- Page 51 SmartLi-ESM-24020P1 Quick Guide 1 Installation and Cable Connection Figure 1-62 Two UPS2000-G-15KRTL-01s connected in parallel + four BBB boxes + 16 shared batteries Issue 03 (2022-12-30) Copyright © Huawei Digital Power Technologies Co., Ltd.
- Page 52 SmartLi-ESM-24020P1 Quick Guide 1 Installation and Cable Connection Figure 1-63 Four UPS2000-G-15KRTL-01s connected in parallel + four BBB boxes + 16 shared batteries Issue 03 (2022-12-30) Copyright © Huawei Digital Power Technologies Co., Ltd.
-
Page 53: Verifying The Installation
Otherwise, the equipment may be damaged due to condensation. Issue 03 (2022-12-30) Copyright © Huawei Digital Power Technologies Co., Ltd. - Page 54 Remove the protective objects when batteries need to be used. Issue 03 (2022-12-30) Copyright © Huawei Digital Power Technologies Co., Ltd.
-
Page 55: Power-On Commissioning
Wear insulated gloves and use insulated tools to prevent electric shocks or short circuits. CA UTION During the power-on procedure, power off the batteries immediately if any fault is detected. Rectify the fault before proceeding with the procedure. Issue 03 (2022-12-30) Copyright © Huawei Digital Power Technologies Co., Ltd. -
Page 56: Logging In To The App
2.3.1 Used with the UPS2000-H-6/10KRTL-L Step 1 Use a mobile phone browser to scan the QR code on the front panel of a battery module to download and install the NetEco app. Issue 03 (2022-12-30) Copyright © Huawei Digital Power Technologies Co., Ltd. - Page 57 Figure 2-2 Select Application (1) Android or HarmonyOS (2) iOS Step 5 Tap SmartLi. The Connect WLAN screen is displayed. Use either of the following methods to connect to the WiFi network. Issue 03 (2022-12-30) Copyright © Huawei Digital Power Technologies Co., Ltd.
- Page 58 Tap Scan to connect to WiFi. Scan the QR code on the front panel of the battery module. Figure 2-4 Scanning a QR code Step 6 Tap Next to access the SmartLi login screen. Issue 03 (2022-12-30) Copyright © Huawei Digital Power Technologies Co., Ltd.
- Page 59 Step 8 Tap OK as prompted. The Change Password screen is displayed. After the preset password is changed successfully, use the new password to log in to the app. Issue 03 (2022-12-30) Copyright © Huawei Digital Power Technologies Co., Ltd.
- Page 60 Step 9 After the login is successful, set parameters on the displayed Quick Settings screen. Set Number of battery packs, Battery pack ID, and System time based on site requirements. Figure 2-8 Quick Settings Issue 03 (2022-12-30) Copyright © Huawei Digital Power Technologies Co., Ltd.
-
Page 61: Used With The Ups2000-G-15/20Krtl-01
Battery capacity to 38 Ah: 19 x 4/2 = 38 Step 2 Use a mobile phone browser to scan the QR code on the front panel of a battery module to download and install the NetEco app. Issue 03 (2022-12-30) Copyright © Huawei Digital Power Technologies Co., Ltd. - Page 62 Figure 2-10 Select Application (1) Android or HarmonyOS (2) iOS Step 6 Tap SmartLi. The Connect WLAN screen is displayed. Use either of the following methods to connect to the WiFi network. Issue 03 (2022-12-30) Copyright © Huawei Digital Power Technologies Co., Ltd.
- Page 63 Tap Scan to connect to WiFi. Scan the QR code on the front panel of the battery module. Figure 2-12 Scanning a QR code Step 7 Tap Next to access the SmartLi login screen. Issue 03 (2022-12-30) Copyright © Huawei Digital Power Technologies Co., Ltd.
- Page 64 Step 9 Tap OK as prompted. The Change Password screen is displayed. After the preset password is changed successfully, use the new password to log in to the app. Issue 03 (2022-12-30) Copyright © Huawei Digital Power Technologies Co., Ltd.
- Page 65 Running mode to Lithium battery simulated lead-acid and Number of lead- acid batteries to 20. Set Number of battery packs, Battery pack ID, and System time based on site requirements. Issue 03 (2022-12-30) Copyright © Huawei Digital Power Technologies Co., Ltd.
-
Page 66: Disconnecting The Battery Supply
If the battery system will not be used right now, perform the following steps to disconnect the battery supply to avoid battery overdischarge. Step 1 Choose Overview > SOC(%) to query and record the SOC of each battery module on the app. Issue 03 (2022-12-30) Copyright © Huawei Digital Power Technologies Co., Ltd. -
Page 67: Recharge Requirements For Batteries With Low Soc
Batteries are not charged in time after commissioning and power-off. ● After batteries are discharged, the power grid does not supply power for a long time and batteries cannot be charged in time. Issue 03 (2022-12-30) Copyright © Huawei Digital Power Technologies Co., Ltd. - Page 68 SOC ≥ 30% 90 days 20% ≤ SOC <30% 75 days 10% ≤ SOC < 20% 60 days 5% ≤ SOC <10% 30 days SOC < 5% 20 days Issue 03 (2022-12-30) Copyright © Huawei Digital Power Technologies Co., Ltd.
-
Page 69: A Lifting Trolley
You can decide whether to choose it based on site requirements. Appearance Figure A-1 Lifting trolley (1) Tabletop (2) Handle (3) Lowering switch (4) Elevating pedal (5) Foot brake Issue 03 (2022-12-30) Copyright © Huawei Digital Power Technologies Co., Ltd. - Page 70 Step 3 Repeatedly step on the elevating pedal to raise the tabletop to a proper height. Step 4 Lift the lowering switch to slowly lower the tabletop to the required height. ----End Issue 03 (2022-12-30) Copyright © Huawei Digital Power Technologies Co., Ltd.
-
Page 71: B Acronyms And Abbreviations
SmartLi-ESM-24020P1 Quick Guide B Acronyms and Abbreviations Acronyms and Abbreviations BBB box battery bus bar box end of discharge energy storage module state of charge Issue 03 (2022-12-30) Copyright © Huawei Digital Power Technologies Co., Ltd.
Need help?
Do you have a question about the SmartLi-ESM-24020P1 and is the answer not in the manual?
Questions and answers