
Subscribe to Our Youtube Channel
Related Manuals for Fronius Robacta TC 2000 ext.

Summary of Contents for Fronius Robacta TC 2000 ext.
- Page 1 Operating Instructions Robacta TC 2000 ext. Robacta TC 2000 ext. US Cleaning Unit TC 2000 EN-US Operating instructions 42,0426,0259,EA 004-25102022...
-
Page 3: Table Of Contents
Table of contents Safety Instructions Explanation of Safety Instructions General Intended Use Environmental Conditions Obligations of the Operating Company Obligations of Personnel Particular hazard areas Personal Protection and Protection of Others Dangers due to Mains Current and Operating Current EMC Device Classifications EMC Measures Safety Measures at the Setup Location and During Transport Safety Measures in Normal Operation... - Page 4 Mains connection Setting Up and Connecting the Cleaning Device Assembly note Screwing the cleaning unit and work stand to the mounting surface (foundation) Screwing the base unit and work stand to the surface (foundation) Connecting the cleaning unit to the base unit Connecting the Mains Cable Connecting the mains cable Installing the wire cutter...
-
Page 5: Safety Instructions
Safety Instructions Explanation of DANGER! Safety Instruc- tions Indicates an immediate danger. ▶ Death or serious injury may result if appropriate precautions are not taken. WARNING! Indicates a possibly dangerous situation. ▶ Death or serious injury may result if appropriate precautions are not taken. CAUTION! Indicates a situation where damage or injury could occur. -
Page 6: Intended Use
Intended Use The device is to be used exclusively for its intended purpose. The device is intended exclusively for the electromagnetic cleaning of Fronius welding torches. Utilization for any other purpose, or in any other manner, shall be deemed to be “not in accordance with the intended purpose.”... -
Page 7: Personal Protection And Protection Of Others
Always integrate the device into a higher-level safety system in a secured area. If this area has to be accessed for preparatory or maintenance work, ensure that the entire system is shut down for the duration of access to this area and remains shut down to prevent unintended operation, e.g., as a result of a control error In addition to these Operating Instructions, the safety rules of the robot manu-... -
Page 8: Dangers Due To Mains Current And Operating Current
Keep persons, especially children, away during the operation of the devices and during the welding process. If persons are in the vicinity, however: instruct them about all dangers (blinding hazard due to arcs, injury hazard due to flying sparks, welding fume hazardous to health, noise exposure, pos- sible hazard due to mains current or welding current, possible hazard due to electromagnetic fields, possible hazard due to the magnetic field of the cleaning aperture, moving mechanical parts, compressed air/parting agent... -
Page 9: Emc Measures
EMC device classification as per the rating plate or technical data. EMC Measures WARNING! Electromagnetic field! Electromagnetic fields may cause health problems that are not yet known. It is the operating company’s responsibility to ensure that there is no electro- magnetic interference with electrical and electronic equipment. -
Page 10: Safety Measures In Normal Operation
It is essential to conduct a visual inspection of the device to check for damage after it has been transported but before it is commissioned. Have any damage re- paired by trained service technicians before commissioning the device. Safety Measures Only operate the device when all safety devices are fully functional. -
Page 11: Disposal
Copyright Copyright of these Operating Instructions remains with the manufacturer. Text and illustrations were accurate at the time of printing. Fronius reserves the right to make changes. The contents of the Operating Instructions shall not provide the basis for any claims whatsoever on the part of the purchaser. If you... -
Page 13: General
General... -
Page 15: General
General Device concept The cleaning device consists of a base unit – the Robacta TC 2000 ext. / Robacta TC 2000 ext. US a cleaning unit – the Cleaning Unit TC 2000 in various designs The cleaning device is designed to clean a variety of different welding torch geometries. - Page 16 WARNING! Risk of serious injuries due to: The magnetic field of the cleaning aperture Compressed air/parting agent mixture discharged from the cleaning aperture Flying debris (chips, etc.) Moving mechanical parts During maintenance and servicing, keep the device de-energized and depressurized. Do not use the functions described here until you have fully read and understood the following documents: These Operating Instructions...
- Page 17 Prohibition for persons with pacemakers. Persons with pacemakers must seek advice from their doctor before working with the device or being in the immediate vicinity of the device...
-
Page 18: Functional Principle
Functional principle Operating prin- As soon as the cleaning device is connected to the grid, the (page 28) ciple lights up. The capacitors, which store the energy for the cleaning process, are discharged and no outputs are actuated. NOTE! In order for the capacitors' charging process to begin, the following prerequis- ites must be met: ▶... - Page 19 d) After the cleaning process has finished, the program sequence starts again with a check of the device temperature. If a cleaning process has finished in- correctly, the 'Error' signal will be output. The cleaning device once again ini- tiates the charging process of the capacitors. If the cleaning readiness is 'Ready', another cleaning process can be carried out.
-
Page 20: Representation Of The Magnetic Flux Density Within The Cleaning Coil For Twin Applications
Representation Depending on the requirements, the insertion depth of the welding torch in the of the magnetic cleaning coil can be used to regulate how strong an effect the magnetic flux flux density density should have on the individual areas of the welding torch. within the clean- ing coil for twin NOTE! -
Page 21: Scope Of Supply And Options
Scope of Supply and Options General The cleaning device may be operated in conjunction with various options. De- pending on the area of application, various sequences in the work process can be optimized as a result. Scope of Supply Base unit (available in various versions) Standard I/O (X1) connecting plug without cable Four screws for mounting the cleaning device on the work stand Available Op-... -
Page 22: Transport
Transport Transport equip- Transport the device using the following transport equipment: ment On a pallet using a counterbalanced lift truck On a pallet using a lift truck Manually WARNING! Danger from devices and objects falling. This can result in severe personal injury and damage to property. ▶... -
Page 23: Operating Controls, Connections And Mechanical Components
Operating controls, connections and mechanical components... -
Page 25: Safety
Safety Safety Please follow the safety rules below when using all the functions described in the "Operating controls, connections, and mechanical components" chapter. WARNING! Danger from incorrect operation and work that is not carried out properly. This can result in severe personal injury and damage to property. ▶... -
Page 26: Standard I/O (X1) Connecting Plug Configuration For The Robot Control
Standard I/O (X1) Connecting Plug Configuration for the Robot Control General WARNING! Danger from electrical current. This can result in serious personal injury and damage to property. ▶ The cleaning device must not be supplied with electrical power until the in- stallation has been completed. - Page 27 Roboter Not assigned +24 V HIGH - Quick Stop +24 V LOW - Quick Stop HIGH - Cleaning Start +24 V LOW - Cleaning Start +24 V Supply Voltage max. 20 mA Ready +24 V Supply Voltage max. 20 mA Fluid Level Control Supply Voltage +24 V...
-
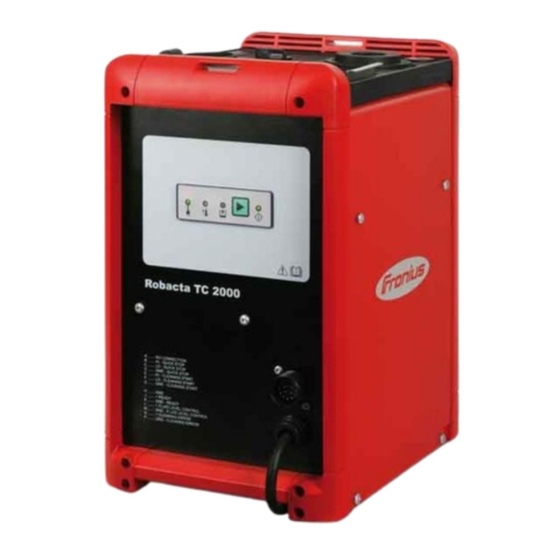
Page 28: Operating Controls, Connections And Mechanical Components
Operating controls, connections and mechanical components General All functions of the cleaning device are activated via the robot control. For setup operation, the cleaning process can be triggered manually on the base unit hous- ing. NOTE! Individual images may differ slightly from your device. However, the function of the operating elements and connections is identical. -
Page 29: Connections And Mechanical Components Of The Base Unit
NOTE! After this indication lights up, one more cleaning process can be carried out. The device will not charge itself for the next cleaning process until it has cooled down to the operating temperature. Fill level indication No function, always lit Discharge button If the button is pressed briefly, the cleaning device will carry out the fol- lowing functions:... -
Page 30: Connections And Mechanical Components Of The Cleaning Unit
Cleaning unit connection sock- For connecting the cleaning unit connection cable Compressed air connection socket For supplying the cleaning device with compressed air Device rear Work stand (option) Collecting container for weld- ing residues Optional work stand Connections and Cleaning aperture with internal mechanical com- parting-agent injection nozzles ponents of the... - Page 31 NOTE! The cleaning aperture of the standard cleaning unit (Cleaning Unit TC 2000) is equipped with a brush seal at the factory. This cleaning unit may only be operated if the brush seal is installed. Brush seals must not be removed. Interconnecting hosepack For connecting to the base unit WARNING!
-
Page 33: Installation And Startup
Installation and Startup... -
Page 35: Safety
This can result in serious personal injury and damage to property. ▶ All the work and functions described in this document must only be carried out by a trained Fronius service technician. ▶ Read and understand this document in full. -
Page 36: Before Installation
Before installation Operating per- WARNING! sonnel, mainten- ance personnel Danger due to machines starting automatically. This can result in severe personal injury and damage to property. ▶ The device must only ever be operated/maintained by one person. ▶ Ensure that there is only one person in the device's operating area while it is being worked on. -
Page 37: Mains Connection
Mains connec- CAUTION! tion Danger due inadequately dimensioned electrical installations. This can lead to serious damage ▶ The grid lead and its fuse protection should be designed to suit the existing power supply. The technical data on the rating plate should be followed. CAUTION! Danger due to incorrect mains voltage. -
Page 38: Setting Up And Connecting The Cleaning Device
Setting Up and Connecting the Cleaning Device Assembly note NOTE! Before the definitive installation of the base unit and cleaning unit, make sure that the cleaning unit interconnecting hosepack is long enough for the planned installation positions. After the installation of the devices, the interconnecting hosepack must rest on the ground without any tensile stress and must not be suspended in the air. -
Page 39: Screwing The Base Unit And Work Stand To The Surface (Foundation)
Screwing the NOTE! base unit and work stand to Only attach the base unit to the foundation with the work stand provided for the surface that purpose. (foundation) NOTE! Depending on the surface, different mounting materials may be required for connecting the work stand to the surface. -
Page 40: Connecting The Cleaning Unit To The Base Unit
Connecting the Remove the cover from the cleaning unit connection socket on the rear of cleaning unit to the base unit the base unit Insert the connecting plug of the interconnecting hosepack into the base unit Tighten the screws on the connecting plug of the interconnecting hosepack to secure it in the cleaning unit connection socket WARNING! Danger from electrical current. -
Page 41: Connecting The Mains Cable
Connecting the Mains Cable Connecting the To connect the mains cable: mains cable Plug in the mains cable Turn the mains cable 45° to the right until it audibly locks into place... -
Page 42: Installing The Wire Cutter
Installing the wire cutter Installing the NOTE! wire cutter on the cleaning Wire cutters for conventional applications (one wire electrode) and for twin ap- plications (two wire electrodes) should be installed in the same manner – as de- device scribed below. NOTE! The spacers, lock washers and screws for installing the wire cutter are supplied with the wire cutter. -
Page 43: Connecting The Cleaning Unit To The 'Robacta Reamer' Parting Agent Container
Connecting the Cleaning Unit to the ‘Robacta Reamer’ Parting Agent Container Connecting the NOTE! cleaning unit to the 'Robacta Only use the 'Robacta Reamer' parting agent provided by the manufacturer. Reamer' parting Its composition is specifically tailored for use with the cleaning device. Correct agent container operation is not ensured when other products are used. -
Page 44: Start Up The Cleaning Device
Start up the Cleaning Device General NOTE! If wetting agent has not been applied to the inside of the welding torch, this may lead to the permanent contamination of the welding torch when welding begins. Always wet the inside of the welding torch with the manufacturer's 'Robacta Reamer' parting agent before starting an automatic application. -
Page 45: Cleaning Program Sequence For Single Wire Applications
Cleaning Program Sequence for Single Wire Ap- plications Program Se- Welding quence with Clean the gas nozzle tip and nozzle fitting Parting Agent Inject parting agent Atomizer – Welding Overview Cleaning the Gas NOTE! Nozzle Tip and Nozzle Fitting – During the cleaning process, blow out the welding torch with compressed air via Detailed De- the hosepack. - Page 46 NOTE! Make sure that the gas nozzle does not touch the housing parts of the cleaning aperture at any time. Move the welding torch to the in- jection position See graphic NOTE! During the injection process, do not blow out compressed air through the welding torch.
-
Page 47: Cleaning Program Sequence With Parting Agent Atomizer
Cleaning Pro- Set 1/Reset 1 Start gram Sequence Compressed air gas purging with welding Program “Welding torch with Parting torch cleaning” Agent Atomizer Set 2/Reset 2 Signal “Cleaning start” Move to position A Set 3/Reset 3 Signal “Spray in parting agent” Move to position B Set 1 Wait 0.5 seconds... -
Page 48: Cleaning Program Sequence For Twin Applications
Cleaning Program Sequence for Twin Applica- tions Program Se- Welding quence with Clean the gas nozzle tip and nozzle fitting Parting Agent Inject parting agent Atomizer – Welding Overview Cleaning the gas NOTE! nozzle tip and During the cleaning process, blow out the welding torch with compressed air via nozzle fitting –... - Page 49 Maintain the cleaning position/ injection position See graphic NOTE! During the injection process, do not blow out compressed air through the welding torch. Inject parting agent into the weld- ing torch for approximately 0.7 seconds Move the welding torch to the starting position above the cleaning aperture – approximately 50 mm (1.97 in.) above the cleaning aperture and centrically with respect to the middle of the cleaning aperture The cleaning process is completed and the welding torch is ready for use...
-
Page 50: Cleaning Program Sequence With Parting Agent Atomizer
Cleaning Pro- Set 1/Reset 1 Start gram Sequence Compressed air gas purging with welding Program “Welding torch with Parting torch cleaning” Agent Atomizer Set 2/Reset 2 Signal “Cleaning start” Move to position A Set 3/Reset 3 Signal “Spray in parting agent” Move to position B Set 1 Wait 0.5 seconds... -
Page 51: Troubleshooting, Maintenance, And Disposal
Troubleshooting, Maintenance, and Disposal... -
Page 53: Safety
This can result in serious personal injury and damage to property. ▶ All the work and functions described in this document must only be carried out by a trained Fronius service technician. ▶ Read and understand this document in full. - Page 54 WARNING! Danger due to insufficient ground conductor connection. This can result in serious personal injury and damage to property. ▶ The housing screws provide an adequate ground conductor connection for grounding the housing and should not under any circumstances be replaced by other screws that do not provide a reliable ground conductor connection.
-
Page 55: Troubleshooting
Troubleshooting Troubleshooting Make a note of the serial number and configuration of the device, and provide the service team with a detailed error description if: Errors occur that are not covered in this document The troubleshooting measures provided in this document are unsuccessful Grid voltage indication does not light up Grid lead connected Cause:... - Page 56 Parting agent is not injected ‘Robacta Reamer’ parting agent container is full Cause: Injection quantity too low Remedy: Set injection quantity (injection time) Cause: Intake filter in ‘Robacta Reamer’ parting agent container dirty Remedy: Blow out the intake filter in the ‘Robacta Reamer’ parting agent con- tainer from the inside out with compressed air using the intake hose (see section Clean the intake filter in the parting agent container...
-
Page 57: What To Do In The Event Of An Error
What to Do in the Event of an Error What to Do in WARNING! the Event of an Error Danger of serious damage to property and personal injury from electric shock. The cleaning device has detected a serious error if: ▶... -
Page 58: Service, Maintenance And Disposal
Do not blow electronic parts clean from a short distance away. Open the base unit and cleaning unit and blow clean with dry and reduced compressed air Every 12 Months Have a Fronius service technician perform a safety inspection on the cleaning device Clean the intake NOTE! -
Page 59: Disposal
Disposal Disposal must only be carried out in accordance with the section of the same name in the "Safety rules" chapter. -
Page 61: Technical Data
Technical data... -
Page 63: Technical Data
Technical data General CAUTION! Danger due to insufficiently dimensioned electrical installations. Serious damage may result. ▶ Select the grid lead and fuse protection to suit the device being used. The technical data on the rating plate applies. Robacta TC Mains voltage 230 V 2000 ext. -
Page 64: Cleaning Unit Tc 2000
Cleaning Unit TC EMC device class 2000 Dimensions l/w/h (without interconnecting hosepack 340/145/300 mm and collecting container for welding residues) 13.39/5.71/8.66 in. Weight 8.1 kg 17.86 lb. Cleaning Unit TC EMC device class 2000 LH Dimensions l/w/h (without interconnecting hosepack 340/145/300 mm and collecting container for welding residues) 13.39/5.71/8.66 in.
Need help?
Do you have a question about the Robacta TC 2000 ext. and is the answer not in the manual?
Questions and answers