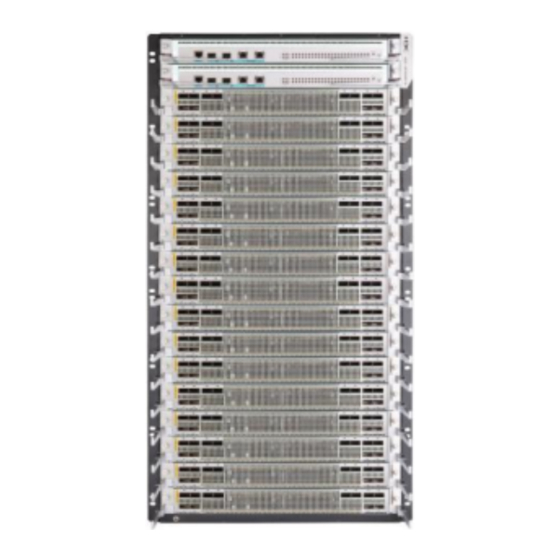
H3C CR19000-16 Installation, Quick Start
Core router
Hide thumbs
Also See for CR19000-16:
- Installation manual (146 pages) ,
- Preparing for installation (15 pages) ,
- Installation manual (102 pages)

Subscribe to Our Youtube Channel
Related Manuals for H3C CR19000-16


Summary of Contents for H3C CR19000-16
- Page 1 H3C CR19000-16 Core Router Installation Quick Start New H3C Technologies Co., Ltd. http://www.h3c.com BOM:3104A0W2 Document version: 6PW109-20211015...
- Page 2 The information in this document is subject to change without notice. All contents in this document, including statements, information, and recommendations, are believed to be accurate, but they are presented without warranty of any kind, express or implied. H3C shall not be liable for technical or editorial errors or omissions contained herein.
-
Page 3: Table Of Contents
Contents 1 Inspecting the router at delivery ······························································· 1-1 2 Preparing for installation ·········································································· 2-1 Determining the installation personnel ············································································································ 2-1 Installation site requirements ·························································································································· 2-1 Equipment room requirements ················································································································ 2-1 Grounding requirements ························································································································· 2-1 Space requirements ································································································································ 2-1 Cooling requirements ······························································································································ 2-3 Safety recommendations ································································································································... - Page 4 Cables for connecting E1 ports ············································································································· 11-3 Connecting an E1 cable ························································································································ 11-3 Routing signal cables ···································································································································· 11-4 12 Verifying the installation ······································································· 12-1 13 Power-on check ··················································································· 13-1 Power-on check flowchart ····························································································································· 13-1 Checking the LEDs ······································································································································· 13-1...
-
Page 5: Inspecting The Router At Delivery
Inspecting the router at delivery When the router is delivered, inspect the items against the packing list. Make sure all items in the list are delivered in good condition. Keep the items secure for future use. IMPORTANT: • Install the router after finishing inspection. Do not inspect the router when installing it. •... -
Page 6: Preparing For Installation
Preparing for installation Determining the installation personnel The personnel for installing and maintaining the router must have received professional training and are familiar with the precautions in installation and skilled and professional in router installation and maintenance. Installation site requirements Equipment room requirements For correct operation of the router, make sure the equipment room meets the following requirements:... - Page 7 Depth—979 mm (38.54 in) With dimensions (H × W × D) of 2200 × 600 × 1200 mm (86.61 × 23.62 × 47.24 in) Chassis—857 mm (33.74 in) CR19000-16 • A minimum of 105 mm (4.13 in) between Cable management ...
-
Page 8: Cooling Requirements
Figure 2-2 Rack requirements Cooling requirements CAUTION: • For adequate heat dissipation, make sure the air inlet and outlet vents of the router are not blocked and adequate clearance is reserved around the air vents. • Make sure the rack for the router has a good cooling system, with the perforation rate of rack doors greater than 50%. -
Page 9: Safety Recommendations
Figure 2-3 Airflow through the chassis Safety recommendations To avoid bodily injury and damage to the router, read all safety recommendations carefully before installation. Note that the recommendations do not cover every possible hazardous condition. Safety symbols When reading this document, pay special attention to the following symbols: WARNING means an alert that calls attention to important information that if not understood or followed can result in personal injury. -
Page 10: Esd Prevention
Model Shipping weight Dimensions (H × W × D) CR19000-16 119.3 kg (263.01 lb) 931 × 440 × 857 mm (36.65 × 17.32 × 33.74 in) The shipping weight of the router includes the chassis and packaging material. Determine a moving... -
Page 11: Moving The Chassis
Moving the chassis CAUTION: • To avoid chassis damage, use only the chassis handles other than any other component to move the chassis. • During the moving process, keep the router upright and do not put down the router or drag the router on the ground. -
Page 12: Preparing Installation Tools
Preparing installation tools Installation tools are required when installing the router. Prepare installation tools as required. Figure 2-6 provides installation tools for your reference. Figure 2-6 Installation tools... -
Page 13: Installation Flowchart
Installation flowchart Figure 3-1 Installation flowchart Start Inspect the router Read safety recommendations Prepare for installation Examine the installation site Prepare installation tools Rack-mount the router Ground the router DC power supplies Install power supplies AC power supplies MPUs Install removable Fabric modules components Interface modules... -
Page 14: Rack-Mounting The Router
LSXM1BSR 1 RU (24.80 in to 35.43 in) For information about installing the slide rails, see H3C LSXM1BSR 1U Bottom-Support Rails Installation Guide (available also at https://www.h3c.com/en/Support/Resource_Center/EN/Routers/Catalog/CR19000/CR19000/). When installing slide rails, make sure the load-bearing plane of the slide rails is perpendicular to the four rack posts. - Page 15 Figure 4-1 Marking the cage nut installation holes Insert cage nuts into the marked square holes in the front rack posts. Cage nuts are not required for the two upper marked installation holes on the right front rack post. Figure 4-2 Installing the cage nuts Place the router on the slide rails from the front of the rack.
- Page 16 Figure 4-3 Mounting the router in a rack...
-
Page 17: Grounding The Router
Grounding the router CAUTION: Make sure the ground point on the rack is connected reliably to a grounding strip in the equipment room. To ground the router: Remove the grounding screws from the grounding point on the chassis. Use the grounding screws to attach the two-hole grounding lug of the grounding cable to grounding point on the chassis. -
Page 18: Installing Power Supplies
Installing power supplies Installing DC power supplies Available DC power supplies The PSR2400-54D DC power supply is available for the router. Table 6-1 describes the PSR2400-54D DC power supply specifications. Table 6-1 PSR2400-54D DC power supply specifications Item Specification Rated input voltage –48 to –60 VDC Input voltage range –40 to –72 VDC... - Page 19 Figure 6-1 Removing a filler panel Correctly orient the power supply. Align the power supply with the power supply slot. Then slide the power supply along the guide rails into the slot until the latch locks the power supply in place.
-
Page 20: Connecting A Dc Power Cord
Figure 6-2 Installing a DC power supply Connecting a DC power cord CAUTION: • Make sure each power cord has a separate circuit breaker. • Before you connect a power cord, turn off the circuit breaker for it. To connect a DC power cord: Route the power cord along the cable ladder. - Page 21 Affix cable labels to the power cord 20 mm (0.79 in) to each end of the power cord. Figure 6-3 Connecting a DC power cord...
-
Page 22: Installing Ac Power Supplies
Installing AC power supplies Available AC power supplies The PSR2400-54A and PSR3000-54A power supplies are available for the router. Table 6-2 describes the available AC power supply specifications. Table 6-2 Available AC power supply specifications Item PSR2400-54A PSR3000-54A • • AC power input: AC power input: 100 to 130 VAC @ 60 Hz... - Page 23 Figure 6-4 Removing a filler panel Correctly orient the power supply. Align the power supply with the power supply slot. Then slide the power supply along the guide rails into the slot until the latch locks the power supply in place.
-
Page 24: Connecting An Ac Power Cord
Figure 6-5 Installing an AC power supply Connecting an AC power cord CAUTION: • Make sure each power cord has a separate circuit breaker. • Before you connect a power cord, turn off the circuit breaker for it. To connect an AC power cord: Route the power cord along the cable ladder. - Page 25 Figure 6-6 Connecting an AC power cord (using a releasable cable tie)
-
Page 26: Installing Modules
Unless otherwise stated, MPUs, interface modules, and fabric modules are collectively referred to as "modules" in this document. The CR19000-16 router has an MPU section, interface module section, fabric module section, power supply section, and fan tray section. "LPU" in Figure 7-1 refers to an interface module and "SFU"... -
Page 27: Installing Interface Modules
To install an MPU: Wear an ESD wrist strap and make sure it makes good skin contact and is reliably grounded. Remove the filler panel from the target MPU slot. Keep the removed filler panel secure for future use. Open the ejector levers of the MPU. Insert the MPU steadily into the slot along slide rails. -
Page 28: Installing An Interface Module That Uses Detachable Ejector Levers
Installing an interface module that uses detachable ejector levers CAUTION: • Put the detachable ejector lever back on its holder after use and then attach it to the chassis or cabinet for future use. • The ejector lever holder is magnetic. Be aware of electromagnetic interference. •... - Page 29 The number of screws for securing the protection box in Figure 7-4 is for illustration only and the actual number of screws on your interface module might differ from that. Figure 7-4 Removing the protection box Correctly orient the interface module. Align the module with the slot and push it steadily into the slot along the guide rails until about half of the module is in the slot.
-
Page 30: Installing An Interface Module That Uses General Ejector Levers
Figure 7-6 Installing an ejector lever Open the ejector levers and continue to push the module by its middle part on the front panel until you cannot push it any further. As shown in Figure 7-7, close the ejector levers until they come in close contact with the front panel. -
Page 31: Installing Interface Subcards
Figure 7-9 Installing an interface module that uses general ejector levers Installing interface subcards For the interface subcard compatibility with interface modules, see H3C CR19000-16 Core Router Hardware Information and Specifications. If you are not to install an interface subcard in a slot on an interface module, keep the filler panel in the slot. - Page 32 Continue to push the interface subcard by its middle part on the front panel until you cannot push it any further. Close the right ejector lever until it comes in close contact with the front panel. Use a screwdriver to fasten the captive screw on the interface subcard. Figure 7-10 Installing an interface subcard...
-
Page 33: Installing Cable Management Brackets
Installing cable management brackets The cable management brackets are to be installed along the left and right edges of the interface module slots. To install a cable management bracket, insert the cable management bracket end that has a spring tab into the cable management bracket hole until the bracket has close contact with the hole, as shown in Figure 8-1. -
Page 34: Installing Fabric Modules
Installing fabric modules CAUTION: • If you are not to install a fabric module in a fabric module slot, keep the filler panel in the slot. • The router does not allow a mixture of different models of fabric modules. •... -
Page 35: Installing A Filler Panel In A Fabric Module Slot
Figure 9-2 Installing a fabric module Installing a filler panel in a fabric module slot Loosen the captive screws on the ejector levers of the filler panel and then open the ejector levers. Align the filler panel with the fabric module slot. Push the filler panel slowly into the slot along the guide rails. - Page 36 Figure 9-3 Installing a filler panel in a fabric module slot...
-
Page 37: Installing Fan Trays
Installing fan trays CAUTION: • The fan tray is high and heavy. To avoid device damage, use two people to install or remove a fan tray. • To ensure adequate heat dissipation, make sure the router has two fan trays installed. IMPORTANT: A fan tray covers fabric module slots. - Page 38 Figure 10-1 Installing a fan tray 10-2...
-
Page 39: Connecting Signal Cables
Connecting signal cables Installing transceiver modules and optical fibers WARNING! Disconnected optical fibers or transceiver modules might emit invisible laser light. Do not stare into beams or view directly with optical instruments when the router is operating. CAUTION: • Before installing a transceiver module, remove the optical fibers, if any, from it. For more information about installing transceiver modules, see the installation guide for the transceiver modules. - Page 40 Figure 11-1 Installing a transceiver module and optical fiber (LC port) Figure 11-2 Installing a transceiver module and optical fiber (MPO port) 11-2...
-
Page 41: Connecting Cables To E1 Ports
Connecting cables to E1 ports Cables for connecting E1 ports You can use an E1 cable to connect an E1 port (HM96 male connector). Typically, an E1 cable has an HD96 female connector at one end and multiple BNC, RJ-45, or SMB connectors at the other end. -
Page 42: Routing Signal Cables
Figure 11-4 Connecting an E1 75-ohm cable (using coaxial connectors and 75-ohm adapter cables) E1 75-ohm cable 75-ohm adapter cable Peer device (75-ohm E1 port) E1 / E1-F (75 ohm) Coaxial connector • If the impedance of the E1 port on the peer device is 120 ohms, you must use an impedance converter to adapt the impedance. - Page 43 Figure 11-6 Routing signal cables 11-5...
-
Page 44: Verifying The Installation
Verifying the installation Table 12-1 Post-installation checklist Item Requirements • No condensation is on the surface of the router or inside the router. • The router is clean and dust-free. Installation • No packaging boxes, packaging bags, or other packaging materials are left location around the chassis. -
Page 45: Power-On Check
Table 13-1 Table 13-2. If the LED states are not as described in Table 13-1 Table 13-2, the router and components might be faulty. For more information about the LEDs, see H3C CR19000-16 Core Router Hardware Information and Specifications. 13-1... - Page 46 Table 13-1 MPU LED descriptions Status Description Steady green All the fan trays are operating correctly. FAIL Steady green All the installed power supplies are operating correctly. FAIL The modules are loading software. CAUTION: Slow flashing green (4 Hz) To avoid damaging the modules, do not power off the router or hot swap the modules when the modules are loading software.
Need help?
Do you have a question about the CR19000-16 and is the answer not in the manual?
Questions and answers