
Related Manuals for Kyocera DP-670


Summary of Contents for Kyocera DP-670
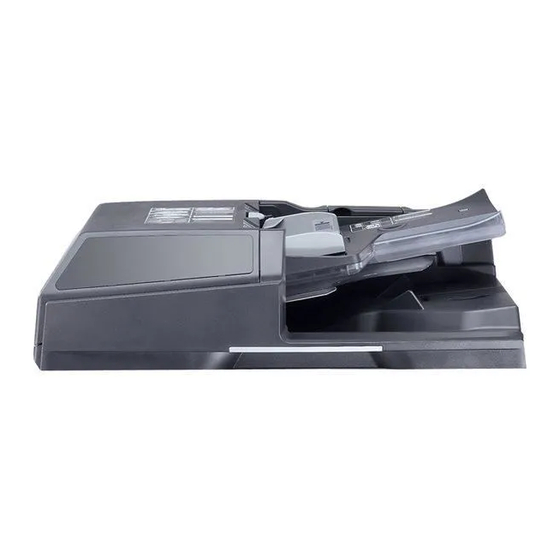
- Page 1 Option Copier DP-670 / PF-670 / AK-670 DF-730 DF-670 / JS-670 / Fax System M Data Security C / UG-30 Installation Manual Code Y108820-3...
- Page 2 PUBLICATION ISSUED BY: Olivetti S.p.A. 77, Via Jervis - 10015 Ivrea (TO) Italy Copyright © 2007, Olivetti All rights reserved...
- Page 3 DP 670 Output Connector for Interconnecting Cable is non-LPS. Output: 357VA max. Please use the item below Interconnecting Cable/ P/N: See Spare Parts Catalogue...
- Page 4 E M4 × 14 screw ..........5 J Label A [Operation procedure] (Metric English F Caution label [Do not leave documents at the models except for 100 V specifications) ..1 device.] (except for 100 V specifications) ..1 K Label B [Operation procedure] (Metric G Caution label [Face Up] models except for 100 V specifications) ..
- Page 5 Precautions Procedure 2. Insert the pins (D) into the hinge holes (1) of Installing the DP DP (A) and slide the DP (A) toward the front ・ Be sure to remove any tape and/or 1. Install two pins (D). side to install it. cushioning material from supplied parts.
- Page 6 3. Fix the DP using four M4 × 14 screws (E). Attaching the original mat 4. Place the original mat (B) with its hook and loop fasteners up over the platen. Right: One Left: Three Align the original mat (B) corner that has not been surface cut with the rear left corner (2) of the platen.
- Page 7 Connecting the signal cable Adhering the labels (for 100 V specification models with color 6. Connect the connector (3) of the signal cable (Inch models) touch panel) 7. After cleaning with alcohol, adhere caution 7. After cleaning with alcohol, adhere label to the machine.
- Page 8 5 (J) 4 (J) (Metric models except for 100 V After cleaning with alcohol, adhere label A [Operation procedure] (J), label B [Operation specifications) procedure] (K), and/or label C [Operation procedure] (L). 7. After cleaning with alcohol, adhere caution (Models with color touch panel for English): Adhere both the illustration label (4) and instructions label (5) of label A [Operation procedure] (J), label [Do not leave documents at the device.] which A is shown.
- Page 9 20mm 20mm 20mm 20mm Checking the operation 1. To check the machine operation, prepare an A3 size original (a) where four lines (b) are drawn 20 mm from the edges and one line (c) is drawn at the center. 2. Connect the power plug to the wall outlet and turn the main power switch on. 3.
- Page 10 Checking image from the DP Be sure to adjust in the following order. If not, the adjustment cannot be performed correctly. For checking the angle of leading edge, see page 8. <Reference value> Simplex copying: within ±3.0 mm; Duplex copying: within ±4.0 mm For checking the angle of trailing edge, see page 11.
- Page 11 3mm/4mm 3mm/4mm Checking the angle of leading edge Check the gap between line (1) of original (a) and line (2) of copy example. If the gap exceeds the reference value, perform the following adjustment. <Reference value> For simplex copying: Within ±3.0 mm For duplex copying: Within ±4.0 mm Vérification de l’angle du bord avant Vérifiez l’écart entre la ligne (1) de l’original (a) et la ligne (2) de l’exemple de copie.
- Page 12 Adjusting the DP 3. Tighten two adjusting screws (4). 1. Open the DP and loosen two adjusting screws (4) of right hinge. 4. Remove the original mat (B) and refit it (see 2. Adjust the position of the DP. steps 4 and 5 on page 3). For copy example (d): Move the DP up ( ).
- Page 13 3mm/4mm 3mm/4mm 5. Make a proof copy again. 6. Repeat steps 1 to 5 until line (2) of copy example shows the following the reference values. <Reference value> For simplex copying: Within ±3.0 mm For duplex copying: Within ±4.0 mm 5.
- Page 14 3mm/4mm 3mm/4mm Checking the angle of trailing edge Check the gap between line (1) of original (a) and line (2) of copy example. If the gap exceeds the reference value, perform the following adjustment. <Reference value> For simplex copying: Within ±3.0 mm For duplex copying: Within ±4.0 mm Vérification de l’angle du bord arrière Vérifiez l’écart entre la ligne (1) de l’original (a) et la ligne (2) de l’exemple de copie.
- Page 15 Adjusting the DP 2. Release three latches (6) at the rear of the 1. Open the DP and release two latches (5) DP using a flat-head screwdriver to remove using a flat-head screwdriver. the cover (7). Réglage du DP 2. Libérez les trois verrous (6) situés à l’arrière 1.
- Page 16 3. Adjust the height of DP. 4. Refit the cover (7) removed in step 2. For copy example (f): Loosen the nut (8) and then loosen the adjusting screw (9). 5. Remove the original mat (B) and refit it (see For copy example (g): Tighten the adjusting screw (9).
- Page 17 3mm/4mm 3mm/4mm 6. Make a proof copy again. 7. Repeat steps 1 to 6 until line (2) of copy example shows the following the reference values. <Reference value> For simplex copying: Within ±3.0 mm For duplex copying: Within ±4.0 mm 6.
- Page 18 -1.5% +1.5% Checking the magnification Adjusting the DP magnification Check the gap between line (1) of original (a) 1. Enter the maintenance mode and run the maintenance item U070 to adjust. and line (2) of copy example. If the gap exceeds For first side: Select [MAIN ADJ].
- Page 19 -1.5% +1.5% 2. Change the setting value. 3. Make a proof copy again. For copy example (h): Increase the setting value. 4. Repeat steps 1 to 3 until line (2) of copy For copy example (i): Decrease the setting value. example shows the following the reference Amount of change per step: 0.21 mm values.
- Page 20 Checking the leading edge timing Adjusting the DP leading edge timing For models with monochrome touch Check the gap between line (1) of original (a) 1. Enter the maintenance mode and run the panel and line (2) of copy example. If the gap exceeds maintenance item U071 to adjust.
- Page 21 2. Change the setting value. 3. Make a proof copy again. For copy example (j): Decrease the setting value. 4. Repeat steps 1 to 3 until line (2) of copy For copy example (k): Increase the setting value. example shows the following the reference Amount of change per step: 0.196 mm values.
- Page 22 2mm/3mm 2mm/3mm Checking the center line Adjusting the DP center line For models with monochrome touch Check the gap between line (1) of original (a) 1. Enter the maintenance mode and run the panel and line (2) of copy example. If the gap exceeds maintenance item U072 to adjust.
- Page 23 2mm/3mm 2mm/3mm 2. Change the setting value. 3. Make a proof copy again. For copy example (l): Increase the setting value. 4. Repeat steps 1 to 3 until line (2) of copy For copy example (m): Decrease the setting value. example shows the following the reference Amount of change per step: 0.086 mm values.
- Page 24 60 1mm (60 5mm) 128 1mm Automatic adjustment using the original for adjustment Before performing this adjustment, be sure to adjust the angle of leading edge and the angle of trailing edge (see pages 8 and 11). 1. Cut the trailing edge of an original for adjustment as shown in a figure. 2.
- Page 25 Adjusting the DP open/close angle To adjust the DP open/close angle to 30 3. Insert the angle adjusting plate (C) and fit it degrees To adjust the DP open/close angle to 60 using M4 × 14 screw (E). 1. Remove two stop rings (12) and pull the degrees 1.
- Page 26 PF-670...
- Page 27 CAUTION ATTENTION PRECAUCION VORSICHT ATTENZIONE 注 意 注 意 2007.6 303K656810...
-
Page 28: Supplied Parts
F Stay ...............4 Use the paper size card (E) which is the same English G M4 × 20 screw ..........2 specification paper size used in the machine. H M4 × 10 screw ..........2 Supplied parts A Paper feeder..........1 B Pin ..............2 C Joint plate ............ - Page 29 Precautions Precaution for unpacking Procedure Hold the positions shown in the figure and Releasing lift plate stopper ・ Be sure to remove any tape and/or 1. Pull each cassette out and then remove the remove the paper feeder from the outer case. cushioning material from supplied parts.
- Page 30 Installing the paper feeder 4. Place the machine on the paper feeder (A) to 5. Fix the machine using two pins (B). 3. Pull out and remove cassette 2 (3) from the fit the positioning pins (4) at the front left and 6.
- Page 31 7. Remove the screw (6) at the rear side of the 8. Remove the screw (8) to remove the metal 9. Connect the connector (10) to the machine. paper feeder to remove the cover (7). plate (9). The removed metal plate (9) is no longer required.
- Page 32 10. Attach the joint plate (C) using two screws. 11. Pass the wires (12) through the clamp (11). 12. Refit the cover (7) using the screw (6) removed in step 7. Right: Use the screw (8) removed in step 8 Be sure to pass the wires (12) through the clamp (11) because the wires (12) may Left: Use M3 ×...
- Page 33 Adjusting the height Attaching the stays (For 110V, 120 V, and 220-240 V specifications) 13. Turn four adjusters (13) until they reach the 14. Attach two stays (F) at the rear side of the paper feeder using an M4 × 20 screw (G) for each. floor and then adjust them so that the Also, attach two stays (F) at the left side using an M4 ×...
- Page 34 Checking the center line 17. Enter the maintenance mode and run 15. Connect the power plug of the machine to the wall outlet and turn the main power switch on. maintenance item U993. 16. Load paper in each cassette. 18. Select [PG1] to print a test pattern. Make a proof copy to check the operation.
- Page 35 19. Check the center line of paper (14) and the center line of test pattern (15). Adjusting the center line 20. Pull the cassette out and loosen the screw If the gap of lines (14) and (15) exceeds the reference value, proceed to step 20. (16) of the adjusting plate.
- Page 36 21. For a test pattern example (a): 22. Gently close the cassette. 23. Print a test pattern again. Turn the adjusting screw (17) clockwise, move the adjusting plate in the direction of black arrow 24. Repeat steps 20 to 23 until the gap of the (➡) and then tighten the screw (16).
- Page 37 AK-670 DF-730 Output Connector for Interconnecting Cable is non-LPS. Output: 24 V dc (426 VA max.) Please use the item below Interconnecting Cables. P/N: AVGR05700F...
- Page 38 Supplied parts Two pieces of binding screw M4 × 10 supplied Precaution for unpacking Replace steps 1 to 6 on page 5 in the Installation Guide for document finisher by the following steps. English A Curl eliminator ..........1 A ferrite core (C), two M4 × 20 binding screws (D), with the document finisher will be left.
- Page 39 3. Install the curl eliminator (A) to the left cover (1) while the lever (4) of the curl eliminator (A) is in a 6. Fix the latch catch (G) using two M4 × 20 7. Fix the guide plate (B) using the shoulder Replace step 1 on page 11 in the Installation Guide for document finisher by the following steps.
- Page 40 Addition and change of supplied parts Addition and change of procedure for installing finisher (full-color machines only) English The parts supplied with the job separator described on [Addition] [Change] page 1 are changed as below. In accordance with this Perform the following operation after step 2 on page 2. The screws (J) used in steps 3 and 4 on page 3 are change, the procedure is added and changed as follows.
- Page 41 Modification of Installation Guide for DF-730 English The supplied parts with the job separator described on Steps 3 and 4 on page 3 are modified as described below: page 1 are modified as shown below: 3. Fit the fixing plate F (H) and the fixing plate R (I) to 4.
-
Page 42: Supplied Parts
AK-71C E Binding screw M4 × 6 ........4 For installing the document finisher to a full- English F Binding screw M4 × 10........4 color machine, parts (H), (I), and (J) above G Clamp supplied with the job separator are needed. (Not used for full-color machines)....1 Supplied parts For full-color machines, two pieces of (F) are not... - Page 43 When installing the document finisher to a full- [Steps 1 to 4 below are only for full- 2. To align the document finisher with the paper color machines.] color machine, install the job separator in outlet of the MFP, slide the legs of the advance.
- Page 44 3. Fit the fixing plate F (H) and the fixing plate 4. Fit the latch catch that has been assembled [Steps 1 to 6 below are only for monochrome machines.] R (I) to the latch catch (B) using an S Tite in step 3 to the left cover (3) using the two S screw M4 ×...
- Page 45 3. Fit the curl eliminator (K) to the eject cover 5. Close the eject cover (1). 7. Align the rail retainer (C) with the groove of (1) such that the projections (4) on the cover 6. Fit the latch catch (B) to the eject cover (1) the guide rail (D) and attach the rail retainer fit into the two ends of the curl eliminator (K).
- Page 46 8.0 mm 8.0 mm 8. Orient the guide rail (D) such that its pulley 9. Secure the rail retainer (C) to the MFP using 10. Insert the guide rail (D) into the bottom of the (5) is positioned toward the MFP. two M4 ×...
- Page 47 10mm 10mm Fitting and adjusting the guide rail 12. Separate the document finisher (A) from the 13. Loosen temporarily the two screws (7) that secure the sheet metal (6) of the rail mounting plate (C) on 11. While pressing the guide rail (D) to the MFP and secure it using two M4 ×...
- Page 48 Slide the document finisher to engage it with the Adjusting the height of the document finisher latch catch of the MFP. If the document finisher and the MFP do not engage securely, perform 1. Remove the front and rear covers (9) from the following document finisher height the document finisher (A) by removing two adjustment.
- Page 49 2. Loosen the two screws (10) on the rear right caster of the document finisher (A). Adjust the height of the rear right caster by turning its adjustment bolt (13) using a cross-headed screwdriver so that the axis of the pin (11) of the latch catch is aligned with the marking of the slot (12) of the document finisher (A) when the document finisher (A) is joined to the MFP (viewed from the machine front).
- Page 50 3. Adjust the height of the front right caster in the same manner as in step 2 so that each center of 4. Adjust the height of the left two casters in the the hooking portions (15) of the latch catch is aligned with the center of the two hooks (14) on the same manner as in step 2 so that the right document finisher (A) when the document finisher (A) is joined to the MFP (viewed from above).
- Page 51 5. Reattach the removed parts to their original Connecting the signal cable Connecting the signal cable (monochrome machines only) (full-color machines only) positions. 1. Connect the signal cable (17) of the 1. Connect the signal cable (17) of the document finisher (A) to the MFP, pass the document finisher (A) to the MFP.
-
Page 52: Operation Check
Operation check 1. Insert the MFP power plug to the wall outlet and turn the main switch on. 2. Make test copies and check that the document finisher (A) operates correctly. Vérification du fonctionnement 1. Insérer la fiche d’alimentation du MFP dans la prise murale et mettre l’interrupteur principal sous tension. - Page 53 DF-670...
- Page 54 F Upper left cover..........1 English G Front eject cover ..........1 H Rear eject cover..........1 Finisher tray ...........1 Supplied parts J Staple cartridge ..........1 A Paper conveying unit........1 K Blindfold seal..........1 B Sub staple cover..........1 L Large pin ............1 C Staple cover...........
- Page 55 Precautions Important Procedure When placing the paper conveying unit (A) on Removing the covers ・ Be sure to remove any tape and/or 1. Open the front cover (1) and left cover 1 (2). the floor or the like, be sure to place it upside cushioning material from supplied parts.
- Page 56 4. Release the latch (7) using a flat-head 5. Remove the screw (9) to remove the metal 6. Release the latch (11) using a flat-head screwdriver to remove the cover (8). plate (10). screwdriver and slide the cover (12) to the The removed metal plate (10) is no longer front to remove.
- Page 57 8. Remove the screw (15) from the rear side of Attaching the sub staple cover 9. Insert the hook (17) of the sub staple cover the machine to remove the cover (16). (B) and turn the cover (B) in the direction of arrow until it clicks to attach.
- Page 58 Installing the paper conveying unit 10. Insert the paper conveying unit (A) from the machine front and slide it to the left. 11. Fix the paper conveying unit (A) using two pins. Front: Use the large pin (L). Rear: Use the small pin (M). Installation de l’unité...
- Page 59 Releasing the lever holding plate Installing the finisher process table 12. Loosen the screw (18) of the paper 14. Loosen the screw (20) approx. 3 turns. conveying unit (A) and release the lever Do not turn the screw (20) too far, otherwise it may drop into the machine. holding plate (19) in the direction of arrow.
- Page 60 17. Extend the wires of connectors (22) of the finisher process table (E) straight. 19. At the rear side of the machine, connect the 18. Insert the finisher process table (E) from the front side of the machine and hang the hooks (23) on connector (24) of the finisher process table the right and left of the table (E) onto the machine.
- Page 61 Attaching the upper left cover Installing the staple cover 22. Insert five catches (28) to attach the upper 23. Release two latches (29) of the cover (6) removed in step 3 using a flat-head screwdriver to left cover (F). remove the lower clip holder (30). 24.
- Page 62 25. Fix the staple cover (C) using three screws. 26. Replace the clip holder (3) removed in step Attaching the finisher tray 28. Fix the front eject cover (G) and the rear Upper/Lower right: Use two screws (4) eject cover (H) using an M3 × 6 screw (N) removed in step 3.
- Page 63 29. Insert the front and rear hooks of the finisher Attaching the staple cartridge Adhering the blindfold seal (For models with 30. Open the cover (31) and insert the staple monochrome touch panel only) tray (I) into the front eject cover (G) and the 32.
-
Page 64: Checking The Operation
Checking the operation 1. Connect the power plug of the machine to the wall outlet and turn the main power switch on. 2. Make a proof copy in the staple mode to check the finishing and stapling. Vérification du fonctionnement 1. - Page 65 JS-670...
- Page 66 F Blindfold seal..........1 English G Large pin ............1 H Small pin ............1 M3 × 6 screw ..........1 Supplied parts A Job separator..........1 B LED PWB unit ..........1 C Tray holder ............ 1 D Job separator tray.......... 1 E Left front cover..........1 F Étiquette de masquage ........1 Français G Grande goupille..........1...
- Page 67 Precautions Procedure 4. Release the latch (7) using a flat-head Removing the covers screwdriver to remove the cover (8). ・ Be sure to remove any tape and/or 1. Open the front cover (1) and left cover 1 (2). cushioning material from supplied parts. 2.
- Page 68 5. Remove the screw (9) to remove the metal 6. Release the latch (11) using a flat-head 8. Remove the screw (15) from the rear side of plate (10). screwdriver and slide the cover (12) to the the machine to remove the cover (16). The removed metal plate (10) is no longer front to remove.
- Page 69 Installing the job separator 9. Insert the job separator (A) from the machine front and slide it to the left. 10. Fix the job separator (A) using two pins. Front: Use the large pin (G). Rear: Use the small pin (H). Installation du séparateur de travaux 9.
- Page 70 11. Connect the connector (17) at the rear of the job separator to YC4 (18) on the engine PWB. 12. Loosen the screw (19) to make the drive unit of the job separator ready for starting to drive. 13. Tighten the screw (19). 14.
- Page 71 Attaching the LED PWB unit Installing the job separator tray 15. Connect the connector (20) of the job separator to the connector (21) of the LED PWB unit (B). 17. Insert the tray holder (C) into two openings 16. Pass the wires through the space (22) and fix the LED PWB unit (B) using the M3 × 6 screw (I). (23) and then slide the holder to the right until it clicks.
- Page 72 18. Install the job separator tray (D) from the front side of the machine. Left: Insert the tray into the groove (24). Right: Hang the hook (25) on the tray holder (C). 18. Installez le plateau du séparateur de travaux (D) depuis le côté avant de la machine. Gauche: Insérez le plateau dans la rainure (24).
- Page 73 Installing the left front cover 21. Replace the cover (8) removed in step 4. 19. Release two latches (26) of the cover (6) removed in step 3 using a flat-head screwdriver to 22. Install the left front cover (E) using the two remove the lower clip holder (27).
- Page 74 Adhering the blindfold seal (For models with Checking the operation 3. Make a proof copy to check that a copy is monochrome touch panel only) 1. Connect the power plug of the machine to ejected to the job separator tray. 25.
- Page 75 Fax System M...
- Page 76 English To install the FAX circuit board, see page 1. To install the FAX circuit board as Dual FAX, see page 10. Français Pour installer la carte à circuits FAX, se reporter à la page 1. Pour installer la carte à circuits FAX comme FAX double, se reporter à la page 10. Español Para instalar la tarjeta de circuitos de FAX, vea la página 1.
- Page 77 Supplied parts F Alphabet label ..........1 Precautions G FAX operation section label A FAX circuit board ........... 1 ・ Be sure to remove any tape and/or (except for 100 V model)........1 B Modular connector cable cushioning material from supplied parts. H FAX operation section label (100 V/120 V/Australian models only) ...
- Page 78 <d-Copia 300MF/400MF/500MF> <d-Copia 2500MF/3000MF> Procedure Install the FAX circuit board. 2. Insert the FAX circuit board (A) along the groove in OPT1 and secure the board with two screws (1) that have Remove the cover. been removed in step 1. 1.
- Page 79 <d-Copia 300MF/400MF/500MF> <d-Copia 2500MF/3000MF> 10 mm Install the ferrite core Connect the MFP to the telephone line. (for 110 V/230 V/New Zealand models only). 4. Plug the telephone line modular connector cable with the ferrite core (D) into the line terminal, 3.
- Page 80 <d-Copia 300MF/400MF/500MF> <d-Copia 2500MF/3000MF> 30 10 mm Install the ferrite core (telephone line of the Connect the MFP to the separate phone (except for New Zealand model). separate phone). 6. Plug the separate phone line with the ferrite core (D) into the line terminal, and then connect the 5.
- Page 81 <d-Copia 300MF/400MF/500MF> <d-Copia 2500MF/3000MF> Seal the terminal (for New Zealand model). 7. Wipe the surface of the telephone terminal with alcohol and adhere the terminal seal (C). Perform this procedure for New Zealand model only. Fermer hermétiquement la borne (modèle pour la Nouvelle-Zélande). 7.
- Page 82 Attach the alphabet labels. 8. Wipe the area above the numeric keys at the right side of the operation panel with alcohol and adhere the alphabet labels (F) here. In Asia and Oceania, use PQRS TUV WXYZ label, and do not use PRS TUV WXY and OPER labels. <When installing in d-Copia 300MF/400MF/500MF>...
- Page 83 Attach the FAX operation section label. 9. Wipe the label surface shown in the figure with alcohol and adhere the FAX operation section label (G) of the corresponding language. <When installing in d-Copia 300MF/400MF/500MF> Adhere the FAX operation section label (G) that A is shown. <When installing in d-Copia 2500MF/3000MF>...
- Page 84 <d-Copia 400MF/500MF> <d-Copia 2500MF/3000MF> XXXXXXXXXX XXXXXXXXXX Attach the JATE label (for 100 V model only). 10. Perform this procedure for 100 V model only. Fixer l’étiquette JATE (modèle 100 V seulement). 10. Effectuer cette procédure pour le modèle 100 V seulement. Coloque la etiqueta JATE (sólo para el modelo de 100 V).
- Page 85 For Australian model <d-Copia 300MF/400MF/500MF> <d-Copia 2500MF/3000MF> For New Zealand model Attach the approval label (for Australian/New Zealand model only). When installing the optional Dual FAX (when 11. Attach the approval label (J) after wiping with alcohol. adding the FAX circuit board to OPT2), proceed Perform this procedure for Australian/New Zealand model only.
- Page 86 Install the Dual FAX Remove the cover. 1. Remove two screws (1) and then remove Refer to page 1 for the supplied parts. OPT2 cover (2). When adding the FAX circuit board to OPT2, the second FAX operation section label (G) and the approval label (J) are not required.
- Page 87 <d-Copia 300MF/400MF/500MF> <d-Copia 2500MF/3000MF> Install the FAX circuit board. 2. Insert the FAX circuit board (A) along the groove in OPT2 and secure the board with two screws (1) that have been removed in step 1. Do not touch the FAX circuit board (A) terminal. Hold the top and bottom of the FAX circuit board, or the projection of the board to insert the FAX circuit board (A).
- Page 88 <d-Copia 300MF/400MF/500MF> <d-Copia 2500MF/3000MF> 10 mm Seal the terminal. Install the ferrite core (for 110 V/230 V/New 3. Wipe the surface of the telephone terminal with alcohol and adhere the terminal seal (C). Zealand models only). 4. Install the ferrite core (D) onto the modular The telephone terminal on the FAX circuit board installed to OPT2 is unavailable (invalid).
- Page 89 <d-Copia 300MF/400MF/500MF> <d-Copia 2500MF/3000MF> Connect the MFP to the telephone line. Secure the modular connector cable (only when installing in d-Copia 300MF/400MF/500MF). 5. Insert the plug with ferrite core (D) into the line terminal. Connect the other plug to the telephone 6.
- Page 90 Initialize the FAX circuit board. Refer to the operation guide to create a FAX 1. Plug the MFP into a power outlet, and turn on the main power. Box. 2. If the FAX circuit board has been installed only in OPT1 or installed both in OPT1 and OPT2 (to initialize all FAX circuit boards) Perform the maintenance mode U600 to initialize the fax control assembly.
- Page 91 Data Security Kit C...
- Page 92 303KP56710 Data Security Kit (C) Installation Guide For MFP English Models Supplied Parts Guide d'installation du kit de sécurité des USB Key ......................1 données (C) pour les modèles MFP Precautions before Activating Guía de instalación del Kit de seguridad (C) para ・...
- Page 93 Datensicherheits-Kit (C) – Installationsanleitung Deutsch für MFP-Modelle Gelieferte Teile Kit Sicurezza Dati (C) - Guida all'installazione per i USB-Schlüssel ....................1 modelli MFP Vorsichtsmaßnahmen vor der Aktivierung Data Security Kit (C) 複合機用設置手順書 ・ Durch Aktivieren des Datensicherheits-Kits werden alle Daten gelöscht, die vom Kunden auf der Festplatte gespeichert wurden.
- Page 94 UG-30...
- Page 95 303KR56710 UG-30 Installation Guide English Guide d'installation de l'UG-30 Supplied parts Guía de instalación de UG-30 USB Key................... 1 Precautions before Activating Be sure that the Main Power Switch of the machine is turned off. Activating Procedure 1. Insert the USB Key into the USB Memory Slot of the machine and turn the Main Power Switch on.
- Page 96 UG-30 Installationsanleitung Deutsch UG-30 - Guida all'installazione Gelieferte Teile UG-30 設置手順書 USB-Schlüssel ................. 1 Vorsichtsmaßnahmen vor der Aktivierung Stellen Sie sicher, dass der Netzschalter des Geräts ausgeschaltet ist. Aktivierungsverfahren 1. Stecken Sie den USB-Schlüssel in den USB-Speichersteckplatz des Geräts ein und schalten Sie den Netzschalter ein. 2.
-
Page 97: Updating Status
UPDATING STATUS DATE UPDATED PAGES PAGES CODE 10/2007 EDITION Y108820-3...
Need help?
Do you have a question about the DP-670 and is the answer not in the manual?
Questions and answers