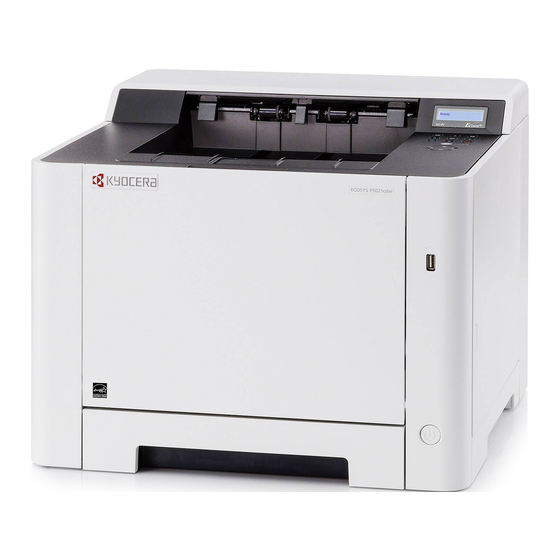
Kyocera Ecosys P5021cdn Setup Manual
Hide thumbs
Also See for Ecosys P5021cdn:
- Operation manual (233 pages) ,
- Service manual (217 pages) ,
- Quick manual (36 pages)
Advertisement
Quick Links
Advertisement

Subscribe to Our Youtube Channel
Summary of Contents for Kyocera Ecosys P5021cdn
- Page 1 Kyocera Wi-Fi Installation Setup Guide...
- Page 2 STEP 1 KYOCERA WI-FI INSTALLATION SETUP GUIDE After receiving your printer, remove the papers from the packing list envelope. Be sure not to discard the AIS ID sticker as this includes your equipment ID number. (855) 448-4247 AIS-NOW.com...
- Page 3 STEP 2 KYOCERA WI-FI INSTALLATION SETUP GUIDE Open the box, remove the packing, lift the printer out, and remove it from the plastic bag. (855) 448-4247 AIS-NOW.com...
- Page 4 STEP 3 KYOCERA WI-FI INSTALLATION SETUP GUIDE Remove the moisture bag which is taped to the top of the output tray. Read and remove the sticker on the front of the machine. (855) 448-4247 AIS-NOW.com...
- Page 5 STEP 4 KYOCERA WI-FI INSTALLATION SETUP GUIDE Open the right side of the panel and remove the yellow tape from the toner cartridges. Close the ride side panel and place the AIS ID sticker on the door. (855) 448-4247 AIS-NOW.com...
- Page 6 STEP 5 KYOCERA WI-FI INSTALLATION SETUP GUIDE Plug in the power cord and power on the printer by pressing the round power button on the front of the device. Note, the device will take a few moments to warm-up. The screen will ask for a language. Press “OK”...
- Page 7 STEP 6 KYOCERA WI-FI INSTALLATION SETUP GUIDE The screen will read, “Managed by Admin (office). Press “OK.” Add paper to the paper tray and wait for the toner to be added. (855) 448-4247 AIS-NOW.com...
- Page 8 STEP 7 KYOCERA WI-FI INSTALLATION SETUP GUIDE Select, “Menu” and then press the Down Arrow until you see “Wi-Fi Direct Set.” Then press the Right Arrow once. Use the Up and Down Arrows to enter your ID. You can select the Right Arrow to move to the next digit (Note, your ID is the last two digits of the model number plus 00).
- Page 9 STEP 8 KYOCERA WI-FI INSTALLATION SETUP GUIDE Use the Up and Down Arrows to enter your Password. Then, select, “OK.” Note, your password is the last two digits of the model number plus 00. Then, select, “OK” again. Press the Up Arrow to turn Wi-Fi “On.” Then, select “OK.”...
- Page 10 STEP 9 KYOCERA WI-FI INSTALLATION SETUP GUIDE Power off the printer and then power it back on. Select, “Menu” and press the Down Arrow to “Wi-Fi Direct.” Then press the Right Arrow once. (855) 448-4247 AIS-NOW.com...
- Page 11 STEP 10 KYOCERA WI-FI INSTALLATION SETUP GUIDE Press the Down Arrow twice so that Press the Down Arrow once so that the message reads, “Network Name the message reads, “Password.” (SSID).” IMPORTANT: please make IMPORTANT: please make note of note of the SSID to be used later.
- Page 12 STEP 11 KYOCERA WI-FI INSTALLATION SETUP GUIDE On your computer or laptop select your wireless network setting. Select the wireless network that matches the SSID on your printer. Then select, “Connect.” (855) 448-4247 AIS-NOW.com...
- Page 13 STEP 12 KYOCERA WI-FI INSTALLATION SETUP GUIDE When prompted, to enter a PIN from the router label, select the link, “Connect using a security key,” instead. Enter the password that was noted during the printer setup and then click, “Next.”...
- Page 14 STEP 13 KYOCERA WI-FI INSTALLATION SETUP GUIDE Open your Wi-Fi Setup Tool folder and run the WifiSetupToolMain.exe. Be sure to select “Do not use WPS.” Then, click “Next” twice. Select, “Wi-Fi Direct,” and then click, “Next” two times. (855) 448-4247...
- Page 15 STEP 14 KYOCERA WI-FI INSTALLATION SETUP GUIDE Click, “Next.” (855) 448-4247 AIS-NOW.com...
- Page 16 STEP 15 KYOCERA WI-FI INSTALLATION SETUP GUIDE Select, “Express” and click, “Finish.” (855) 448-4247 AIS-NOW.com...
- Page 17 STEP 16 KYOCERA WI-FI INSTALLATION SETUP GUIDE Select your printer and click, “Next.” Enter your printer Login Username and Password (Both of these credentials are: Admin). Then, click “Next.” (855) 448-4247 AIS-NOW.com...
- Page 18 STEP 17 KYOCERA WI-FI INSTALLATION SETUP GUIDE Select your wireless network and then click, “Next.” Enter your wireless network password (Pre-Shared Key) and then click,“Next.” (855) 448-4247 AIS-NOW.com...
- Page 19 STEP 18 KYOCERA WI-FI INSTALLATION SETUP GUIDE Click, “Finish.” Your printer is connected to the network when the Wi-Fi light illuminates green. (855) 448-4247 AIS-NOW.com...


Need help?
Do you have a question about the Ecosys P5021cdn and is the answer not in the manual?
Questions and answers