Table of Contents
Advertisement
Quick Links
Advertisement
Table of Contents

Related Manuals for Kyocera DF-760


Summary of Contents for Kyocera DF-760
- Page 1 DF-760(B) MT-720(B) BF-720 PH-5A PH-5B PH-5C Operation Guide...
- Page 2 Please read the Operation Guide before using this product. After reading, keep it close to the copier/printer for easy reference. This guide mainly explains usage when used with the copier feature. See the Printer Driver User Guide for more information on usage from a computer when using the printer feature.
-
Page 3: Table Of Contents
Specifications ............37 DF-760(B), MT-720(B), BF-720, PH-5A, PH-5B AND PH-5C OPERATION GUIDE... - Page 4 DF-760(B), MT-720(B), BF-720, PH-5A, PH-5B AND PH-5C OPERATION GUIDE...
-
Page 5: Safety Information
[Always connect the machine to an outlet with a ground connection] ..Please contact your service representative to order a replacement if the safety warnings in this Operation Guide are illegible or if the guide itself is missing (fee required). DF-760(B), MT-720(B), BF-720, PH-5A, PH-5B AND PH-5C OPERATION GUIDE... -
Page 6: Caution Labels
The interior of this section reaches high temperatures. DO NOT touch this section as there is a danger of being burned. LABEL 3 DO NOT place any objects underneath Tray A. NOTE: DO NOT REMOVE THESE LABELS. DF-760(B), MT-720(B), BF-720, PH-5A, PH-5B AND PH-5C OPERATION GUIDE... -
Page 7: Installation Precautions
Immediately turn the copier/printer OFF (O) at the main power switch and remove the copier/printer power plug from its outlet. Then contact your service representative. DF-760(B), MT-720(B), BF-720, PH-5A, PH-5B AND PH-5C OPERATION GUIDE... - Page 8 Do not touch electrical parts, such as connectors or printed circuit boards. They could be damaged by static electricity. DO NOT attempt to perform any operations not explained in this Operation Guide. DF-760(B), MT-720(B), BF-720, PH-5A, PH-5B AND PH-5C OPERATION GUIDE...
-
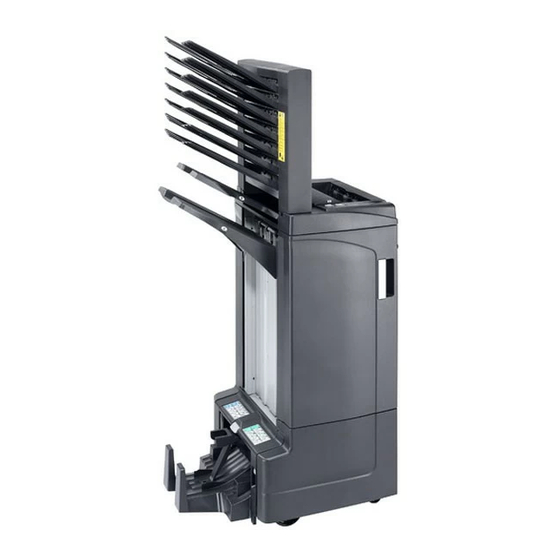
Page 9: Names Of Parts
Inner tray cover (D6) Trays 1 - 7 Inner tray cover (D7) Mailbox cover Staple cartridge holder A Right cover (D8) Pressure roller bottom adjust knob (E1) Pressure roller top adjust knob (E2) DF-760(B), MT-720(B), BF-720, PH-5A, PH-5B AND PH-5C OPERATION GUIDE... -
Page 10: Operation
Tray A, Tray B and Tray C differs depending on the size of copy paper being used. For further information refer to page 37. On completion of the job, remove the copies. DF-760(B), MT-720(B), BF-720, PH-5A, PH-5B AND PH-5C OPERATION GUIDE... - Page 11 Tray A, Tray B and Tray C differs depending on the size of copy paper being used. For further information refer to page 37. On completion of the job, remove the copies. DF-760(B), MT-720(B), BF-720, PH-5A, PH-5B AND PH-5C OPERATION GUIDE...
-
Page 12: Staple Mode
17" and 11 " × × • 14" and 8 11" × × 11x8 " 11x17" x11" 8 x14" x11" x14" Select Sort: On Mode on the operation panel of the machine. DF-760(B), MT-720(B), BF-720, PH-5A, PH-5B AND PH-5C OPERATION GUIDE... - Page 13 Load the originals in the Document Processor, or one at a time on the Platen. NOTE: Refer to the Operation Guide for the machine for Document Processor and Platen specifications. Select other features as required and press Start. DF-760(B), MT-720(B), BF-720, PH-5A, PH-5B AND PH-5C OPERATION GUIDE...
- Page 14 Select the Booklet Stitching mode on the operation panel of the machine. NOTE: Refer to the Operation Guide for the machine for more detailed information. DF-760(B), MT-720(B), BF-720, PH-5A, PH-5B AND PH-5C OPERATION GUIDE...
- Page 15 220 g/m NOTE: Punching requires the optional punching unit. Tray C cannot be specified as the output destination for punch mode. Select Hole Punch mode on the operation panel of the machine. DF-760(B), MT-720(B), BF-720, PH-5A, PH-5B AND PH-5C OPERATION GUIDE...
-
Page 16: Interrupt Mode
When done copying in interrupt mode, turn off interrupt copy mode from the machine itself. Replace the original and press Start. Copying of the interrupted job resumes. DF-760(B), MT-720(B), BF-720, PH-5A, PH-5B AND PH-5C OPERATION GUIDE... -
Page 17: Preparation For Usage
To use the machine to select the tray required, refer to the Operation Guide for the machine. On the full color machine, the output tray can be specified with the copy and fax functions. On the monochrome machine, the output tray can be specified with the copy, fax, and printer functions. DF-760(B), MT-720(B), BF-720, PH-5A, PH-5B AND PH-5C OPERATION GUIDE... -
Page 18: Maintenance
See page 18 to refill staple cartridge holder B/C of the optional folding unit. While pushing the finisher release lever, pull the finisher out from the machine. Open the right cover (D8). Remove the staple cartridge holder. DF-760(B), MT-720(B), BF-720, PH-5A, PH-5B AND PH-5C OPERATION GUIDE... - Page 19 Re-install the staple cartridge holder. The staple cartridge holder will click into place when it has been inserted correctly. Close the right cover (D8) and re-install the finisher back into position on the machine. DF-760(B), MT-720(B), BF-720, PH-5A, PH-5B AND PH-5C OPERATION GUIDE...
- Page 20 When re-installing, align the triangle marks on the staple cartridge holder and the staple unit. The staple cartridge holder will click into place when it has been inserted correctly. Push the folding unit back into position. DF-760(B), MT-720(B), BF-720, PH-5A, PH-5B AND PH-5C OPERATION GUIDE...
- Page 21 Take care not to spill the waste hole punch scraps when removing the container. Dispose of the hole punch scraps appropriately. Re-install the punch waste box. Align it with the guides in the Document Finisher. Close the front cover. DF-760(B), MT-720(B), BF-720, PH-5A, PH-5B AND PH-5C OPERATION GUIDE...
-
Page 22: Troubleshooting
Document Finisher and the machine. While pushing the finisher release lever, pull the finisher out from the machine. DF-760(B), MT-720(B), BF-720, PH-5A, PH-5B AND PH-5C OPERATION GUIDE... - Page 23 If the illustration shown displays on the machine’s operation panel, there is a paper jam in the conveyor section to Tray A. Lift open Tray B and remove the jammed paper. DF-760(B), MT-720(B), BF-720, PH-5A, PH-5B AND PH-5C OPERATION GUIDE...
- Page 24 If a jammed paper is located at the bottom of the tray and it is difficult to remove, lift the inner tray paper holder and remove the jammed paper from the lower side of the tray. DF-760(B), MT-720(B), BF-720, PH-5A, PH-5B AND PH-5C OPERATION GUIDE...
- Page 25 If the illustration shown displays on the machine’s operation panel, there is a paper jam in the conveyor section to Tray B. Remove any jammed paper from the ejection section. Open the tray C. DF-760(B), MT-720(B), BF-720, PH-5A, PH-5B AND PH-5C OPERATION GUIDE...
- Page 26 Close the tray C and front cover. Tray C If the illustration shown displays on the machine’s operation panel, there is a paper jam in the conveyor section to Tray C. DF-760(B), MT-720(B), BF-720, PH-5A, PH-5B AND PH-5C OPERATION GUIDE...
- Page 27 Open the tray C and front cover. Turn the conveyor knob (D2) to the left to feed the paper along to enable easy removal. Follow step 3 onward on page 22 to remove jammed paper. DF-760(B), MT-720(B), BF-720, PH-5A, PH-5B AND PH-5C OPERATION GUIDE...
- Page 28 If the illustration shown displays on the machine’s operation panel, there is a paper jam in the Mailbox. Open the mailbox cover and remove the jammed paper. Close the mailbox cover. DF-760(B), MT-720(B), BF-720, PH-5A, PH-5B AND PH-5C OPERATION GUIDE...
- Page 29 If there is no paper jam in the right cover (D8), proceed to the following step. Close the right cover (D8) and re-install the finisher back into position on the machine. Open the front cover. Pull out the inner tray (D5). DF-760(B), MT-720(B), BF-720, PH-5A, PH-5B AND PH-5C OPERATION GUIDE...
- Page 30 Open the inner tray cover (D7) and remove the jammed paper. Close the inner tray cover (D6) and inner tray cover (D7). NOTE: Close the inner tray cover (D6) securely until the magnet catches. DF-760(B), MT-720(B), BF-720, PH-5A, PH-5B AND PH-5C OPERATION GUIDE...
- Page 31 Turn the folding unit conveyor knob (D10) to right to feed the paper along to enable easy removal, and remove the paper. Open the folding unit paper plate guide (D9) and remove the paper jam. DF-760(B), MT-720(B), BF-720, PH-5A, PH-5B AND PH-5C OPERATION GUIDE...
- Page 32 Lift open the folding tray and remove any jammed paper. Close the open trays and covers, and return the folding unit to its original position. DF-760(B), MT-720(B), BF-720, PH-5A, PH-5B AND PH-5C OPERATION GUIDE...
- Page 33 Paper curled downward Open the front cover. ‘ ’ Set pressure roller top adjust knob (E2) to . For operation method, see Paper curled upward on page 32. DF-760(B), MT-720(B), BF-720, PH-5A, PH-5B AND PH-5C OPERATION GUIDE...
- Page 34 If the paper is severely curled, turn the knob to "5". Align the knob with a number to lock the knob by setting the knob protrusions into the frame cutout area. DF-760(B), MT-720(B), BF-720, PH-5A, PH-5B AND PH-5C OPERATION GUIDE...
-
Page 35: Clearing A Staple Jam
A. While pushing the finisher release lever, pull the finisher out from the machine. Open the right cover (D8). DF-760(B), MT-720(B), BF-720, PH-5A, PH-5B AND PH-5C OPERATION GUIDE... - Page 36 Re-install the staple cartridge holder. The staple cartridge holder will click into place when it has been inserted correctly. Close the right cover (D8) and re-install the finisher back into position on the machine. DF-760(B), MT-720(B), BF-720, PH-5A, PH-5B AND PH-5C OPERATION GUIDE...
- Page 37 Remove staple cartridge holder B or C. Open the cover plate (B) of the staple cartridge holder and remove any jammed staples. Close the cover (B) plate of the staple cartridge holder into its original position. DF-760(B), MT-720(B), BF-720, PH-5A, PH-5B AND PH-5C OPERATION GUIDE...
- Page 38 When re-installing, align the triangle marks on the staple cartridge holder and the staple unit. The staple cartridge holder will click into place when it has been inserted correctly. Push the folding unit back into position. DF-760(B), MT-720(B), BF-720, PH-5A, PH-5B AND PH-5C OPERATION GUIDE...
-
Page 39: Specifications
) A4: 1500 sheets A3: 750 sheets Paper Weight (220 g/m ) A4: 1240 sheets A3: 620 sheets †† Limited to A4, A4R, B5, 11 × 8 ", 8 × 11" and 16K. DF-760(B), MT-720(B), BF-720, PH-5A, PH-5B AND PH-5C OPERATION GUIDE... - Page 40 6 to 9 copies in a set: 20 sets 10 to 16 copies in a set: 10 sets Paper Weight 60-220 g/m (1 cover sheet only for 91 g/m or greater) DF-760(B), MT-720(B), BF-720, PH-5A, PH-5B AND PH-5C OPERATION GUIDE...
- Page 41 MEMO...
- Page 42 MEMO...
- Page 44 First edition 2009.7 Printed in China 303LT56030...
Need help?
Do you have a question about the DF-760 and is the answer not in the manual?
Questions and answers