Advertisement
PACKAGE CONTENTS
* 1x PoE switch
CONNECTION
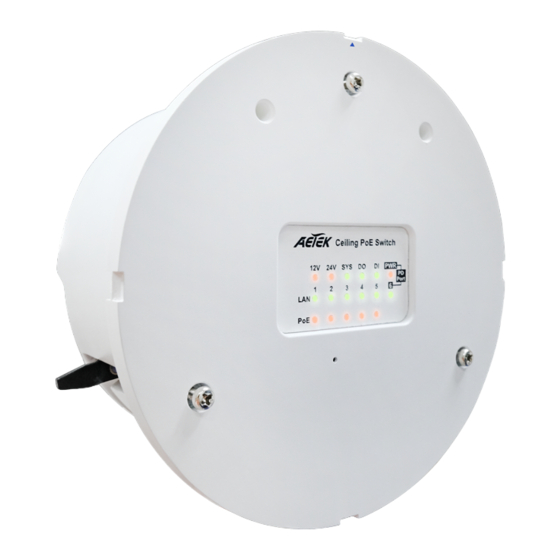
C62-050-30-A / C62-050-30-B
SYS LED
24V LED
12V LED
LAN LED
PoE LED
Reset
Installed on the system ceiling
1. Attach the ceiling mount bracket to plasterboard, etc.
● It is recommended to add the fastening screw to the hole size of the ceiling, turn it with a screwdriver to install it.
The ceiling thickness that can be connected with the clamping bracket is from 5 to 45 mm.
● The recommended screw torque is 7kgf-cm±3.
● Install on the ceiling with sufficient strength.
● If you have to install it on rock wool ceiling and other weak ceiling panels, please provide enough reinforcement.
● The recommended ceiling opening size is φ150mm.
● The recommended minimum space (height) for ceiling switch installation is 140mm (For Installation and CAT5/6 cable routing.)
Installation Steps
C62-050-30-A / C62-050-30-B
Step 1
φ150mm
Recommend hole size
for mounting ceiling PoE switch
is φ150 mm.
Step 4
Push up ceiling PoE switch to
the ceiling hole.
C62-050-30-A L2 PRO bt Ceiling PoE Switch
C62-050-30-B L2 PRO bt Ceiling PoE Switch
Quick Installation Guide
* 1x Quick Installation Guide
DO LED
DI LED
PWR LED
PD Port
Step 2
φ150mm
Connect LAN cable to
ceiling PoE switch.
Step 5
140mm
Use a flathead screwdriver to installing
Turn right to lock.
(Turn left release)
DI
DO
bt PoE Input
LAN
Connect 12V / 24V / DI / DO cable
140mm
P/N: A625016600G
24VDC Output
12VDC Output
at PoE Output
bt PoE Output
GND
Step 3
φ150mm
12V / 24V
DI / DO
to ceiling PoE switch.
Step 6
Attach cover to
ceiling PoE switch.
140mm
45~50mm
Advertisement
Table of Contents

Related Manuals for AETEK C62-050-30-A


Summary of Contents for AETEK C62-050-30-A
- Page 1 C62-050-30-A L2 PRO bt Ceiling PoE Switch P/N: A625016600G C62-050-30-B L2 PRO bt Ceiling PoE Switch Quick Installation Guide PACKAGE CONTENTS * 1x PoE switch * 1x Quick Installation Guide CONNECTION C62-050-30-A / C62-050-30-B SYS LED DO LED 24VDC Output...
- Page 2 7 ~ 12 seconds All LEDs stay ON AETEK INC. 6F, No.192-1, Lien-Cheng Rd., Chung-Ho, New Taipei City, 235, Taiwan, R.O.C. Copyright © 2023 AETEK INC. All rights reserved. | T : +886 - 2-82452822 | W : www.aetektec.com | E : sales@aetektec.com...
Need help?
Do you have a question about the C62-050-30-A and is the answer not in the manual?
Questions and answers