Table of Contents

Subscribe to Our Youtube Channel
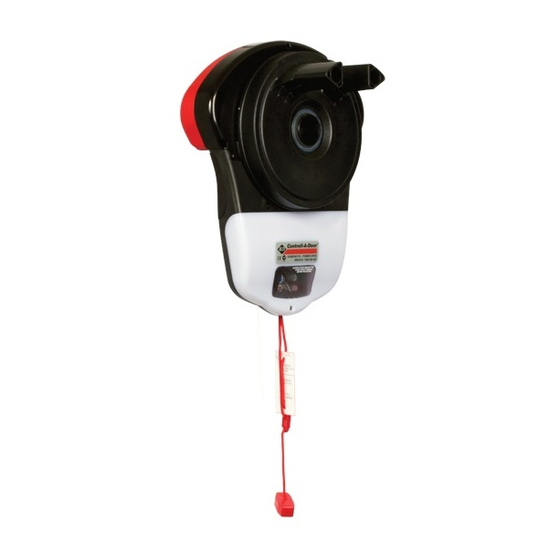
Related Manuals for B&D Power Drive RDO-1V4


Summary of Contents for B&D Power Drive RDO-1V4
- Page 1 Power Drive & Roll-A-Pro ® Rolling Door Opener installation instructions These instructions are intended for professional garage door opener installers. All references are taken from inside looking out. DOC# 161061_04 RELEASED: 27/10/22 www.bnd.com.au...
-
Page 2: Table Of Contents
® Power Drive & Roll-A-Pro installation instructions Contents 13. Auto-Close (CAD PD Only) Installation Instructions 13.1 Safety Beams 1. Installation Safety Warnings! 13.2 Auto Close Option 1. Home Owner Safety Warnings! 14. Coding a Transmitter 2. Kit Contents 14.1 Storing the Transmitter Code 3. -
Page 3: Installation Safety Warnings
® Power Drive & Roll-A-Pro installation instructions 1. Installation Safety Warnings! This automatic garage door opener is designed and tested to offer safe service provided it is installed and operated in strict accordance with the following safety warnings. Failure to comply with the following instructions may result in death, serious personal injury or property damage. -
Page 4: Home Owner Safety Warnings
® Power Drive & Roll-A-Pro installation instructions 1. Home Owner Safety Warnings! This automatic garage door opener is designed and tested to offer safe service provided it is installed and operated in strict accordance with the following safety warnings. Failure to comply with the following instructions may result in death, serious personal injury or property damage. -
Page 5: Kit Contents
® Power Drive & Roll-A-Pro installation instructions 2. Kit Contents Fastner Bag 6. 2 x Nilock Nut 1. Power Drive 1 x RDO-1V4 drive unit 7. 2 x 2 x 3/16 x 1/2 flat washers Roll-A-Pro 1 x RDO-1V3 drive unit 8. -
Page 6: Setup Requirements
® Power Drive & Roll-A-Pro installation instructions 4. Setup Requirements 4.1 The Opener: a. MUST BE installed in a dry position, protected from weather. (Moisture or corrosion not covered by Warranty) b. Is factory set for RIGHT HAND SIDE installation (from inside garage), but capable of LEFT HAND SIDE installation. c. -
Page 7: Door Preparation
® Power Drive & Roll-A-Pro installation instructions 5. Door Preparation 5.1 Prepare the Door: a. Clean the guides if there is any oil or wax present using a suitable white spirit. The only lubricant suitable for use on door guides is silicon spray. DO NOT use WD-40, RP-7, petroleum grease, or similar. b. -
Page 8: Pinning The Door
® Power Drive & Roll-A-Pro installation instructions 7. Pinning the Door 7.1 Pinning the Door to the drum: Pinning the door’s curtain to its drum maintains security when the Screw into opener is closed. If the curtain is not pinned the door can be partially the low part opened manually. -
Page 9: Mounting The Opener
® Power Drive & Roll-A-Pro installation instructions 9. Mounting the Opener 9.1 Raising the Door: a. When in position, remove the U-bolt (or bolts) and saddle from the door bracket. b. Lift the door up and away from the wall until clear of the door bracket, before lowering the door to rest on the door stand or prop. -
Page 10: Setting The Travel Limits
® Power Drive & Roll-A-Pro installation instructions 10. Setting the Travel Limits 10.1 Initial Preparation: S E T T I N G L I M I T S When setting the Close limit, ensure the position CAUTION: Limit setup is not available when is when the door makes rst contact with the running on battery backup ground. -
Page 11: Clearing The Door Limit Positions
® Power Drive & Roll-A-Pro installation instructions 10.2 Clearing the Door Limit Positions 10.3 Controller memory reset NOTE: If unhappy with the travel limit settting, restart this To clear the controller: procedure by clearing the door limit positions as per below first. -
Page 12: Safety Testing
® Power Drive & Roll-A-Pro installation instructions 11. Safety Testing 11.1 Test the Close Cycle CAUTION: Take care when completing a a. Press the OPERATE button to open the door. safety test. Failure to follow this warning b. If the door closes, press the OPERATE button to stop the door, can result in serious personal injury then press OPERATE again to open. -
Page 13: To Recall Factory Set Force
® Power Drive & Roll-A-Pro installation instructions 11.7 To Recall Factory Set Force 11.8 To Re-profile the door T O R E C A L L F A C T O R Y S E T F O R C E R E - P R O F I L I N G T H E D O O R Re-pro ling is a simple way of re-learning the travel S T E P O N E... -
Page 14: Auto-Close (Cad Pd Only)
® Power Drive & Roll-A-Pro installation instructions 13. Auto-Close (CAD PD Only) 13.1 Safety Beams A Safety Beam Kit may be fitted to this opener. When this option WARNING! It is compulsory to have is fitted, the operation of this device is such that if an object (i.e Safety Beams installed when using car, child etc) blocks the Infra-Red beam, then the garage door Auto-Close mode. -
Page 15: Coding For Courtesy Light
® Power Drive & Roll-A-Pro installation instructions 14.3 Coding for Courtesy Light 14.4 Coding for Vacation Mode V A C A T I O N M O D E C O U R T E S Y L I G H T S T E P O N E S T E P T W O S T E P O N E... -
Page 16: Erasing All Transmitter Codes
® Power Drive & Roll-A-Pro installation instructions 14. Coding a Transmitter 14.7 Erasing ALL Transmitter Codes 14.8 Installing the Wall Mounted Transmitter I N S T A L L I N G W A L L R E M O T E C O N T R O L E R A S I N G A L L T R A N S M I T T E R C O D E S S T E P O N E S T E P O N E... -
Page 17: Opener Safety & Security
2 . 0 M A N U A L D O O R O P E R A T I O N T O D I S E N G A G E T H E O P E N E R ®... -
Page 18: User Operating Controls
® Power Drive & Roll-A-Pro installation instructions 18. User Operating Controls Button Function 1. OPERATE Opens/stops/closes the door. 2. CODE SET LED (Red) Flashes when a code is being stored or when the transmitter button is pressed 3. CLOSE LIMIT LED (Red) Illuminates and flashes as the door closes, and remains on when the close limit position has been reached. -
Page 19: Specifications
® Power Drive & Roll-A-Pro installation instructions 20. Specifications Technical Specifications Power Drive Roll-A-Pro ® RDO-1V4 RDO-1V3 Rated voltage range: 230V - 240V 230V - 240V Rated frequency: 50Hz 50Hz Maximum door opening Door Height: 3.25 turns of the drum wheel 3.25 turns of the drum wheel (approx. -
Page 20: Troubleshooting
® Power Drive & Roll-A-Pro installation instructions 21. Troubleshooting Symptom Possible cause Remedy The opener does The opener does not have power Plug a device of similar voltage (e.g. a hairdryer) not work from the into the power point and check that it is OK transmitter The battery in the transmitter is flat Replace the battery... - Page 21 ® Power Drive & Roll-A-Pro installation instructions 21. Troubleshooting Symptom Possible cause Remedy The SERVICE LED has A Fault has been detected. The fault Record opener function (How many beeps?) started to flash and will be active each time an attempt then press the LIMIT SET button once to reset is beeping numerous is made to operate the door.
-
Page 22: After Installation Care
® Power Drive & Roll-A-Pro installation instructions 22. After Installation Care 22.1 Service Checklist Preventative servicing of your garage door and opener, WARNING! Failure to maintain your is just as important as servicing your car. Much like the your garage door voids the warranty engine of your car, your garage door is made up of on your garage door opener. -
Page 23: Battery Replacement
® Power Drive & Roll-A-Pro installation instructions 22. After Care Installation 22.2 Battery Replacement C H A N G I N G A B A T T E R Y Battery Type: 1 x CR2032. S T E P O N E Light Status Battery WARNING! The battery is hazardous and must...
Need help?
Do you have a question about the Power Drive RDO-1V4 and is the answer not in the manual?
Questions and answers