Table of Contents
Advertisement
Available languages
Available languages
Quick Links
Advertisement
Table of Contents

Related Manuals for HMS ZP6591


Summary of Contents for HMS ZP6591
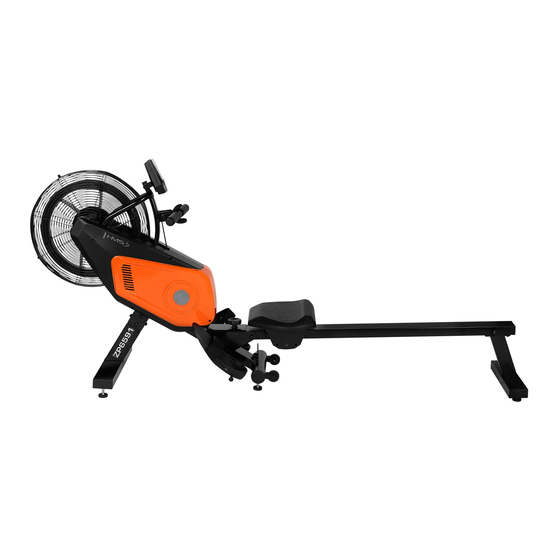
- Page 1 ZP6591...
- Page 2 Uwagi dotyczące bezpieczeństwa 1. Przed pierwszym użyciem należy zapoznać się dokładnie z instrukcją i zachować ją na przyszłość. 2. Należy uwzględnić wszystkie ostrzeżenia i środki ostrożności łącznie z etapami montażu. Z maszyny można korzystać jedynie zgodnie z jej przeznaczeniem. 3. Mając na względzie własne bezpieczeństwo, produkt należy zmontować i użytkować zgodnie z niniejszą...
-
Page 3: Lista Części
Lista części Opis Ilość Opis Ilość Rama główna Stopnica Tor jezdny Duża podkładka Φ30×Φ10×δ2.5 Przedni stabilizator Gałka M10×20 Tylny stabilizator Czujnik Wspornik siedziska Linka czujnika L=950mm Uchwyt komputera Zatyczka przewodu Φ12 Uchwyt Kwadratowa zaślepka 20×20 Śruba sześciokątna M10×70 Nakrętka nylonowa M5 Tuleja Φ14×Φ10×10 Wkręt wpuszczany M6×10 Łożysko 6000Z... - Page 4 Prawa osłona Wspornik uchwytu Mała osłona Zaślepka S17 PasekPJ320 Montaż Krok 1 Montaż przedniego stabilizatora 1. Przymocuj 2 stopki poziomujące Φ38×M10 (49) do przedniego stabilizatora (3). 2. Usuń 6 śrub M8×15 (59) I podkładek Φ8×Φ16×1.5 (18) przedniego stabilizatora (3). 3. Połącz stabilizator (3) z ramą główną (1) przy pomocy wcześniej usuniętych śrub I podkładek. Używając dołączonego klucza imbusowego.
- Page 5 Krok 2 Montaż tylnego stabilizatora I siedziska 1. Umieść siedzisko (64) na szynie (2), nałóż 2 gumowe odbojniki Φ23×15 (58) na szynę (2) I przykręć 2 śruby ST4.2×25 (56) wraz z płaskimi podkładkami Φ5×Φ9×1.0 (57).DO montażu użyj uniwersalnego śrubokrętu. 2. Umieść 2 gumowe odbojniki Φ38×M10 (49) na tylnym wsporniku (4) a następnie połącz wspornik (4) z szyną...
- Page 6 Krok 4 Montaż stopnic Przymocuj obie stopnie (32) do ramy głównej (1) przy pomocy 4 śrub M12×160 (30) używając klucza uniwersalnego. Narzędzia: Krok 5 Montaż komputera 1. Usuń 4 śruby M5x10 (15z licznika (17). 2. Połącz linkę czujnika (36) z gniazdem w komputerze (17). Schowaj wystający przewód do otworu w komputerze.
- Page 7 Komputer Funkcje 1. Naciśnij MODE/ENTER aby wybrać funkcję. 2. Automatycznie wyświetla kolejne wyniki z trybie co 6 sek. SCAN 3. Sekwencja po naciśnięciu MODE/ENTER : TIME→ DIST→CAL→ PULSE→RPM/SPEED 1. Zakres 0.0 ~ 99.9 SPEED 2. W przypadku braku odpowiedniego sygnały w trakcie ćwiczeń po 4 sekundach komputer zacznie wskazywać...
- Page 8 Ustawienia treningu 1. Naciśnij MODE/ENTER w celu wyboru funkcji TIME, DISTANCE, CALORIES I PULSE. Użyj przycisku SET w celu ustawienia wartości a następnie naciśnij MODE/ENTER w celu zatwierdzenia Np. Możesz zmienić docelowy czas ćwiczeń jeśli okienko TIME miga poprzez naciśnięcie klawisza SET. Naciśnij MODE/ENTER, aby zatwierdzić...
- Page 9 Uwaga: Zwróć szczególną uwagę podczas przenoszenia urządzenia w przypadku podniesionej szyny (2), gdyż tylny stabilizator może znajdować się na wysokości twojej głowy (4).
-
Page 10: Dane Techniczne
Konserwacja Właściwa konserwacja urządzenia wpływa znacząco na jego żywotność. Niewłaściwa konserwacja może spowodować uszkodzenie bieżni lub skrócić żywotność produktu. Wszystkie części należy regularnie sprawdzać i dokręcać. Zużyte części należy natychmiast wymienić. Czyszczenie Regularne czyszczenie pasa bieżnego zapewnia długą żywotność produktu. Uwaga: Bieżnia musi być... -
Page 11: Safety Precautions
SAFETY PRECAUTIONS 1. Read this manual carefully before first using and retain it for future reference. 2. Observe all warnings and preacutions including assembly steps. Use it only for intended purpose. 3. Assemble and use it only according to this manual to assure your safety. Inform all other users about safe usage. -
Page 12: Spare Parts List
Spare Parts List Description Description Main Frame Foot Pedal Rail Big Washer Φ30×Φ10×δ2.5 Front Support Stabilizer Knob M10×20 Rear Support Stabilizer Sensor Holder Seat Cushion Fixer Sensor Wire L=950mm Meter Plate Wire Plug Φ12 Handlebar Square End Cap 20×20 Hexagon Bolt M10×70 Nylon Nut M5 Bushing Φ14×Φ10×10 Phillips Recessed Screw M6×10... -
Page 13: Assembly Instruction
Seat Cushion 383×292×59 Cross Pan Head Self-drilling Left Chaincover Cross Pan Head Self-tapping Screw ST4.2×20 Right Chaincover Handlebar Fixer Screw ST4.2×25 Small Cover Nut Cap S17 Belt PJ320 Assembly instruction Step 1 Front Support Stabilizer Installation 1. Install two Φ38×M10 Rubber Pads (49) onto the Front Support Stabilizer (3). 2. - Page 14 Step 2 Rear Support Stabilizer and Seat Cushion Installation 1. Insert the Seat Cushion (64) into the Rail (2), then install two Φ23×15 Cushions (58) to the Rail (2) with two ST4.2×25 Cross Pan Head Self-drilling Screws (56) and two Φ5×Φ9×1.0 Flat Washers (57).Tighten screws with the Spanner with Phillips Screwdriver provided.
- Page 15 Step 4 Foot Pedal Installation Attach left and right Foot Pedals (32) onto the Main Frame (1) with four M12×160 Hexagon Bolts (30) Tighten bolts with the Spanner provided. Step 5 Meter Installation 1. Remove four M5x10 Phillips Screws (15) from the Meter (17). 2.
- Page 16 Computer Functions 1. In SCAN mode, press MODE/ENTER key to choose functions. 2. Automatically scan through each mode in sequence every 6 seconds. SCAN 3. The sequence of display when press MODE/ENTER key : TIME→ DIST→ CAL→PULSE→RPM/SPEED 1. Range 0.0 ~ 99.9 SPEED 2.
- Page 17 RECOVERY 1. After the console detects pulse signal, press the RECOVERY key to enter recovery mode to monitor heart rate recovery ability. Workout setting 1. Press MODE/ENTER key to select the function of TIME, DISTANCE, CALORIES and PULSE. Use SET Key for setting and press MODE/ENTER key for confirmation. For instance the time set-up, when the time value is blinking, you can use SET Key to adjust thenumber.
- Page 18 Align the hole of the Rail (2) with the Main Frame (1). Then lock with the Φ30×Φ10×δ2.5 Big Washer (33) and M10×20 Knob (34) with clockwise direction. CAUTION: Move with caution when you vertically fold the Rail (2), as your head may touch the Rear Support Stabilizer (4).
-
Page 19: Maintenance
Maintenance Proper maintenance is very important to ensure a faultless and operational condition of the treadmill. Improper maintenance can cause damage to the treadmill or shorten the life of the product. All parts of the must be checked and tightened regularly. Worn out parts must be replaced immediately. - Page 20 Bezpečnostní pokyny 1. Před prvním použitím je potřeba seznámit se přesně s návodem a uschovat si jej do budoucnosti. 2. Mějte na paměti všechna upozornění a bezpečnostní opatření včetně montážních kroků. Stroj lze používat pouze k určenému účelu. 3. S ohledem na vlastní bezpečnost by měl být výrobek sestaven a používán v souladu s tímto návodem.
- Page 21 Seznam částí Č. Popis Ilość Popis Ilość Hlavní rám Pedál Vodicí dráha Velká podložka Φ30×Φ10×δ2.5 Přední stabilizátor Knoflík M10×20 Zadní stabilizátor Snímač Podpora sedadla Kabel snímače L=950mm Držák počítače Kabelová zástrčka Φ12 Držák Čtvercový koncový kryt 20×20 Šestihranný šroub M10×70 Nylonová...
- Page 22 Pravý kryt Podpora držitele Malý kryt Zástrčka S17 Popruh PJ320 Montáž Krok 1 Montáž předního stabilizátoru 1. Připevněte 2 vyrovnávací nohy Φ38×M10 (49) k přednímu stabilizátoru (3). 2. Odstraňte 6 šroubů M8×15 (59) a podložek Φ8×Φ16×1.5 (18) z předního stabilizátoru (3). 3.
- Page 23 Krok 2 Montáž zadního stabilizátoru a sedadla 1. Umístěte sedadlo (64) na kolejnici (2), nasaďte 2 gumové nárazník Φ23×15 (58) na lištu (2) a našroubujte 2 šroubyST4.2×25 (56) spolu s plochými podložkami Φ5×Φ9×1.0 (57). K montáži použijte univerzální šroubovák. Umístěte 2 gumové nárazníky Φ38×M10 (49) na zadní držák (4) a pak držák připojte (4) ke kolejnici (2) pomocí...
- Page 24 Krok 4 Montáž pedálů Upevněte oba pedály (32) k hlavnímu rámu (1) pomocí 4 šroubů M12×160 (30) pomocí univerzálního klíče. Nářadí Klíč S10-S13-S17-S19 Krok 5 Instalace počítače 1. Odstraňte 4 šrouby M5x10 (15 z počítadla (17). 2. Připojte kabel snímače (36) k zásuvce na počítači (17). Vyčnívající drát vložte do otvoru v počítači.
- Page 25 Počítač Funkce 1. Stisknutím tlačítka MODE / ENTER vyberte funkci. SCAN 2. Automaticky zobrazuje následné výsledky z režimu každých 6 sekund. 3. Sekvence po stisknutí MODE/ENTER : TIME→ DIST→CAL→ PULSE→RPM/SPEED 1. Rozsah 0.0 ~ 99.9 SPEED 2. Pokud během cvičení po 4 sekundách není k dispozici správný signál, počítač zobrazí...
- Page 26 Mastavení tréninu 3. Stisknutím tlačítka MODE / ENTER vyberte funkci TIME, DISTANCE, CALORIES I PULSE. Tlačítkem SET nastavte hodnotu a potvrďte stisknutím tlačítka MODE / ENTER Můžete například změnit cílový čas cvičení, pokud bliká okno TIME stisknutím tlačítka SET. Stiskněte MODE / ENTER pro potvrzení...
- Page 27 Pozor: Věnujte pozornost při pohybu zařízení v případě zvednuté kolejnice (2), protože zadní stabilizátor může být na úrovni hlavy (4).
-
Page 28: Technické Specifikace
Údržba Správná údržba zařízení výrazně ovlivňuje jeho životnost. Nesprávná údržba může přístroj poškodit nebo zkrátit jeho životnost. Všechny díly by měly být pravidelně kontrolovány a dotahovány. Opotřebované díly je třeba ihned vyměnit. Čištění Pravidelné čištění pásu zaručuje dlouhou životnost výrobku. Poznámka: Aby nedošlo k úrazu elektrickým proudem, musí... - Page 29 Sicherheitsanmerkungen 1. Vor dem ersten Gebrauch sollte die unten stehende Bedienungsanleitung sorgfältig durchgelesen und für die Zukunft aufbewahrt werden. 2. Es sollten alle Warnungen und Vorsichtsmaßnahmen sowie die einzelnen Montageschritte berücksichtigt werden. Nutzen Sie das Gerät nur gemäß seinem Verwendungszweck. 3.
- Page 30 Stückliste lfd. Nr. Beschreibung Menge lfd. Beschreibung Menge Hauptrahmen Trittstufe Fahrbahn Große Unterlegscheibe Φ30×Φ10×δ2.5 Vorderer Stabilisator Knauf M10×20 Hinterer Stabilisator Sensor Stütze der Sitzfläche Sensorkabel L=950mm Computerhalter Blende der Leitung Φ12 Griff Quadratische Blende 20×20 Sechskantschraube M10×70 Nylon-Mutter M5 Hülse Φ14×Φ10×10 Senkschraube M6×10 Kugellager 6000Z Linke Abdeckung...
-
Page 31: Montage
Sitz 383× 292× 59 Selbstschneidende Schraube mit Kreuzschlitz ST4.2×20 Linke Abdeckung Selbstschneidende Schraube mit Kreuzschlitz ST4.2×25 Rechte Abdeckung Stütze für den Griff kleine Abdeckung Blende S17 PasekPJ320 Montage Schritt 1 Montage des vorderen Stabilisators 1. Befestigen Sie 2 Nivellierfüße Φ38 × M10 (49) am vorderen Stabilisator (3). 2. - Page 32 Schritt 2 Einbau des hinteren Stabilisators und des Sitzes 1. Platzieren Sie den Sitz (64) auf die Schiene (2), setzen Sie die 2 Gummipuffer Φ23 × 15 (58) auf die Schiene (2) und befestigen Sie die 2 Schrauben ST4.2 × 25 (56) mit den Unterlegscheiben Φ5×Φ9×1.0 (57) Verwenden Sie für die Montage einen Universal- Schraubendreher.
- Page 33 Schritt 4 Montage der Trittstufen Befestigen Sie beide Stufen (32) mit 4 Schrauben M12×160 (30) und einem Universalschlüssel am Hauptrahmen (1). Werkzeug: Schlüssel S10-S13-S17-S19 Schritt 5 Montage des Computers 1. Entfernen Sie die 4 M5x10-Schrauben (15z des Zählers (17). 2. Verbinden Sie das Sensorkabel (36) mit der Buchse am Computer (17). Stecken Sie das hervorstehende Kabel in das Loch im Computer.
- Page 34 Computer Funktionen 1. Drücken Sie MODE / ENTER, um die Funktion auszuwählen. SCAN 2. Zeigt automatisch alle 6 Sekunden die nachfolgenden Ergebnisse des Modus an. 3. Reihenfolge nach Drücken von MODE / ENTER: TIME→ DIST→CAL→ PULSE→RPM/SPEED 1. Bereich 0.0 ~ 99.9 SPEED 2.
- Page 35 Trainingseinstellungen 1. Drücken Sie MODE / ENTER, um TIME, DISTANCE, CALORIES und PULSE auszuwählen. Stellen Sie den Wert mit der SET-Taste ein und bestätigen Sie mit MODE / ENTER. z. B. Sie können die Ziel-Trainingszeit ändern, wenn die TIME-Zeit blinkt, indem Sie die SET-Taste drücken.
- Page 36 Achtung: Achten Sie besonders darauf, wenn Sie das Gerät bewegen und bei angehobener Schiene (2), dass sich der hintere Stabilisator in Kopfhöhe (4) befinden kann.
-
Page 37: Wartung
Wartung Eine richtig durchgeführte Wartung beeinflusst deutlich die Lebensdauer des Gerätes. Falsch durchgeführte Wartungen können Beschädigungen der Laufbahn oder eine Verkürzung der Produktlebensdauer zur Folge haben. Alle Teile sollten regelmäßig geprüft und angezogen werden. Verbrauchte Teile sollten sofort ausgetauscht werden. Reinigung Die regelmäßige Reinigung des Laufbandes gewährleistet eine lange Lebensdauer des Produktes. - Page 38 Rozgrzewka / Warm-up / rozcvička / Warm-up FAZA ROZGRZEWKI Faza ta ma za zadanie poprawić krążenie i usprawnić pracę mięśni, a także zmniejszyć ryzyko skurczu luz kontuzji. Zaleca się wykonanie kilku ćwiczeń rozciągających zgodnie z poniższymi ilustracjami. Każde ćwiczenie rozciągające powinno trwać około 30 sekund. Nie należy nadmiernie rozciągać...
- Page 39 III. COOL-DOWN PHASE In this stage, your cardio-vascular system and muscles should get calm. Repeat the warm-up exercises, reduce your tempo and continue for approx. 5 mins. Repeat the stretching exercises, but don’t overstretch or jerk your muscles. As you get fitter, you can exercise longer and harder. It is advisable to train at least three times a week and, if possible, to space your workouts evenly throughout a week.
- Page 40 ETAPPE DER AUFWÄRMUNG Diese Etappe hilft den Kreislauf zu beschleunigen, was die Muskelübungen effektiver macht und zudem reduziert das Risiko einer Verletzung. Führen Sie vor dem Training immer eine Reihe von Streck-Übungen durch, entsprechend den unten stehenden Abbildungen. Jede Übung sollte mindestens 30 Sekunden ausgeführt werden.
-
Page 41: Karta Gwarancyjna
KARTA GWARANCYJNA Nazwa artykułu: Kod EAN: Data sprzedaży: WARUNKI GWARANCJI 1. Sprzedawca w imieniu Gwaranta udziela gwarancji na terytorium RP na okres 24 miesięcy od daty sprzedaży: hulajnoga 24 miesiące, akumulator 6 miesięcy 2. Gwarancja będzie respektowana przez sklep lub serwis po przedstawieniu przez klienta: czytelnie i poprawnie wypełnionej karty gwarancyjnej z pieczątką... -
Page 42: Guarantee Card
GUARANTEE CARD Article name: EAN code: Date of sale: GUARANTEE TERMS The Seller provides guarantee on behalf of the Guarantor within the territory of the Republic of Poland for the period of 24 months from the date of sale: electric power assisted booster 24 months, charger 6 months The Guarantee will be recognised by the shop or service centre after the client provides: - clearly and correctly filled-in guarantee card with the sale stamp and the seller’s signature - valid purchase... -
Page 43: Záruční List
ZÁRUČNÍ LIST Název produktu: EAN kód: Datum prodeje: ZÁRUČNÍ PODMÍNKY skútr 24 měsíců, Prodávající jménem Ručitele poskytuje záruku na území Polska po dobu 24 měsíců od data prodeje: baterie po dobu 6 měsíců Záruka bude respektována obchodem nebo servisem po předložení zákazníkem: čitelně... - Page 44 GARANTIEKARTE Artikelname: EAN-Code: Verkaufsdatum: GARANTIEBEDINGUNGEN 3. Der Verkäufer gewährt im Namen des Garanten eine Garantie für 24 Monate nach dem Verkaufsdatum auf dem Hoheitsgebiet der Republik Polen: Roller 24 Monate Akku 6 Monate 4. Die Garantie wird von dem Laden oder dem Service nach Vorlage: der leserlich und korrekt ausgefüllten Garantiekarte mit Verkaufsstempel und Unterschrift des Verkäufers eines gültigen Kaufnachweises für das Gerät mit dem Verkaufsdatum / Rechnung/...
- Page 45 IMPORTER: ABISAL Sp.Z.O.O., ul. Świętej Elżbiety 6, 41-905 Bytom abisal@abisal.pl www.abisal.pl...
Need help?
Do you have a question about the ZP6591 and is the answer not in the manual?
Questions and answers