
Related Manuals for HMS ATLAS TYTAN 12


Summary of Contents for HMS ATLAS TYTAN 12
- Page 1 ATLAS - HOME GYM - ATLAS TYTAN 12 INSTRUKCJA UŻYTKOWANIA – MANUAL INSTRUCTION – NÁVOD K OBSLUZE...
-
Page 2: Uwagi Dotyczące Bezpieczeństwa
UWAGI DOTYCZĄCE BEZPIECZEŃSTWA Produkt ten przeznaczony jest wyłącznie do użytku domowego i zaprojektowano go tak, aby zapewnić optymalne bezpieczeństwo. Powinny być przestrzegane następujące zasady: Przed rozpoczęciem treningu skonsultuj się z lekarzem w celu stwierdzenia braku przeciwwskazań do korzystania ze sprzętu do ćwiczeń. Decyzja lekarza jest niezbędna w przypadku przyjmowania leków wpływających na pracę serca, ciśnienie krwi i poziom cholesterolu. -
Page 3: Lista Części
LISTA CZĘŚCI Ilość Ilość Nazwa Nazwa Płytka regulacyjna Główna podstawa Bloczek Tylna podstawa Tulejka bloczka Przednia podstawa Górny wspornik Hak bezpieczeństwa Przewód 2. Wspornik pionowy Łańcuch Wspornik siedziska Gałka (M16) Dźwignia do ćwiczeń mięśni nóg Stalowa tuleja Wzmacniający wspornik Wspornik modlitewnika Pianka (250 mm) Przewód 3 Uchwyt stacji motylkowej... - Page 6 MONTAŻ KROK 1 1.Przymocuj główną podstawę(1) do tylnej podstawy (2) i chromowanych prętów (22) korzystając śrub M10x20 (78-2 zestawy), podkładek i śrub M8x20 (81-2 zestawy) oraz podkładek. 2. Przymocuj główną podstawę (1) do przedniej podstawy (3) korzystając ze śrub M10x45 (75-2 zestawy), podkładek i śrub M8x20 (81-2 zestawy) oraz podkładek.
- Page 7 KROK 3 1.Przymocuj wspornik pionowy (5) do głównej podstawy (1) korzystając ze śrub M10x50 (74-2 zestawy), podkładek i nakrętek. KROK 4 1.Przymocuj górny wspornik 4) do wspornika pionowego (5) korzystając z płytki wzmacniającej (48) oraz śrub M10x50 (74-2 zestawy). Wsuń pręty (22) do otworów w górnym wsporniku (4), połącz korzystając ze śrub M10x20 (78-2 zestawy).
- Page 8 KROK 6 1.Przymocuj lewe ramię (12) do uchwytu stacji motylkowej (10) korzystając ze stalowej tulei (42) oraz śrub M12x85 (70), podkładek i nakrętek. 2.Wsadź uchwyty (16) w otwory lewego i prawego ramienia (12,11). Przymocuj korzystając ze śrub M10x20 (78) I podkładek. KROK 7 1.Przymocuj dźwignię...
- Page 9 KROK 8 1.Przymocuj oparcie (58) do wspornika (5) korzystając ze śrub M8x45 (80-1 zestaw) oraz podkładek . 2.Przymocuj siedzisko (57) do wspornika (6) korzystając ze śrub M8x45 (80-1 zestaw) oraz podkładek . 3.Przymocuj modlitewnik (60) do wspornika (9) korzystając ze śrub M8x20(63-1 zestaw) oraz podkładek. KROK 9 1.Przymocuj lewe i prawe ramię...
- Page 10 KROK 10 1.Przymocuj lewą i prawą podpórkę do pompek (55,56) do tylnej podstawy (2) korzystając ze śrub M10x90 (71-2 zestawy), podkładek i nakrętek.
-
Page 12: Zakres Stosowania
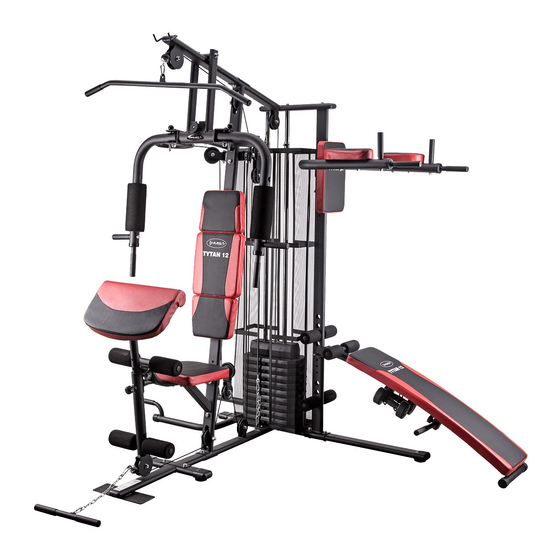
ZAKRES STOSOWANIA Atlas TYTAN 12 jest urządzeniem przeznaczonym do ćwiczeń ogólnorozwojowych w warunkach domowych. Nie może być używany w celach terapeutycznych, rehabilitacyjnych i komercyjnych. INSTRUKCJA TRENINGU 1. Rozgrzewka Przed rozpoczęciem treningu sugerujemy wykonać ćwiczenia rozgrzewające. Dział obsługi klienta: ABISAL Sp. z o.o. -
Page 13: Karta Gwarancyjna
KARTA GWARANCYJNA Nazwa artykułu: …………………………………………………………. Kod EAN: ………………………………………………………………… Data sprzedaży: …………………………………………………………. …………………………………..(Pieczątka i podpis sprzedawcy) WARUNKI GWARANCJI Sprzedawca w imieniu Gwaranta udziela gwarancji na terytorium RP na okres 24 miesięcy od daty sprzedaży. Gwarancja będzie respektowana przez sklep lub serwis po przedstawieniu przez klienta: - czytelnie i poprawnie wypełnionej karty gwarancyjnej z pieczątką... -
Page 14: Important Safety Information
OWNERS MANUAL IMPORTANT SAFETY INFORMATION This product has been designed for home use only and built for optimum safety. Please note the following safety precautions: Before starting any exercise program you should consult your doctor to determine if you have any physical or health conditions that could create a risk to your health and safety, or prevent you from using the equipment properly. -
Page 15: Part List
PART LIST Name Name Adjusting plate Main base tube Pulley Back base tube Pulley bushing Front base tube Upper support Safe hook Cable 2. Vertical support Chain Seat support Locking knob (M16) Leg extension Steel bushing Reinforced tube Arm cushion support Foam (250 mm) Chest press Cable 3... -
Page 18: Assembly Instruction
ASSEMBLY INSTRUCTION STEP 1 1.Attach main base tube(1) to back base tube(2),chrome bar(22)using Hex bolts M10x20(78-2sets), washers and Hex bolts M8x20 (81-2sets),washers. 2.Attach main base tube(1) to front base tube(3)using Hex bolts M10x45(75-2sets), washers,nuts and Hex bolts M8x20(81-2sets),washers. STEP 2 1.Attach weights(24, 29) to chrome bars(22) as shown. - Page 19 STEP 3 1.Attach Vertical support(5)to Main base tube(1) using Hex bolts M10x50(74-2sets) washers and nuts. STEP 4 1.Attach Upper support(4)to Vertical support(5) using reinforced plate (48)and Hex bolts M10x50(74-2sets) and insert chrome bars(22) into holes of upper support(4) using Hex bolts M10x20(78-2sts). 2.Attach seat support(6),reinforced tube(8) to Vertical support(5) using reinforced plate(48) and Hex bolts...
- Page 20 STEP 6 1.Attach left arm(12) to chest press(10) using steel bushing(42) and Hex bolts M12x85(70),washer and nut. 2.Insert handle bar(16) to holes of left,right arm(12,11) using Hex bolts M10x20(78),washer. STEP 7 1.Attach leg extension(7) to seat support(6) using Hex bolts M10x70 (72-1sets) washers and nuts. 2.Insert arm cushion support (9) into leg extension(7) using locking knob(41).
- Page 21 STEP 8 1.Attach back cushion(58) to vertical support(5) using Hex bolts M8x45 (80-1sets) washers . 2.Attach seat pad(57)to seat support (6)using Hex bolts M8x45(80-1sets) washers . 3.Attach arm cushion(60) to arm cushion support(9)using Hex bolts M8x20(63-1sets) washers . STEP 9 1.Attach pull up left,right arm(52,53) to vertical tube (59) using Hex bolts M10x50(74-2sets) washers and nuts.
- Page 22 STEP 10 1.Attach push up left, right arm(55,56) to back base tube (2) using Hex bolts M10x90(71-2sets) washers and nuts.
-
Page 24: Training Instruction
Home gym is use for all body exercises . Home gym TYTAN 12 is H class item. Unit is not intended for commercial use therapy or rehabilitation. TRAINING INSTRUCTION 1. Warm-Up To prevent injury and maximize performance we recommend that each workout period starts with a warm-up. Consumer service department: ABISAL Sp. z o. o. ul. Św. Elżbiety 6 41–905 Bytom www.abisal.pl www.hms-fitness.p... - Page 25 BEZPEČNOSTNÍ POKYNY Výrobek je určen výlučně k domácímu použití a byl navržen tak, aby byla zajištěna optimální bezpečnost. Dodržujte následující pokyny: V případě možnosti existence zdravotních překážek ve využívání tohoto zařízení se před započetím tréninku poraďte s lékařem. Rozhodnutí lékaře je nezbytné především v případě používání léků ovlivňujících práci srdce, krevní...
- Page 26 Hmotnost netto – 142.5 kg Rozměry po rozložení – 151 x 116 x 205 cm Max.zatížení výrobku – 100 kg ÚDRŽBA K čištění zařízení nepoužívejte agresivní čisticí prostředky. K odstraňování znečištění a prachu používejte měkký, vlhký hadřík. Zařízení přechovávejte na suchém místě tak, aby bylo chráněno před vlhkostí a korozí. SEZNAM ČÁSTÍ...
- Page 27 břišních svalů Pěnovka (310 mm) Dlouhý pěnovkový váleček Levá podpěra - kliky Klínek pro výběr závaží Pravá podpěra – kliky Chromované pruty (1820 mm) Ocelová síťka Sedadlo Opěradlo Vrchní závaží Zadní svislá vzpěra Objímka Podpěradlo Klínek Φ10 Opěradlo (malé) Velká podložka (Φ45) Podloketník (malý) Gumový...
- Page 30 MONTÁŽ KROK 1 1. Připevněte hlavní rám (1) k zadnímu stabilizátoru (2) a chromovaným prutům (22) pomocí šroubů M10x20 (78-2 soupravy), podložek a šroubů M8x20 (81-2 soupravy) a podložek. 2. Připevněte hlavní rám (1) k přednímu stabilizátoru (3) pomocí šroubů M10x45 (75-2 soupravy), podložek a šroubů...
- Page 32 KROK 3 1.Připevněte svislý rám (5) k hlavnímu rámu (1) pomocí šroubů M10x50 (74-2 soupravy), podložek a matek. KROK 4 1.Připevněte horní rám (4) k svislému rámu (5) pomocí zpevňující destičky (48) a šroubů M10x50 (74-2 soupravy). Vsuňte pruty (22) do otvorů...
- Page 33 4. Připevněte šroub ve tvaru písmene „T” (31) ke vzpěře ve tvaru písmene „T” (13) pomocí šroubů M10x40 (76), podložek a matek. KROK 6 1.Připevněte levé rameno (12) k držadlu části posilování prsních svalů (10) pomocí ocelové objímky (42) a šroubů M12x85 (70), podložek a matek.
- Page 34 KROK 8 1.Připevněte opěradlo (58) k rámu (5) pomocí šroubů M8x45 (80-1 souprava) a podložek . 2.Připevněte sedadlo (57) k rámu (6) pomocí šroubů M8x45 (80-1 souprava) a podložek . 3.Připevněte podpěradlo (60) k rámu (9) pomocí šroubů M8x20(63-1 souprava) a podložek.
- Page 35 KROK 9 1.Připevněte pravé a levé rameno části k posilování břišních svalů (52,53) k zadní svislé vzpěře (59) pomocí šroubů M10x50 (74-2 soupravy), podložek a matek. 2.Vsuňte držadla (16) do levého a pravého ramene (55,56), připevněte je pomocí šroubů M10x20 (78-2 soupravy), podložek a matek.
- Page 37 ROZSAH UŽÍVÁNÍ Atlas TYTAN 12 je zařízením určeným k posilování těla v domácím prostředí. Není možno zařízení používat k terapeutickým, rehabilitačním a komerčním účelům. NÁVOD KE CVIČENÍ 1. Rozcvička Před započetí tréninku doporučujeme provést zahřívací cviky.
- Page 38 SICHERHEITSANMERKUNGEN Dieses Produkt ist ausschließlich zum Hausgebrauch geeignet und wurde so entworfen, damit die optimale Sicherheit gewährleistet wird. Die folgenden Regeln sollten beachtet werden: 18. Vor dem Trainingsbeginn sollten Sie einen Arzt befragen, ob es keine Kontraindikationen zur Benutzung des Übungsgerätes gibt.
-
Page 39: Technische Daten
29. Nutzen Sie das Gerät nur gemäß seinem Verwendungszweck. Wenn ein Bauteil beschädigt bzw. abgenutzt wird oder wenn Sie bei der Benutzung des Gerätes beunruhigende Geräusche hören, sollten Sie die Übungen sofort unterbrechen. Benutzen Sie das Gerät so lange nicht, bis die Störungsursache beseitigt wird. 30. - Page 40 Stütze der Scott-Curl-Bank Schaumstoff (250 mm) Griff der Butterfly-Station Leitung 3 Linker Arm Schaumstoff (160 mm) Rechter Arm Schaumstoff (140 mm) PVC Stoßdämpfer Φ30x7 T-Stütze Verstärkungsplatte (100mm) Stange der Butterfly-Station Verstärkungsplatte (130mm) Querbalken Griff Gummi-Stoßdämpfer Stahlplatte Blockgriff Linker für Schaumstoff (370 mm) Bauchmuskulaturübungen für Rechter...
-
Page 43: Montage
MONTAGE SCHRITT 1 1.Befestigen Sie die Hauptgrundlage(1) an hinteren Grundlage verchromten Stangen (22) mithilfe der Sätze), M10x20 Schrauben(78-2 Unterlagen und Schrauben M8x20 (81-2 Sätze) und Unterlagen. 2. Befestigen Sie die Hauptgrundlage (1) an die vordere Grundlage (3) mithilfe der M10x45 Schrauben (75-2 Sätze), der Unterlagen und M8x20 Schrauben (81-2 Sätze) und Unterlagen. - Page 45 SCHRITT 3 1.Befestigen Sie die senkrechte Stütze (5) an der Hauptgrundlage (1) mithilfe der M10x50 Schrauben (74-2 Sätze), der Unterlagen und Schrauben. SCHRITT 4 1. Befestigen Sie die Hauptstütze 4) an der senkrechten Stütze (5) mithilfe der Verstärkungsplatte (48) und der M10x50 Schrauben (74-2 Sätze).
- Page 46 SCHRITT 5 1. Befestigen Sie die T-Stütze (13) und den Griff des Blocks (51) an der senkrechten Stütze unter Verwendung der M10x50 Schrauben (74), der Unterlagen und Muttern. 2. Befestigen Sie den Griff der Butterfly-Station (10) an der oberen Stütze (4) unter Verwendung der M12x145 Schrauben (67), der Stahlhülse (42), der Unterlagen und Muttern.
- Page 47 SCHRITT 7 1.Befestigen Sie den Hebel für die Übungen der Beinmuskulatur (7) an der Stütze der Sitzfläche (6) mithilfe der M10x70 Schrauben (72-1 Sätze), der Unterlagen und Muttern. 2. Stecken Sie die Stütze der Scott-Curl-Bank (9) in den Hebel (7) und arretieren Sie es mit dem Bolzen (41). SCHRITT 8 1.
- Page 48 SCHRITT 9 1.Befestigen Sie den linken und den rechten Arm für die Übungen der Beinmuskulatur (52,53) an der hinteren Abstützung (59) mithilfe der M10x50 Schrauben (74-2 Sätze), der Unterlagen und Muttern. 2. Schieben Sie die Griffe (16) in den linken und den rechten Arm (55,56) und befestigen Sie sie mithilfe der M10x20 Schrauben (78-2 Sätze), der Unterlagen und Muttern.
- Page 49 SCHRITT 10 1.Befestigen Sie den linken und den rechten Griff für die Liegestützen(55,56) an der hinteren Grundlage(2) unter Verwendung der M10x90 Schrauben (71-2 Sätze), der Unterlagen und Muttern.
- Page 51 VERWENDUNGSBEREICH Die Fitnessstation TYTAN 12 ist ein Gerät, das für allgemeine Übungen zu Hause bestimmt ist. Es darf nicht zu therapeutischen, Personalisierungs- und kommerziellen Zwecken verwendet werden. TRAININGSANLEITUNG 1. Aufwärmung Vor dem Training empfehlen wir, Aufwärmübung...
Need help?
Do you have a question about the ATLAS TYTAN 12 and is the answer not in the manual?
Questions and answers