
Related Manuals for HOOKE ROAD BXG.5004


Summary of Contents for HOOKE ROAD BXG.5004
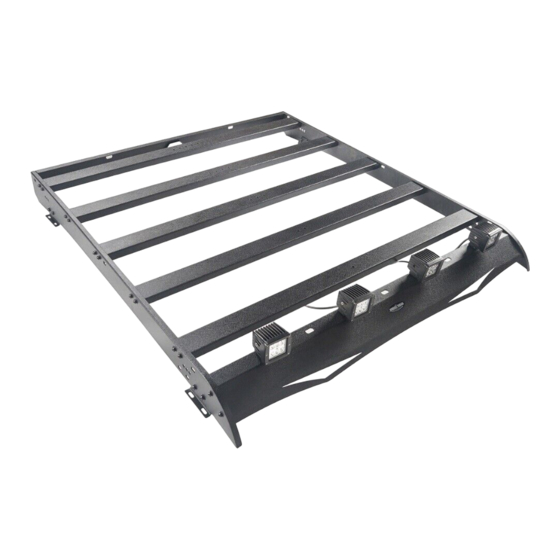
- Page 1 Roof Rack BXG.5004 (1)Contents: (2)Tools required: A.13mm & 12mm Wrench; B.4mm & 5mm Socket Wrench; C.Pneumatic Riveting Nut Gun with 6mm Nut Chuck; D. 4mm Ratchet Allen Key Wrench;...
- Page 2 About 2 hours, 2-3 people may be needed. Installation time may differ according to your mechanical skill level. (PLEASE VERIFY ALL PARTS ARE PRESENT AND READ INSTRUCTIONS CAREFULLY BEFORE STARTING INSTALLATION!) To view the electronic version (BXG.5004), please scan the QR code.
- Page 3 (4) Installation instruction: Step 1: Install the PART “D”, “E”, “F”, “G”, “H”, “A”, “I” and “B2”. The assembly using the bolts PART “J”, “M” and “O”. As shown below. Note: Pay attention to the order of the five cross bars.
- Page 4 Step 2: Install the PART “B2”, “A”, “I” with PART “J”, “L”, “M”, “O”. As shown below.
- Page 6 Step 3: Repeat above steps for another side.
- Page 7 Step 4: Install the roof rack. First , place it on the proper positon on the top of vehicle. Step 5: Note the position of the installation brackets with a marking pen. According to the marks, drill eight installation holes totally. Then use the pneumatic riveting nut gun with 6mm nut chuck to install the eight riveting nuts.
- Page 8 Step 5: Place the rack on the top of the car. Install it with PART “K”, “P” and “N”.
- Page 9 Step 6: The installation is complete. We hope you enjoy a wonderful off road life with this quality product!
- Page 10 1.The product parts in this instruction may differ slightly from the actual product contents but generally does not affect the installation of the product. 2.Please feel free to contact your distributor if you have any kind of question about your purchase. Hooke Road to find your parts...
Need help?
Do you have a question about the BXG.5004 and is the answer not in the manual?
Questions and answers