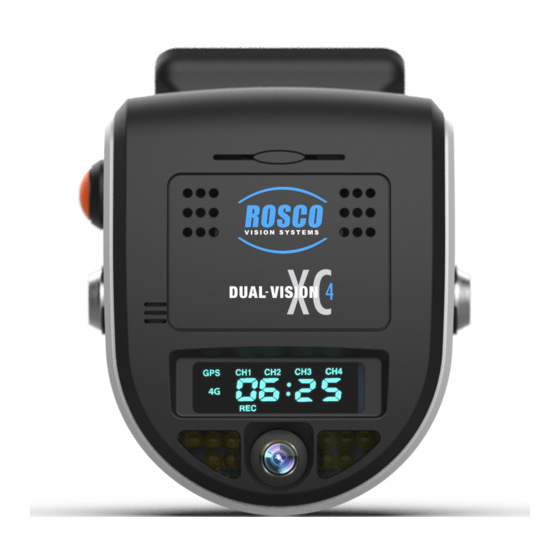
Rosco Dual-Vision XC4 Installation Manual
2010 chevy/gmc bus
Hide thumbs
Also See for Dual-Vision XC4:
- Installation & operating instructions manual (40 pages) ,
- Installation manual (16 pages) ,
- Install manual (13 pages)
Advertisement
Quick Links
2010 Chevy/GMC Bus Installation Guide
This guide will show the proper way to install a Dual-Vision XC4 Camera in a 2010 Chevy/GMC Bus.
Please review the Installation Guidelines for grounding and making connections prior to installing. In this
guide you will find dash removal, wire locations, & mounting locations.
Verify no vehicle service lights are on prior to installation. Contact a Fleet Manager immediately if the
vehicle has any damage
After testing and verifying power wires, disconnect the negative battery terminal to prevent any
accidental shorts or blown fuses
th,
UPDATED October 15
2018
***NEW PART***
***Harness DV457 is needed if trigger wires are being connected***
For Technical Support please contact our support team at:
Techsupport@Roscovision.com
Blue – Extra Installation Parts Needed
Gray – Caution
Purple – New Installation
Red – Warning
Version 4.10.2
Proprietary and Confidential
2010 Chevy/GMC Bus
Advertisement

Summary of Contents for Rosco Dual-Vision XC4
- Page 1 2010 Chevy/GMC Bus Installation Guide This guide will show the proper way to install a Dual-Vision XC4 Camera in a 2010 Chevy/GMC Bus. Please review the Installation Guidelines for grounding and making connections prior to installing. In this guide you will find dash removal, wire locations, & mounting locations.
- Page 2 2010 Chevy/GMC Bus Installation Guide Before starting your install, its best to prep the windshield for recorder mounting Giving the VHB tape time to cure before mounting the Recorder will give you a permanent bond and prevent recorders from falling. A- Squeeze to release primer and apply to the windshield B- Apply Primer to the bracket C- Wait for the primer to dry leaving a dull haze on the windshield...
- Page 3 2010 Chevy/GMC Bus Installation Guide Installation Layout Always use a grommet when running wires through access panels Before starting your installation please take note of component mounting locations. Version 4.10.2 Proprietary and Confidential 2010 Chevy/GMC Bus...
-
Page 4: Step 1 - Panel Removal
2010 Chevy/GMC Bus Installation Guide Step 1 - Panel Removal: • Remove the four Philips screws on the front access panel located on top of the driver (Photo A) • Remove the four Philips screws on the driver’s side access panel located on top of driver’s side door (Photo B) Drivers Side Access Panel Front Access Panel... -
Page 5: Step 2 - Power Connections
2010 Chevy/GMC Bus Installation Guide Step 2 - Power Connections: ALWAYS TEST WIRES FIRST TO VERIFY CONSTANT AND IGNITION FUSE BLOCK! • Remove the 10MM bolt on the fuse distribution block • Connect a ring terminal on the RED CONSTANT wire and connect it to the factory fuse block on the left •... -
Page 6: Step 3 - Antenna Mounting
2010 Chevy/GMC Bus Installation Guide Step 3 - Antenna Mounting: The Manufacture recommends mounting the antenna on the windshield Mount the antenna on the same side of the vehicle as the PDC Notice the angled part of the antenna is on the inside of the vehicle (Photo A & B). - Page 7 2010 Chevy/GMC Bus Installation Guide Please review the WIFI Installation Guideline if you’re not using the 4G Modem Step 4 - PDC & Modem Connections: • Connect the USB cable from the modem to the PDC and secure with a zip tie (Photo A) •...
- Page 8 2010 Chevy/GMC Bus Installation Guide Step 5 - PDC & Modem Mounting Location: Always screw or zip tie the PDC & Modem. Please note this vehicle has a bracket installed that fits the PDC. If you don’t have a bracket in the front access panel find a secure location to secure components with a zip tie or screw Front Access Panel IT’S IMPORTANT TO NEATLY ZIP TIE WIRES TO A FACTORY BRACKET OR HARNESS TO PREVENT FROM...
- Page 9 2010 Chevy/GMC Bus Installation Guide Step 6- Camera Mounting and wire Routing: Large truck with split window Factory Sensor under Mirror Small Passenger Vehicle Recorder Mounting Mount away from sun visors & Inside the wiper swipe Emergency Vehicle For small passenger vehicles, mount the Recorder under the rear-view mirror (Photo A). If the vehicle has any factory sensors under the rear-view mirror, mount the Recorder to the right of the mirror, not causing a distraction to the driver (Photo B).
- Page 10 2010 Chevy/GMC Bus Installation Guide To verify proper angle & correct mounting, press the driver activity button. Logon to your Rosco account and view activity to confirm proper angle Version 4.10.2 Proprietary and Confidential 2010 Chevy/GMC Bus...


Need help?
Do you have a question about the Dual-Vision XC4 and is the answer not in the manual?
Questions and answers