Table of Contents
Advertisement
Quick Links
Advertisement
Table of Contents

Related Manuals for Labconco Protector XL 1124 Series


Summary of Contents for Labconco Protector XL 1124 Series
- Page 1 Original instructions XL™ Floor-Mounted Protector (Walk-In) Laboratory Fume Hoods Models 1124 Series, 4' Vertical 1125 Series, 5' Vertical 1126 Series, 6' Vertical 1128 Series, 8' Vertical & Horizontal 1120 Series, 10' Horizontal 1121 Series, 12' Horizontal 1122 Series, 16' Horizontal...
- Page 2 ® The warranty for Protector from date of installation or two years from date of shipment from Labconco, whichever is sooner. Warranty is non-transferable and only applies to the owner (organization) of record. Buyer is exclusively responsible for the set-up, installation, verification, decontamination or calibration of equipment.
-
Page 3: Table Of Contents
Original instructions ABLE ONTENTS CHAPTER 1: INTRODUCTION About This Manual Typographical Conventions Conventions Typographiques Your Next Step CHAPTER 2: PREREQUISITES Location Requirements Support Requirements Exhaust Requirements (Exigences électriques) Electrical Requirements Service Line Requirements Space Requirements CHAPTER 3: GETTING STARTED Unpacking Your Floor-Mounted Fume Hood Removing the Shipping Skid Sash Weight Release Disassembly &... - Page 4 Original instructions CHAPTER 4: PERFORMANCE FEATURES AND SAFETY PRECAUTIONS Performance Features Safety Precautions (Consignes de sécurité) CHAPTER 5: USING YOUR PROTECTOR XL Operating the Vertical-Rising Sash Operating the Horizontal-Sliding Sashes Operating the A-Style Combination Sash Operating the Blower Operating the Lights Working in your Protector Fume Hood CHAPTER 6: MAINTAINING YOUR PROTECTOR XL Service Safety Precautions...
-
Page 5: Chapter 1: Introduction
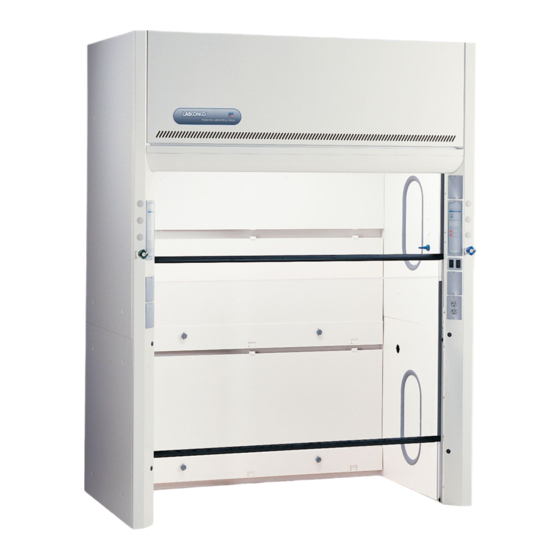
It is the result of Labconco’s more than 60 years of experience in manufacturing fume hoods, and users like you suggested many of its features to us. The Vertical Floor- Mounted Hood is rated high performance low flow at 60 fpm and the Horizontal Floor-Mounted Hood is listed at 80 fpm. - Page 6 Original instructions Chapter 1: Introduction Figure 1-1 Vertical Floor-Mount Figure 1-2 Horizontal Floor-Mount Product Service 1-800-522-7658...
-
Page 7: About This Manual
Original instructions Chapter 1: Introduction About This Manual This manual is designed to help you learn how to install, use, and maintain your laboratory fume hood. Instructions for installing optional equipment on your hood are also included. Chapter 1: Introduction provides a brief overview of the floor-mounted laboratory fume hood, explains the organization of the manual, and defines the typographical conventions used in the manual. -
Page 8: Typographical Conventions
Original instructions Chapter 1: Introduction Appendix E: References lists the various resources available that deal with laboratory fume hoods. Appendix F: Disassembly and Reassembly Instructions lists the required tools as well as step by step instructions for disassembling and reassembling the Protector XL Hood. -
Page 9: Your Next Step
Original instructions Chapter 1: Introduction A number icon precedes information that is specific to a particular model of laboratory fume hood. The 4' icon indicates the text is specific to the 4-foot wide model. The 5' icon indicates the text is specific to the 5-foot model, etc. ... - Page 10 Original instructions Chapter 1: Introduction For information on making modifications to the configuration of your fume hood, go to Chapter 7: Modifying Your Protector XL Floor-Mounted Hood. Refer to Chapter 8: Troubleshooting if you are experiencing problems with your fume hood. Product Service 1-800-522-7658...
-
Page 11: Chapter 2: Prerequisites
Original instructions HAPTER REREQUISITES Before you install your floor-mount laboratory fume hood, you need to prepare your site for installation. Carefully examine the location and floor where you intend to install your floor-mounted hood. You must be certain that the area is level and of solid construction. -
Page 12: Location Requirements
Original instructions Chapter 2: Prerequisites Location Requirements The floor-mounted fume hood should be located away from traffic patterns, doors, windows, fans, ventilation registers, and any other air-handling device that could disrupt its airflow patterns. All windows in the room should be closed. La hotte monté... - Page 13 Proper blower selection for vertical and horizontal floor-mounted hoods can be determined from these exhaust requirements and the total system static pressure loss. Contact Labconco Customer Service for assistance in sizing a blower system. Refer to Appendix G: VAV Floor-Mounted Open Area Guidelines to properly assess the fume hood area opening, allowing the variable air volume (VAV) mechanical system to be programmed at various sash positions.
-
Page 14: Electrical Requirements
Original instructions Chapter 2: Prerequisites Electrical Requirements The Protector XL Floor-Mounted Hood models feature internal wiring for the LED light assembly and light switch. All internal wiring is terminated at the single point wiring junction box for hook-up by a qualified electrician. The blower switch, and light switch wires are also terminated at the single point wiring junction box for hook-up by a qualified electrician. -
Page 15: Chapter 3: Getting Started
Original instructions HAPTER ETTING TARTED Now that the site for your floor-mounted fume hood is properly prepared, you are ready to unpack, inspect, install, and certify your unit. Read this chapter to learn how to: Unpack and move your floor-mounted hood. ... -
Page 16: Unpacking Your Floor-Mounted Fume Hood
IF YOUR HOOD WAS DAMAGED IN TRANSIT, YOU MUST FILE A CLAIM DIRECTLY WITH THE FREIGHT CARRIER. LABCONCO CORPORATION AND ITS DEALERS ARE NOT RESPONSIBLE FOR SHIPPING DAMAGES. Do not discard the shipping skid or packing material for your floor-mounted fume hood until you have checked all of the components and installed and tested the unit. -
Page 17: Sash Weight Release
Original instructions Chapter 3: Getting Started After you verify the fume hood components, move your hood to the location where you want to install it. Then, follow the steps listed next to remove the separate shipping skids from the lower base and upper cabinet. 1. -
Page 18: Upper Cabinet Installation Of The Xl Floor-Mounted Hood
Original instructions Chapter 3: Getting Started Upper Cabinet Installation of the Protector XL Floor-Mounted Hood Remove the upper cabinet assembly side panels and front panels prior to cabinet placement. Then place the upper cabinet assembly on top of the lower base assembly, being careful to clear the lower base assembly during placement. -
Page 19: Vertical-Rising Sash Installation
Original instructions Chapter 3: Getting Started Vertical-Rising Sash Installation for the 4', 5', 6', & 8' Floor-Mounted Hoods The Vertical-Rising Sash Floor-Mounted Hood has two vertical-rising sashes. The rear vertical-rising sash moves from the floor to full open and picks up the front vertical-rising sash, which travels from the midpoint to full open. - Page 20 Original instructions Chapter 3: Getting Started Rear Lower Sash attaches to Inner Cable to Inner Weight for full Front Upper Sash attaches to travel Outer Cable to Outer Sheet Metal Weights for partial upper travel Inner Front Inner Rear Pulley Pulley for Rear Lower Sash Outer Rear Pulley...
- Page 21 Original instructions Chapter 3: Getting Started Left Corner Post Typical Stainless Steel Corner Post Screws. Right Corner Upper Front Post Sash Rubber Bumper Front Vertical Sash Left Sash Track Rear Sash Rubber Bumper Figure 3-3 Product Service 1-800-522-7658...
- Page 22 Original instructions Chapter 3: Getting Started Left Sash Weight for Upper Sash that travels partially Sheet Metal Sash Weight for Lower Sash that travels to floor Right Sash Weight Left Rear Sash Track Right Rear Sash Track Rear View Figure 3-4 Product Service 1-800-522-7658...
-
Page 23: Lower Sash Track & Threshold Installation
Original instructions Chapter 3: Getting Started Lower Sash Track & Threshold Installation for Horizontal-Sliding Sashes on 8', 10', 12', & 16' Floor-Mounted Hoods The lower sash track assembly is comprised of a sash track threshold, front and rear ramps, and threshold support brackets. With the corner posts removed the sash track threshold should be placed on the floor between the left and right corner posts, with their corner posts removed at this time. -
Page 24: Horizontal-Sliding Sash Installation
Original instructions Chapter 3: Getting Started Horizontal-Sliding Sash Installation for the 8', 10', 12', & 16' Floor-Mounted Hoods The Floor-Mounted Hood with horizontal-sliding sashes is supplied with four individual sash doors. These doors have been packaged separately during shipment and require installation in the field. The doors should not be installed until the lower sash track threshold has been properly installed. -
Page 25: Corner Post Installation For The Floor-Mounted Hoods
Original instructions Chapter 3: Getting Started Upper Header Sash Track End Support for Header Sash Track Center Support for Header Sash Track Sliding Sash Door Lower Sash Track Threshold Figure 3-6 Corner Post Installation for the Floor- Mounted Hoods Both left and right corner posts have been shipped uninstalled. The one-piece corner posts are to be installed once the upper and lower cabinet assemblies have been properly positioned. - Page 26 Original instructions Chapter 3: Getting Started Upper Baffle Upper Middle Baffle Lower Middle Perforated Baffle Lower Perforated Baffle Figure 3-7 Product Service 1-800-522-7658...
-
Page 27: Header Installation For The Floor-Mounted Hoods
Original instructions Chapter 3: Getting Started Header Installation for the Floor-Mounted Hoods The header is shipped separately in its protective packaging. To install, the header is fastened to the corner covers by four #12 screws. Reach behind the corner posts from the side and install the screws to support the header. -
Page 28: Connecting To The Hood Exhaust System
Consulter le Service Clientèle de Labconco si la calibration de votre soufflerie pour le volume d'aspiration et la perte de pression statique du système le requiert. - Page 29 Original instructions Chapter 3: Getting Started WARNING: The building electrical supply system for Protector Hoods should include overload protection. A switch or circuit breaker should be in close proximity to the equipment and within easy reach of the operator. The switch or circuit breaker is to be marked as the disconnecting device for the equipment.
- Page 30 Original instructions Chapter 3: Getting Started Internal Junction Figure 3-9 All wiring for the fume hood SHOULD be performed by a licensed electrician and conform to all local codes. In most cases, the hood will require the use of shielded conduit to protect the wiring into the hood.
-
Page 31: Connecting The Service Lines To The Protector Hood
Contact Labconco Customer Service for oxygen fixture information. PRUDENCE : Ne pas utiliser de l'oxygène avec l'accessoire de service standard. Contacter le Service Clientèle de Labconco pour les informations d'accessoire d'oxygène. Should access to the hood plumbing fixture bodies be required, remove the service access plate on the hood front corner posts by loosening their individual screws (Figure A-1 in Appendix A). -
Page 32: Sealing The Protector Hood To The Floor
Your Protector Fume Hood has been tested at the factory per ASHRAE 110-1995. All hoods achieve an “as manufactured rating” of less than 0.05 part per million (ppm) at 4 liters per minute (lpm); AM<0.05 (consult Labconco for individual fume hood ratings). For “field use” ASHRAE testing contact Labconco Sales Engineering Team or Customer Service for a certified on-site contractor. -
Page 33: Chapter 4: Performance Features And Safety Precautions
Original instructions HAPTER ERFORMANCE EATURES AFETY RECAUTIONS Performance Features: The Protector XL Floor-Mounted Laboratory Hood is designed to meet the needs of the laboratory scientist who must transport equipment and products for experimentation and testing at OSHA approved high performance/low flow velocities for vertical sashes as low as 60 feet per minute and horizontal sashes as low as 80 feet per minutes. - Page 34 Guardian Monitor (sold separately). 13. Optional Sash Models. 4'-8' Vertical Sashes are offered in smooth anti- racking cable. 8'-16' Horizontal Sashes slide laterally to open. For other sash options, contract Labconco. 14. Frame of epoxy-coated steel and aluminum is durable and corrosion resistant.
- Page 35 Original instructions Chapter 4: Performance Features & Safety Precautions Figure 4-1 Product Service 1-800-522-7658...
-
Page 36: Safety Precautions
Original instructions Chapter 4: Performance Features & Safety Precautions See Figure 4-1. CAUTION – Current rating of receptacle is specified in Appendix D. AVERTIR – Classification des prises de courant est spécifié dans l’Annexe D. CAUTION – See Appendix C and D for complete current rating. AVERTIR –... - Page 37 Original instructions Chapter 4: Performance Features & Safety Precautions Blocking the bottom of the baffle at rear of hood will change the airflow pattern in the hood causing turbulence and possible leakage at the face of the hood. (Don’t store containers or supplies against baffles, as this will affect airflow through the hood).
- Page 38 Original instructions Chapter 4: Performance Features & Safety Precautions Ne pas travailler avec les produits chimiques sous cette hotte sans le système de d’aspiration en marche. Ne pas stocker des produits chimiques sous une hotte aspirante. Perchloric acid use in this hood is prohibited. L'usage d’acide perchlorique sous cette hotte est interdit.
- Page 39 Original instructions Chapter 4: Performance Features & Safety Precautions Proper operation of the fume hood depends largely upon the hood’s location and the operator’s work habits. Consult the Reference Manual in Appendix E. Le correct fonctionnement de la hotte d'aspiration dépend principalement de son emplacement et les habitudes de travail de l'opérateur.
-
Page 40: Chapter 5: Using Your Protector Xl
Original instructions HAPTER SING ROTECTOR Operating the Vertical-Rising Sash Because of the Protector Hood counterbalanced sash mechanism, it will take only a few pounds of force to move the sash up or down, and you can operate the sash smoothly with one or two hands positioned anywhere along the handle. The vertical-rising sash may be raised to a maximum 64"... -
Page 41: Operating The Blower
Start-up Labconco follows the recommendations of the American National Standard Institute with regards to fume hood exhaust systems. A full list of requirements can be found in the ANSI Standard No. Z9.5 Laboratory Ventilation. If you are... - Page 42 Original instructions Chapter 5: Using Your Protector XL Work Techniques Keep all materials at least 6 inches inside of the sash and at least two inches from the side walls and perform all contaminated operations as far to the rear of the work area as possible. ...
-
Page 43: Chapter 6: Maintaining Your Protector Xl
Original instructions HAPTER AINTAINING ROTECTOR Now that you have an understanding of how to work in the fume hood, we will review the suggested maintenance schedule and the common service operations necessary to maintain your fume hood for peak performance. Service Safety Precautions ... -
Page 44: Routine Maintenance Schedule
Original instructions Chapter 6: Maintaining Your Protector XL Puisque certaines opérations d’entretien exigent plusieurs étapes, toujours utiliser la correcte sécurité et consulter votre responsable de sécurité Lors de l'entretien sur n'importe quelles lignes de secteur, toujours éteindre premièrement l’alimentation. ... -
Page 45: Routine Service Operations
Original instructions Chapter 6: Maintaining Your Protector XL The hood baffles should be checked for blockages behind them to ensure that the hood is maintaining proper airflow. Les déflecteurs de hotte devraient être contrôlés pour leur blocage arrière afin d’assurer que la hotte maintient un flux d’air correct. -
Page 46: Chapter 7 Modifying Your Protector Xl
Fume Hood Your Protector Fume Hood has mounting holes to accept a ceiling enclosure to close off the area between the top of the hood and the ceiling. Contact Labconco Customer Service for ordering information. Labconco offers both non-adjustable fixed height ceiling enclosures as well as adjustable ceiling enclosures per the charts below. - Page 47 Original instructions Chapter 7: Modifying Your Protector XL 3-Sided Ceiling Enclosure Kits The panels extend above the top of the hood to the ceiling to hide exposed ductwork, plumbing and wiring. For any 3 ft to 8 ft Protector XL Benchtop, Premier, XStream, Stainless Steel or PVC Fume Hood.
- Page 48 Original instructions Chapter 7: Modifying Your Protector XL Configure Your Adjustable Height Ceiling Enclosure Kit Catalog Number Use this key to configure the seven digit catalog number to order your 3-Sided Adjustable Height Ceiling Enclosure Kit. For example, 9425511 is a 3-Sided Ceiling Enclosure Kit for a 5' x 37.7" deep Protector XL Floor-Mounted Hood with a height range of 14-19".
-
Page 49: Installing Additional Service Fixtures
Additional service fixtures can be installed in the available service fixture holes in both sidewalls and corner posts. The fume hood is factory set to accept up to four valves per side. Contact Labconco Customer Service for information. Figure 7-4 – Hose Connector... -
Page 50: Installing Guardian Airflow Monitors
Monitor or Guardian™ Airflow Monitor The Guardian Airflow Monitors continuously monitor face velocity through the fume hood opening. The fume hood right corner post is factory prepared to mount either monitor. Contact Labconco Customer Service to order. Floor Mount Distillation Grids – Field Installation The floor mount distillation grids have been strategically placed with the vertical rod center lines in front of the lower baffle and middle baffle. -
Page 51: Sash Stop Kit - Field Installation
Your Protector Fume Hood can be ordered with duplex outlets, however, if you ordered a model without an electrical duplex outlet you can have one installed in the field by a qualified electrician. Contact Labconco Customer Service for ordering information. (Not acceptable on explosion-proof hoods). -
Page 52: Chapter 8 Troubleshooting
Original instructions HAPTER ROUBLESHOOTING Refer to the following table if your fume hood fails to operate properly. If the suggested corrective actions do not solve your problem, contact Labconco for additional assistance. PROBLEM CAUSE CORRECTIVE ACTION Remote blower and Wires not connected Check connection of switches. - Page 53 Original instructions Chapter 8: Troubleshooting PROBLEM CAUSE CORRECTIVE ACTION Lamp wiring is Inspect lamp wiring. Fume hood blower operates but lights disconnected. will not operate Defective lamp Replace lamp ballasts. ballasts. See “Certifying the Hood” Chapter 3 and Improper user Contaminants “Safety Precautions”...
- Page 54 Original instructions Chapter 8: Troubleshooting PROBLEM CAUSE CORRECTIVE ACTION Vertical sash frame is Place horizontal glass symmetrically distorted. and pull sash down to air foil. Straighten damaged frame. Cable is frayed or has Re-install, cable must be replaced slipped off the immediately if damaged.
- Page 55 Valve, Labconco (Water) 1/4" Compression Fitting 9823701 Valve, Labconco (Water) 3/8" Compression Fitting 9817000 Valve, Labconco 1/4" Compression Fitting (AIR, GAS, VAC, NIT, etc.) 9817001 Valve, Labconco 3/8" Compression Fitting (AIR, GAS, VAC, NIT, etc.) 9823702 Valve, Labconco Deionized 1/4" Compression Fitting 9823703 Valve, Labconco Deionized 3/8"...
-
Page 56: Appendix A: Protector Xl Components
Original instructions Appendix A: Protector XL Components Item Quantity Part No. Description LED, Direct Wired T8 x 3' – newest models use on 4', 8' & 16' Hoods – 1297503 12 watts each LED, Direct Wired T8 x 4' – newest models use on 5', 6', 10' & 12' 1297504 Hoods –... - Page 57 Original instructions Appendix A: Protector XL Components 1, 2 Figure A-1 Vertical Replacement Parts Product Service 1-800-522-7658...
- Page 58 Original instructions Appendix A: Protector XL Components 1, 2 Figure A-2 Horizontal Replacement Parts Product Service 1-800-522-7658...
-
Page 59: Appendix B: Protector Xl Dimensions
Original instructions PPENDIX XL D ROTECTOR IMENSIONS Figure B-1 Vertical Floor-Mount Dimensions Product Service 1-800-522-7658... - Page 60 Original instructions Appendix B: Protector XL Dimensions Figure B-2 Horizontal Floor-Mount Dimensions Product Service 1-800-522-7658...
-
Page 61: Appendix C Protector Xl Specifications
Original instructions PPENDIX ROTECTOR PECIFICATIONS Environmental Conditions Indoor use only. Maximum altitude: 10,000 feet (3,048 meters). Ambient temperature range: 41° to 104°F (5° to 40°C). Maximum relative humidity: 80% for temperatures up to 88°F (31°C), decreasing linearly to 50% relative humidity at 104°F (40°C). ... - Page 62 Original instructions Appendix C: Protector XL Specifications Product Service 1-800-522-7658...
- Page 63 Original instructions Appendix C: Protector XL Specifications Product Service 1-800-522-7658...
-
Page 64: Appendix D Serial Number Tag Description
Original instructions PPENDIX ERIAL UMBER ESCRIPTION Serial tag includes standard information with the following changes: The portion of the tag for electrical information is labeled with the following units: Volts AC, Phase, Cycle, AMP. Each hood will include one of the following: Volts AC Phase Cycle... - Page 65 Original instructions Appendix D: Serial Number Tag Description This fume hood includes three additional electrical receptacles, individually wired to the field wired box and individually rated as 115V, single phase, 60Hz, 20 Amps. Each duplex can be wired on a dedicated circuit rated at 20A or the duplexes may be ganged together on the same circuit with the total load of the ganged duplexes not exceeding the 20A electrical service they are wired to.
- Page 66 Original instructions Appendix D: Serial Number Tag Description This fume hood includes three additional electrical receptacles, individually wired to the field wired box and individually rated as 230V, single phase, 50Hz, 10 Amps. Each duplex can be wired on a dedicated circuit rated at 10A or the duplexes may be ganged together on the same circuit with the total load of the ganged duplexes not exceeding the 10A electrical service they are wired to.
-
Page 67: (Annexe D: Description De Série Tag Number)
Original instructions Appendix D: Serial Number Tag Description ANNEXE D DESCRIPTION DE SÉRIE TAG NUMBER Étiquette de série comprend des informations standard avec les modifications suivantes: La partie de l'étiquette d'information électrique est étiqueté avec les unités suivantes: Volts AC, phase, cycle, AMP. Chaque hotte comprendra une des opérations suivantes: Volts AC Phase... - Page 68 Original instructions Appendix D: Serial Number Tag Description Cette hotte comprend quatre autres prises électriques, individuellement câblés à la boîte câblées individuellement et classé comme 115V, monophasé, 60 Hz, 20 A. Chaque duplex peut être branché sur un circuit dédié évalué à 20A ou les duplex peuvent être groupés ensemble sur le même circuit que la charge totale des duplex couplées ne dépassant pas le service électrique 20A ils sont câblés.
- Page 69 Original instructions Appendix D: Serial Number Tag Description comme 230V, monophasé, 50Hz, 10 ampères. Chaque duplex peut être branché sur un circuit dédié classé au 10A ou les duplex peuvent être groupés ensemble sur le même circuit que la charge totale des duplex couplées ne dépassant pas le service électrique 10A ils sont câblés.
-
Page 70: Appendix E References
Original instructions PPENDIX EFERENCES Many excellent reference texts and booklets are currently available. The following is a brief listing: Laboratory Ventilation Standards Federal Register 29 CFR Part 1910 Non-mandatory recommendations from “Prudent Practices”. Fume hoods should have a continuous monitoring device ... - Page 71 Original instructions Appendix E: References ANSI Z9.5-2011 Laboratory Standard Covers entire laboratory ventilation system. New and remodeled hoods shall have a monitoring device Ductless hoods should only be used with non-hazardous materials American Industrial Hygiene Association 2700 Prosperity Avenue, Suite 250 Fairfax, VA 22031 (703) 849-8888 SEFA 1-2002...
- Page 72 Original instructions Appendix E: References DiBerardinis. L. et al. Guides for Laboratory Design, Health and Safety Considerations. Wiley & Sons, 1987 McDermott, Henry, Handbook of Ventilation for Contaminant Control, 2 Edition. Butterworth Publishers, 1985. Miller, Brinton M. et al. Laboratory Safety: Principles and Practices. American Society for Microbiology, Washington, D.C.: 1986 NIH Guidelines for the Laboratory Use of Chemical Carcinogens.
-
Page 73: Appendix F Disassembly And Reassembly Instructions
Original instructions PPENDIX ISASSEMBLY AND EASSEMBLY NSTRUCTIONS Required Tools The following tools will be required for disassembly and reassembly: Cordless Drills and Phillips bits. 1/4", 5/16", 3/8", 7/16" Sockets Small Screwdriver Phillips Screwdriver Right Angle Screwdriver 1/4", 5/16" Box Ratchet 1/4"... - Page 74 Original instructions Appendix F: Disassembly & Reassembly Instructions Sash Removal There is one sash to be removed on the 4', 5', and 6' hoods. Please note that there are two sashes that need to be removed for the 8', 10', and 12' hoods and four sashes on the 16' hood.
- Page 75 Original instructions Appendix F: Disassembly & Reassembly Instructions Transport and Reassembly The various subassemblies are now ready to be transported and reassembled in the opposite way the hood was disassembled. All hoods will require a minimum of five people to lift the hood, two people on each side and one in front (for balance only). A hydraulic lift table should be used as an aid in lifting.
-
Page 76: Appendix G: Vav Floor-Mounted Open Area Guidelines
LOOR- OUNTED UIDELINES When integrating a Labconco floor-mounted fume hood into a variable air volume (VAV) mechanical system, properly assessing the area opening of the fume hood is critical to ensure correct controller calibration for maintaining face velocity across all sash positions. Depending on your brand of VAV controller, you may be prompted to enter different information to arrive at this correct area. - Page 77 Original instructions Appendix G: VAV Floor-Mounted Open Area Guidelines c. Free opening area i. Multiply the width opening times the vertical opening (A x B), and enter that here: Free opening area = _____________ square inches = C (sq in) ii.
- Page 78 Original instructions Appendix G: VAV Floor-Mounted Open Area Guidelines c. Free opening area i. Multiply the width opening times the vertical opening (A x B), and enter that here: Free opening area = _____________ square inches = C (sq in) ii.
Need help?
Do you have a question about the Protector XL 1124 Series and is the answer not in the manual?
Questions and answers