Table of Contents
Advertisement
Quick Links
A13.0905
Inverted Metallurgical Microscope,
Semi-APO
Instruction Manual
This instruction manual is for the Invert Metallurgical microscope IE200
series. To ensure the safety and obtain optimum performance and to
familiarize yourself fully with use of this microscope, we recommend that you
study this manual thoroughly before operating the microscope. Retain this
instruction manual in an easily accessible place near the work desk for future
reference.
The instruction is according to industry standard JB/T10077-1999.
www.optoedu.com
1/18
sale@cnoec.com
Advertisement
Table of Contents

Related Manuals for OPTO-EDU A13.0905


Summary of Contents for OPTO-EDU A13.0905
- Page 1 A13.0905 Inverted Metallurgical Microscope, Semi-APO Instruction Manual This instruction manual is for the Invert Metallurgical microscope IE200 series. To ensure the safety and obtain optimum performance and to familiarize yourself fully with use of this microscope, we recommend that you study this manual thoroughly before operating the microscope.
-
Page 2: Table Of Contents
Contents A13.0905 Before using ....................3 1. Nomenclature..................5 2.Assemblage ..................7 2-1 Assemblage scheme..............7 2-2 Assemblage step ................8 3. Operation ..................11 3-1 Illumination ................11 3-2 Focusing ..................11 3-3 Adjust tension of focus .............. 11 3-4 Adjust diopter ................ -
Page 3: Before Using
Before using A13.0905 Invert metallurgical microscope is used to discern and analyze organizational structure from kinds of metal. It is very important in the work of quality research for foundry, smelt, heat treatment and inspection for raw material and analysis for metallurgical structure of material after processing. - Page 4 A13.0905 2. Maintenance 2.1 Clean the lenses gently with a soft lens tissue. Carefully wipe off oil or fingerprints on the lens surfaces with tissue moistened with 3:7 mixture of ethanol and anther or dimethylbenzene. ★ Ethanol and Anther are both flammable. Please leave them away from fire or fire source, especially during the power switch turn on and turn off.
-
Page 5: Nomenclature
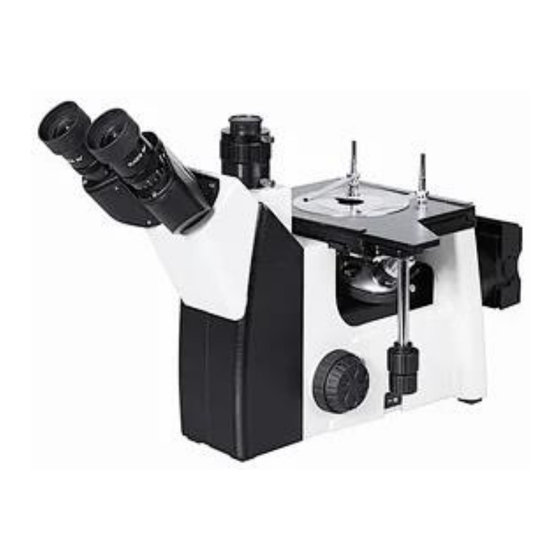
1. Nomenclature A13.0905 5/18 www.optoedu.com sale@cnoec.com... - Page 6 A13.0905 6/18 www.optoedu.com sale@cnoec.com...
-
Page 7: 2.Assemblage
. Assemblage A13.0905 2-1 Assemblage scheme The below numbers shows the assemblage order. ★ Before assemblage, please make sure all parts are without any dust or dirt.. ★ Be careful during assemblage and do not scrap or touch the optical lens. -
Page 8: Assemblage Step
A13.0905 2-2 Assemblage step 2-2-1 Set lamp holder Make sure the pin ① and ③ facing to the hole ② and ④, then lock. (Fig. 2) ★ LED bulb: 3W ★ Halogen bulb: 6V30W (Philips 5761) 2-2-2 Set or replace bulb Use clean glove or gauze to hold the bulb and make sure the bulb pin ①... - Page 9 A13.0905 2-2-4 Set the metal stage ⑴ Set the metal stage ① on mechanical stage as the direction showed. (Fig. 5) ⑵ Turn the metal stage to make the V hole ② direct to the user. Fig.5 2-2-5 Set clips ⑴...
- Page 10 A13.0905 2-2-7 Set Analyzer Insert the analyzer ① into hole ② on microscope stand with its face up to hear click. (Fig.8) Fig.8 2-2-8 Set polarizer and filter Insert the polarizer or filter ① into hole ② on connector between microscope stand and illuminator with its face up to hear click.
-
Page 11: Operation
3. Operation A13.0905 3-1 Illumination ⑴ After connect the microscope with power supply, set main switch at “-“ position. ⑵ Turn the knob ① for brightness to suitable. Clockwise turning of the adjusting knob is to bright and counter to dark. (Fig 11) ★... -
Page 12: Adjust Diopter
A13.0905 3-4 Adjust diopter Diopter is ± 5 and it is point to the line on tube. After getting the clear image through right eyepiece, Please obverse through left eyepiece with left eye. If the image is not clear, please adjust the left diopter adjusting ring ①. -
Page 13: Adjust Field Diaphragm
The adjustment of aperture diaphragm is the same as field diaphragm. Please use ①. knob Please adjust aperture diaphragm to suitable through the contrast of image. (Fig. 19) Fig.19 A13.0905 13/18 www.optoedu.com sale@cnoec.com... -
Page 14: Use Simple Polarizing Kit
CCD or Vidicon and connect to TV adapter again, lock on. ⑷ Adjust the image clear through binocular then obverse through CCD. If it is not clear, you can adjust the adjusting ring ⑥ till clear Fig.22 A13.0905 14/18 www.optoedu.com sale@cnoec.com... -
Page 15: Mount And Use Photo Device
3-12 Mount and use photo device ⑴ Loose the lock-screw ① on tri-tube and take off the tri-cap ②. (Fig 23) ⑵ Mount the photo device as the direction indicated into tri-tube, then lock on screw ①. ⑶ Loose the lock-screw ③ on photo adapter and take off photo tube ④. -
Page 16: Technical Parameter
4.Technical Parameter A13.0905 Technical Parameter for IE200 invert metallurgical microscope eyepiece PL10X/18mm plan eyepiece 195mm normal metallurgical objective (5X、10X、20X、40X) Objective 195mm LWD professional plan metallurgical objective (5X、10X、20X、 50X、100X) Gemmell trinocular head, 45 degrees inclined, with 8:2 prismatic Head Inter-pupillary distance: 55-75mm... - Page 17 Nosepiece is not fixed Fix the nosepiece during focusing Interpupillary is not correct Adjust interpupillary ⑹ eye tired easily Diopter is not correct Adjust diopter or double image Not the same magnification for both Use same eyepiece eyepiece A13.0905 17/18 www.optoedu.com sale@cnoec.com...
- Page 18 Trouble Cause Remedy 2. Mechanics ⑴ too tight of coarse Tension knot is too tight Loose it to suitable knob ⑵ stage slips down Tension knot is too looses Tight it to suitable during obverse 3. Electrical parts There is not power supply Connect the power supply The wires do not connect right Connect it correctly...
Need help?
Do you have a question about the A13.0905 and is the answer not in the manual?
Questions and answers