
Related Manuals for OPTO-EDU A15.1016


Summary of Contents for OPTO-EDU A15.1016
- Page 1 A15.1016 A15.1017 Polarizing Microscope Instruction Manual Please read this manual carefully before using the microscope, and let it’s along with the instrument.
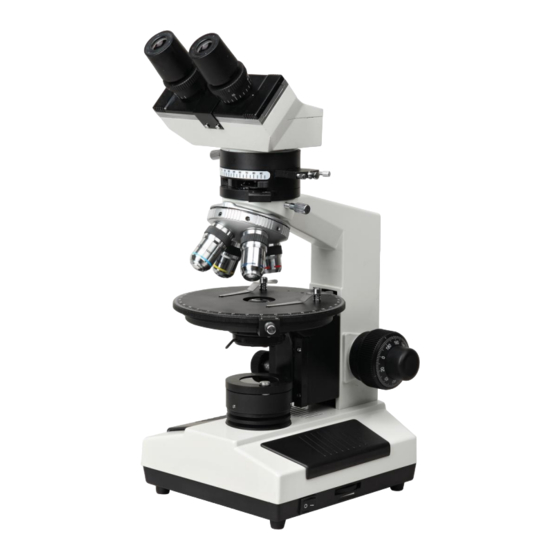
- Page 2 Binocular Tube Eyepiece Bertrand Lens Analyzer Centering Bolts 1/4λplate λplate Optical compensator quartz wedge wedge Microscope wedge wedge Strain-Free Objective Body Rotatable Stage Fine Focus Knob Condenser Stage rotation clamping Coarse Focus Knob knob Brightness Polarizer Adjustment Knob Power Switch...
- Page 3 Ⅰ. USE FIELD The instrument is easy to operate and useful. You can observe kinds of mineral's crystal figure, color, interference color, and even identify their optical performance exactly. It is used so widely that you can see it in everywhere just like geology, petroleum, coal, chemical fiber, medical treatment and physicinspection and so on.
- Page 4 Ⅲ. CONFIGURATION TABLE NAME SPECIFICATION A15.1516-B A15.1516-T ● ● Main Bracket Microscope ● ● Rotatable Stage Body ● ● Condenser Bracket ● Sliding Binocular Head Viewing System ● Sliding Trinocular Head ● ● Analyzer:0° -90° rotatable,swing out Polarized ● ● Bertrand Lens:out of optical path available Accessories ●...
- Page 5 X. INSTALLATION 1. Operation Environment: 1) Temperature:0℃~40℃, Maximum Relative Humidity: 80% 2) High Temperature: High Temperature will result in a mildewing, dewing and even ruinous instrument. 3)Avoid placing the instrument in a dusty environment. When ending your microscope operation, please cover it with the dust cap. 4)Please lay the microscope in a plan and stable position.
- Page 6 Ⅴ.OPERATION 1.Illumination Turn the brightness adjustment knob & the main switch until you obtain the needed brightness. The illumination brightness is decided by kinds of conditions, for example, the contrast of specimen, the magnification of objective, the adjust ability of the eyes and soon. Too weak or too intensive light is not correct.
- Page 7 aperture, not use for adjusting brightness. Usually, for most specimen, it can be obtained a good , enough contrast image if reducing the diaphragm opening to 70- 80% of the N.A. of the objective in use. · Adjusting the center of the aperture diaphragm (iris diaphragm): The center of the condenser's aperture diaphragm(iris diaphragm) has been pre-adjusted at the factory, and should not require readjustment.
- Page 8 cover it with dust helmet. Do wait for the lamp house cooling completely before cover. 6. The cleaning of the prism The contaminations on the prism , for example finger mark\ oil , could be gently wiped with a piece of soft brush\tissue paper or gauze which has been immersed in pure alcohol or xylene. Not use organic solvent to wipe the non-optical elements, when must clean , please use the soft detergent.
Need help?
Do you have a question about the A15.1016 and is the answer not in the manual?
Questions and answers