
Related Manuals for OPTO-EDU A18.1825-LCD


Summary of Contents for OPTO-EDU A18.1825-LCD
- Page 1 A18.1825-LCD LCD Comparison Microscope Instruction Manual To ensure the safety and obtain satisfactory performance, please study this instruction manual thoroughly be fore start to use the instrument.
-
Page 2: Technical Parameters
Model A18.1825-LCD Comparison Microscope is a new generation product of our long-time experience and technical innovation. With our success in solving the technical problem of the adjustability of its separation line width, its quality has, therefore, reached the international advanced standard. - Page 3 Fig.1...
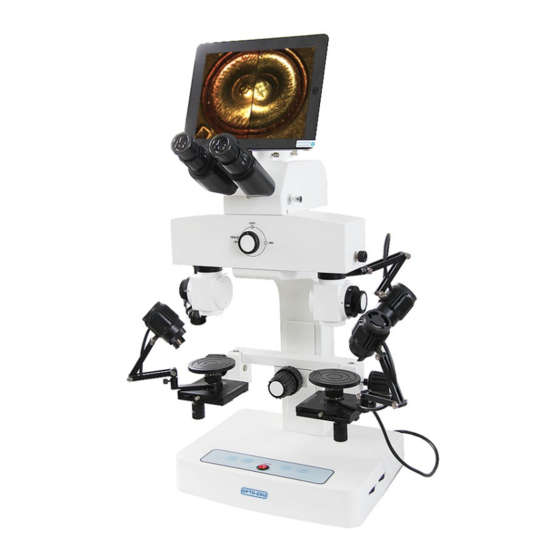
- Page 4 1. Switch (options) 15. Camera (options) 2. Light source changeover switch 16. Video recording tube 3. Light adjusting knob 17. Lever 4. Control panel 18. Magnification correcting Knob 5 .Total switch 19. LED light source 6. Y-axial movement knob 20.12V/50W Strong light source 7.
- Page 5 III. Assembly and Preliminary Observation 1. Loose the clamping screw, take off the dust cover, fix up the binocular head(13),and then clamp it with this screw; 2. Remove two dust covers from the binocular tubes, insert the required eyepieces into the tubes; 3.
- Page 6 3.Horizontal working table: Place some specimen on two table plates, separately drive left and right lifting knob(21) to keep the image clear. For moving left and right the stage, rotate the knob(7); for moving forward and backward the stage , rotate the knob(6).
- Page 7 To order to keep both left and right objective at the same magnification, the operator must make focusing by the following methods : separately place the magnification reticles(28) on two table plates, and view them through eyepieces until two reticles’ scale can completely coincide . If the left and right scales are not matched , turn the magnification correcting knob until the reticles’...
- Page 8 7.Video recording: For video recording , fit up video recording tube(10), on which the CCD (11) is fixed, and then use special video wire, connect to monitor(or computer), push in the lever, the operator may observe an image on screen. 8.
- Page 9 11.Power source: All electric parts are built into the base of instrument. If there is some wrong with the instrument , firstly check the fuse at the back of base. Any further examination or repair which might become necessary should be entrusted to our factory or other special department.
- Page 10 A18.1825-LCD Comparison Microscope Packing List Mainbody 1 pcs Video recording tube 1 pcs Binocular head 1 pcs Photography tube 1 pcs 10X Eyepiece 2 pcs Camera adapter 1 pcs 20X Eyepiece 2 pcs 12V50W halogen lamp 2 pcs Polarizer 2 pcs...
Need help?
Do you have a question about the A18.1825-LCD and is the answer not in the manual?
Questions and answers