
Subscribe to Our Youtube Channel
Related Manuals for Insignia NS-ODD3


Summary of Contents for Insignia NS-ODD3
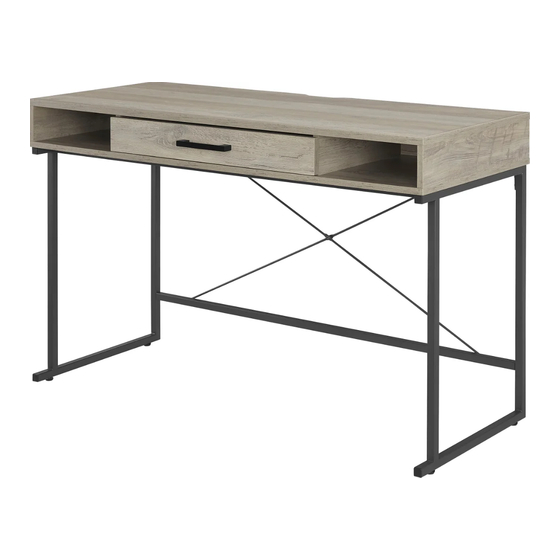
- Page 1 USER GUIDE 47" Computer Desk with Drawer NS-ODD3 Before using your new product, please read these instructions to prevent any damage.
-
Page 2: Table Of Contents
ONE-YEAR LIMITED WARRANTY ................. . .26 Introduction Congratulations on your purchase of a high-quality Insignia product. Your NS-ODD3 represents the state of the art in desk design and is designed for reliable and trouble-free performance. -
Page 3: Safety Information
47" Computer Desk with Drawer Safety informatio WARNING: Please use your furniture correctly and safely. Improper use can cause safety hazards, or damage to your furniture or household items. • This product is intended to hold the maximum weight indicated. Exceeding the maximum weight will result in instability and may cause serious injury. -
Page 4: Parts Included
Parts included Desktop Bottom desk panel Left leg frame Right leg frame Left side panel Right side panel Left storage panel Right storage panel Back panel Front support bar Bottom support bar Front drawer panel Left drawer panel Right drawer panel Back drawer panel Bottom drawer panel Drawer support... -
Page 5: Hardware Included
47" Computer Desk with Drawer Hardware included LABEL HARDWARE QTY. LABEL HARDWARE QTY. Wooden dowel Drawer bracket Long cam-lock screw 3.8 × 35 mm screw 15 × 12 mm cam lock M6 × 30 mms screw Short cam-lock screw Washer 12 ×... -
Page 6: Preparing To Assemble Your Desk
Preparing to assemble your desk Follow the assembly instructions carefully. Make sure that all parts and hardware are included. To prevent product damage, assemble your desk on top of the box. Have another person help you with lifting and assembly. For the best results, do not fully tighen the screws until you have assembled all the other parts. -
Page 7: Assembling Your Desk
47" Computer Desk with Drawer Assembling your desk STEP 1: Insert wooden dowels into the back panel You need: Wooden dowels (6) Back panel Insert six wooden dowels (A) into the edges of the back panel (9), as shown. Be careful not to insert the dowels into the cam-lock screw holes. -
Page 8: Step 2: Insert Wooden Dowels And Cam-Lock Screws Into The Side Panels
STEP 2: Insert wooden dowels and cam-lock screws into the side panels You need: Left side panel Wooden dowels (8) Right side panel Phillips screwdriver Long cam-lock screws (2) Insert eight wooden dowels (A) into the edges of the left side panel (5) and right side panel (6), as shown. Be careful not to insert the dowels into the cam-lock screw holes. -
Page 9: Step 3: Insert Wooden Dowels Into The Storage Panels
47" Computer Desk with Drawer STEP 3: Insert wooden dowels into the storage panels You need: Wooden dowels (8) Left storage panel Right storage panel Insert eight wooden dowels (A) into the edges of the left storage panel (7) and right storage panel (8). www.insigniaproducts.com... -
Page 10: Step 4: Attach Cam-Lock Screws And Wall Straps To The Desktop
STEP 4: Attach cam-lock screws and wall straps to the desktop You need: Washers (2) Long cam-lock screws (11) Wall straps (2) 3.5 × 12 mm screws (2) Desktop Phillips screwdriver Screw 11 long cam-lock screws (B) into the desktop (1) with a Phillips screwdriver. Make sure that the cam-lock screws are straight and flush with each panel. -
Page 11: Step 5: Attach The Side Panels To The Back Panel
47" Computer Desk with Drawer STEP 5: Attach the side panels to the back panel You need: Left side panel Right side panel Cam locks (2) Phillips screwdriver Back panel To connect the left side panel (5) or right side panel (6) to the back panel (9), align the wooden dowel and cam-lock screw with the holes in the panels. -
Page 12: Step 6: Attach The Storage Panels To The Desktop
STEP 6: Attach the storage panels to the desktop You need: Left storage panel Right storage panel Phillips screwdriver Cam locks (4) Desktop To connect the left storage panel (7) or right storage panel (8) to the desktop (1), align the wooden dowels and cam-lock screws with the holes in the panels. -
Page 13: Step 7: Attach The Back/Side Assembly To The Desktop
47" Computer Desk with Drawer STEP 7: Attach the back/side assembly to the desktop You need: Phillips screwdriver 15 × 12 mm cam locks (7) Desktop To connect the back/side assembly to the desktop (1), align the wooden dowels and cam-lock screws with the holes in the panels. -
Page 14: Step 8: Attach The Bottom Desk Panel To The Desk Assembly
STEP 8: Attach the bottom desk panel to the desk assembly You need: Phillips screwdriver 4 × 40 mm screws (11) Bottom desk panel To connect the bottom desk panel (2) to the desk assembly, make sure that the bottom desk panel is not tilted, then align the wooden dowels with the holes in the panels. -
Page 15: Step 9: Assemble The Desk Frame
47" Computer Desk with Drawer STEP 9: Assemble the desk frame You need: Bottom support bar Front support bar Left leg frame Right leg frame M6 × 15 mm screws (12) Hex wrench Upper back support bar Note: To make assembly easier, do not lock the screws tightly until you have assembled all other parts. Use the hex wrench (S) and M6 ×... -
Page 16: Step 10: Attach The Cross Bars And Feet To The Desk Frame
STEP 10: Attach the cross bars and feet to the desk frame You need: Feet (4) Hex wrench M5 × 15 mm screws (4) Cross bars Note: To make assembly easier, do not lock the screws tightly until you have assembled all other parts. Secure the cross bars (19) to the desk frame with four M5 ×... -
Page 17: Step 11: Attach The Desk Frame To The Desk Assembly
47" Computer Desk with Drawer STEP 11: Attach the desk frame to the desk assembly You need: M6 × 30mm screws (8) Washers (8) Hex wrench Note: To make assembly easier, do not lock the screws tightly until you have assembled all other parts. Rotate the desk frame so that the feet point up and the protruding ends are toward the front of the desk frame. -
Page 18: Step 12: Attach A Cam-Lock Screw To The Front Drawer Panel
STEP 12: Attach a cam-lock screw to the front drawer panel You need: Phillips screwdriver Short cam-lock screw Front drawer panel Screw a short cam-lock screw (D) into the front drawer panel (12) with a Phillips screwdriver. Make sure that the cam-lock screw is straight and flush. -
Page 19: Step 13: Assemble The Drawer Frame
47" Computer Desk with Drawer STEP 13: Assemble the drawer frame You need: Left drawer panel Right drawer panel Back drawer panel Drawer support Phillips screwdriver 3.8 × 35 mm screws (5) Drawer brackets (2) 3.5 × 12 mm screws (4) Using four 3.8 ×... -
Page 20: Step 14: Install The Bottom Drawer Panel
STEP 14: Install the bottom drawer panel You need: Bottom drawer panel Slide the bottom drawer panel (16) into the grooves in the drawer frame. www.insigniaproducts.com... -
Page 21: Step 15: Attach The Front Of The Drawer
47" Computer Desk with Drawer STEP 15: Attach the front of the drawer You need: M4 × 25 mm screws (2) Front drawer panel M6 × 12 mm bolts (2) 12 × 11 mm cam lock Phillips screwdriver Handle Align the handle (O) with the holes on the front of the drawer, and secure with two M4 × 25 mm screws (P) and a Phillips screwdriver. -
Page 22: Step 16: Install The Drawer And Tighten The Screws
STEP 16: Install the drawer and tighten the screws You need: Phillips screwdriver Hex wrench Align the drawer’s slides with the slides inside your desk, then push the drawer into your desk. Check each screw and cam-lock screw on your desk to make sure that they are fully tightened. www.insigniaproducts.com... -
Page 23: Step 17: Secure Your Desk To The Wall
47" Computer Desk with Drawer STEP 17: Secure your desk to the wall You need: Washers (2) Anchors (2) 4 × 40 mm screws (2) Drill with M6 bit Phillips screwdriver Hammer WARNING: • DO NOT SKIP THIS STEP. Securing your desk protects children and pets from accidental tip-overs and injury. •... -
Page 24: Step 18: Level Your Desk
STEP 18: Level your desk • Adjust the desk’s feet to level the desk. All four feet are adjustable. www.insigniaproducts.com... -
Page 25: Cleaning Your Desk
47" Computer Desk with Drawer Cleaning your desk • Clean the surface of your desk with a duster or damp cloth only. • Do not use abrasive cleaners. Specifications Dimensions (H × W × D) 30 × 47.2 × 20 in. (76.2 × 120 × 50.8 cm) Weight 52.5 lbs. -
Page 26: One-Year Limited Warranty
Product at no charge with new or rebuilt comparable products or parts. Products and parts replaced under this warranty become the property of Insignia and are not returned to you. If service of Products or parts are required after the Warranty Period expires, you must pay all labor and parts charges. - Page 27 For product inquiries, please contact us with the information below: 1-877-467-4289 www.insigniaproducts.com INSIGNIA is a trademark of Best Buy and its affiliated companies. Distributed by Best Buy Purchasing, LLC 7601 Penn Ave South, Richfield, MN 55423 U.S.A. ©2022 Best Buy. All rights reserved.
Need help?
Do you have a question about the NS-ODD3 and is the answer not in the manual?
Questions and answers