
Related Manuals for Insignia NS-HF2007


Summary of Contents for Insignia NS-HF2007
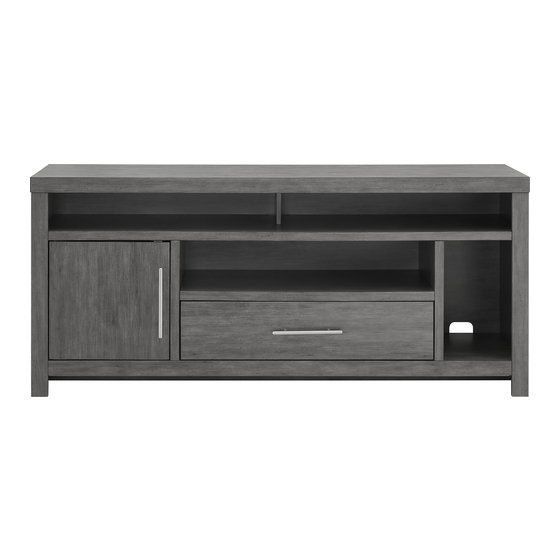
- Page 1 ASSEMBLY GUIDE 58" TV Gaming Stand NS-HF2007 Before using your new product, please read these instructions to prevent any damage.
-
Page 2: Table Of Contents
Contents IMPORTANT SAFEGUARDS ................2 Features . -
Page 3: Features
NS-HF2007 Features • Supports 65 in. (165 cm) TVs up to 60 lbs. (27.2 kg) • Multiple shelves provide a surplus of storage options for your game console, Blue-ray player, cable box, and speakers • Specially designated space allows for vertical-standing game consoles •... -
Page 4: Maximum Weights
58" TV Gaming Stand Maximum weights TV size: 61" (155 cm) 60 lbs. (27.3 kg) 30 lbs. (13.6 kg) 5 lbs. (6.8 kg) 20 lbs. (9.1 kg) 20 lbs. (9.1 kg) 60 lbs. (27.3 kg) WARNING: You can use most flat panel televisions weighing 60 lbs. (27.3 kg) or less. Using televisions or weights heavier than the maximums can result in instability that can cause tip-overs resulting in death or serious injury. -
Page 5: Package Contents
NS-HF2007 Package contents Parts D Long lower shelf (1) A Base (1) B Left divider C Right divider panel (1) panel (1) G Top (1) F Front edge (1) E Upper shelf (1) H Lower support (1) I Left side... -
Page 6: Hardware
58" TV Gaming Stand Hardware LABEL STAND PART QTY. LABEL STAND PART QTY. 3 × 12 mm screw Shelf support 3.5 × 12 mm screw 1 set Left and right rail assembly Cam screw Drawer support Small cam lock 4 × 38 mm screw Dowel 4.5 ×... -
Page 7: Needed Tool
NS-HF2007 Needed tool Phillips screwdriver Assembly instructions STEP 1: You need: Phillips screwdriver AA 3 × 12 mm screw (6) BB Left and right rail assembly (2) C Right divider B Left divider panel (1) panel (1) 1 Separate the CL and CR parts of the rail assembly (BB) from the DL and DR parts and set the DL and DR parts aside for use in another step. - Page 8 58" TV Gaming Stand 6 Tighten the screws with a Phillips screwdriver. www.insigniaproducts.com...
- Page 9 NS-HF2007 STEP 2: You need: CC Cam screw (4) Phillips screwdriver C Right divider B Left divider panel (1) panel (1) 1 Insert two cam screws (CC) into the holes on the left divider panel (B), then tighten the screws with a Phillips screwdriver.
- Page 10 58" TV Gaming Stand STEP 3: You need: EE Dowel (4) D Long lower shelf (1) • Insert four dowels (EE) into the short edges of the long lower shelf (D). www.insigniaproducts.com...
- Page 11 NS-HF2007 STEP 4: You need: Phillips screwdriver DD Small cam lock (4) D Long lower shelf (1) C Right divider B Left divider panel (1) panel (1) Using cam locks When you insert a cam lock, position the open end of the lock toward the cam screw, then insert the cam screw into the cam lock opening.
- Page 12 58" TV Gaming Stand STEP 5: You need: EE Dowel (8) • Insert eight dowels (EE) into the edges of the divider panels (B and C). Make sure that you use the inside hole of each pair of holes. www.insigniaproducts.com...
- Page 13 NS-HF2007 STEP 6: You need: Phillips screwdriver FF 3 × 15 mm screw (2) GG Magnetic door latch (1) E Upper shelf (1) • Align the magnetic door latch (GG) with the holes on the upper shelf (E), then secure the latch with two 3 × 15 mm screws (FF) using a Phillips screwdriver.
- Page 14 58" TV Gaming Stand STEP 7: You need: CC cam screw (4) Phillips screwdriver E Upper shelf (1) • Insert four cam screws (CC) into the outer holes on the upper shelf (E), then tighten the screws using a Phillips screwdriver.
- Page 15 NS-HF2007 STEP 8: You need: EE Dowel (2) HH 4 × 50 mm screw Phillips screwdriver Y Small divider panel (1) E Upper shelf (1) 1 Insert two dowels (EE) into the long edge of the small divider panel (Y).
- Page 16 58" TV Gaming Stand STEP 9: You need: Phillips screwdriver DD Cam lock (4) Using cam locks When you insert a cam lock, position the open end of the lock toward the cam screw, then insert the cam screw into the cam lock opening.
- Page 17 NS-HF2007 STEP 10: You need: EE Dowel (4) A Base (1) • Insert four dowels (EE) into the edge of the base (A). Make sure that you use the holes that don’t have holes above them. www.insigniaproducts.com...
- Page 18 58" TV Gaming Stand STEP 11: You need: CC Cam screw (4) Phillips screwdriver F Front edge (1) 1 Insert four cam screws (CC) into the edge of the front edge (F). Make sure that you use the outer screw hole in each pair of holes.
- Page 19 NS-HF2007 STEP 12: You need: Phillips screwdriver DD Cam lock (4) F Front edge (1) A Base (1) When you insert a cam lock, position the open end of the lock toward the cam screw, then insert the cam screw into the cam lock opening.
- Page 20 58" TV Gaming Stand STEP 13: You need: CC Cam screw (4) EE Dowel (4) Phillips screwdriver 1 Insert four dowels (EE) into the middle holes on the base (A). Make sure that you use the inner hole on each pair of holes.
- Page 21 NS-HF2007 STEP 14: You need: Phillips screwdriver DD Cam lock (4) H Lower support (1) When you insert a cam lock, position the open end of the lock toward the cam screw, then insert the cam screw into the cam lock opening.
- Page 22 58" TV Gaming Stand STEP 15: You need: HH 4 × 50 mm screw (4) Phillips screwdriver 1 Insert four 4 × 50 mm screws (HH) through the base (A) and into the holes on the bottom edges of the left and right divider panels.
- Page 23 NS-HF2007 STEP 16: You need: EE Dowel (12) 1 Insert four dowels (EE) into the base (A). 2 Insert four dowels (EE) into the front edge (F). 3 Insert four dowels (EE) into the left and right divider panels (A and B).
- Page 24 58" TV Gaming Stand STEP 17: You need: CC Cam screw (6) EE Dowel (4) Phillips screwdriver I Left side J Right side support (1) support (1) 1 Insert three cam screws (CC) and two dowels (EE) into the left side support (I) and three cam screws and two dowels into the right side support (J).
- Page 25 NS-HF2007 STEP 18: You need: Phillips screwdriver DD Cam lock (6) I Left side J Right side support (1) support (1) K left side (1) L Right side (1) When you insert a cam lock, position the open end of the lock toward the cam screw, then insert the cam screw into the cam lock opening.
- Page 26 58" TV Gaming Stand STEP 19: You need: CC Cam screw (12) Phillips screwdriver • Insert six cam screws (CC) into the left side (K) and six cam screws into the right side (L), then tighten the screws with a Phillips screwdriver.
- Page 27 NS-HF2007 STEP 20: You need: Phillips screwdriver DD Cam lock (12) Using cam locks When you insert a cam lock, position the open end of the lock toward the cam screw, then insert the cam screw into the cam lock opening.
- Page 28 58" TV Gaming Stand STEP 21: You need: V Upper back panel (1) M Lower back panel (1) • Slide the lower back panel (M) into the grooves on the left and right sides (K and L) then slide the upper back panel (V). www.insigniaproducts.com...
- Page 29 NS-HF2007 STEP 22: You need: EE Dowel (6) • Insert two dowels (EE) into the top edges of the left side (K), the right side (K), and the small divider (Y). Make sure that you use the inside hole in each pair of holes.
- Page 30 58" TV Gaming Stand STEP 23: You need: CC Cam screw (6) Phillips screwdriver G Top (1) 1 Insert one cam screw (CC) into each corner and the middle of the top (G). Make sure that you use the outside hole of each pair of holes.
- Page 31 NS-HF2007 STEP 24: You need: Phillips screwdriver DD Cam lock (6) When you insert a cam lock, position the open end of the lock toward the cam screw, then insert the cam screw into the cam lock opening. 1 Insert two cam locks (DD) into the inside top edges of the left side (K), the right side (K), and the left top side of the small divider (Y).
- Page 32 58" TV Gaming Stand STEP 25: You need: VV Cam lock cover (14) • Snap cam lock covers (W) over the exposed cam locks on the left and right sides, the small divider (panel), and the left and right divider panels. www.insigniaproducts.com...
- Page 33 NS-HF2007 STEP 26: You need: Phillips screwdriver SS 3.5 × 16 mm screw (12) RR Back support bracket (12) • Insert twelve back brackets (RR) into the edges of the back panels, then secure each bracket with a 3.5 × 16 mm screw (SS).
- Page 34 58" TV Gaming Stand STEP 27: You need: Phillips screwdriver II 3 × 16 mm screw (6) TT Cable wrap (2) 1 Insert six 3 × 16 mm screw (II) along the outer edges of the lower back (M), then tighten the screws with a Phillips screwdriver.
- Page 35 NS-HF2007 STEP 28: You need: Phillips screwdriver JJ Handle (1) 1 Remove the screws from the handle (JJ). 2 Align the handle with the holes on the outside of the door (N), then insert the screws through the inside of the door and into the handle.
- Page 36 58" TV Gaming Stand STEP 29: You need: Phillips screwdriver FF 3 × 15 mm screw (4) LL Upper hinge pin (1) KK Lower hinge pin (1) 1 Insert the lower hinge pin (KK) into the pin hole on the left bottom of cabinet. 2 Insert the upper hinge pin (LL) into the pin hole on the left top of cabinet.
- Page 37 NS-HF2007 STEP 30: After the door is installed, you might need to adjust the door so that it fits snuggly into the cabinet. You need: Phillips screwdriver • Loosen the hinge pin screws, slightly slide the door forward or back, then tighten the screws.
- Page 38 58" TV Gaming Stand STEP 31: You need: O Short upper shelf (1) MM shelf support (4) 1 Insert the four shelf supports (MM) inside the cabinet. Make sure that all the supports are on the same level. 2 Tilt the short upper shelf (O), then slide the shelf above the shelf supports and into the cabinet. 3 Lower the shelf onto the supports.
- Page 39 NS-HF2007 STEP 32: You need: Phillips screwdriver OO Drawer support (2) NN 3.5 × 12 mm Q Right drawer P Left drawer screw (4) side (1) side (1) 1 Align a drawer support (OO) with the holes on the inside of the left drawer side (P), then insert two 3.5 × 12 mm screws (NN) through the outside of the drawer and into the support.
- Page 40 58" TV Gaming Stand STEP 33: You need: PP 4 × 38 mm screw Phillips screwdriver R Drawer back (1) 1 With the grooves in the drawer back (R) and the left and right drawer sides (P and Q) facing inward, insert two 4 ×...
- Page 41 NS-HF2007 STEP 34: S Drawer bottom (1) • With the drawer back facing down, slide the drawer bottom (S) into the grooves on the drawer sides and back. Make sure that the holes in the drawer bottom fit over the cam screws in the drawer back.
- Page 42 58" TV Gaming Stand STEP 35: You need: PP 4 × 38 mm screw Phillips screwdriver T Drawer support (1) 1 Insert two 4 × 38 mm screws (PP) through the holes on the back of the drawer and into the holes in the drawer support (T).
- Page 43 NS-HF2007 STEP 36: You need: CC Cam screw (2) Phillips screwdriver U Drawer front (1) • With the groove in the drawer front (U) facing up, insert two cam screws (CC) into the drawer front, then tighten the screws with a Phillips screwdriver.
- Page 44 58" TV Gaming Stand STEP 37: You need: Phillips screwdriver DD Cam lock (2) When you insert a cam lock, position the open end of the lock toward the cam screw, then insert the cam screw into the cam lock opening. 1 Insert the two cam screws on the drawer front (U) into the drawer support.
- Page 45 NS-HF2007 STEP 38: You need: Phillips screwdriver QQ 4.5 × 14 mm screw (4) 1 Align the sides of the drawer so the holes in the brackets align with the holes on the drawer front. 2 Insert two 4.5 × 14 mm screws (QQ) through each bracket and into the drawer front.
- Page 46 58" TV Gaming Stand STEP 39: You need: Phillips screwdriver JJ Handle (1) 1 Remove the screws from the handle (JJ). 2 Align the handle with the holes on the outside of the drawer front, then insert the screws through the back of the drawer front and into the handle.
- Page 47 NS-HF2007 STEP 40: You need: Phillips screwdriver AA 3 × 12 mm screw (6) BB Left and right rail assembly (2) 1 Insert three 3 × 12 mm screws (AA) into the holes on the DL and DR parts of the rail assembly (BB).
- Page 48 58" TV Gaming Stand STEP 41: 1 Align the rail assemblies on the drawer with the rails inside cabinet, then slightly lift the drawer up so that the wheels fit into the slots on the rail assemblies. 2 Slide the drawer into the cabinet. www.insigniaproducts.com...
- Page 49 NS-HF2007 STEP 42: You need: Phillips screwdriver UU Anti-tip bracket with plastic strap (2) 1 Insert one screw through one hole on each bracket and into the left and right holes on the top of the back. Tighten the screws with a Phillips screwdriver.
-
Page 50: Maintaining Your Tv Stand
58" TV Gaming Stand Maintaining your TV stand Your TV stand is designed for year-round use with only minimal cleaning and maintenance. • Use a soft, clean, cloth that won’t scratch the surface when dusting. • Use of furniture polish is not necessary. Should you choose to use polish, test first in an inconspicuous area. •... -
Page 51: One-Year Limited Warranty
During the Warranty Period, if the original manufacture of the material or workmanship of the Product is determined to be defective by an authorized Insignia repair center or store personnel, Insignia will (at its sole option): (1) repair the Product with new or rebuilt parts; or (2) replace the Product at no charge with new or rebuilt comparable products or parts. - Page 52 1-877-467-4289 (U.S. and Canada) or 01-800-926-3000 (Mexico) INSIGNIA is a trademark of Best Buy and its affiliated companies. Distributed by Best Buy Purchasing, LLC 7601 Penn Ave South, Richfield, MN 55423 U.S.A. V2 ENGLISH ©2021 Best Buy. All rights reserved.
Need help?
Do you have a question about the NS-HF2007 and is the answer not in the manual?
Questions and answers